How to import Eventbrite events to Airtable with 5 easy methods


[.blog-callout]
TL;DR
- Eventbrite has no native two-way sync with Airtable, so you need one of 5 methods: CSV export, Airtable's CSV import app, Data Fetcher plus Simplescraper, Zapier, or Make.
- CSV import works well for a one-time transfer. Zapier and Make keep your Airtable base updated automatically as new attendees register.
- Once your event data lives in Airtable, you can build a shareable event dashboard or portal on top of it with Softr, without touching the original spreadsheet. [.blog-callout]
Eventbrite doesn't connect natively to Airtable, so once your event wraps up, your attendee and order data stays stuck inside Eventbrite's own reports. If you want to analyze past events, spot attendee trends, or build a central hub for your event data, you need to move that data into a tool built for storing and organizing it.
That tool is Airtable. It lets you structure event data into linked tables and build views your whole team can use, well beyond what Eventbrite's built-in reporting offers.
Below are 5 ways to import your Eventbrite events data into Airtable, from a one-time CSV upload to a fully automated sync with Zapier or Make.
Let's go!
Importing Eventbrite events data as a CSV file
If you don't have access to Airtable's premium CSV import app, or you just need a quick one-time import, you can bring your CSV file in manually with the steps below.
Step 1: Export your Eventbrite events data as a CSV file.
Eventbrite has a separate section where you can go through all the data connected with your event.
We chose to export the “Attendee Summary” report, here’s how:
Now, let’s get back to importing the CSV file to Airtable.
Step 2: Open the view where you want to import your file.
Step 3: Click “Add or Import” next to the list of tables.
Step 4: Click the “CSV file”.
Step 5: Select the CSV file to import. (Note, the file size limit on CSV uploads is 5MB)
The import adjustment dialog will pop up, where you can preview your CSV file and adjust field mappings before importing.
After you’re done with changes, click “Import” and your Eventbrite events data is imported into Airtable.
Import Eventbrite events data with the CSV import app
The CSV import app is an Airtable app available on paid plans, with a 25,000-row limit. It lets you customize and edit imported records and merge data with existing ones.
To work with the CSV import app, open the base where you want to import your Eventbrite events and follow the instructions:
Step 1: Install the CSV import app by clicking the "Apps" button at the top right corner of your view.
Step 2: Click the "Install an app" button.
Step 3: Find and install the CSV import app.
Step 4: Import the Eventbrite CSV file into the app.
Step 5: Configure settings and field mappings before importing the CSV file into your base.
These were the default steps required for importing Eventbrite events data to Airtable. The next steps are optional but important if you want to import your data without difficulties.
Additional steps
Step 6: If your table has existing records, enable “Merge with existing records”.
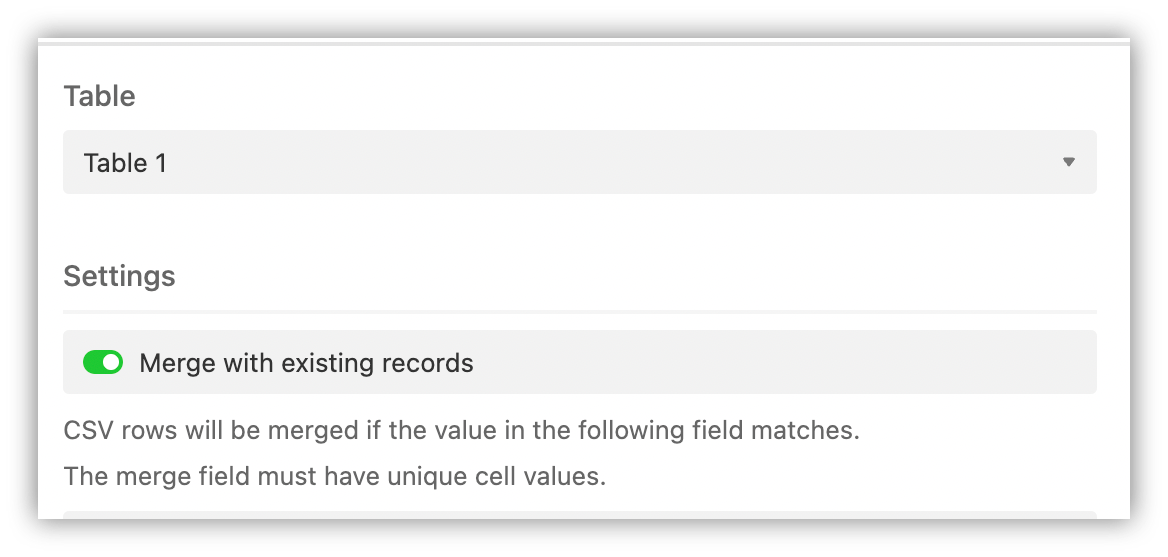
Step 7: Toggle on “Skip blank or invalid CSV values", if there are blank fields in the CSV.

Step 8: Enable “Create missing select options” to create a new option in case there are single/multiple-select fields in your table.
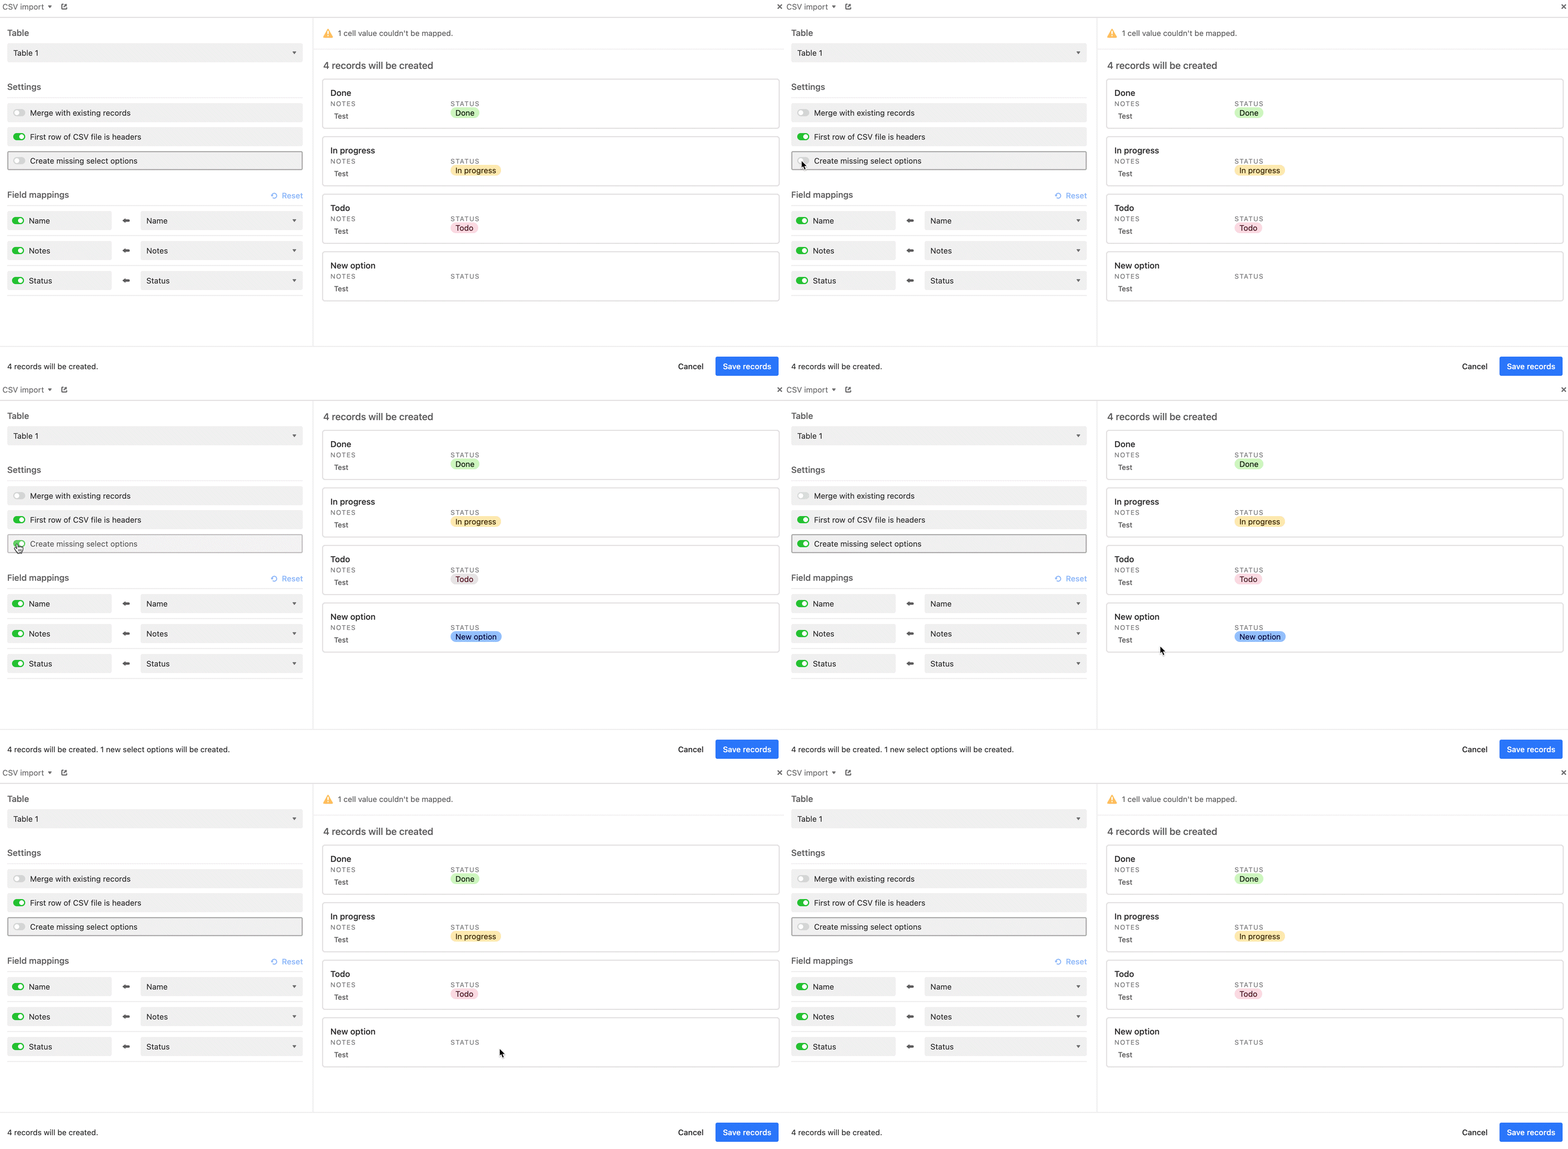
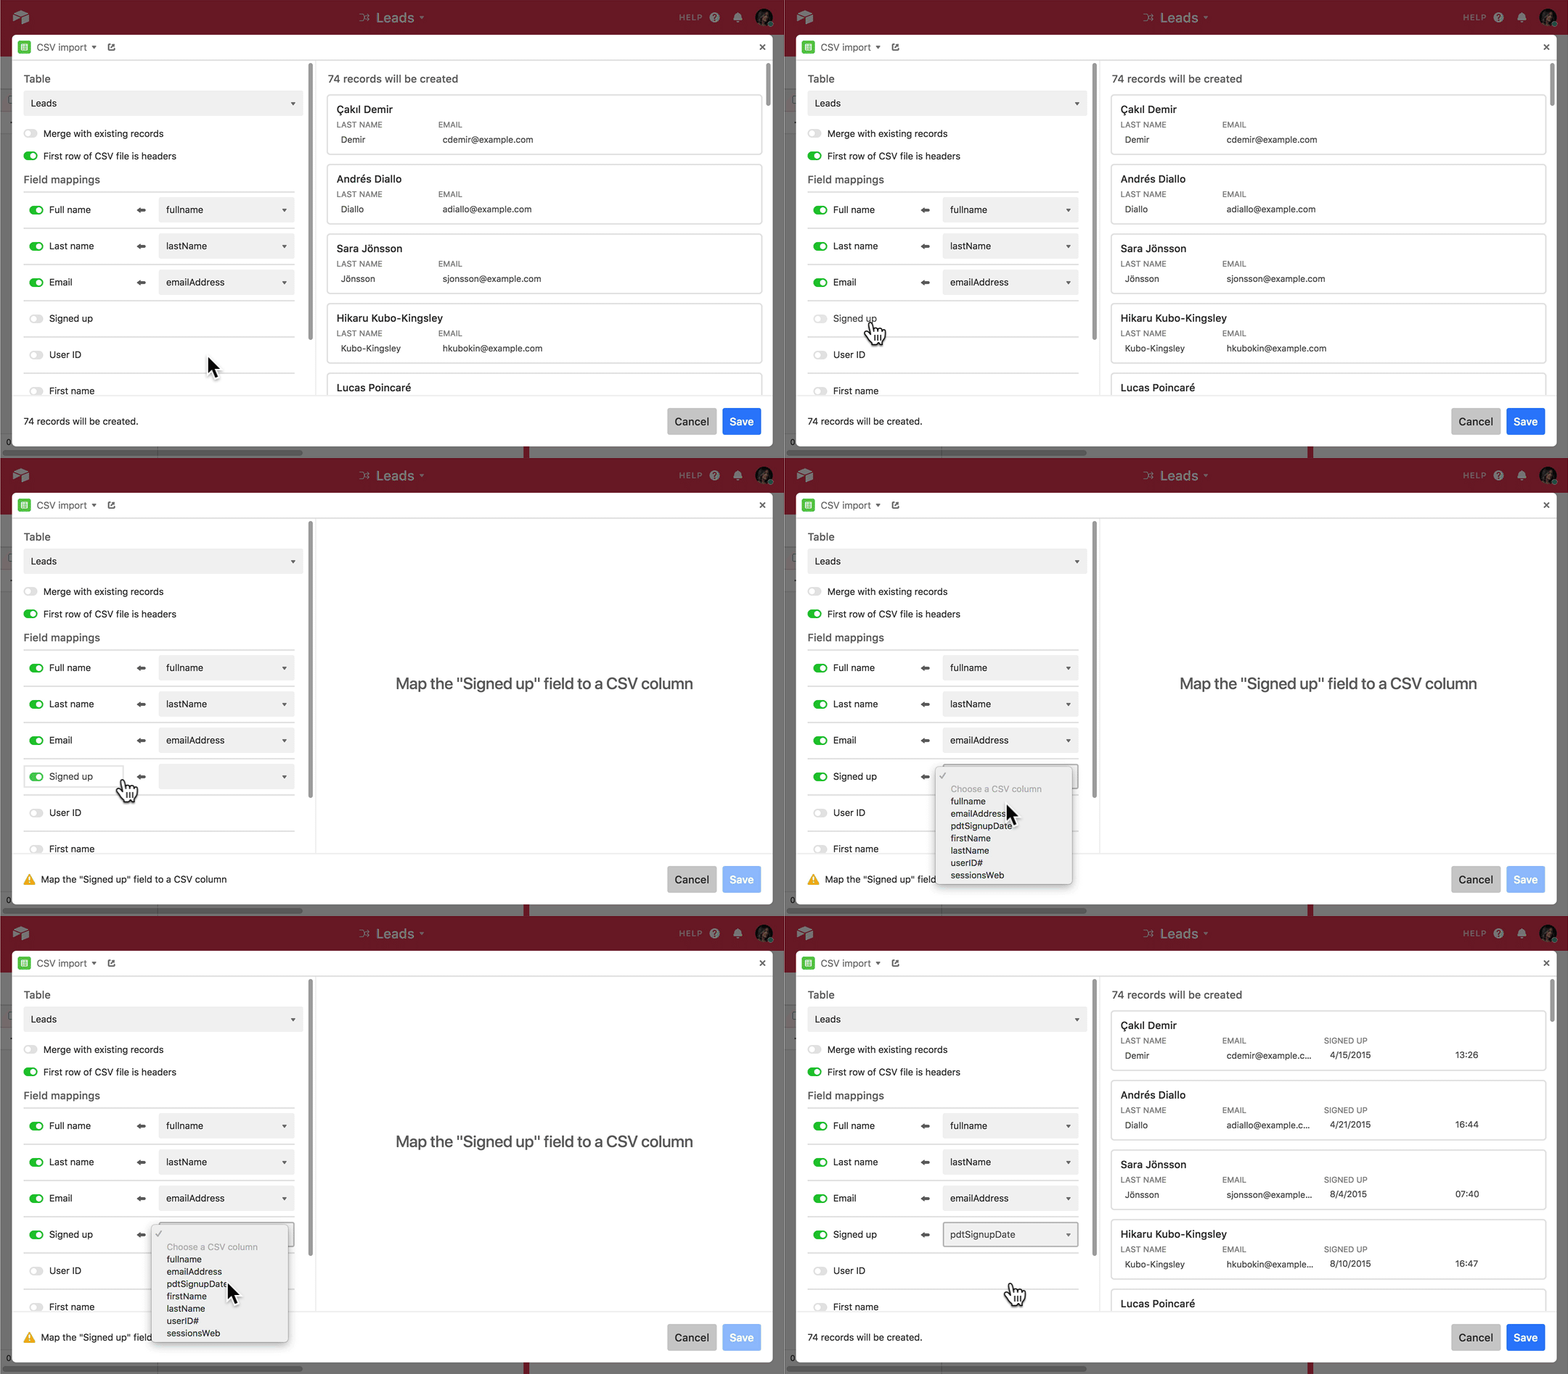
Step 9: Set field mappings to match Airtable rows with your CSV file.
To successfully set field mappings, select the field toggle, choose a column from the drop-down menu, and map the value.
Import Eventbrite events data to Airtable with Data Fetcher and Simplescraper
Data Fetcher is another Airtable app that can sync many platforms into your base, available on Airtable's paid plans (see our Airtable pricing guide for current limits). On its own, Data Fetcher won’t pull Eventbrite events into Airtable. That’s where Simplescraper comes in: a Chrome extension built to be one of the simplest, most powerful no-code web scrapers around.
This method is handy if you need to gather data on several events at once. (More on this later)
With Simplescraper, we’ll scrape the required data from Eventbrite, then import it into Airtable with Data Fetcher.
Let’s get started!
Scrape Eventbrite events data with Simplescraper
To scrape data from Eventbrite, follow the instructions below:
Step 1: Go to the Chrome Web Store and install the Simplescraper extension.

Step 2: Go to the Eventbrite events page you want to scrape. We're scraping Eventbrite's online events page.
Step 3: From the Chrome extension menu at the top right corner of the page, find Simplescraper and choose “Scrape the website”.

Step 4: At the top of the page, a new bar will appear. Click on “Add a property”.

Step 5: Add and name properties to proceed. Each property represents a different type of data you want to scrape.
Step 6: Select the item you want to scrape by clicking on it where it appears on the screen.
Simplescraper can scrape URLs, image URLs, names, and dates.
Step 7: Adjust the CSS selector at the bottom of the bar so the tool scrapes the right data. You can find the CSS selectors here, though Data Fetcher also recognizes common data types with its own default selectors.
We want to scrape the names, dates, and images of the online events:

Step 8: Once you’re done, click “View Results”.
Step 9: Click “Save recipe” in the left sidebar and sign up for Simplescraper.

Step 10: Sign up for a free Simplescraper account.
Step 11: Enter a name for the recipe.
Step 12: Click “Create recipe” at the bottom of the screen.
Step 13: Click on the recipe under “My Recipes”.
Step 14: Click “Run recipe” and let it run.
Step 15: Go to the Eventbrite API section and copy the API URL.
That's it. You can also download the CSV file and import your Eventbrite events data with the CSV import app or a manual CSV upload, as shown above.
Import Eventbrite events data with Data Fetcher
Step 1: Install the Data Fetcher app from the Airtable marketplace, found in the top right corner of your base.
Step 2: Create a free account and start a new request.
Step 3: On the request screen, select “Custom” from the Application menu.

Step 4: Enter a name for your request.
Step 5: For URL, paste the Eventbrite API URL you copied from Simplescraper.

Step 6: Select the Airtable output table and view where you want to pull in the Eventbrite events.

Step 7: Click “Save & Run”.

The request will run and the Response field mapping tab will open. Select how the Eventbrite fields should be mapped to Airtable rows.
Step 8: Once you’re done with field mapping, click “Save & Run” again.

Data Fetcher will create the fields in the output table, run the request, and import the data from Eventbrite into Airtable.
These are all the steps required for syncing Eventbrite with Airtable manually and for free.
Import Eventbrite data to Airtable with Zapier
Zapier is an automation tool that lets you connect the web apps you use and automate workflows between them. It's one of the best options for syncing Eventbrite with Airtable, letting you pull data on new attendees and copy new Eventbrite events to Airtable automatically.
In our example, we’ll create a trigger that fires when an attendee registers for our sample event.
Connect Eventbrite with Zapier
Step 1: Sign in or sign up to Zapier.

Step 2: Go to the Eventbrite x Airtable page and click “Connect Airtable + Eventbrite” to get started.
Step 3: Select or connect an Eventbrite account.

Step 4: If you're connecting a new account, allow Zapier to access your Eventbrite account.

Step 5: Select the person or organization who owns the event and click “Next”.

Step 6: Select the types of events you want to see in the imported data.

Step 7: Select the event you want to set a trigger for.

That's everything you need to connect Eventbrite to Zapier.
Now, let's connect Airtable to Zapier.
Connect Airtable to Zapier
Step 1: Connect a new account or use a pre-connected Airtable account.

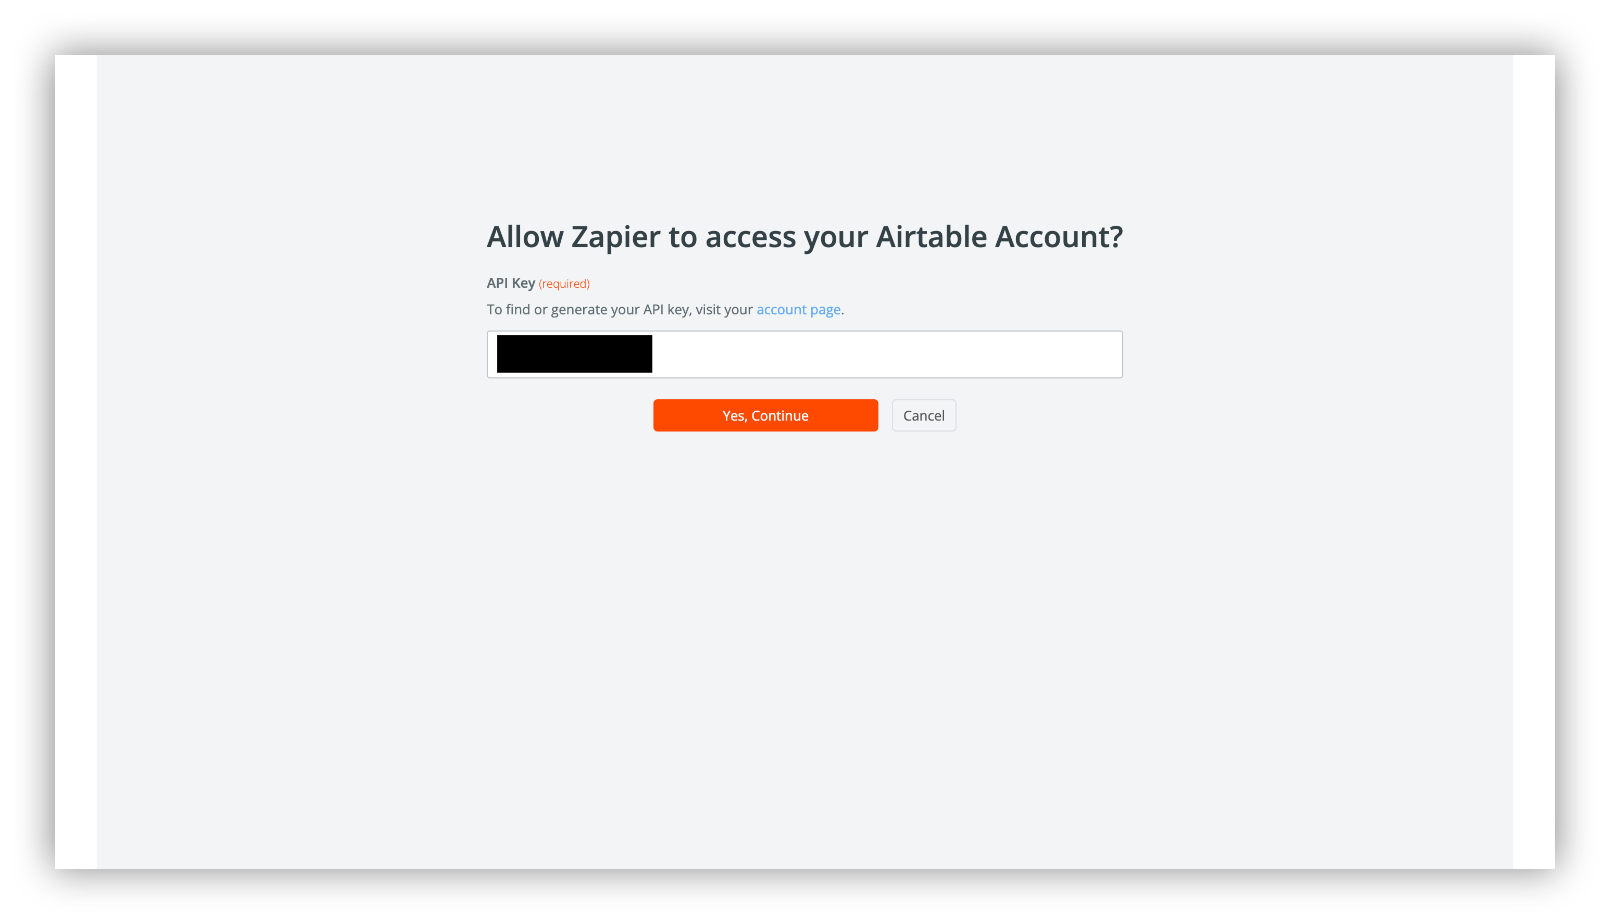
Step 2: A new window will pop up asking for your Airtable API key.
You can get your API key from your account page.
Step 3: Click “Yes, Continue” once you've entered your API key.
Step 4: Choose an output base and a table for importing data.


Step 5: Select the fields you want to edit in the output table.

Step 6: Map fields from Eventbrite into Airtable.

Step 7: Test the Zap.


That’s it. You can manage your Zap, turn it on or off, or delete it whenever you need to.

Import Eventbrite events data to Airtable with Make
Next, let's look at Make.
Make (formerly Integromat) is another automation tool, but it's more customizable and offers a wider range of modules (requests) for importing Eventbrite events data into Airtable.
With Make, you can also watch, create, list, and delete attendees, events, orders, and tickets in your Eventbrite account, all automatically.
Connect Eventbrite to Make
Step 1: Sign up or sign in to your Make account and open “My Organization”.
Step 2: Click “Create a new scenario” to start syncing Eventbrite with Airtable.
Step 3: Select Eventbrite and choose an Eventbrite module to build the scenario.
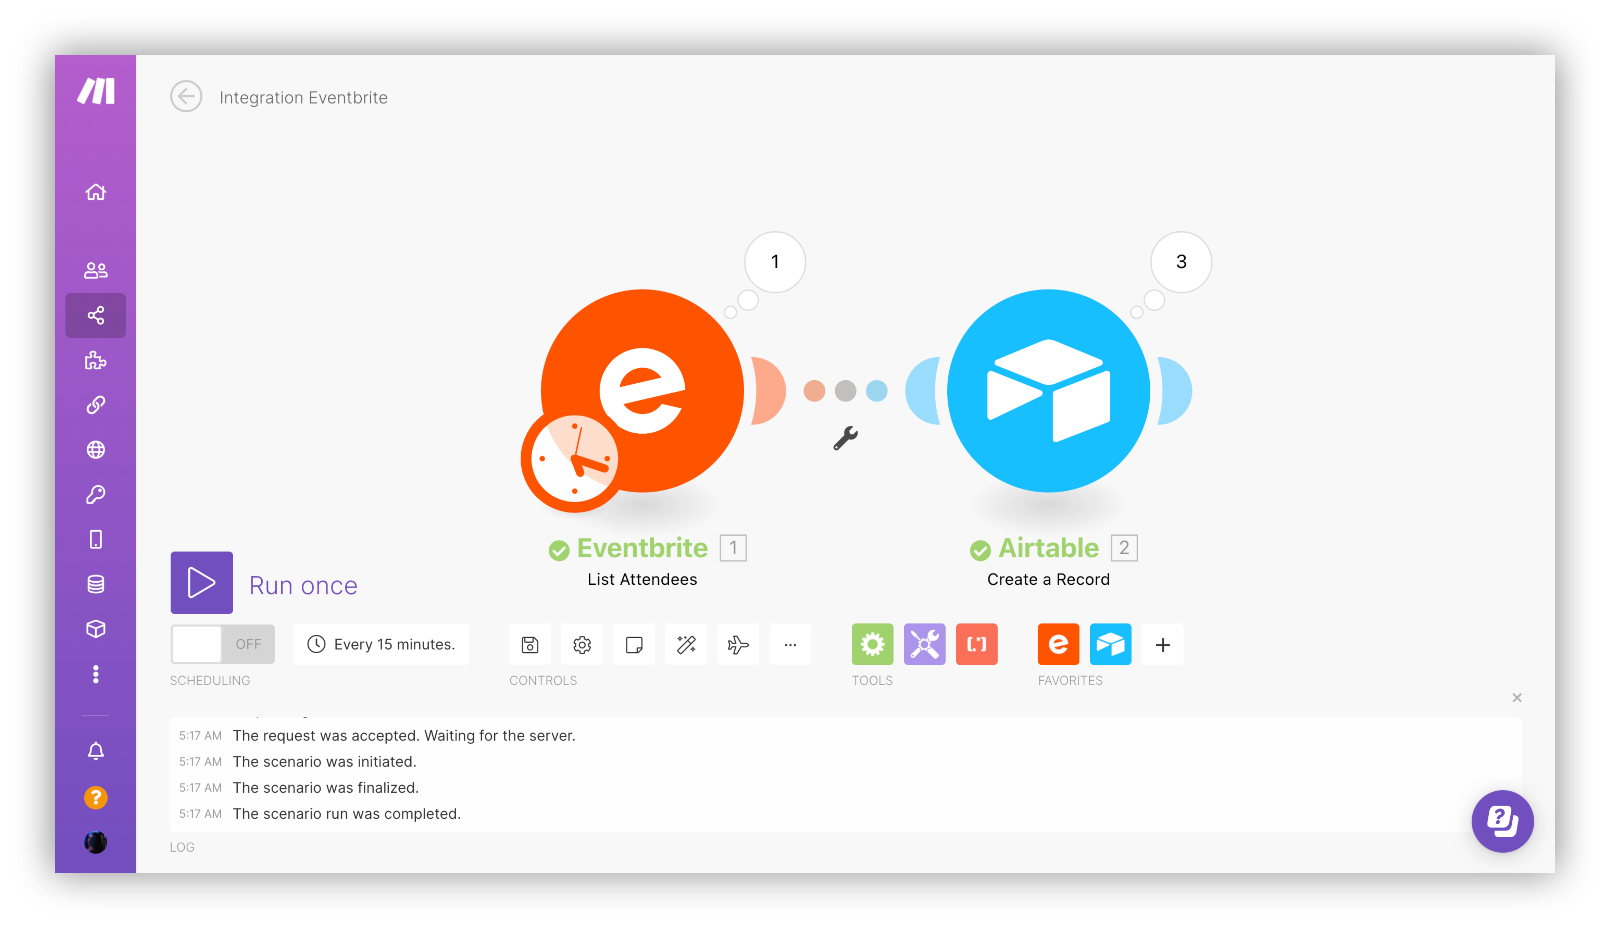
We chose the “List Attendees” module so Make retrieves a list of attendees for our event. You can learn more about the available modules here.
Step 4: Connect an Eventbrite account to Make.
Step 5: Allow Make to access your Eventbrite account.
Step 6: Select the organization or person whose events you want to list.
Step 7: Select the events you want to list.
Step 8: Choose the status of attendees you want to track.
Step 9 (optional): Enter a date and time to only list attendees modified after a specific period.

Step 10: Run the module once to check that it works.

The next part of the syncing process is connecting Airtable to Make.
Connect Airtable to Make
Step 1: Click the + button in the lower right corner of the page.
Step 2: In the dialog that opens, find Airtable and select the right action.
Step 3: Select the “Create a new record” action, so attendee data gets imported into the table automatically.
Step 4: Connect an Airtable account by clicking “Add” and entering your Airtable API key.

Step 5: Select an output Base and Table to create new records in.
Step 6: Select which fields to import from your Eventbrite data.
We wanted to list the First Name, Last Name, Status, and Email of each attendee in the output table.

Step 7: Run your scenario once to confirm your data imports into Airtable records successfully.
From imported data to a shareable event hub
Getting your Eventbrite data into Airtable solves the "where does this data live" problem. It doesn't solve the "how does my team actually use it" problem. Airtable's own grid is built for people who edit records, not for stakeholders who just need to check attendee counts or browse an event calendar. If you're evaluating what to build on top of that data, our guide to the best event management software is a useful next read.
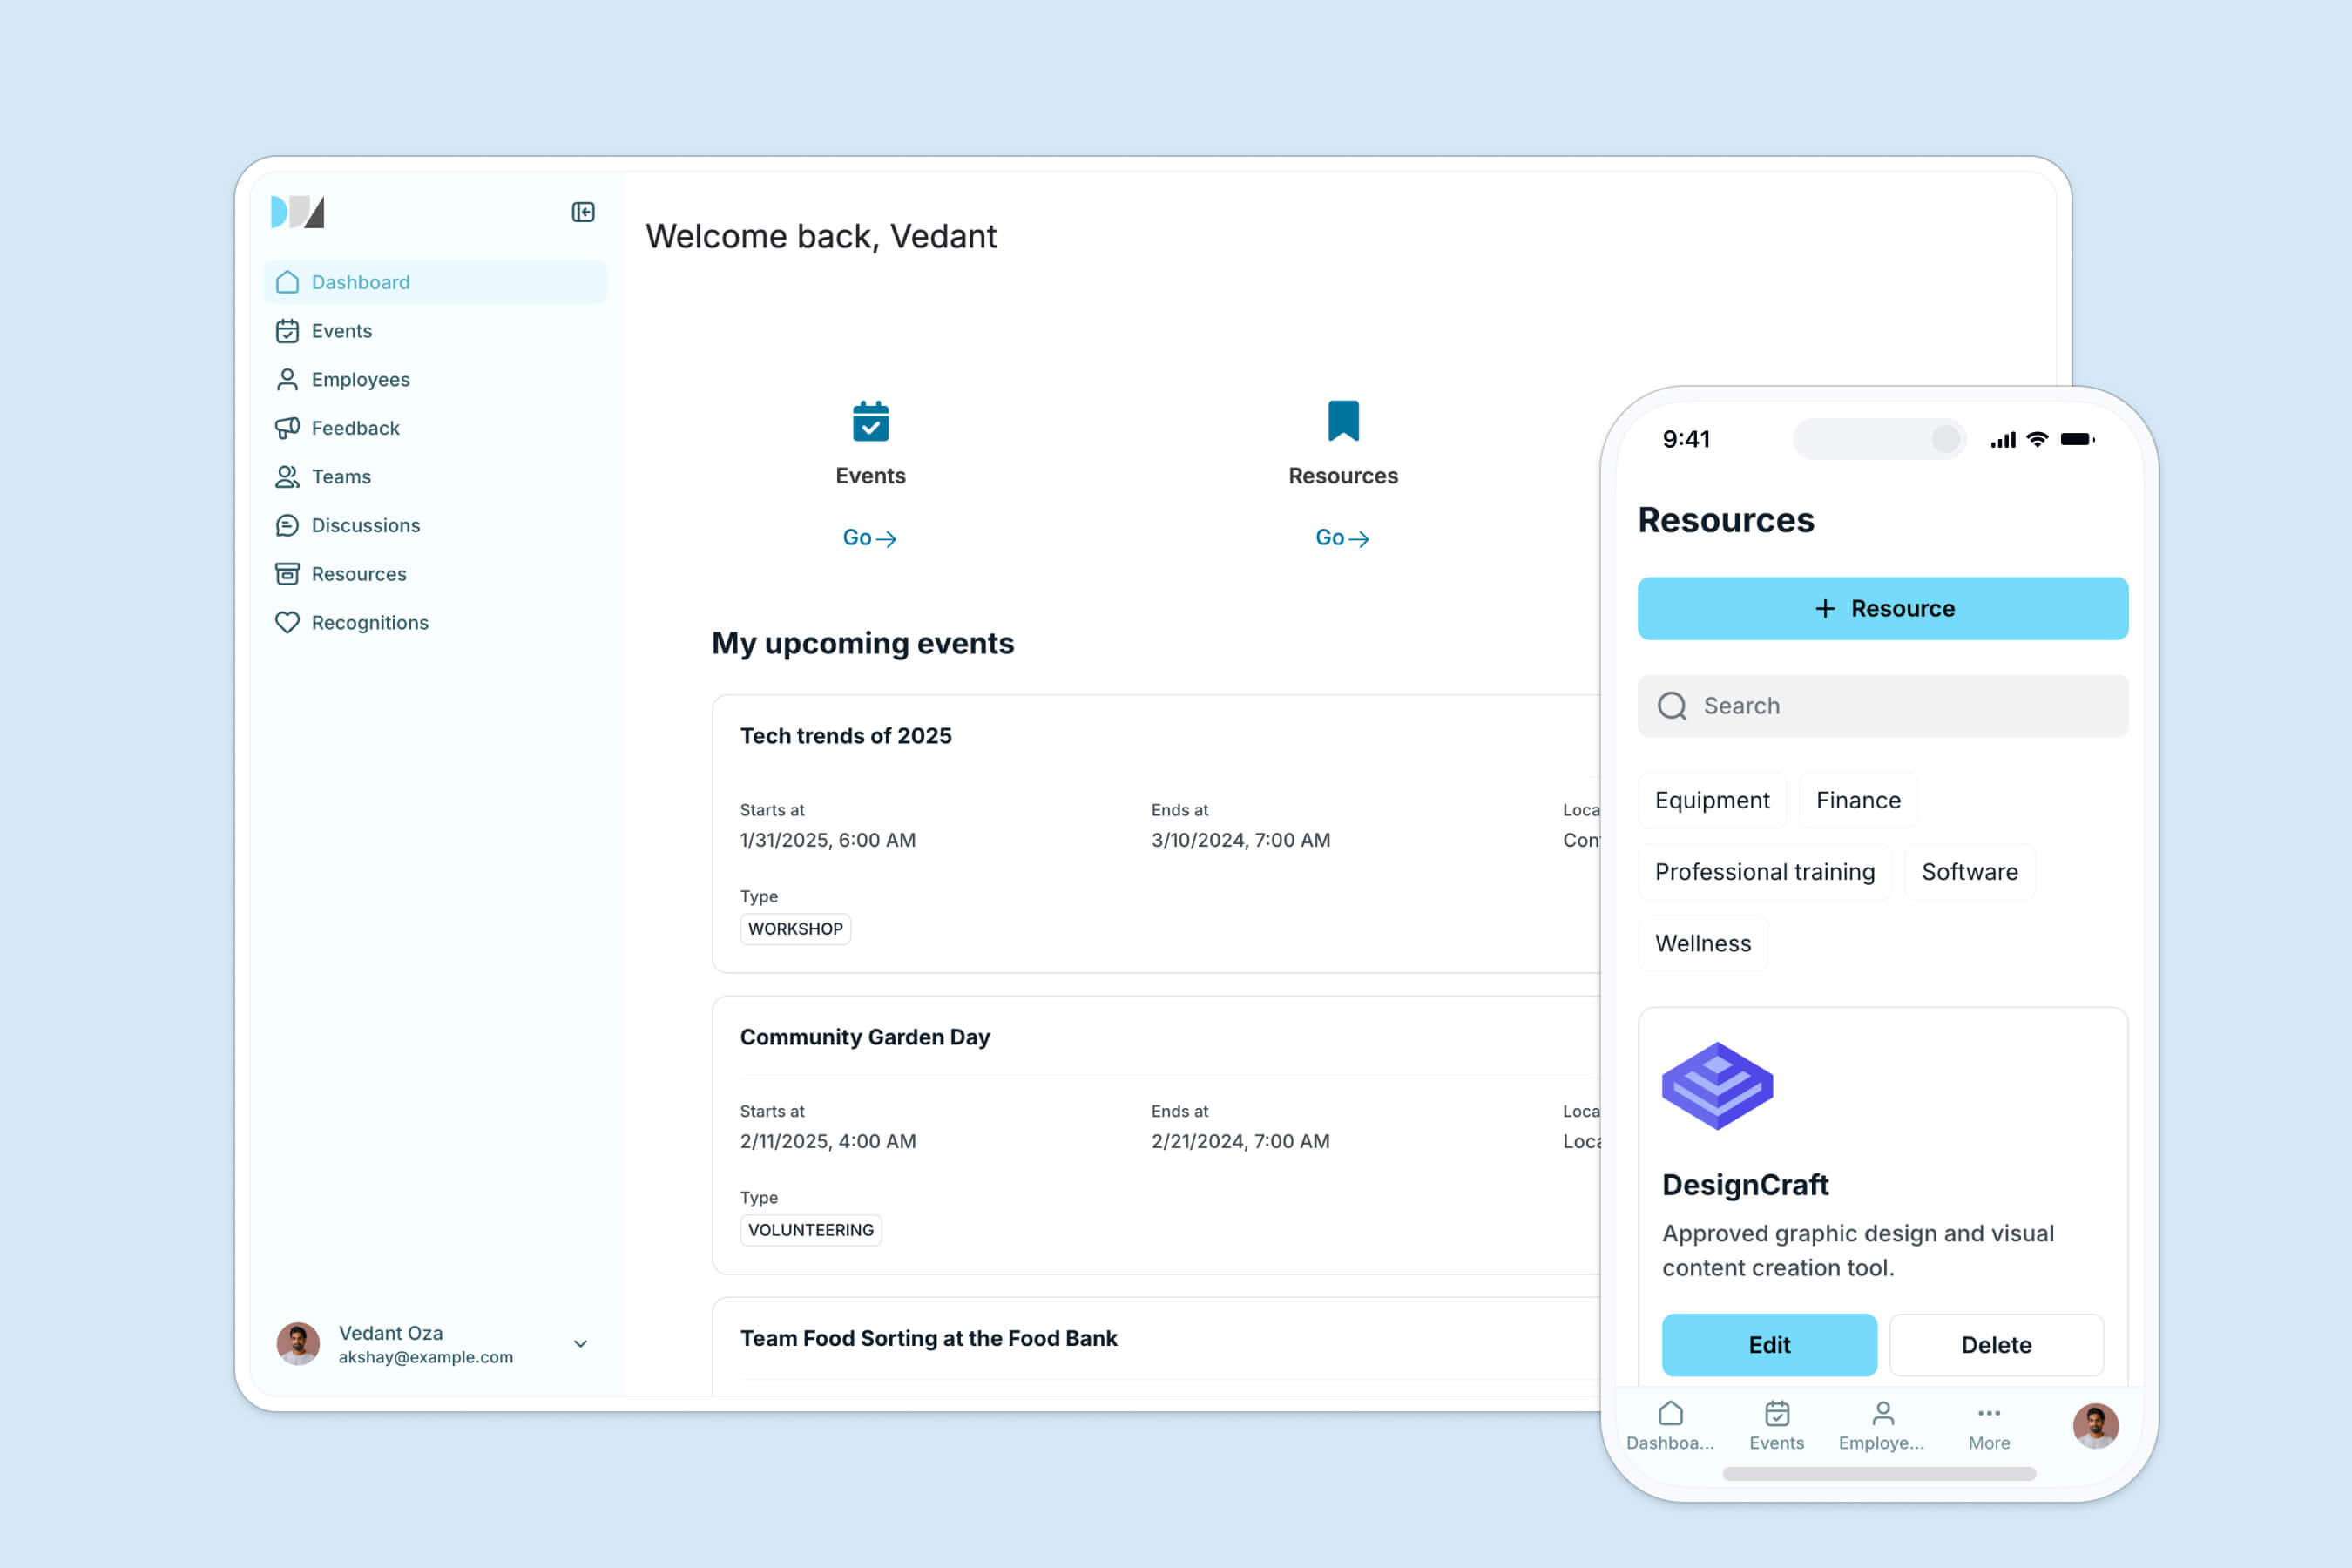
This is where Softr comes in. Softr connects directly to your Airtable base (alongside Softr Databases and 21+ other data sources) and turns those records into a real business app: an event dashboard for your team, a self-serve portal for attendees, or a partner-facing view of upcoming events, without duplicating your data or writing code.
"I find Softr very intuitive and easy to navigate, which is great for someone who is not a programmer by nature. It integrates very nicely with Airtable and other databases we are already using, making it nice that it just sits on top of the systems we have." - Natalie S., Director of Operations, G2 review
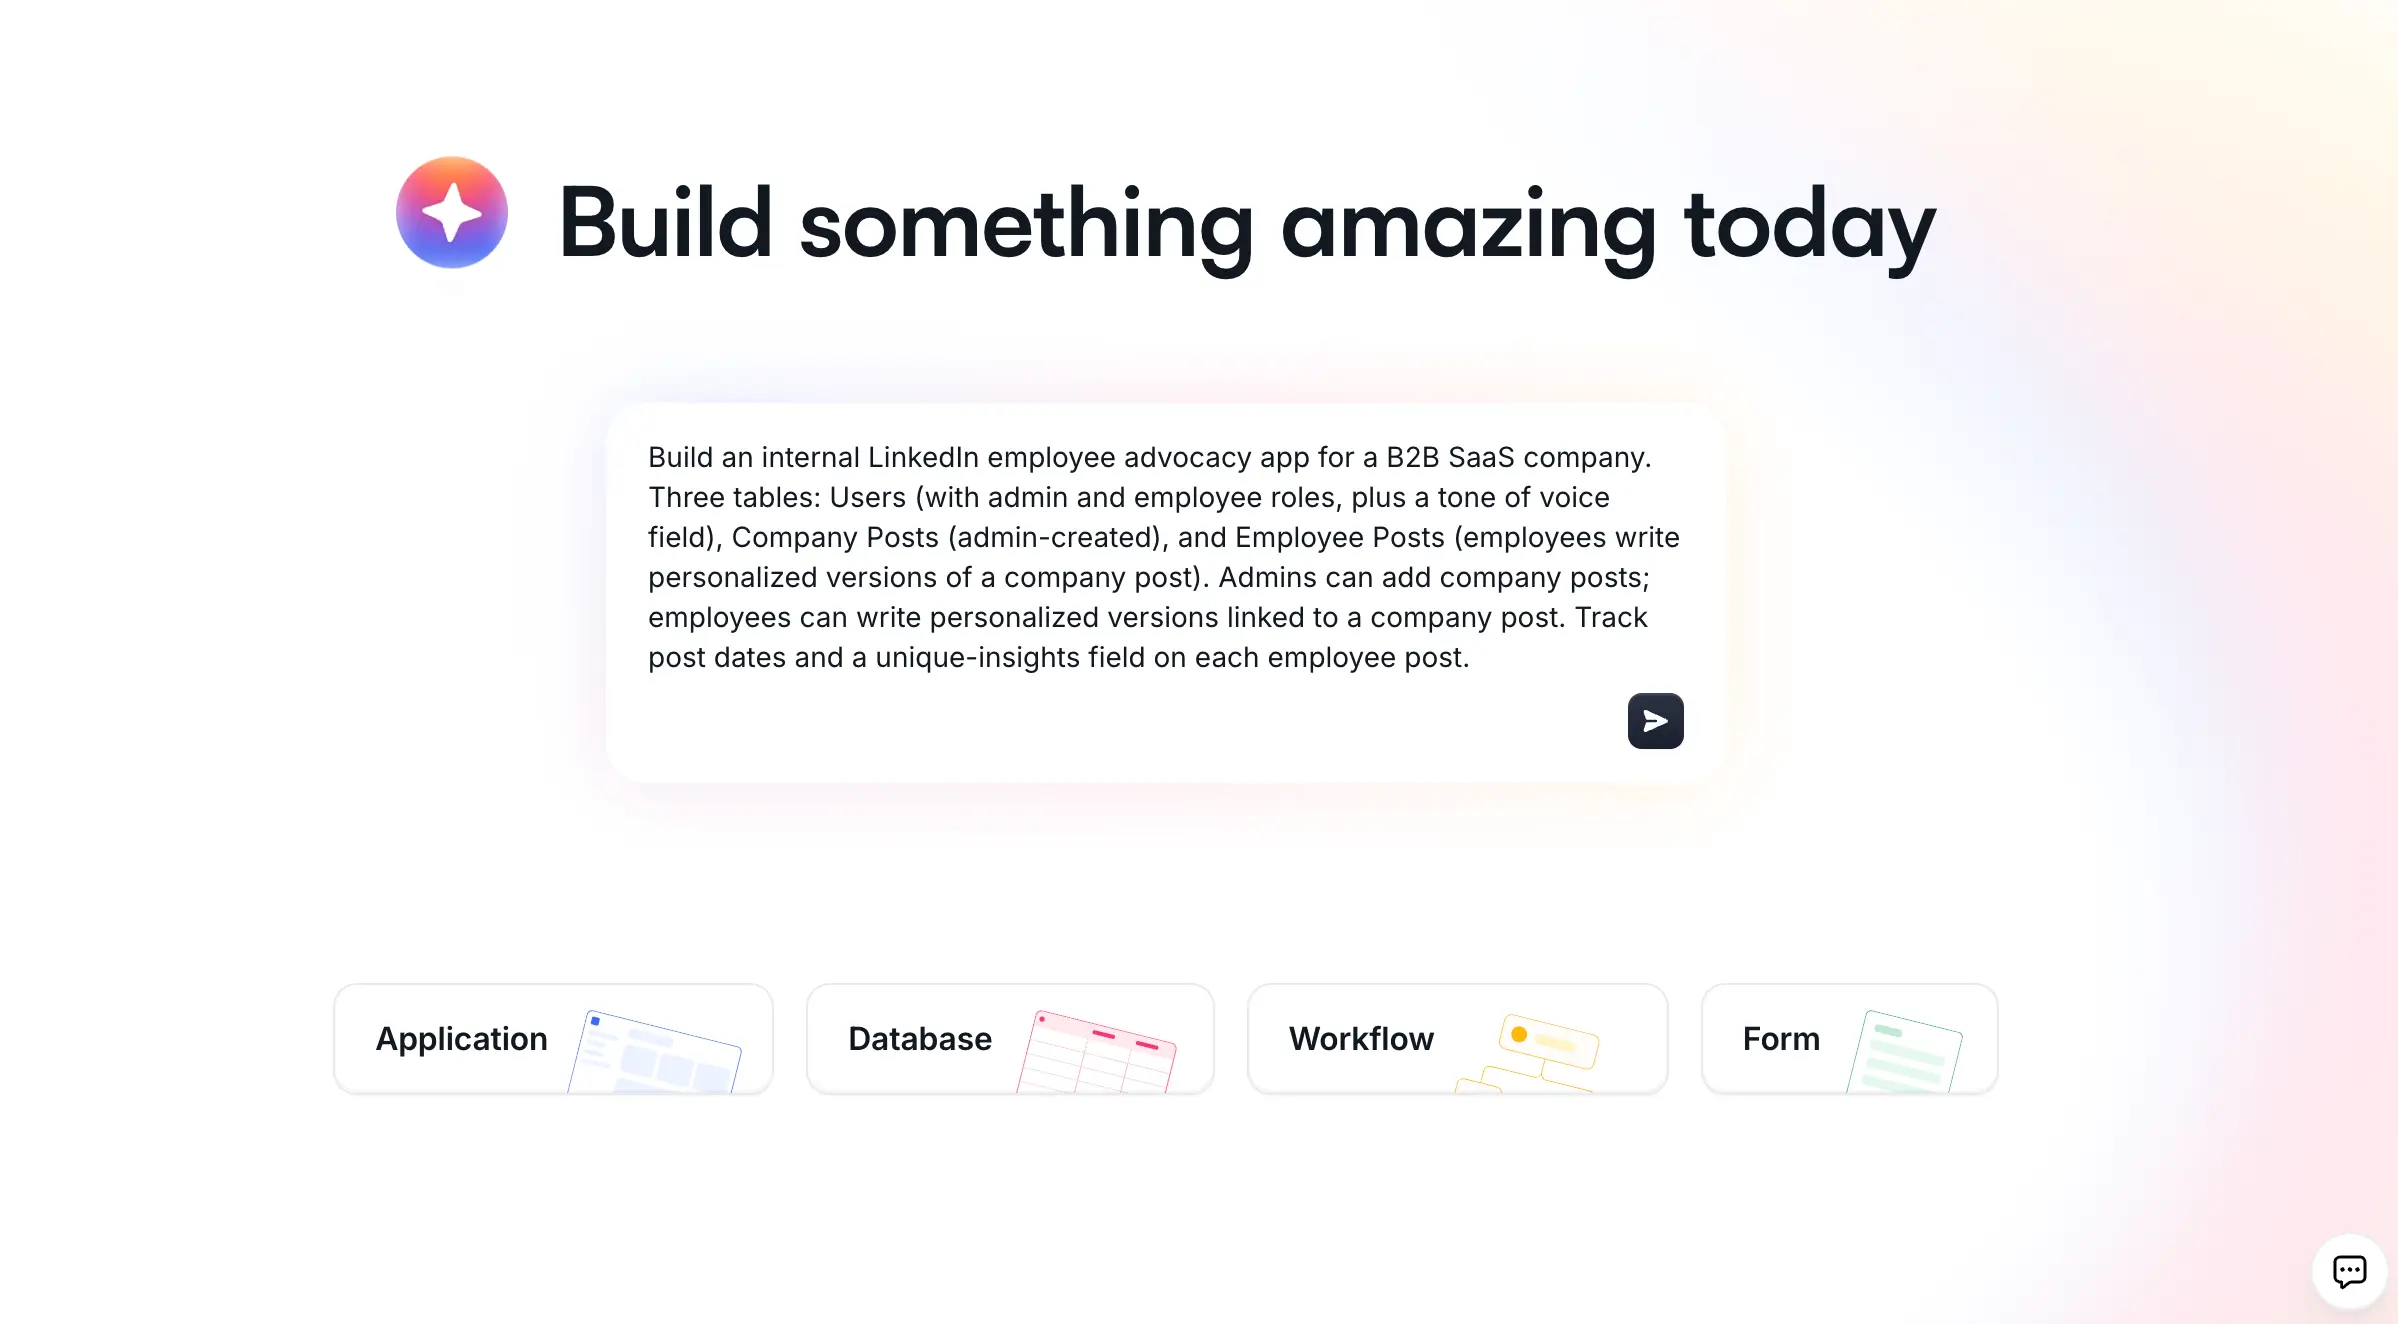
To get started, describe the app you want to the AI Co-Builder (for example, "an event dashboard showing upcoming Eventbrite events, attendee counts, and a signup form"), and it generates the pages, blocks, and permissions connected to your Airtable data. You can also start from a ready-made Event Planning template if you'd rather not build from a blank canvas, then set up users and permissions so only the right people see the right events.
If you'd rather automate the sync itself instead of building a dashboard, Softr also has native Softr Workflows plus integrations with Zapier and Make, so you can trigger actions, like a Slack notification when a new attendee registers, straight from your app.
Build the event hub your team actually uses
Manually exporting CSVs or scraping Eventbrite works fine when you need Eventbrite data in Airtable once. Zapier and Make keep it running automatically. Either way, once your event data lives in a proper database, try Softr for free to turn those Airtable records into a dashboard, portal, or event hub your whole team can use without ever opening a spreadsheet. If you're still deciding whether Airtable is the right database for the job, our Airtable review and Airtable alternatives comparison are good next reads.
Frequently asked questions
Can Eventbrite sync directly with Airtable?
What's the easiest way to import Eventbrite events into Airtable?
Does importing Eventbrite data into Airtable require a paid Airtable plan?
Can I get notified automatically when a new attendee registers on Eventbrite?
What can I do with my Eventbrite data once it's in Airtable?