How to create a custom Kanban board in Airtable


TL;DR
- You can build a Kanban board in Airtable three ways: starting from scratch, using your existing tables, or building one in Softr on top of your Airtable data.
- Airtable's native Kanban view works well for quick, single-table boards, but it's limited once you need permissions, client-facing sharing, or a full app around it.
- Softr turns your Airtable base into a secure, shareable Kanban board you can embed in a portal, app, or website, with granular access control for different user groups.
- If you're starting fresh, you can also skip Airtable entirely and manage your Kanban data in a Softr Database, Softr's own native data layer.
If you are looking to organize tasks and projects, a Kanban board in Airtable can be your solution, as it offers a visual representation of your workflow. Whether you're managing a team project, tracking personal tasks, planning content, or even using Airtable as a CRM, a Kanban board can be tailored to fit your needs.
To create a kanban board in Airtable, you can choose from three primary methods:
- Starting from scratch: if you've never used Airtable and none of your bases or tables are set up to manage tasks yet, this method walks you through creating a new table in a new base and which fields are essential;
- Using your existing data: this method is ideal if you're already familiar with Airtable and want to use its built-in features to create a Kanban board directly within the platform;
- Using Softr: this is the more complete method if you want to take your Airtable data further, adding secure sharing, granular permissions, and a real interface around it. Not only can you create a Kanban board, but you can also share it selectively with clients or teammates, and integrate it into your Softr app, portal, or website.
Each of these methods has its merits, but using Softr adds the flexibility you'll eventually need, especially once you're managing a more comprehensive project management system with multiple user groups. And if you're building something new rather than working from an existing Airtable base, keep in mind you don't have to use Airtable at all: Softr Databases can hold the same task and project data natively, with instant workflow triggers and no third-party sync required.
Creating a Kanban board view in Airtable from scratch
Creating a kanban board from scratch allows you to tailor the board to your specific needs and preferences. In this section, I'll guide you through the process of setting up a new table in Airtable and introduce you to the essential fields to create a functional Kanban board.
Kanban boards are versatile tools that can be adapted for a variety of purposes, such as tracking sales leads, managing editorial calendars, overseeing product development, or even organizing personal tasks. While Kanban boards can be molded to fit almost any workflow, for the context of this article, I'll be focusing on project management as our primary use case.
{{cta-1}}
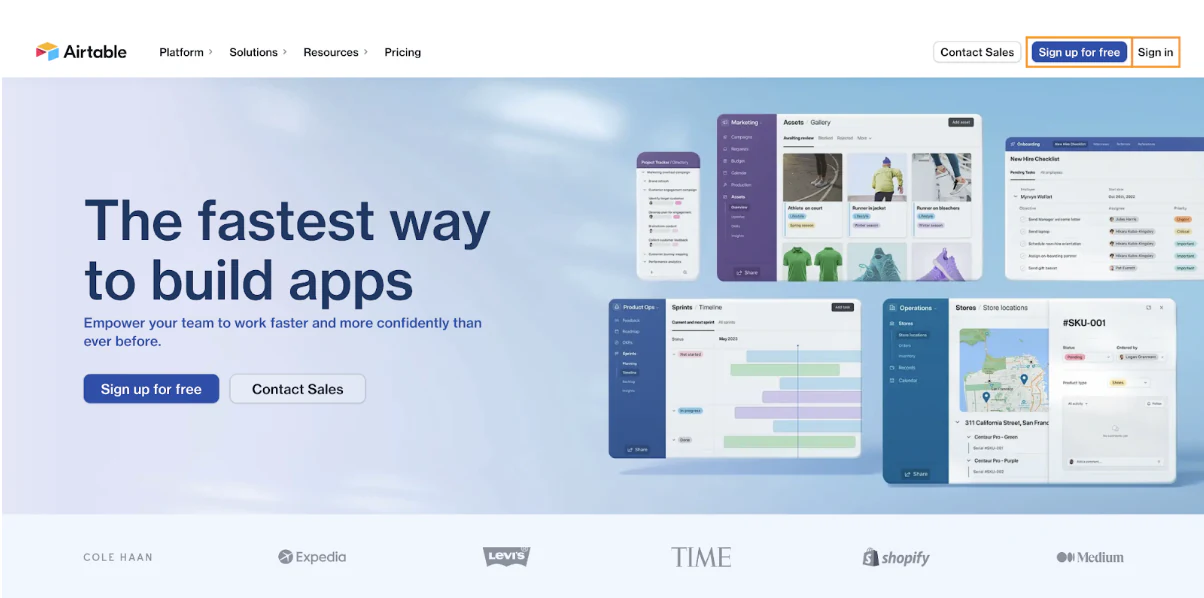
Step 1: Sign in or sign up to Airtable
Before you start creating your Kanban board in Airtable, you need to have an account. If you don’t have one, you need to sign up for Airtable. However, if you already have an account, sign in to Airtable with your login credentials.
Step 2: Setting up your Airtable base
Next, you need to create a new Airtable base that can organize your data, so that you can create a Kanban board. This includes ensuring you use descriptive namings, create the necessary tables, and that each of those tables has the needed Airtable fields.
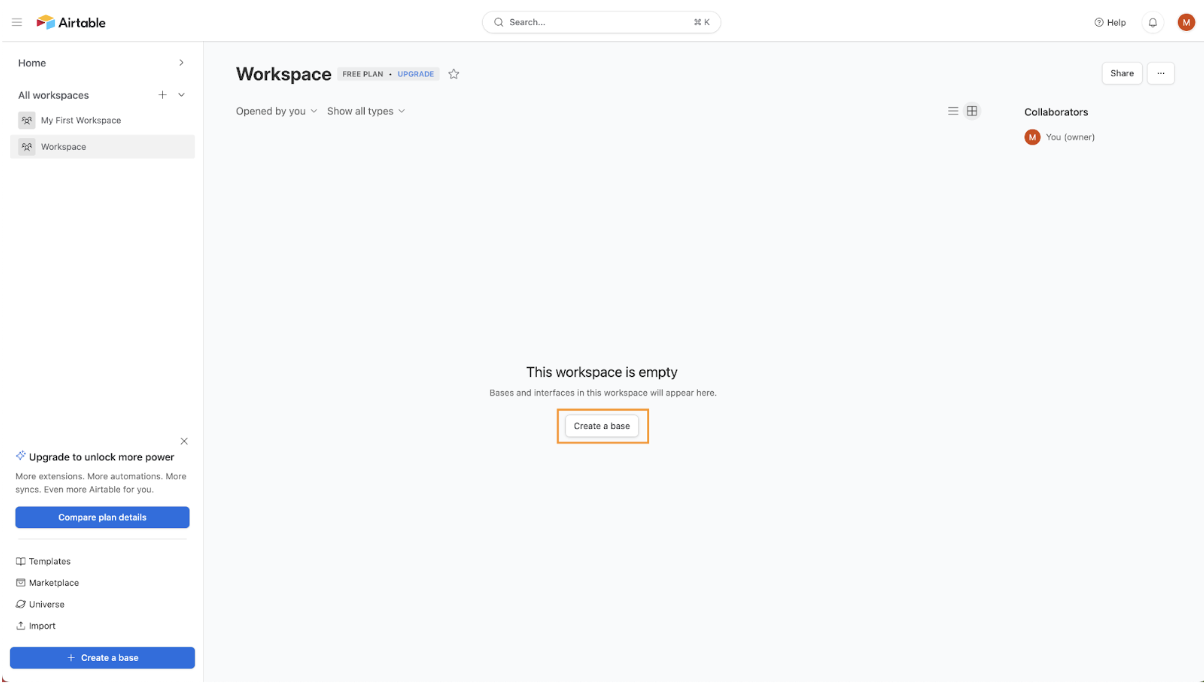
Step 2.1: Create an Airtable base
On your Airtable workspace, you will find the "Create a base" button. Click on it.
Step 2.2. Rename your Airtable base
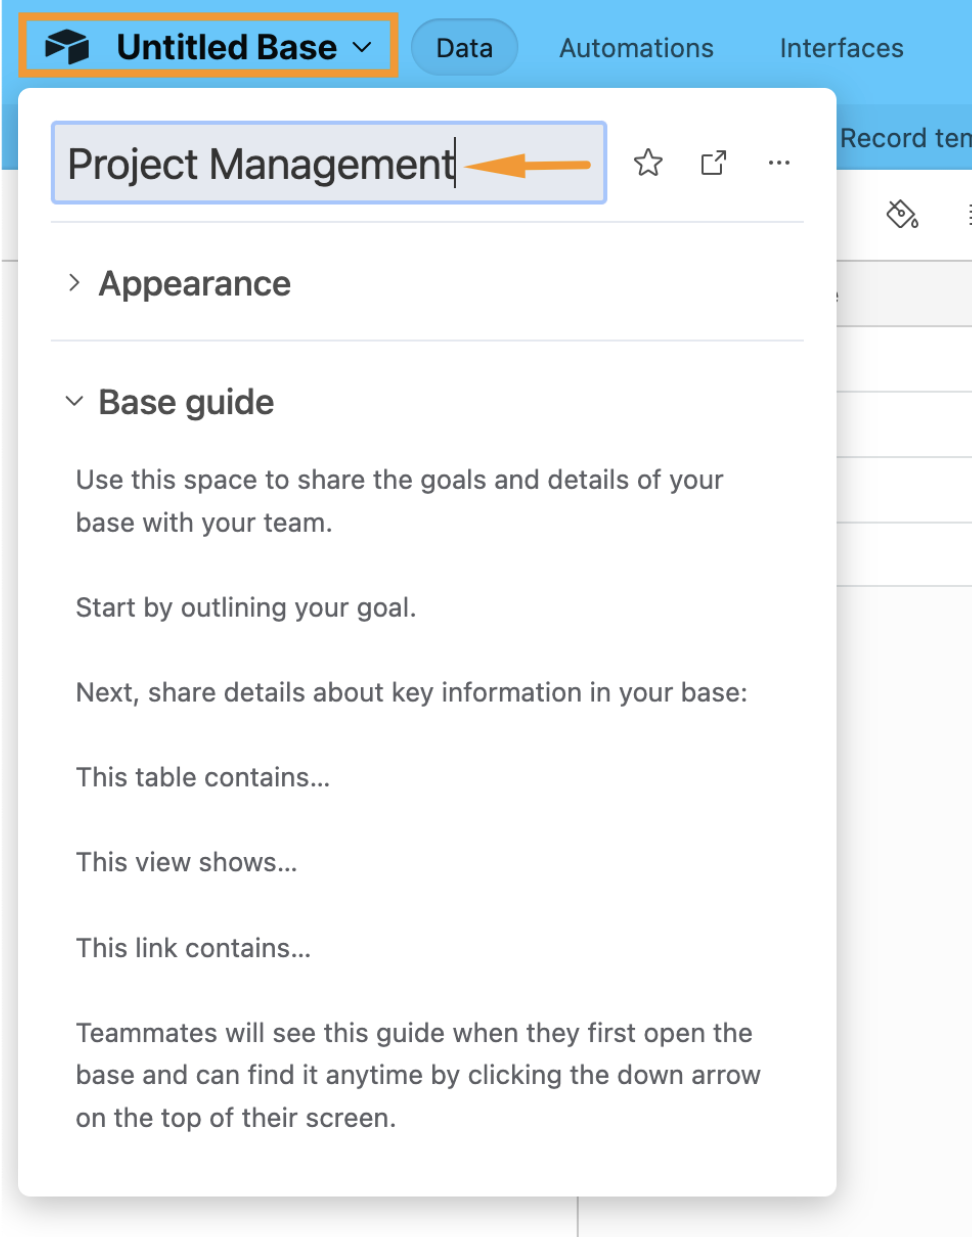
By default, Airtable will name your base "Untitled Base." As you think about naming your base, consider the tables that will be part of this base. When using a kanban board, you might have tables for "Taks," "Projects," "Employees" or "Customers."
Given the multifaceted nature of project management, having a base with an undescriptive name like "Untitled Base" can be confusing, especially if you plan to have multiple bases in the future.
To name your newly created Airtable base more descriptively, click on its name and type a new one, such as "Project Management."
Step 2.3: Rename your table
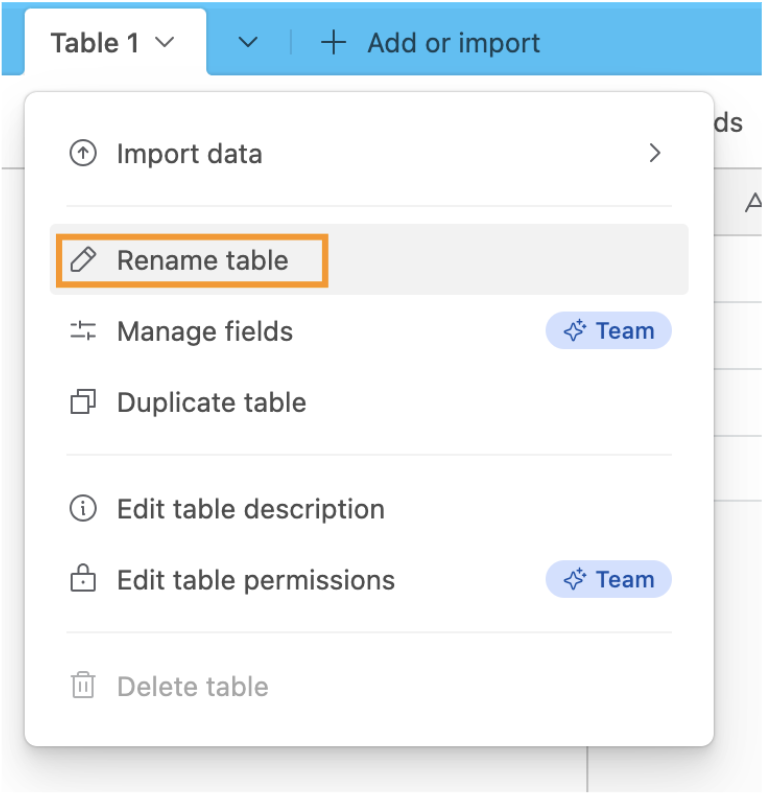
Also by default, the table in your Airtable base will be named "Table 1." This is not a helpful name, as it doesn’t indicate what data will be added to this table. Each table serves a unique purpose in organizing and categorizing your content. For instance, "Employees" might list your teammates, while "Projects" may list the various initiatives your team is currently working on.
As you’ll use this specific table to keep track of your Tasks in Airtable, click on the table name, click on "Rename table," type a new name, such as "Tasks," and click on "Save."
Step 2.4: Change the title of existing fields
Fields in Airtable function similarly to columns in a spreadsheet, helping you categorize and organize your data. The first field is typically reserved for the titles or names of your tasks or projects, as that's often how you will identify each item on your Kanban board. Depending on your specific needs, you might use the first column for different identifiers, such as task IDs or unique project codes.
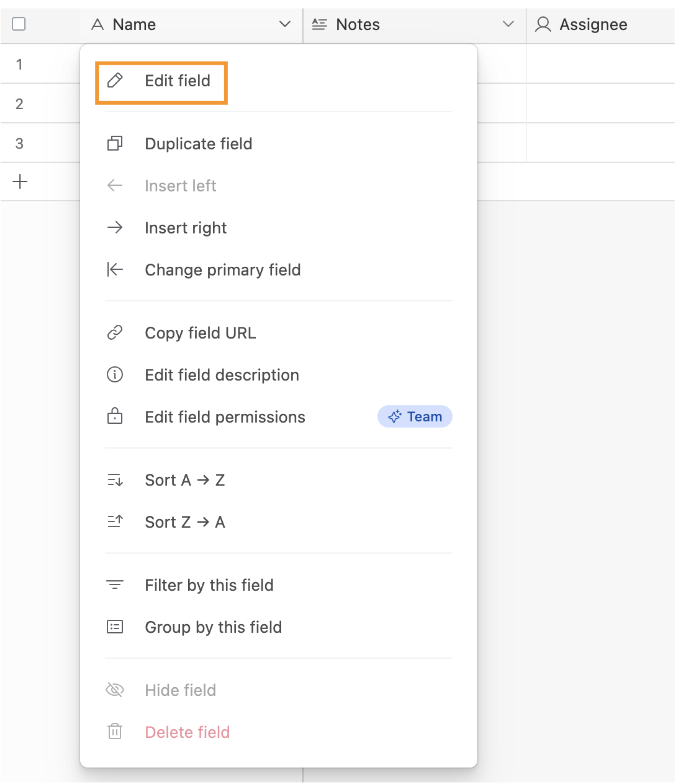
To change the name of the first column, click on the header of the first field, which will default to "Name." In the dropdown that appears, select "Edit field." Rename it to "Task Title," "Project Name," or any other identifier that suits your workflow, and then click on "Save."
You might need to adjust or add other fields to optimize your kanban board. Beyond the primary title or name, common fields for a kanban board include:
- Status: This is crucial for a kanban board. It indicates the current stage of a task or project, such as "To Do," "In Progress," or "Completed." Ensure this Airtable field type is set to Single select, so you can easily move tasks between different stages;
- Assignee: If the people responsible for tasks or projects have access to the Airtable base, you can create a field with the field type User. If they don't have access, a Single line text field to note down their name will suffice;
- Due Date: use the Date & Time field type to set deadlines for tasks or project milestones;
- Priority: to highlight the importance or urgency of tasks, you can create a Single select field with options like "High," "Medium," and "Low;"
- Category or Project: if you want your kanban board in Airtable to encompass multiple projects or task categories, a Single select or Multiple select field can help categorize each task;
- Attachments: if there are relevant documents, images, or files associated with a task or project, use the attachment field type to upload and store them directly in Airtable.
Step 3: Add your data
With your fields set up, you can now start adding your data to Airtable, which will be shown on your Kanban board. To do so, click on a cell and add the relevant details for each task.
Step 4: Create the Kanban view
One of the features you will use is the ability to switch between different Airtable views. So far, you’ve been working with the grid view, but you can see the same data with the Kanban view.
Step 4.1: Create a new view
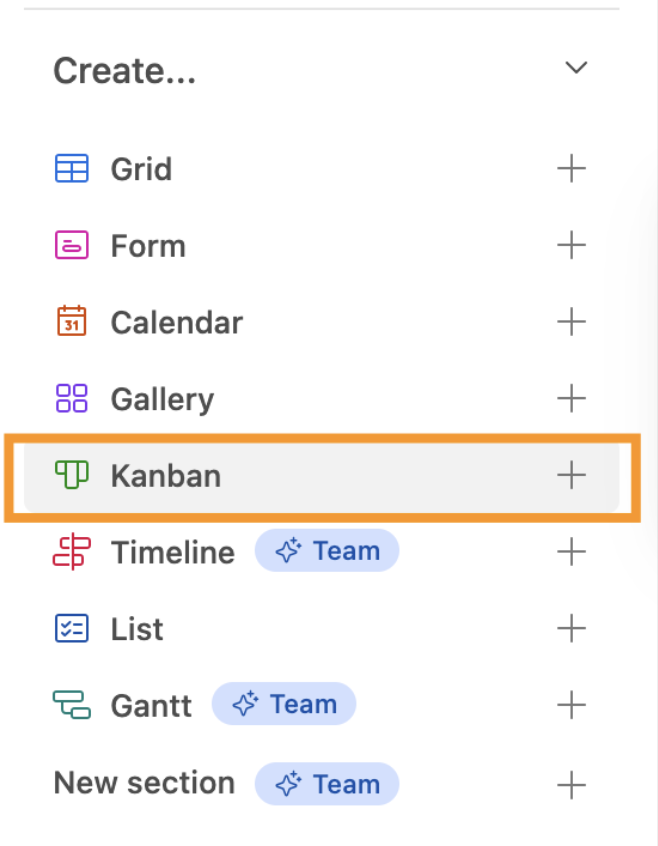
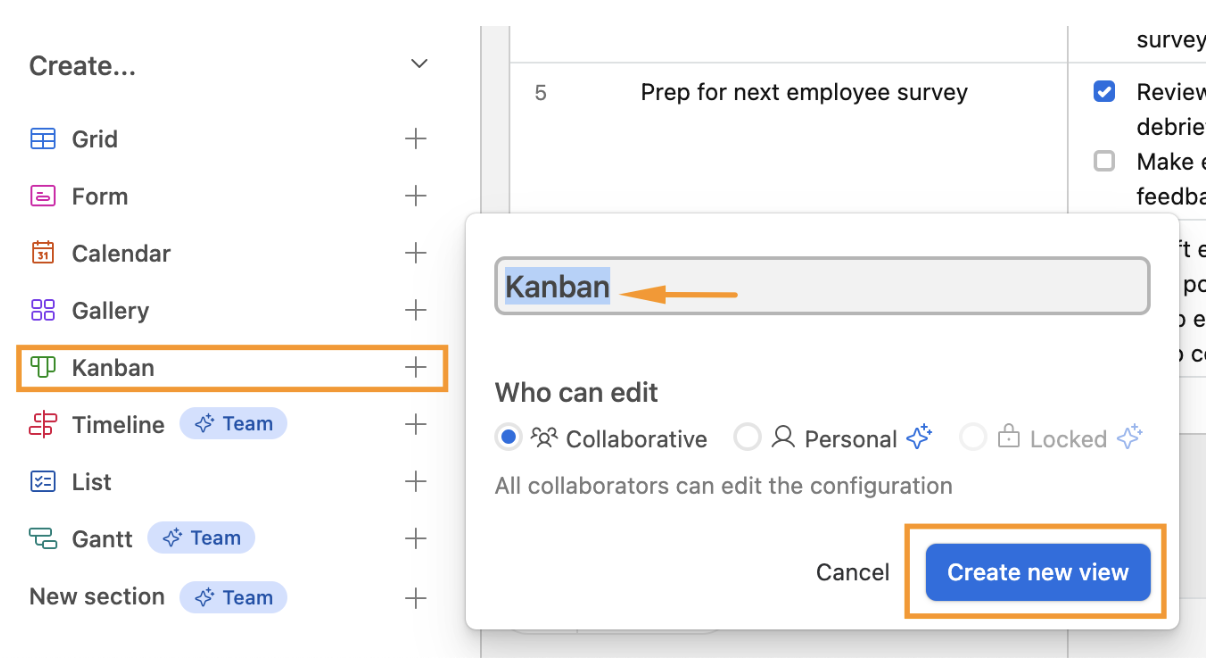
On the left sidebar, you will see a heading with the text "Create…" above a list. There, click on "Kanban."
Step 4.2: Configure the new view
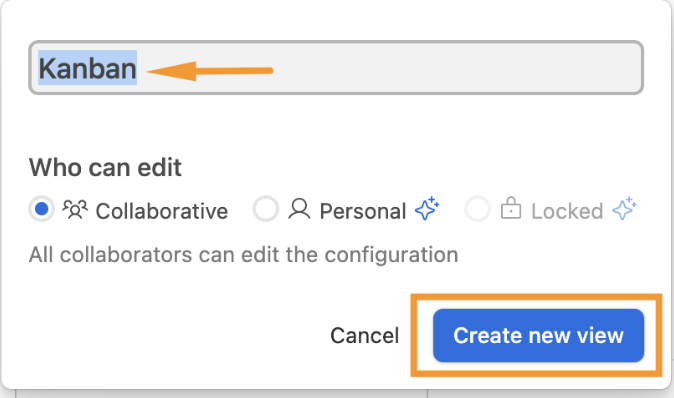
Next, choose a name for the Kanban view. “Kanban” could work well. Then you can select who can see and edit this new view:
- If you select "Collaborative," everyone can both edit and view this view;
- If you select "Personal," only you can both edit and view this view.
Once you’ve made your choice, click on "Create new view."
Step 4.3: Choose a grouping field
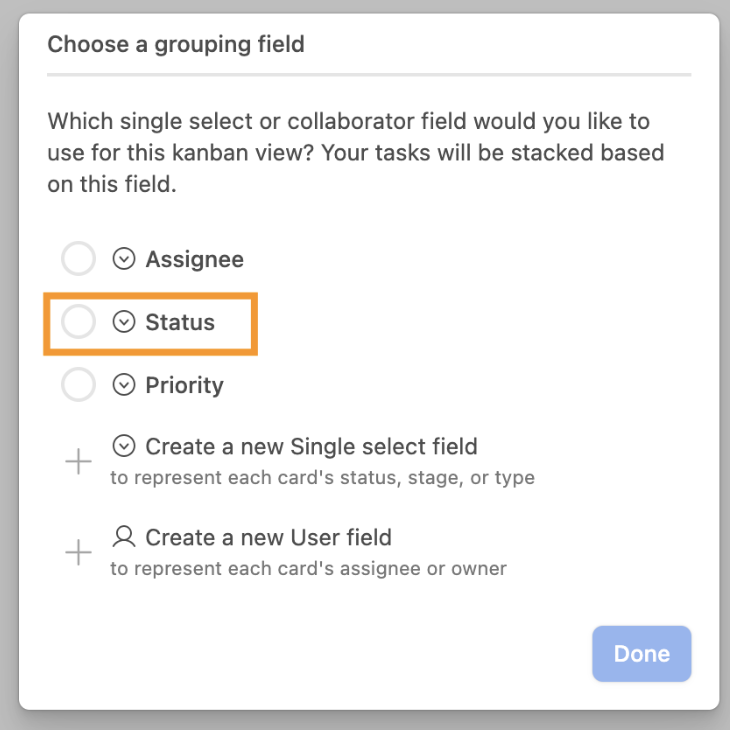
In order for Airtable to show a task on a given column in your Kanban board, it needs to know which field should be used to do so. Typically, this will be the "Status" you created earlier in this process.
To select this field, click on the dropdown list and select the field. Then click on "Done."
Step 5: You’ve created a kanban board in Airtable
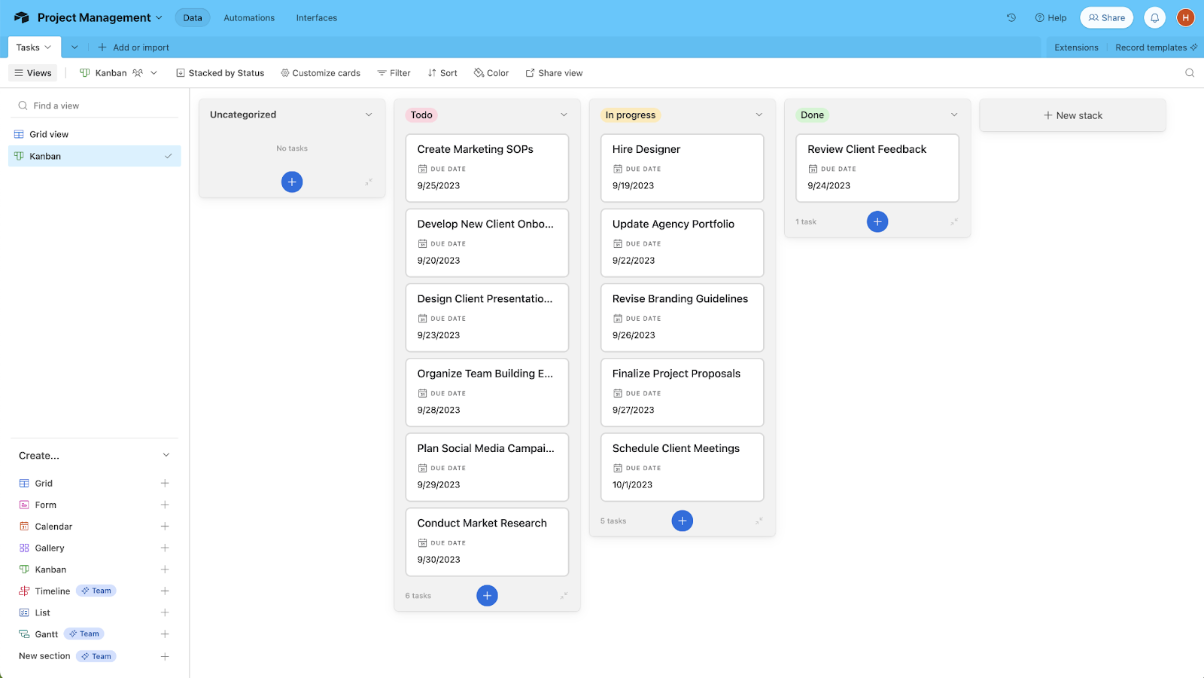
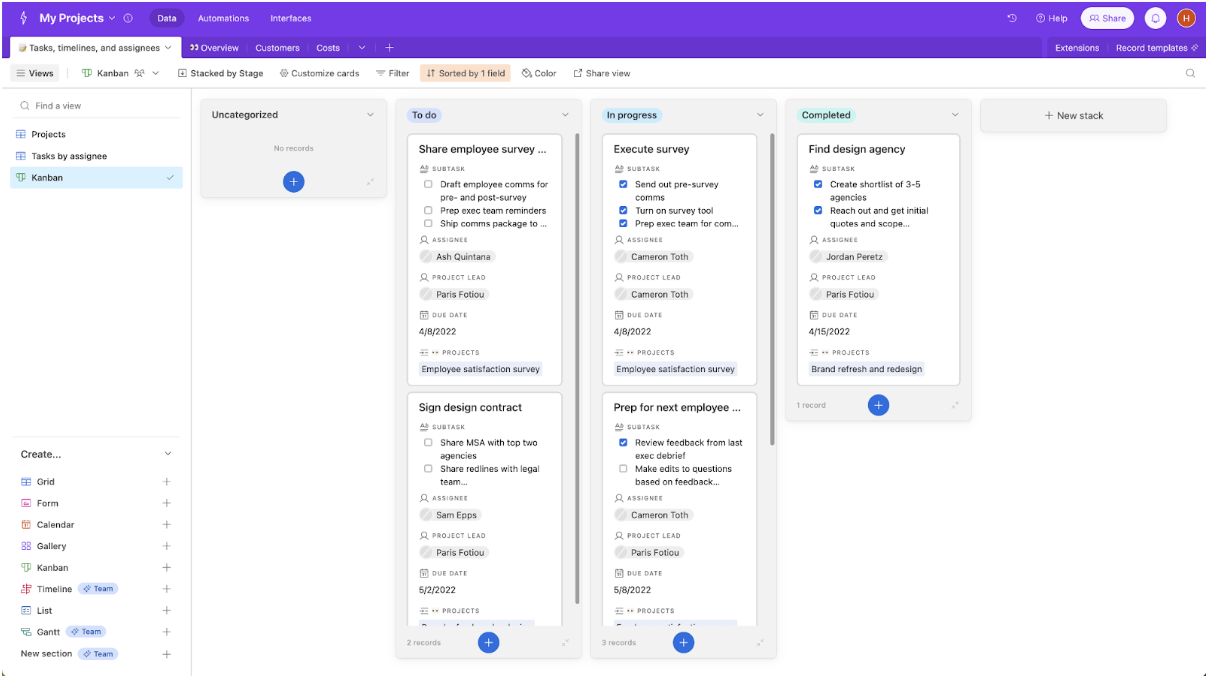
You’ve now set up a kanban board in Airtable. You can see all your tasks or projects organized in columns, making it easy to visualize and manage your workflow.
Creating a Kanban board view in Airtable using your existing data
If you've been using Airtable for a while, you likely have tables filled with data that can be transformed into a visual Kanban board. In this section, I'll guide you through the process of turning that data into a functional Kanban board.
Step 1: Sign in to Airtable
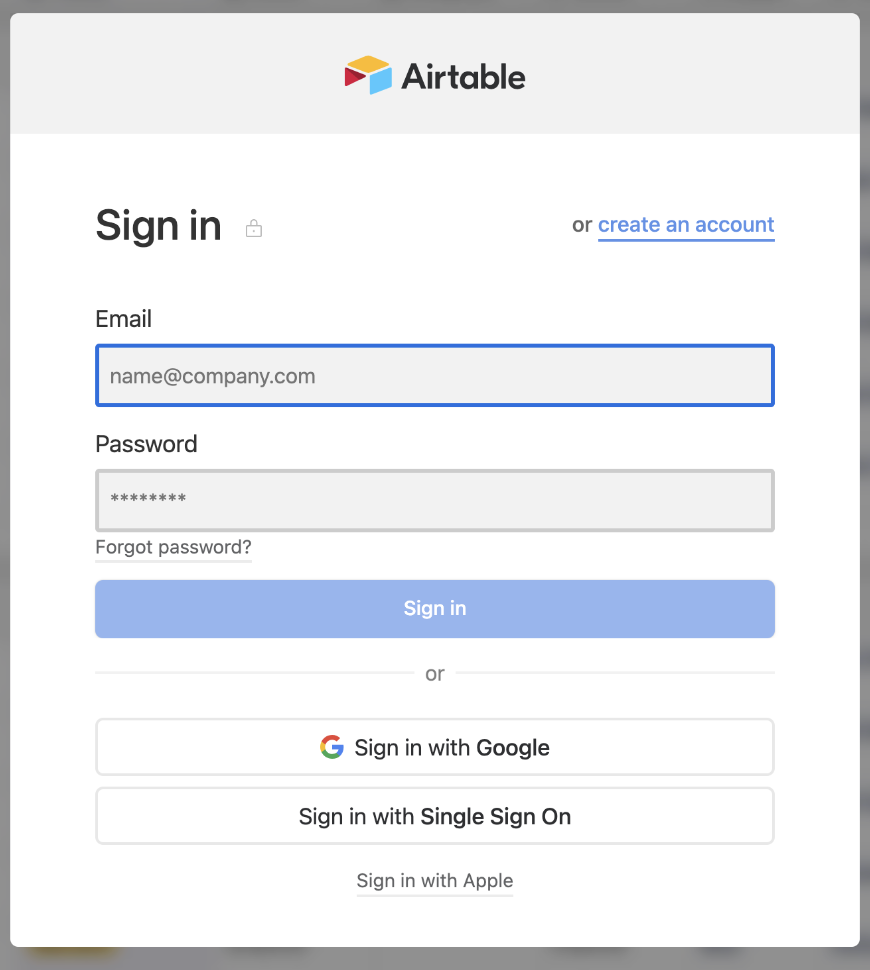
Before you start to create your kanban board in Airtable, you’ll need to sign in to Airtable with your login credentials.
Step 2: Ensure your table is set up properly
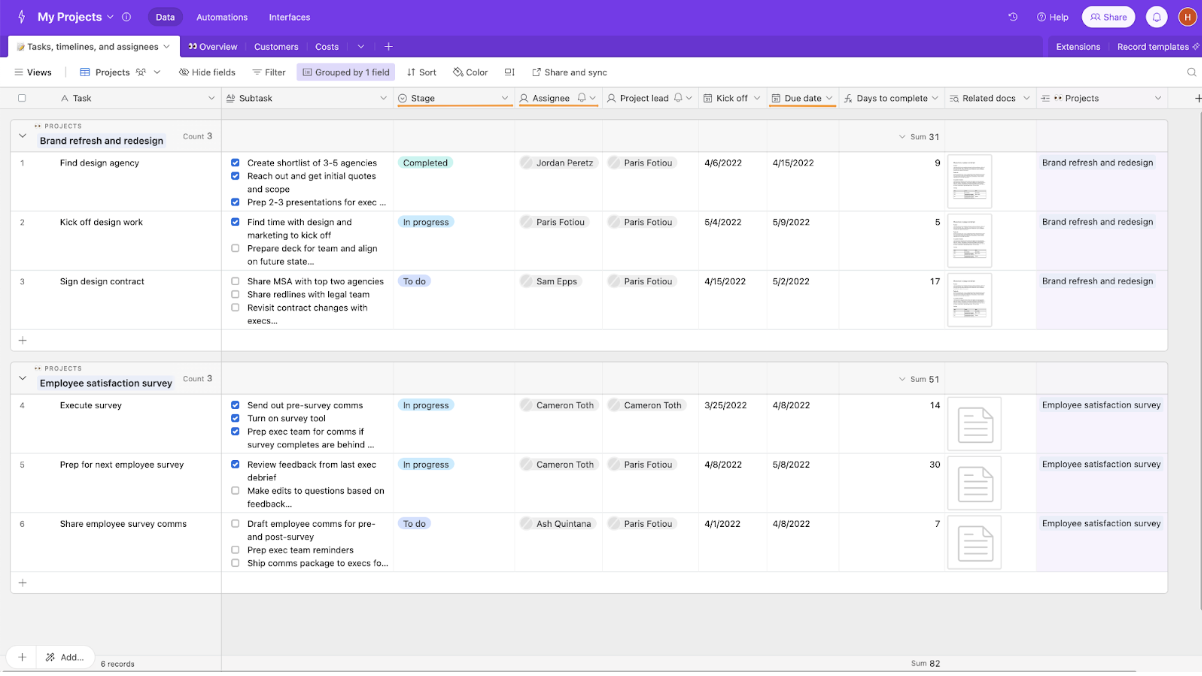
Before you can create a kanban board, it's essential to ensure that your table is structured correctly. The Kanban view in Airtable relies on a single select field to categorize and display your cards. This means you need a field where each record (or task) can only belong to one category (or column) at a time. For example, a task cannot be “In progress” and “Done” at the same time.
Step 2.1: Access your base
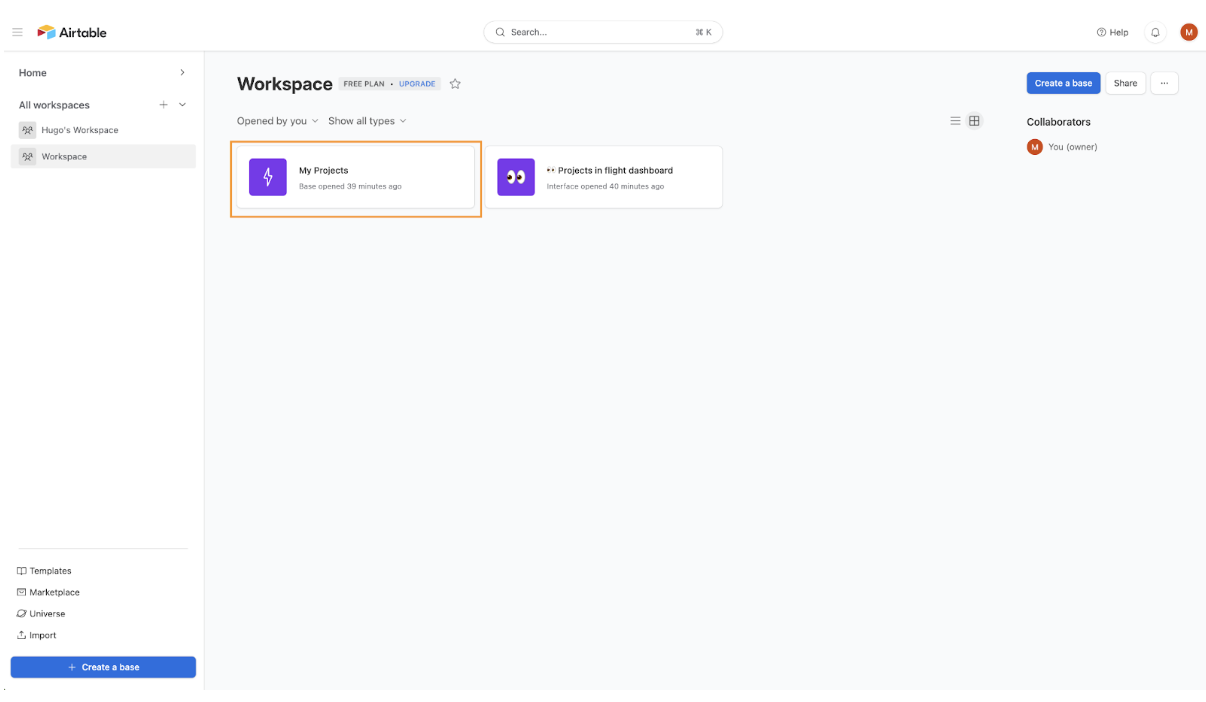
Navigate to the Airtable base where your data is located.
Step 2.2: Access your desired table
Click on the table with which you wish to have a kanban board.

Step 2.3: Audit your fields
Look through your current fields to determine if you have a single select field that can be used for the columns in a Kanban board. This could be a field like "Status" or "Stage" where each task has a specific stage in the workflow. Depending on the details you need to have on each card of your Kanban board, you may need to have fields like "Due date," "Image," or "Assignee."
If you do have all the necessary fields set up correctly, move to Step 3.
Step 2.4: Edit fields (if necessary)
If you have a field that can be used for the kanban view but it's not named appropriately or doesn't have the right options, click on the dropdown arrow next to the field name. Then select "Edit field" to make the necessary adjustments, changing the name or the field type.
Step 2.5: Add a new Single select field (if none exists)
If you don't have a suitable field to use for a kanban board, you'll need to create one. Click on the "+" icon to add a new field. Choose the "Single Select" field type. Add options that represent the stages or categories for your kanban board, such as "To Do," "In Progress," and "Completed." Next, you need to assign a stage for each of your tasks, using this newly created Airtable field.
Step 3: Create a Kanban view
Now that your table is set up correctly, you can proceed to create the Kanban view.
Step 3.1: Add a new view
On the left-sidebar name "Views", heading called "Create…", you’ll find the option "Kanban." Choose a name for this view and click on "Create new view."
Step 3.2: Adjust the Kanban settings
Now, a pop-up will appear for you to select the grouping field. Airtable will automatically list all the fields of the "Single select" type. When you choose one, the board in the background will update to match the grouping field you selected. Hit "Done" when you finish.
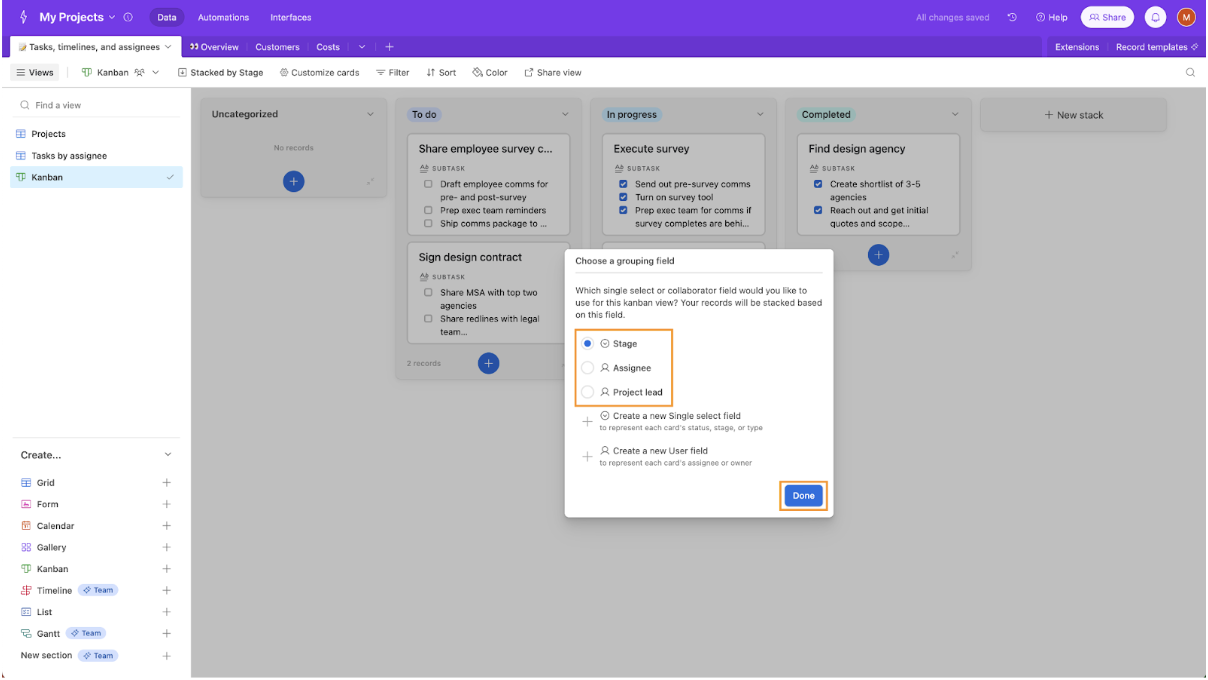
Choosing a grouping field for a Kanban board in Airtable.
Step 4: Personalize your kanban board
Once you've set up your Kanban board, personalizing it can help you get the most out of your workflow. Airtable offers a range of customization options to tailor the kanban board to your needs:
- Filtering Cards: You can filter your Kanban cards based on specific criteria. For instance, if you want to view tasks assigned to a particular project lead or those that fall under a certain category, filtering by any of these will be invaluable;
- Showing or Hiding Fields: Depending on the information you want visible at a glance, you can choose to show or hide specific fields on each card. This means you can decide whether or not details like the assignee, due date, and other fields are displayed on the front of the card;
- Sorting Cards: Organizing your tasks is crucial for efficient project management. With the sorting feature, you can arrange your cards based on the information in a chosen field. For example, you might want to sort tasks by due date to prioritize upcoming deadlines.
Step 5: You’ve created a Kanban board in Airtable
You’ve now set up a Kanban board in Airtable. You can see all your data organized in columns, making it easy to visualize and manage.
Creating a Kanban board in Softr, using Airtable as a data source
Softr simplifies the process of turning your Airtable data into a Kanban board, while adding the customization, permissions, and sharing options Airtable's native view doesn't offer. In this section, I'll guide you through setting up a Kanban board in Softr backed by your existing Airtable data.
One customer summed up why this combination works well for teams already invested in Airtable: "It integrates very nicely with Airtable and other databases we are already using, making it nice that it just sits on top of the systems we have. I appreciate its functionality in sending notifications, inviting users, and using magic links and other secure features. I also love the ability to control access globally, which is really important for data security and privacy." (Natalie S., Director of Operations, G2 review)
Step 1: Sign in or register to Softr
First, you will need to log in to Softr. If you don’t have an account, you can sign up for Softr for free.

Step 2: Start your app
With your Softr account set up, it's time to create the application where your Kanban board will live. You have three ways to start: describe your app to the AI Co-Builder and let it generate a working structure in minutes, pick a ready-made template, or build from a blank canvas. For a Kanban board tied to Airtable, starting from a template is usually the fastest path, but you can also ask the AI Co-Builder to build your Kanban page and connect it to your Airtable data by describing what you need in plain language.
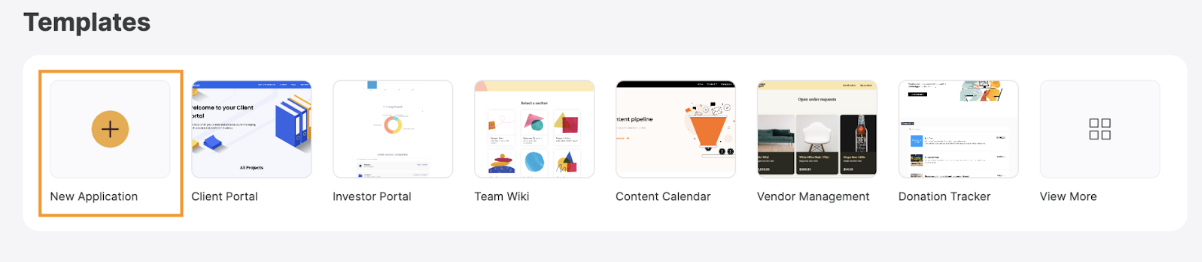
On your Softr dashboard, locate and click on the "New Application" button.
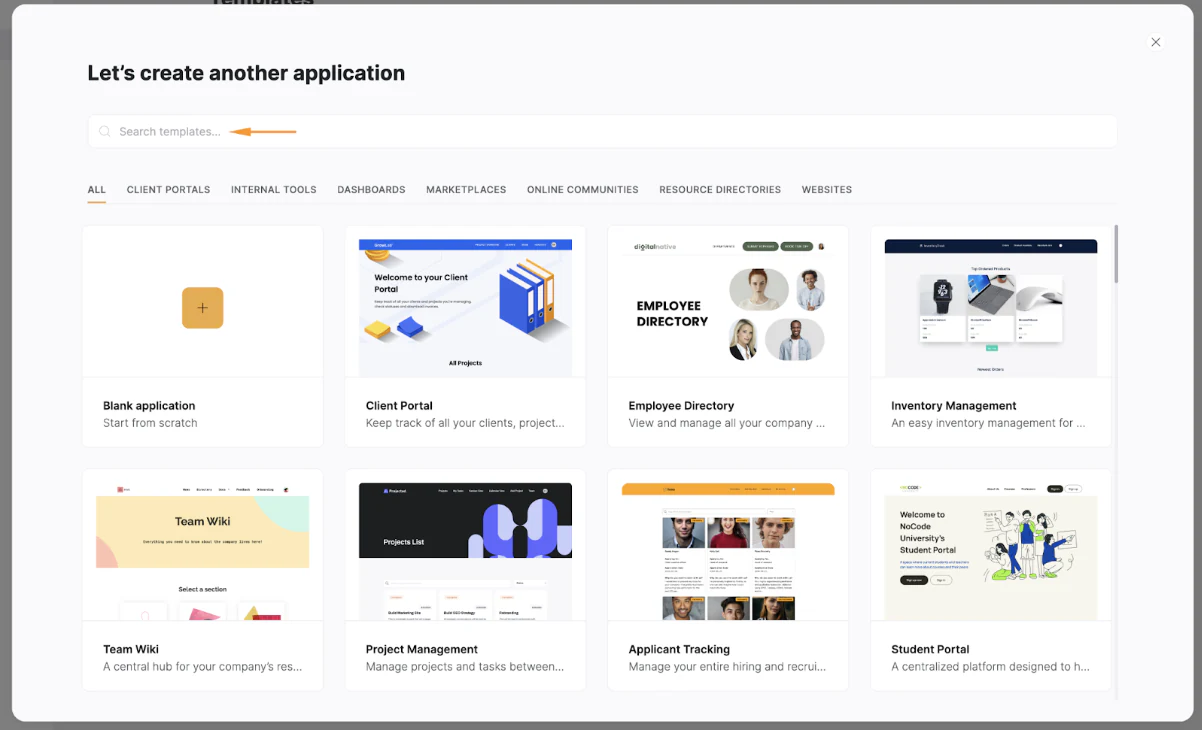
Step 3: Search for a template
Softr offers a wide variety of templates that can simplify the process of using a Kanban board. To create a Kanban board, I recommend the Project Management template. Locate and select the template in the list to proceed.
Step 4: Click on “Use Template”
You can now learn more about the Project Management template, including its features and functionalities. Once you’re ready, click on the “Use Template” button.
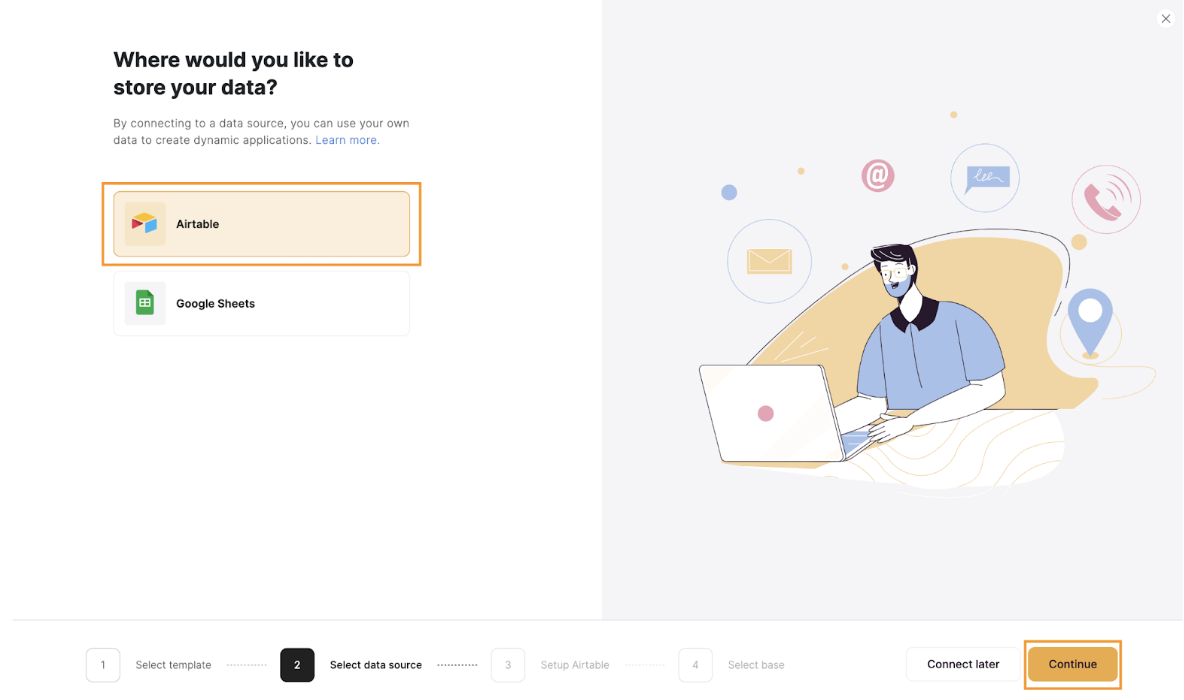
Step 5: Select Airtable as the data source
Once you've selected your template, you'll be prompted to choose a data source. If you want your Kanban board to use data stored in Airtable, select “Airtable” from the available options, and click on “Continue.”
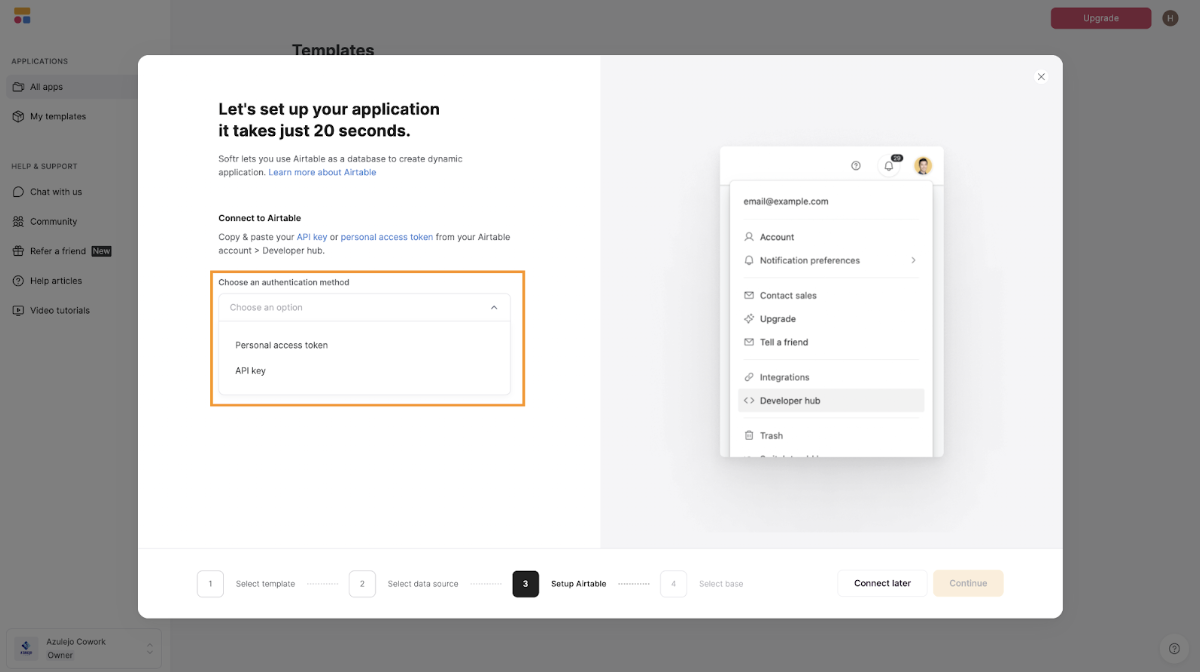
Step 6: Connect to Airtable
Now, you have the choice between using a personal access token or your API key. Follow the steps on the screen or the next few sub-steps below to get your personal access token.
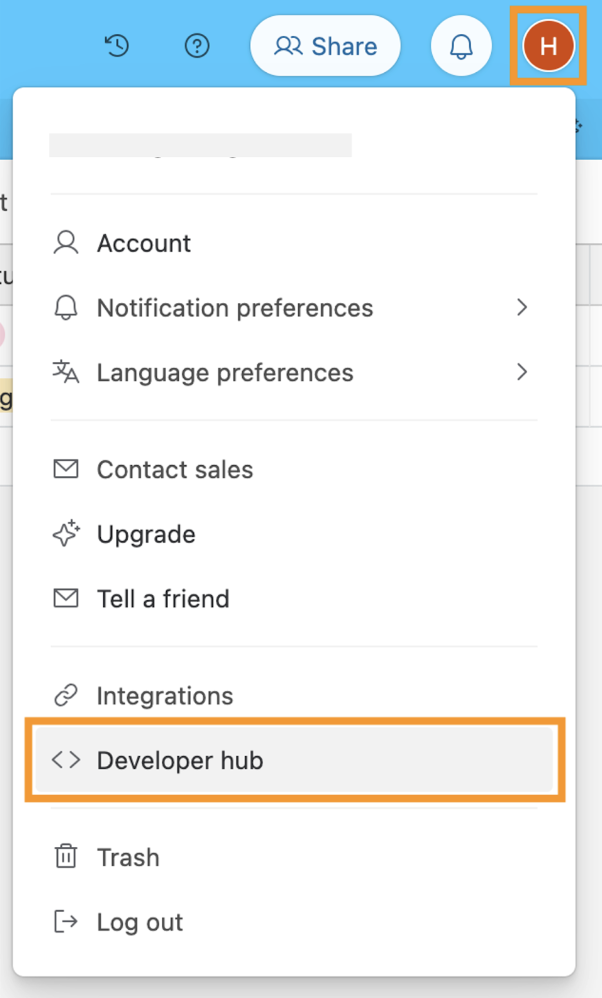
Step 6.1: Go to the Airtable Developer Hub
In Airtable, click on your icon in the top-right corner and then click on “Developer Hub.”
Step 6.2: Create a new token
Click on the “Create new token” button.

Step 6.3: Set your personal token
Name your token and set the scope according to the instructions from Softr. On “Scopes”, select:
- “data.records:read;”
- “data.records:write;”
- “schema.bases:read;”
- “Schema.bases:write.”
On “Access” select the database you created or other generic options that grant access to all your databases.

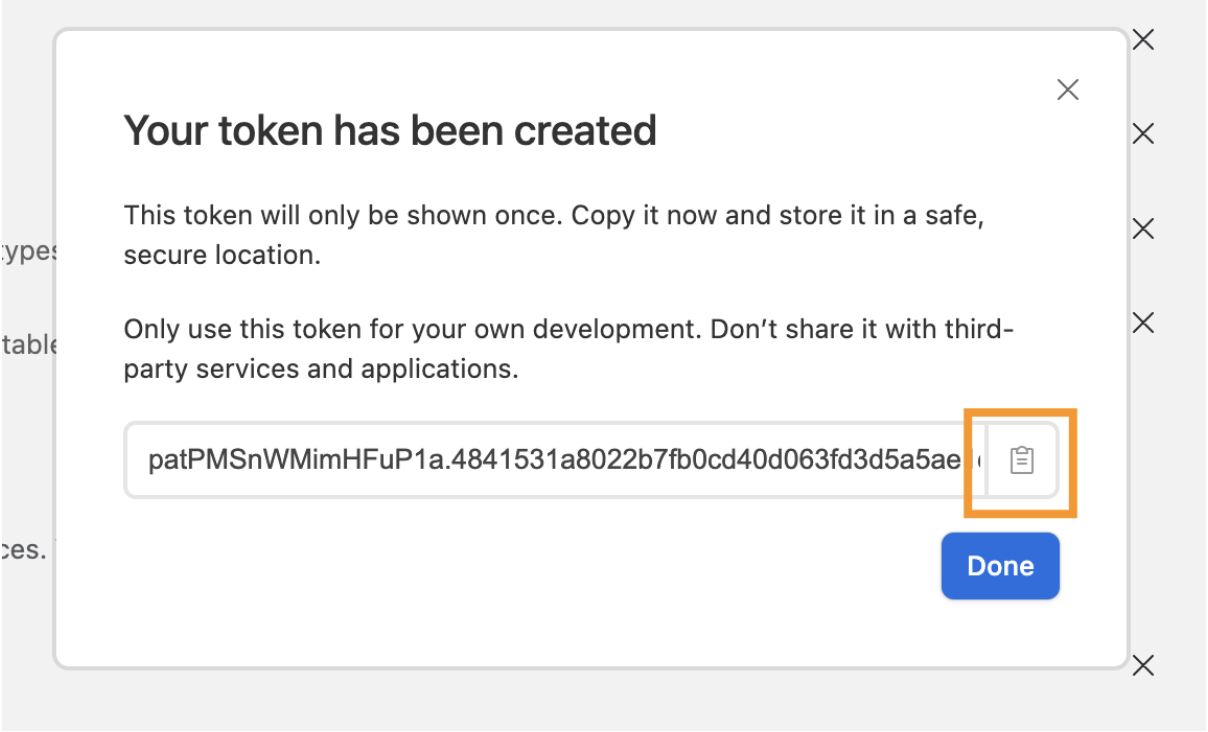
Step 6.4: Copy your token
A popup will appear with your new personal access token. Copy it.
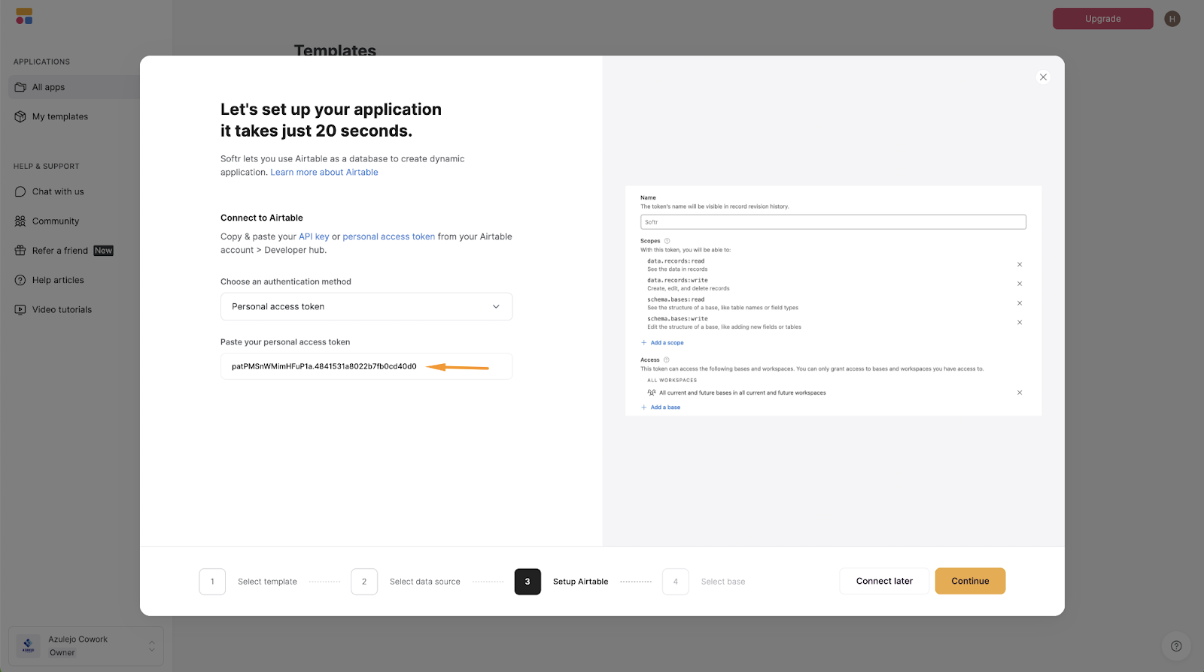
Step 6.5: Paste your token on Softr
Head back to Softr, paste your token to the relevant field, and click on “Continue.”
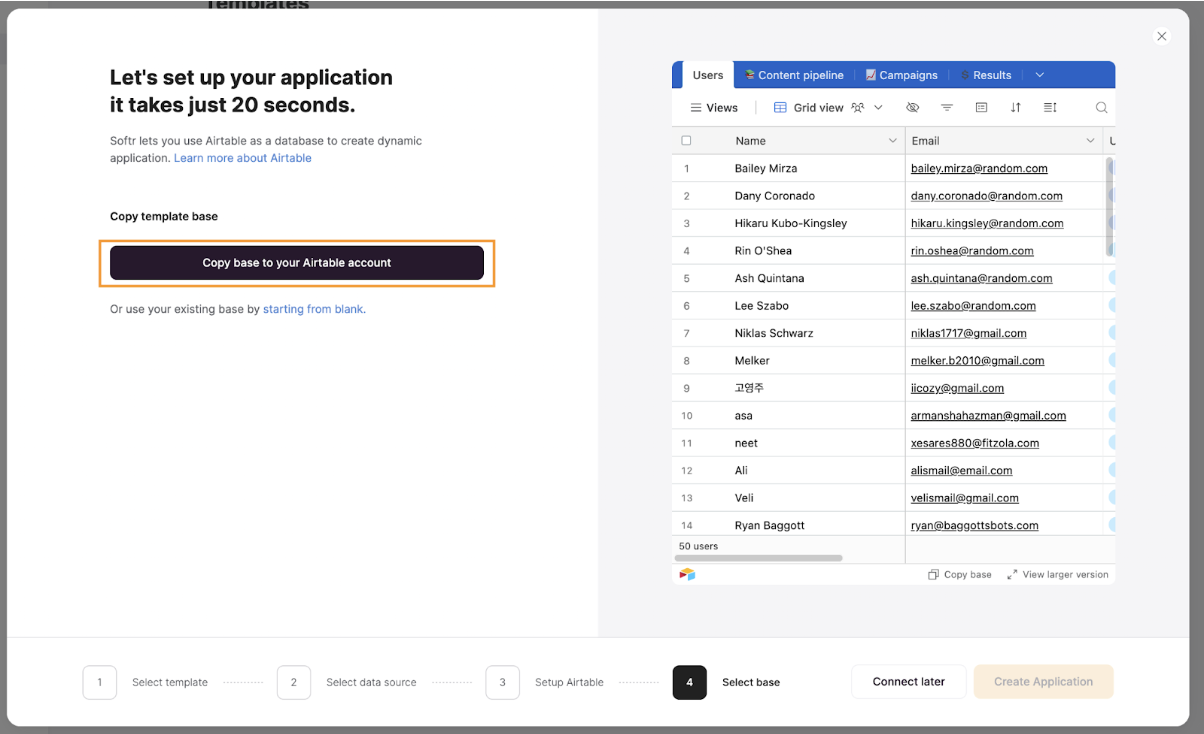
Step 7: Copy the Softr template to Airtable
In order to use Softr’s template for Airtable, click on “Copy base to your Airtable account.”
Step 8: Make sure your data is synced
For your Softr app to display the information you need in the correct way, you have to make sure the app fields match the table columns. In the next steps, I’ll guide you through how you can set up these properties manually, though you can also describe the layout you want to the AI Co-Builder and let it map the fields for you.
Step 8.1: Adjust the source setting
Navigate to a page with a kanban board block. In this example, I’m using the page "/task-kanban." Clicking on the Kanban board block will open a sidebar on the right side of the screen with the source options.
Here, under SOURCE, you can choose the Airtable base, the Airtable table, and the default view where your data can be found.

Step 8.2: Set up your search bar fields
To enhance the usability of your Kanban board, Softr provides a search bar feature. To use this feature in an optimal way, go to the content tab, click on the option under “Search by” and select the fields that should be used to search the user’s inputs.
Step 8.3: Adjust the cards groups
Grouping cards in your Kanban board can provide a clearer structure, especially when dealing with multiple projects or stages. To do so, in the content tab, insert the desired fields on the option under “Group by.”
Step 8.4: Define which information to display
The details displayed on each card in your Kanban board are crucial for quick reference. On the content tab, under “Item fields,” you can set up the information to be displayed by adding the correspondent Airtable field and giving it a title. You can also ask the AI Co-Builder to "add due date, assignee, and priority to each card" and it will configure the item fields for you.
Step 9: You’ve created a Kanban board using both Softr and Airtable
You’ve now set up a Kanban board in Softr. You can see all your tasks or projects organized in columns, making it easy to visualize and manage your workflow with an app that can adapt and grow with your needs.
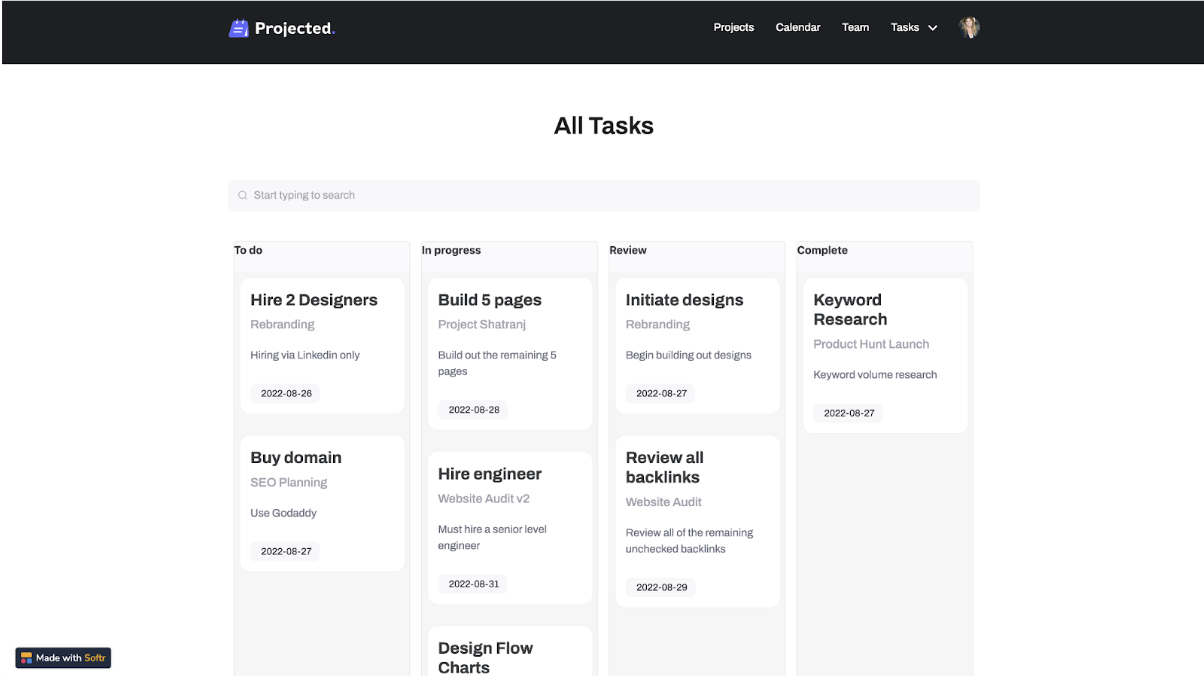
From here, you can layer on more of Softr's app-building capabilities: restrict which users and permissions group can see or edit specific cards, trigger a Softr Workflow whenever a card moves into a new status (for example, notifying a manager when a task hits "Review"), or use the Vibe Coding block if you need a custom card layout the standard Kanban block doesn't support. One customer built exactly this kind of setup: a full customer portal with task tracking and permission levels "in just a couple of hours," combining Airtable data with Softr's granular access control (Casey H., Advisor, G2 review).
Choosing the right Kanban setup for your team
Airtable's native Kanban view is the fastest option if you just need to visualize a single table for yourself or a small internal team. But the moment you need to share that board with clients, restrict what different people can see, or connect it to a broader app with automations, Softr is the better fit. It keeps your Airtable data as the source of truth while giving you a real interface, granular permissions, and room to grow.
If you're starting from zero rather than migrating existing Airtable data, it's worth exploring Softr Databases directly. You get the same drag-and-drop Kanban experience, without needing to maintain a separate Airtable base or wait on API sync delays.
Ready to try it yourself? Grab the Project Management template and connect it to your own Airtable base or a fresh Softr Database in a few minutes.
Frequently asked questions
Does Airtable have a built-in Kanban view?
What field type does Airtable need for a Kanban board?
Can I share my Airtable Kanban board with clients or external users?
Do I need Airtable to build a Kanban board in Softr?
Can I automate what happens when a card changes status?