How to share an Airtable base: The 3 methods you need to know

[.blog-callout]
TL;DR
- Airtable gives you three native ways to share a base: email invites, an invite link, and a public read-only base link. All three are free and take a few minutes to set up.
- The Interface Designer adds a visual layer on top of your data, but on the free plan publishing an interface still exposes the underlying base.
- Native sharing was built for collaborators, not for external clients or vendors. It is hard to show each person only the records that belong to them.
- To share Airtable data securely, build a portal on top of it with Softr. You connect your base (one of 21+ data sources), then use users and permissions so each person sees only the data they should. [.blog-callout]
There are a few ways to share an Airtable base, and the right one depends on who is on the other end. If you are working with teammates who need full access, native sharing is quick and free. If you are sharing with clients, vendors, or partners who should only see a slice of your data, raw base access becomes a problem fast. This guide walks through the three native Airtable methods (email invite, invite link, and public link), the Interface Designer, and how to build a secure, permissioned portal on top of your base with Softr. If you want to skip the build, you can start from a free client portal template.
How to share an Airtable base using the native Airtable Base/View share functionality
Sharing your Airtable base using Airtable’s native sharing functionality will only take a few seconds and is free. Completing these steps will allow you to copy a link that you’ll then be able to share with anyone online. The entire process is quite straightforward (5 minutes) and can be done in three different ways.
Send an email invite
To send a contact a link to your Airtable base by email, follow these steps:
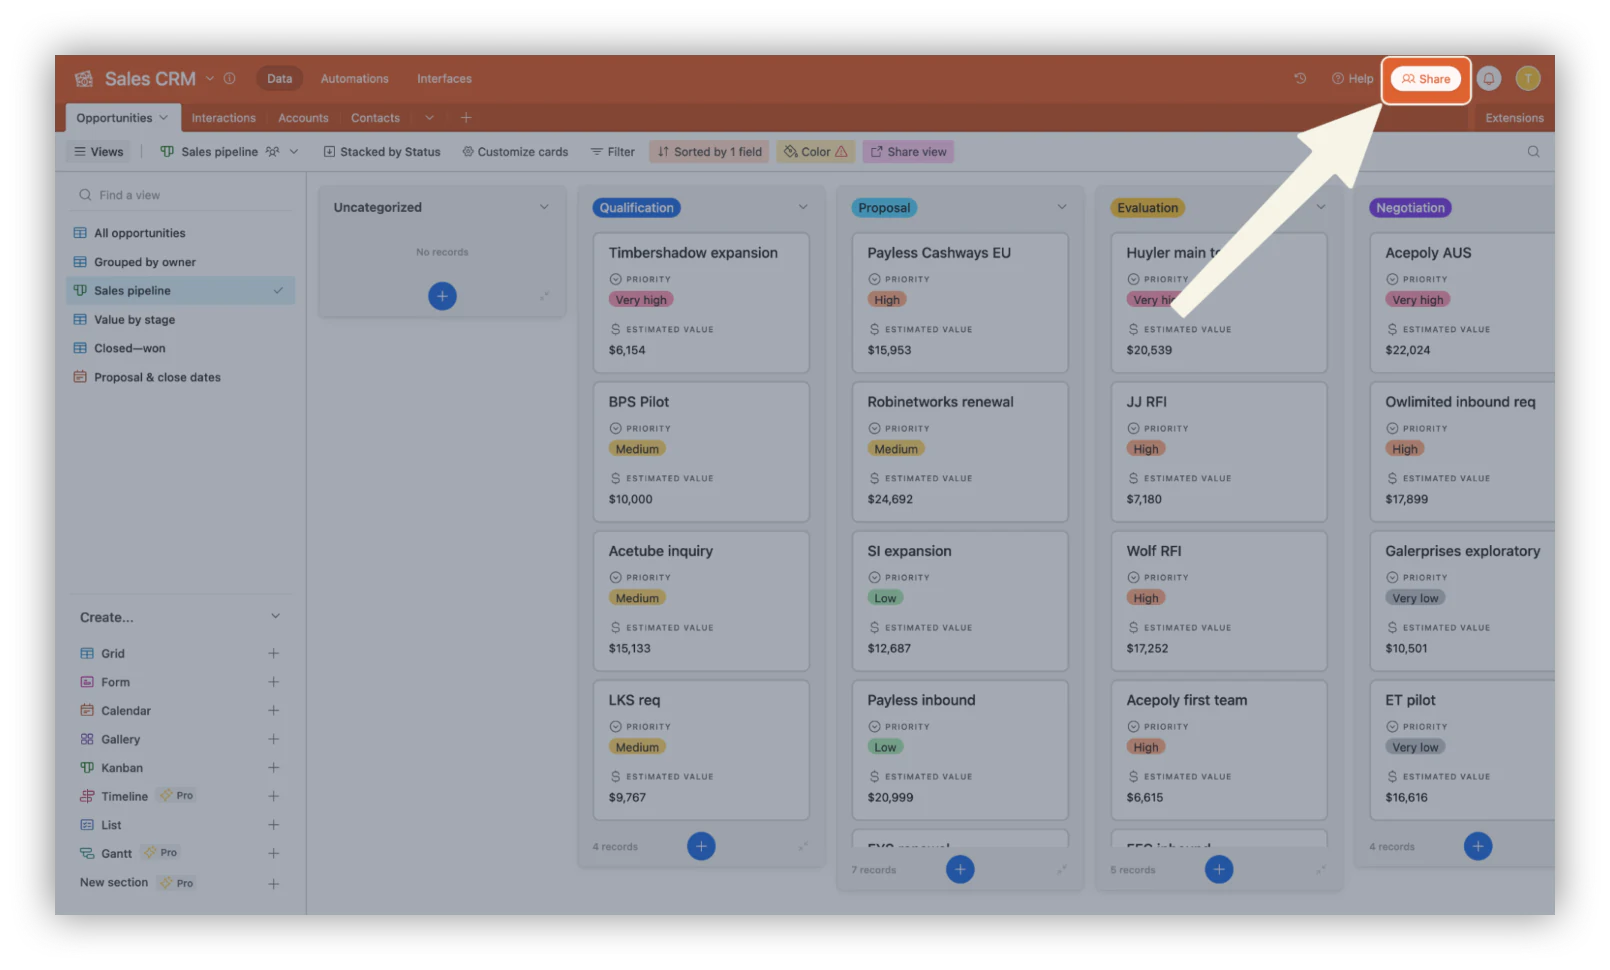
Click on “Share” at the top right corner of your Airtable base
Select “Share” to access the various sharing options available natively in Airtable.
Set the permission level
Select whether the invitees should have Creator, Editor, Commenter or Read-only access rights to your base. Keep in mind that these levels apply to the entire base, so an invitee can see every row in every shared table. For a deeper look at what you can and cannot control, read our complete guide to Airtable permissions.
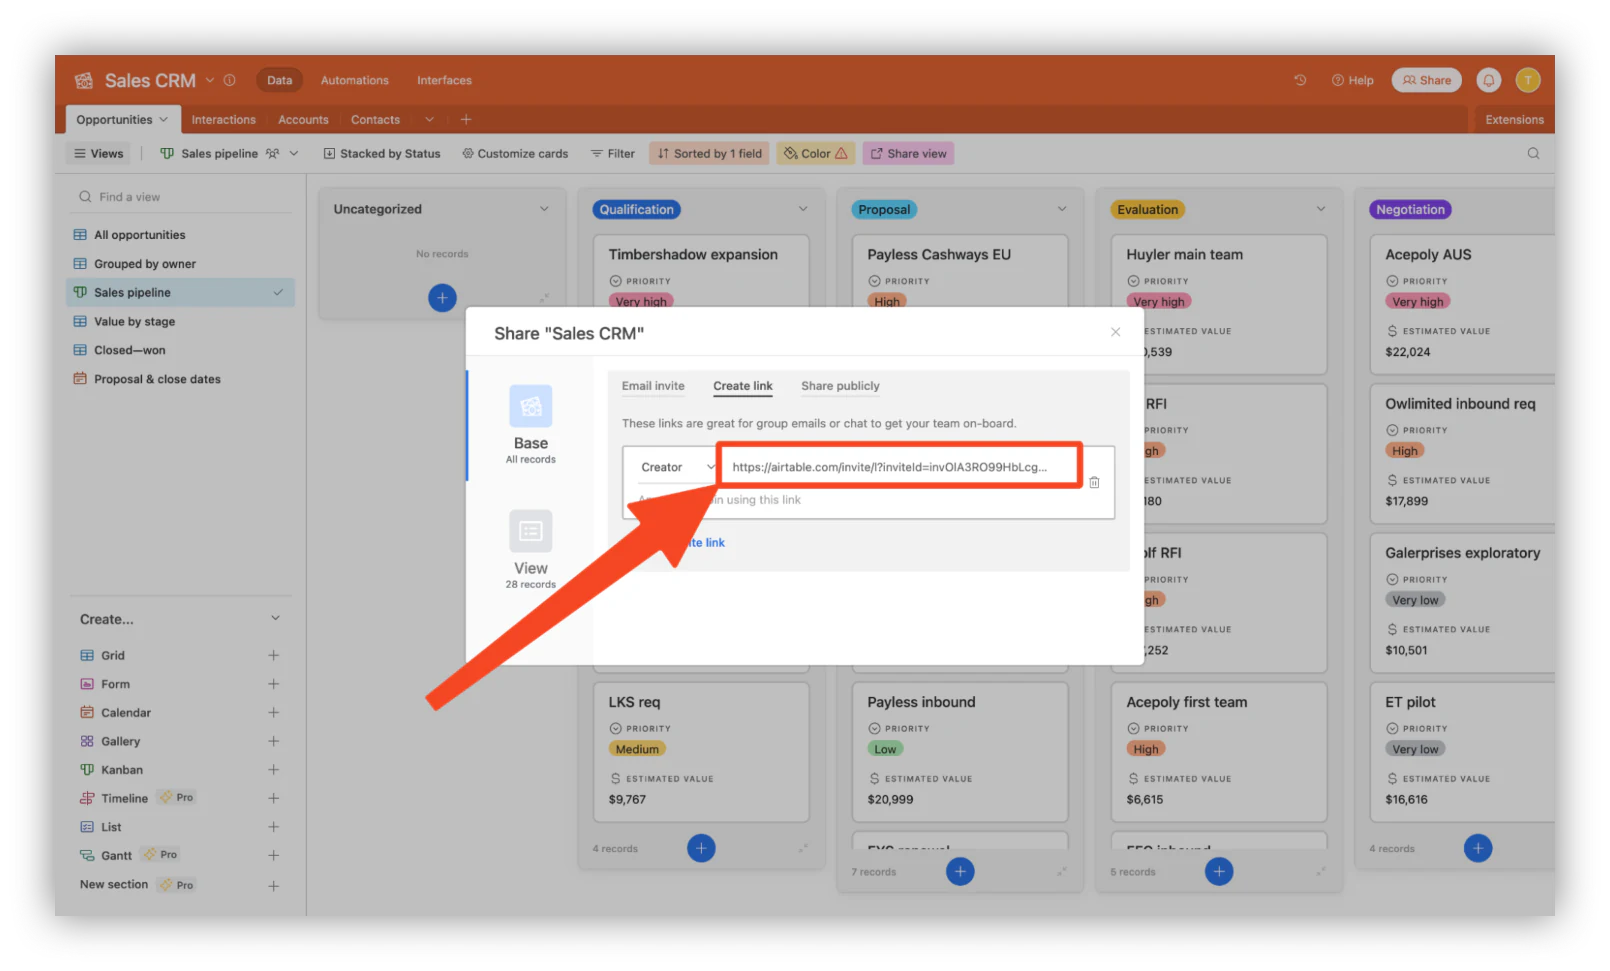
Click on “Invite”
The email addresses you provided will receive an invitation to your Airtable base.
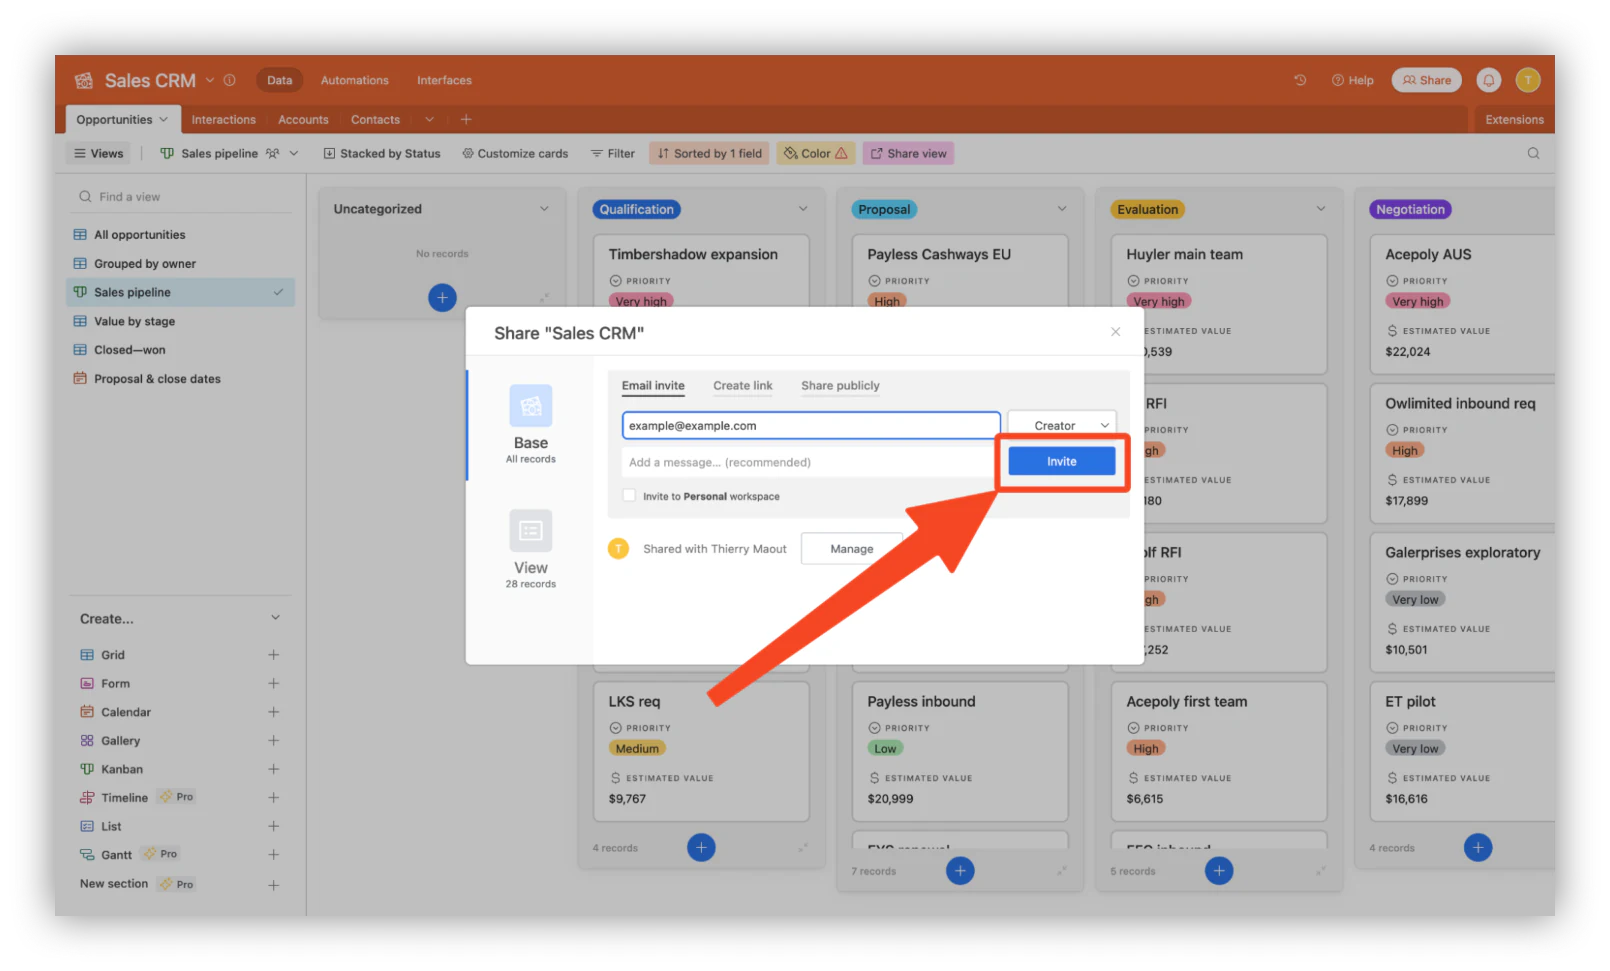
Create a link to the base
You have the ability to generate a link that will lead anyone to your Airtable base. To do so, follow these steps:
Click on “Share” at the top right corner of your Airtable base
Select “Share” to access the various sharing options available natively in Airtable.
Click on “Create Link”
This tab will give you access to link customization and creation options.
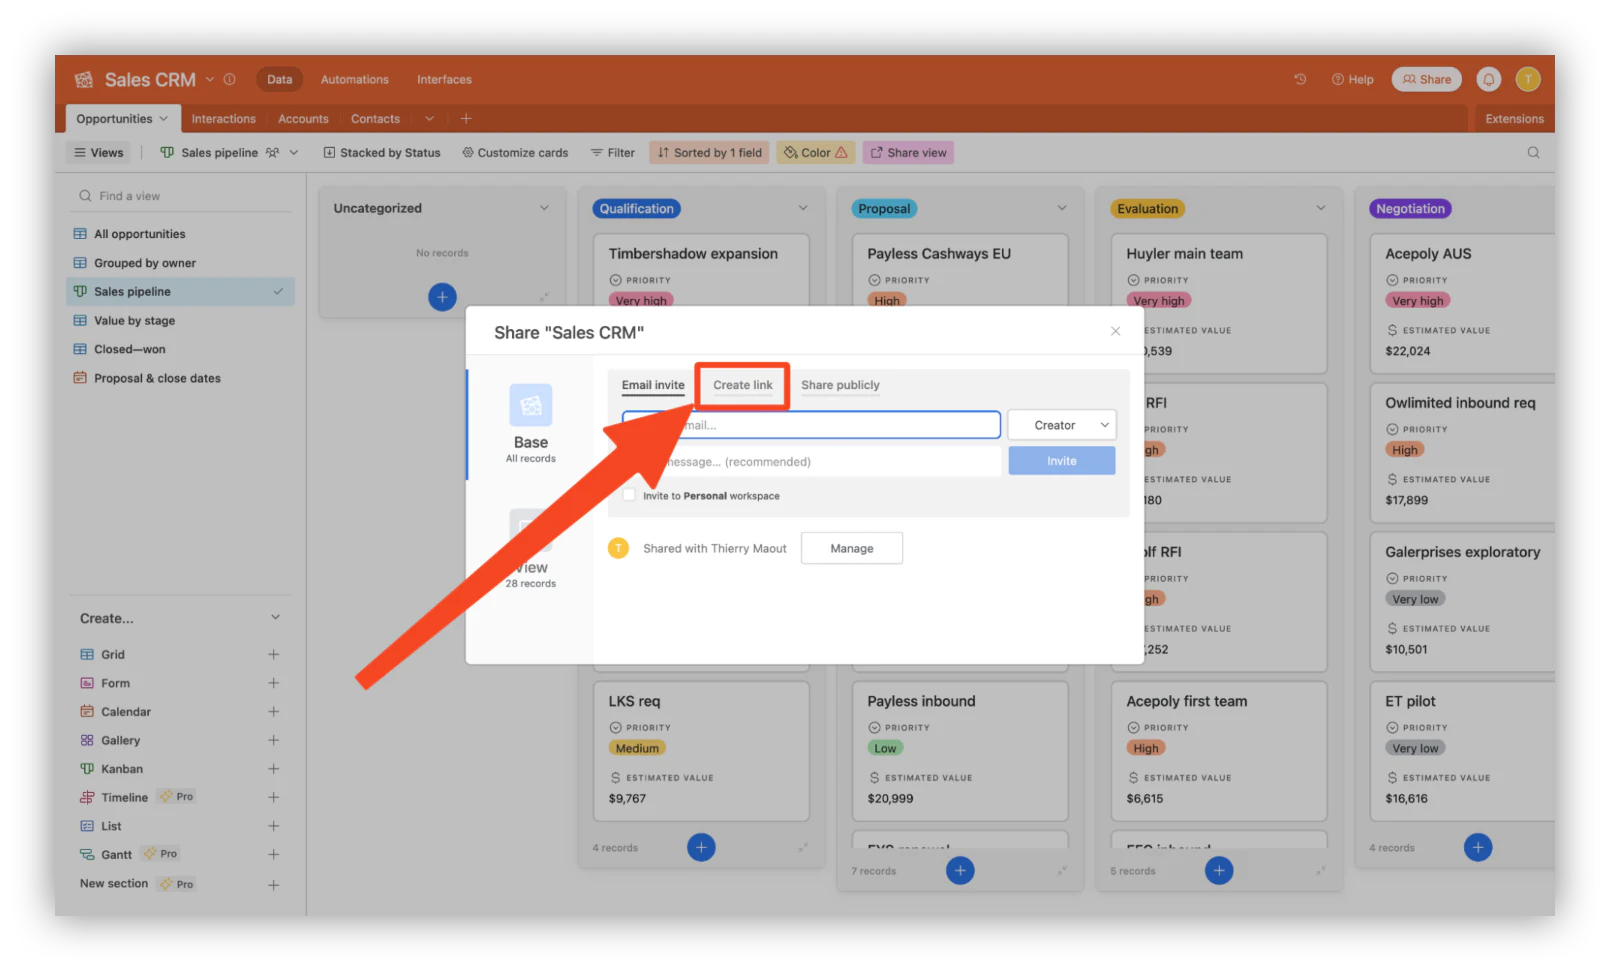
Click on “Create invite Link”
Under each step, you may offer a video or an image showing the step, and a helpful tip to execute the step.
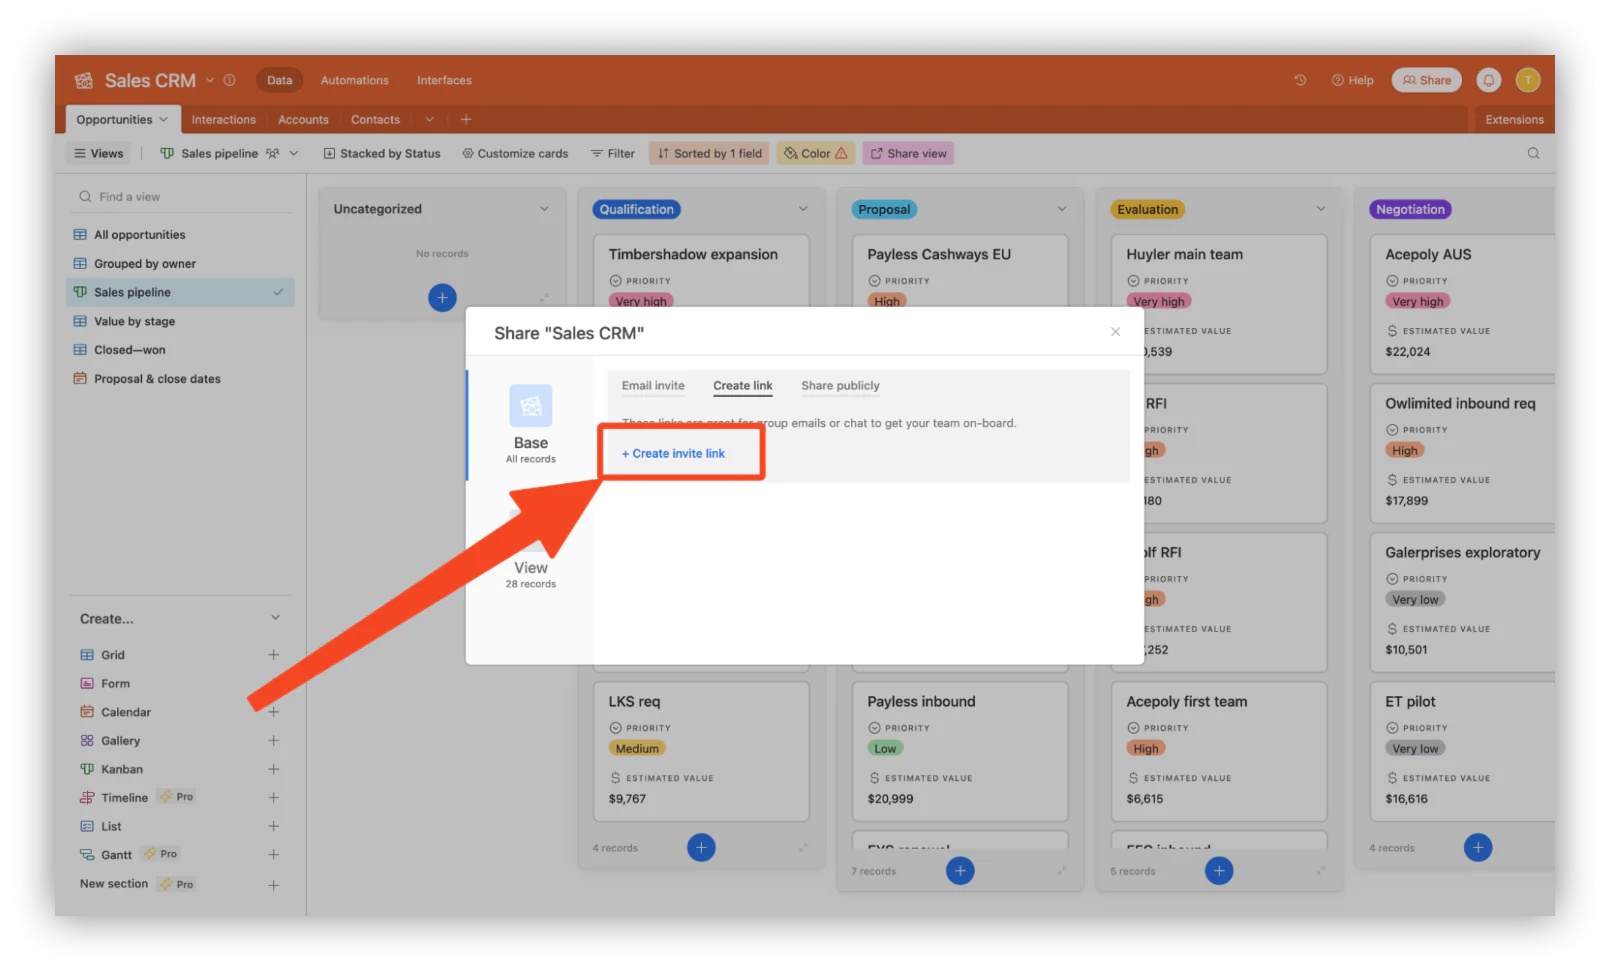
Set the permission level
Select whether people clicking the link should have Creator, Editor, Commenter or Read-only access rights to your base. You also have the option to allow either any email address or a specific list.
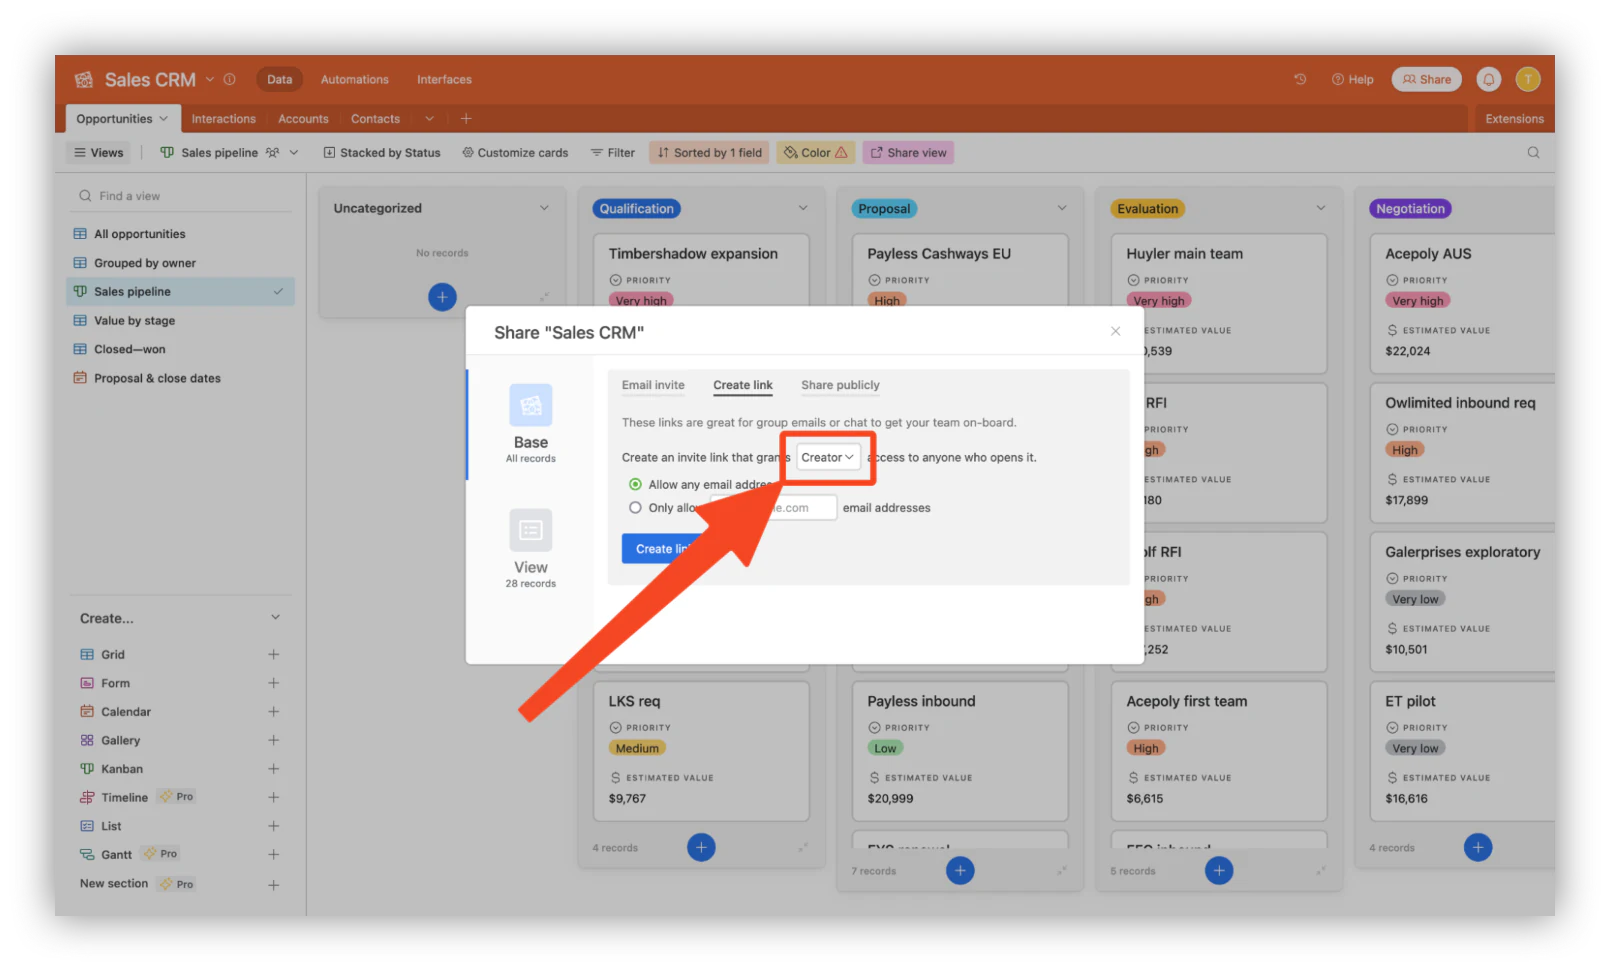
Create the link
Clicking the button will generate a link that fits the parameters you set.
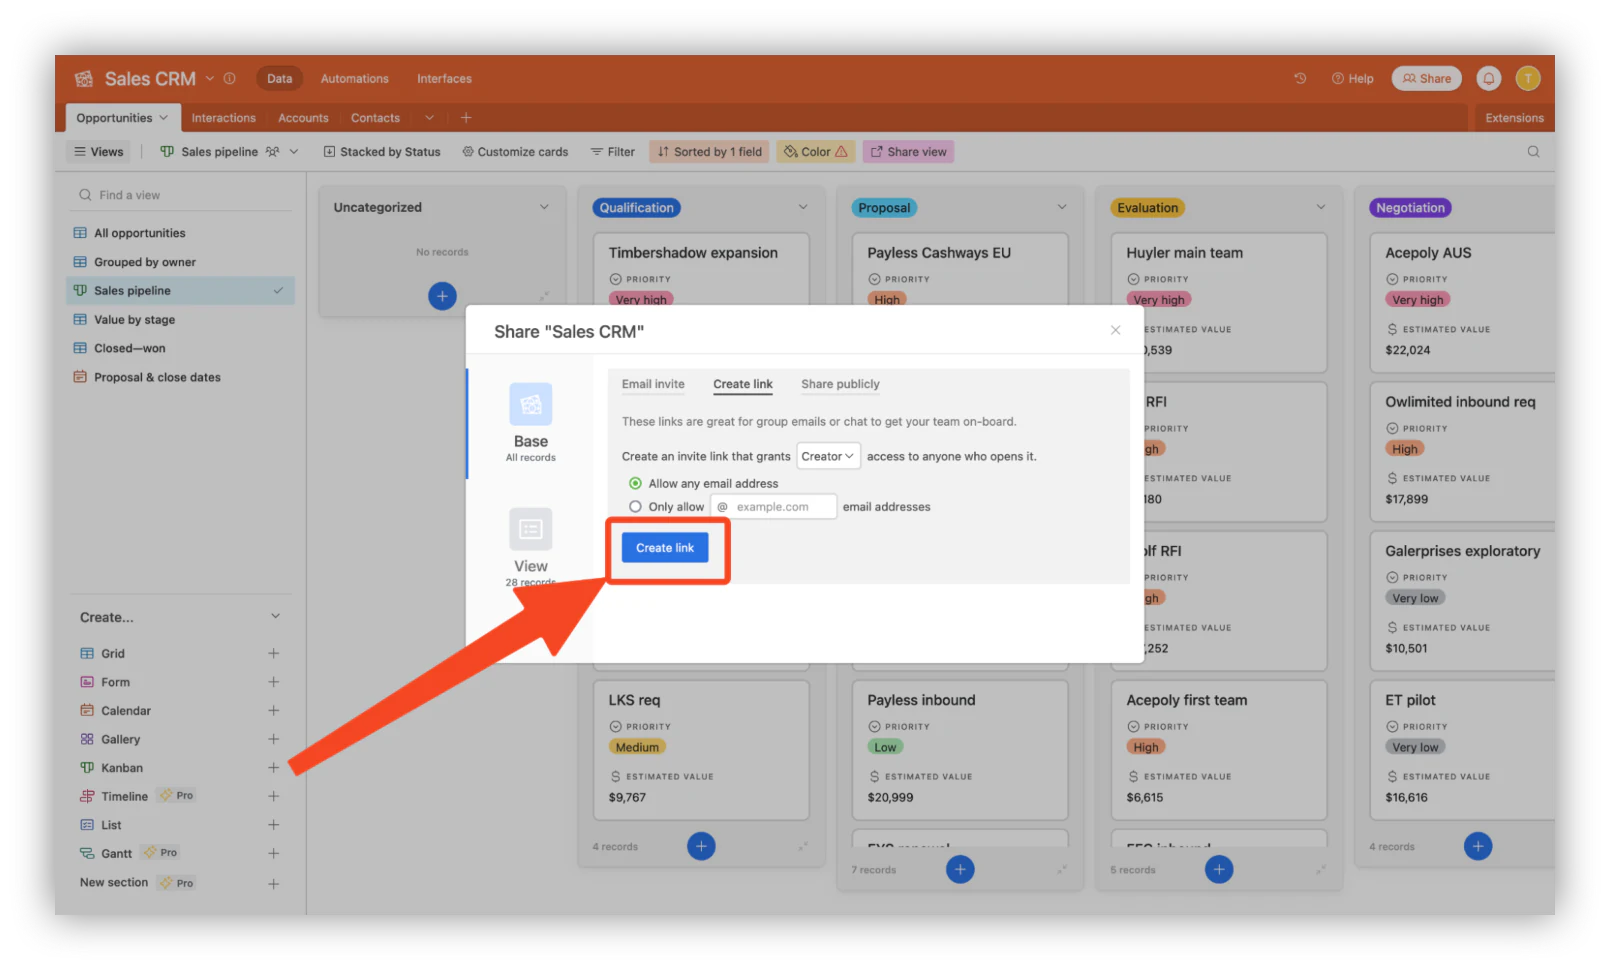
Copy the link
You can directly click the link to copy it, and are now able to share it at your convenience.
Share your Airtable base publicly
To share your Airtable base publicly, all you have to do is following these steps:
Click on “Share” at the top right corner of your Airtable Base
Select “Share” to access the various sharing options available natively in Airtable.
Select the “Share publicly” tab
Access the tab to set the parameters of your public base.
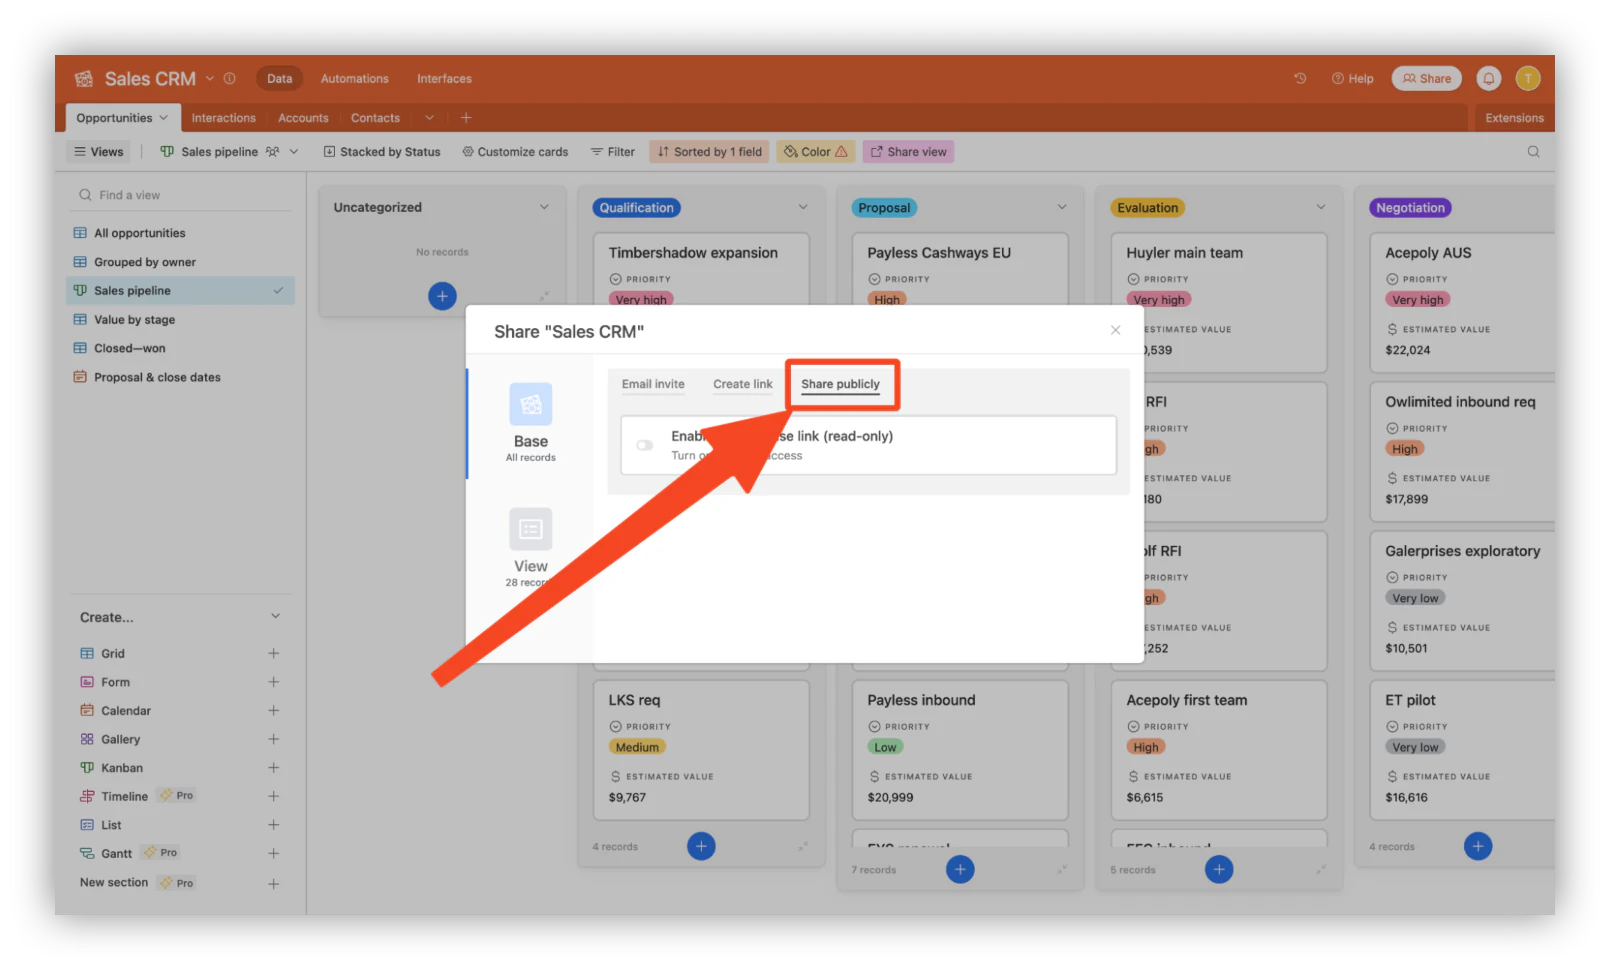
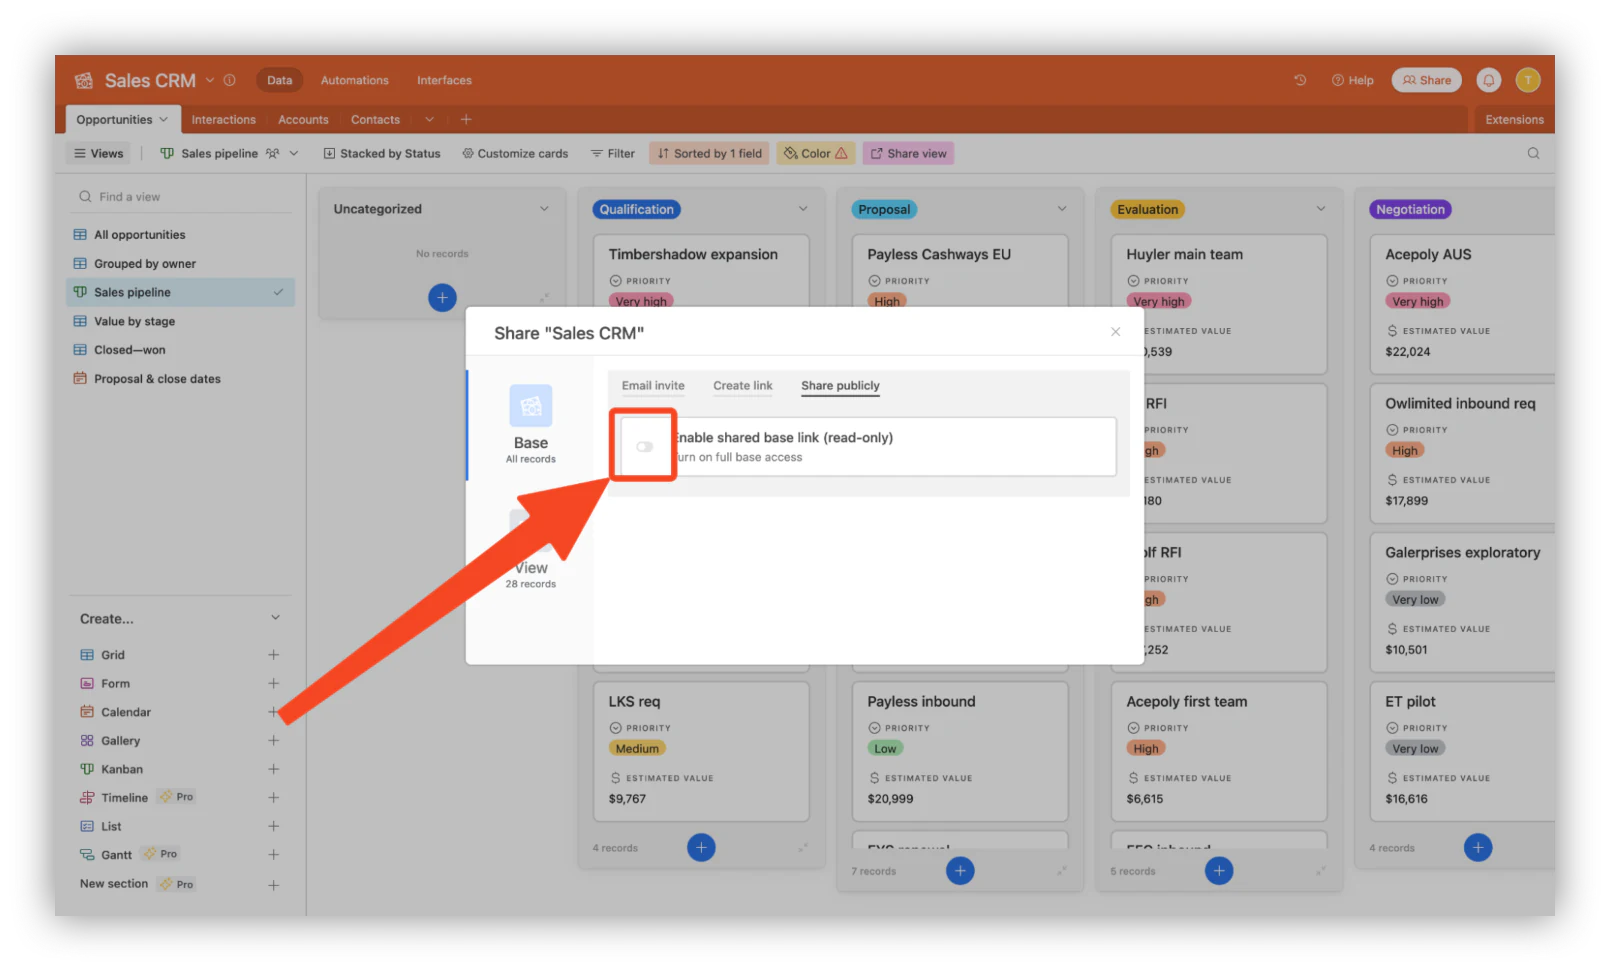
Click on “Enable shared base link (read-only)”
This will give full base access to people with the link.
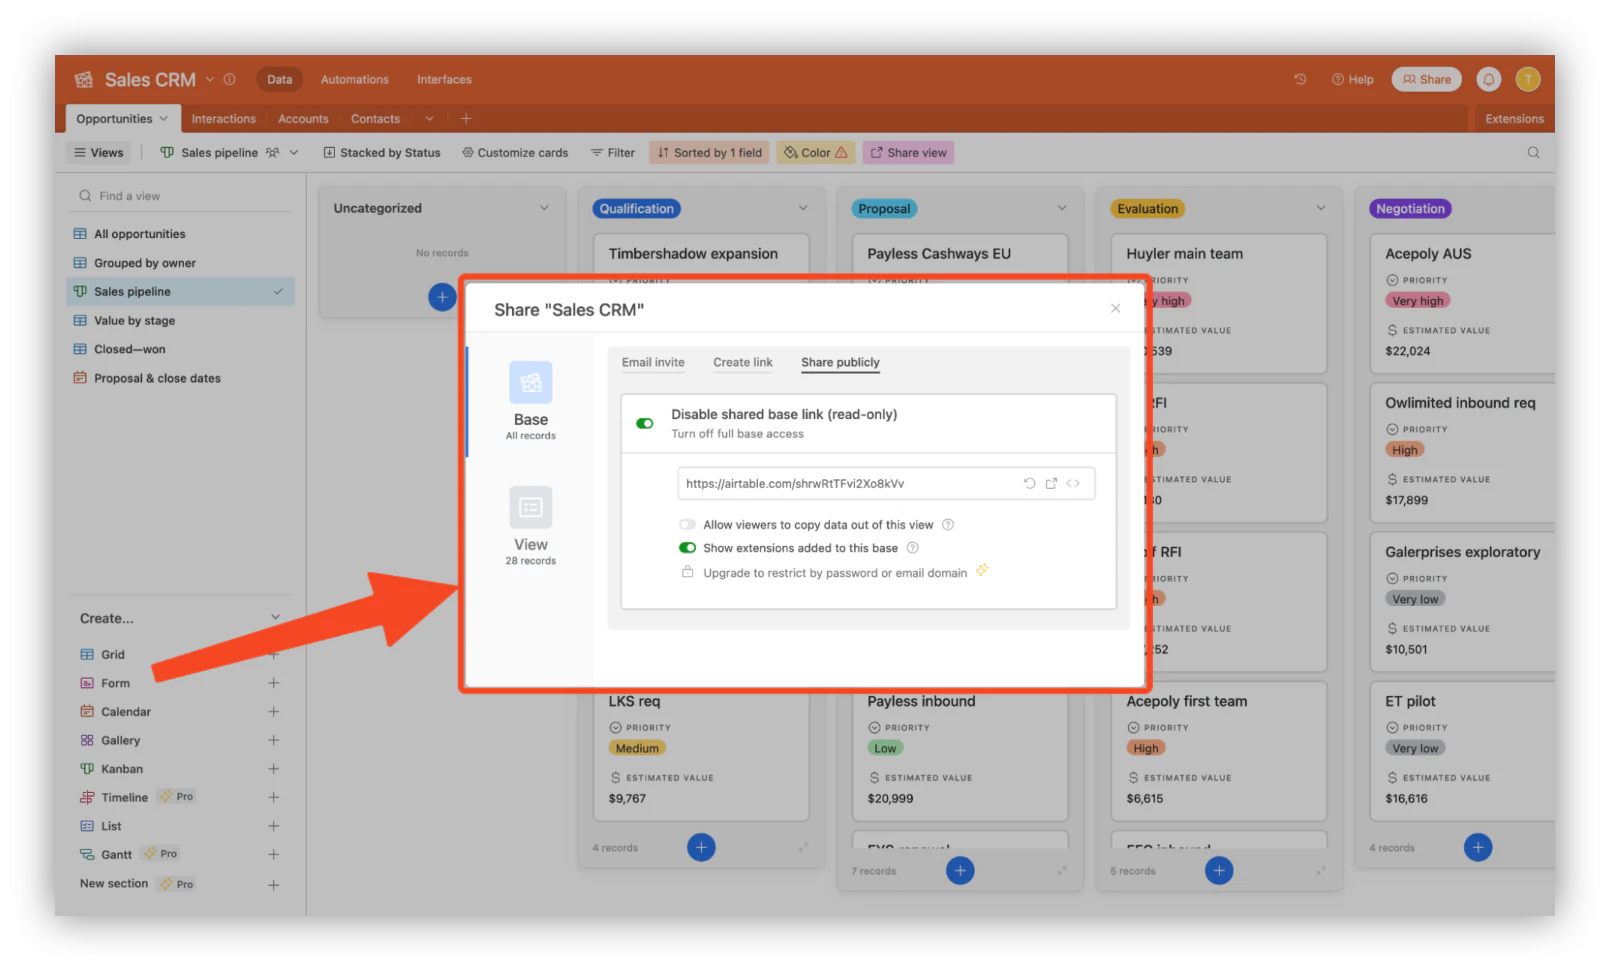
Select your public base parameters
Here, you are able to decide whether to allow viewers to copy data out of this view, and whether to show extensions added to this base. If your Airtable subscription plan allows it, you’re also able to restrict access by password or email domain.
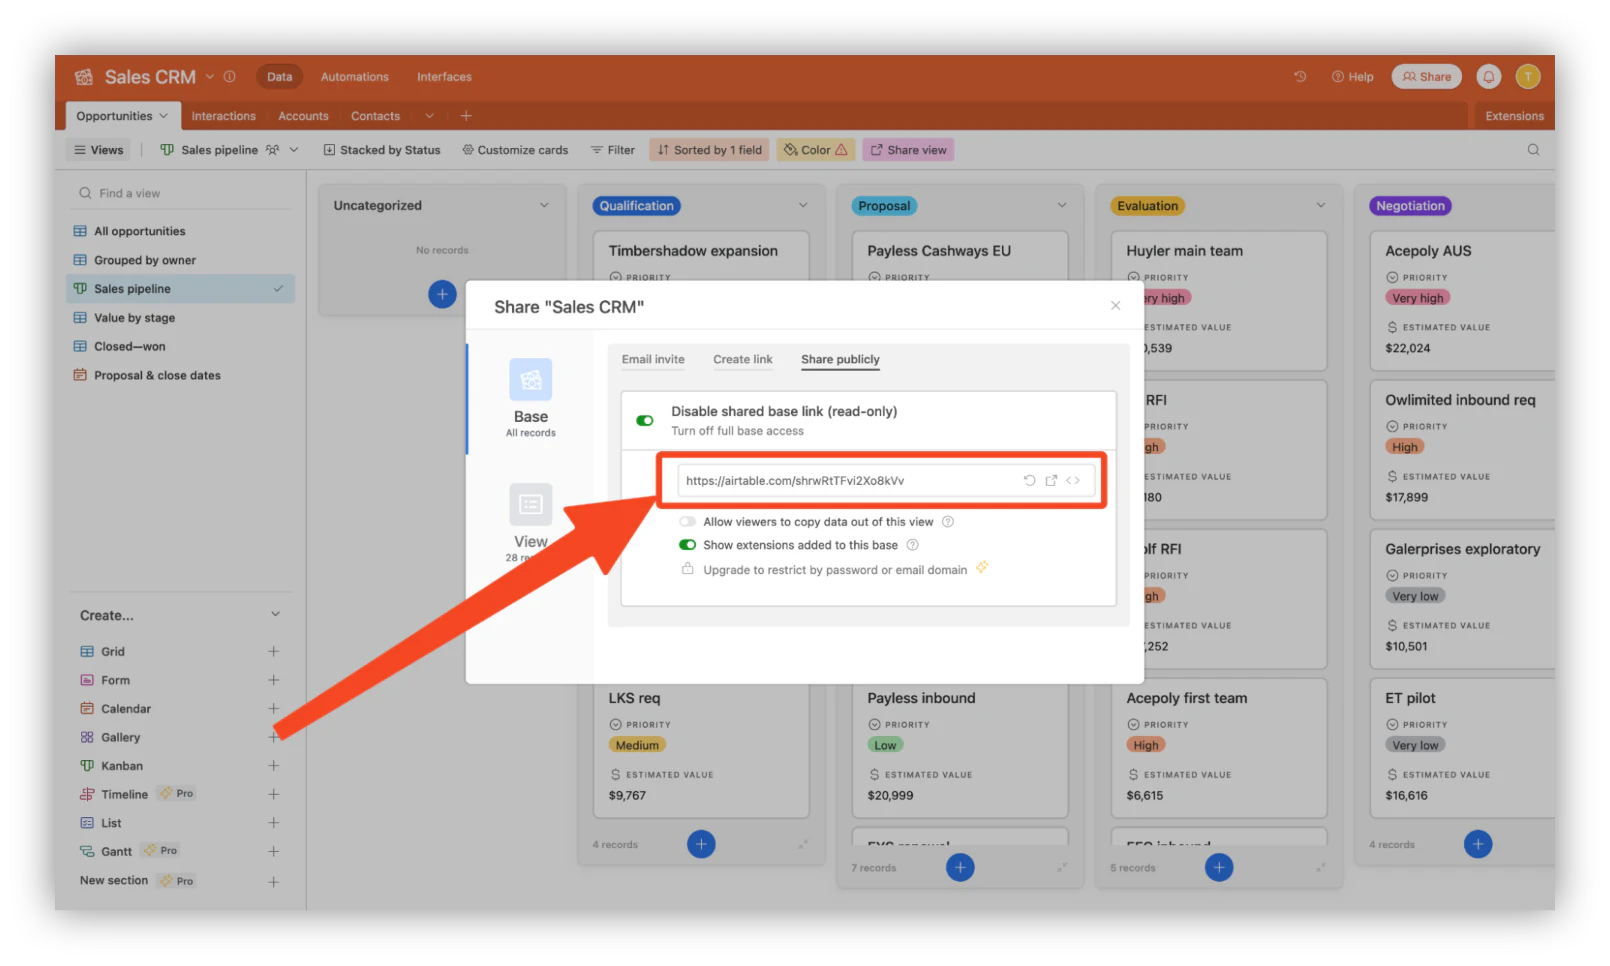
Copy, preview or embed your public Base
You’re now able to copy the link to your public base, but also to preview it, generate a new link, or embed it to another website.
How to share an Airtable base with the Airtable Interface Designer
The methods above all share raw base access, which is fine for collaborators but rarely what you want for clients or external partners. The Airtable Interface Designer is the next step up: it lets you add a visual layer on top of your data and share that instead of the spreadsheet. The Interface Designer is included in Airtable's free plan, and while it takes a bit longer than sharing a base as is, you can set one up in about 30 minutes. To get started, follow these steps:
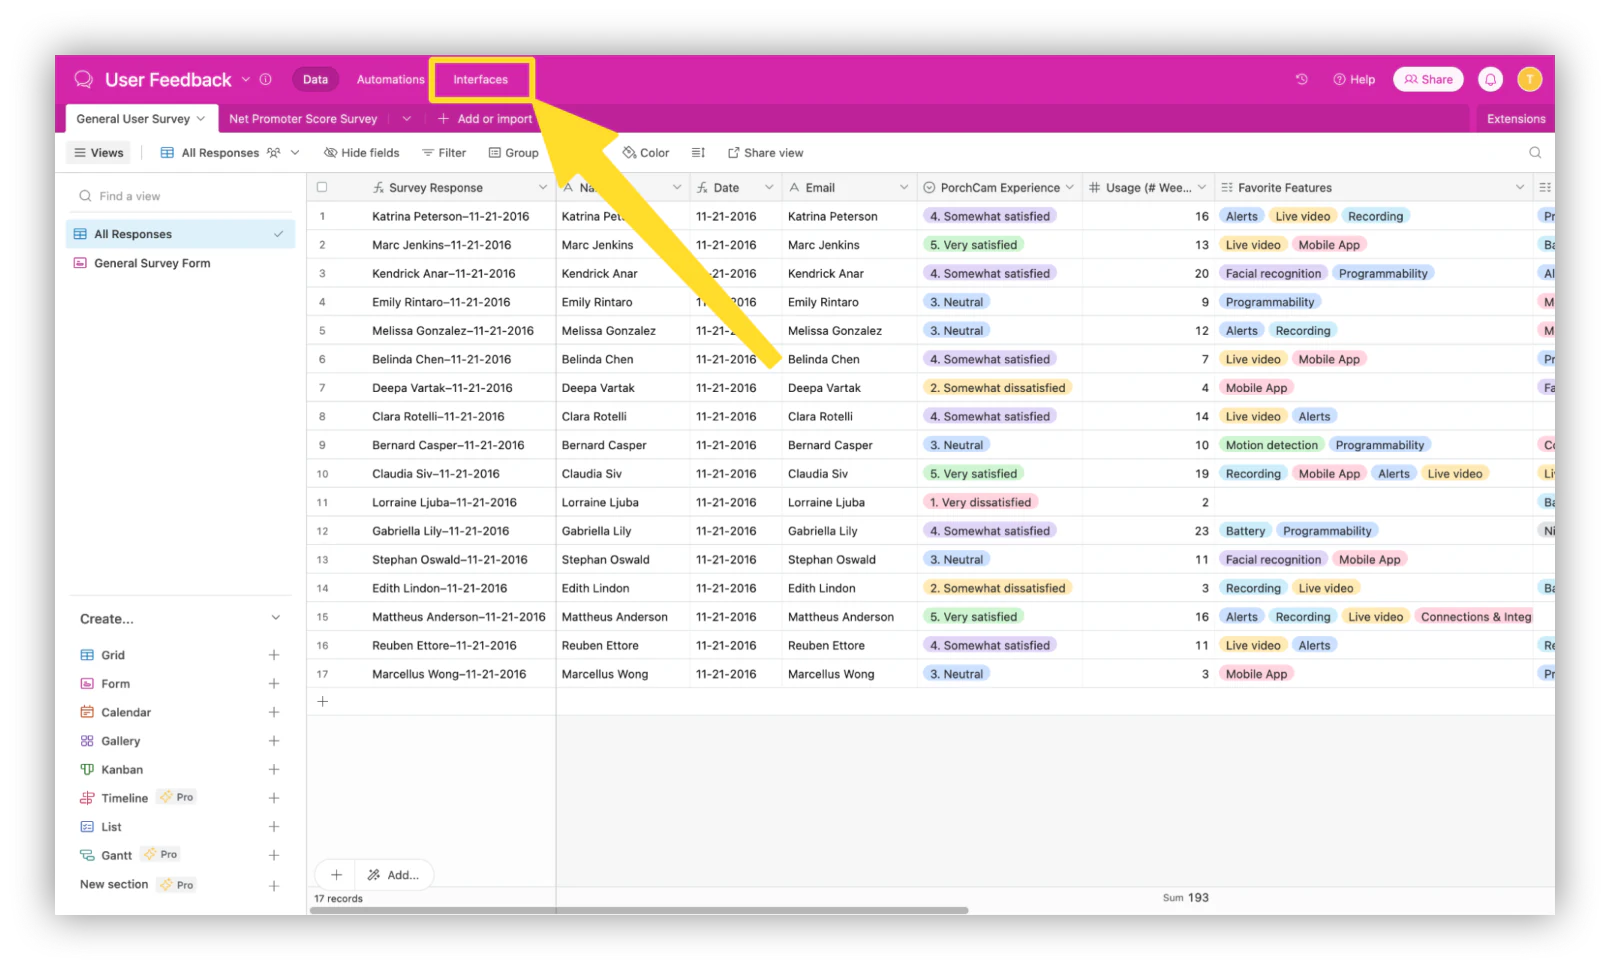
Click on “Interfaces” at the top of your Airtable base
Airtable’s Interface Designer is directly accessible from your base.
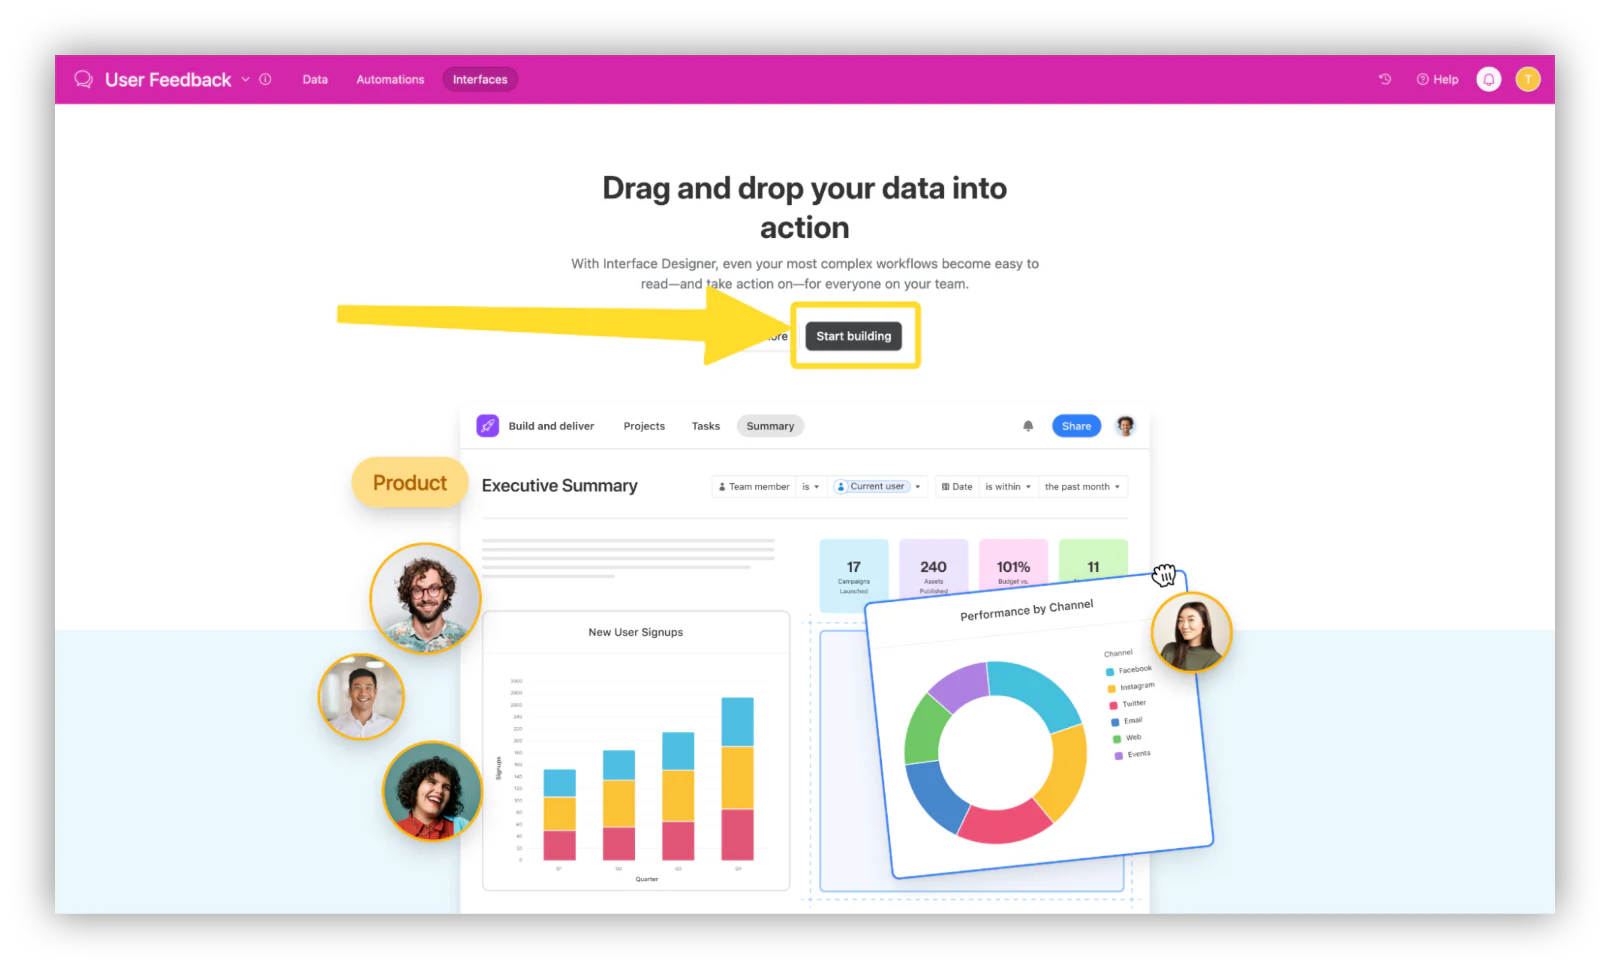
Select “Start building”
Click on “Start Building” to get started with your interface.
Follow the steps
A step-by-step tutorial guides you through the basics of creating your base: Choosing a name, a layout, connecting it to a table, adding elements, and naming your first page.

Build your Airtable interface
Use the drag-and-drop tool to manipulate and display the data from your base in various ways, picking and arranging elements such as texts, charts, filters, buttons, kanban boards, and more.

Click on “Publish” and select your preferred method of sharing
Similarly to the previous steps when sharing a base, you are able to share your interface and base data either by email or by generating a link. Keep in mind that when using Airtable's free plan, sharing an interface will also provide access to the base data, unless you upgrade to the Pro or Enterprise plan starting at $20 per seat per month.

How to share an Airtable base securely with Softr
Native sharing and the Interface Designer both work, but they share access at the base level. The moment you need each person to see only their own records, or you want to publish a polished, branded experience instead of a spreadsheet, you have outgrown raw sharing. This is the problem Softr is built to solve.
"Managing external partners through emails and spreadsheets is a nightmare. A portal allows you to only surface the information that is relevant to them and make approvals on the fly." - Shiran Brodie, Head of Marketing at Softr
Softr is a full-stack platform for building business apps without code. It gives you the interface builder, native Softr Databases, and Softr Workflows in one place. You can keep using Airtable as your backend (it is one of 21+ data sources, alongside Google Sheets, HubSpot, a REST API connector, and Softr's own databases), then build a permissioned client portal, internal tool, or directory on top of it.
The piece that native Airtable sharing cannot match is users and permissions. Instead of handing someone a link to your whole base, you create user groups and data restrictions so each person only sees the pages, blocks, and rows you allow. A vendor logs into the same app as an admin but only ever queries the records tied to their own company.
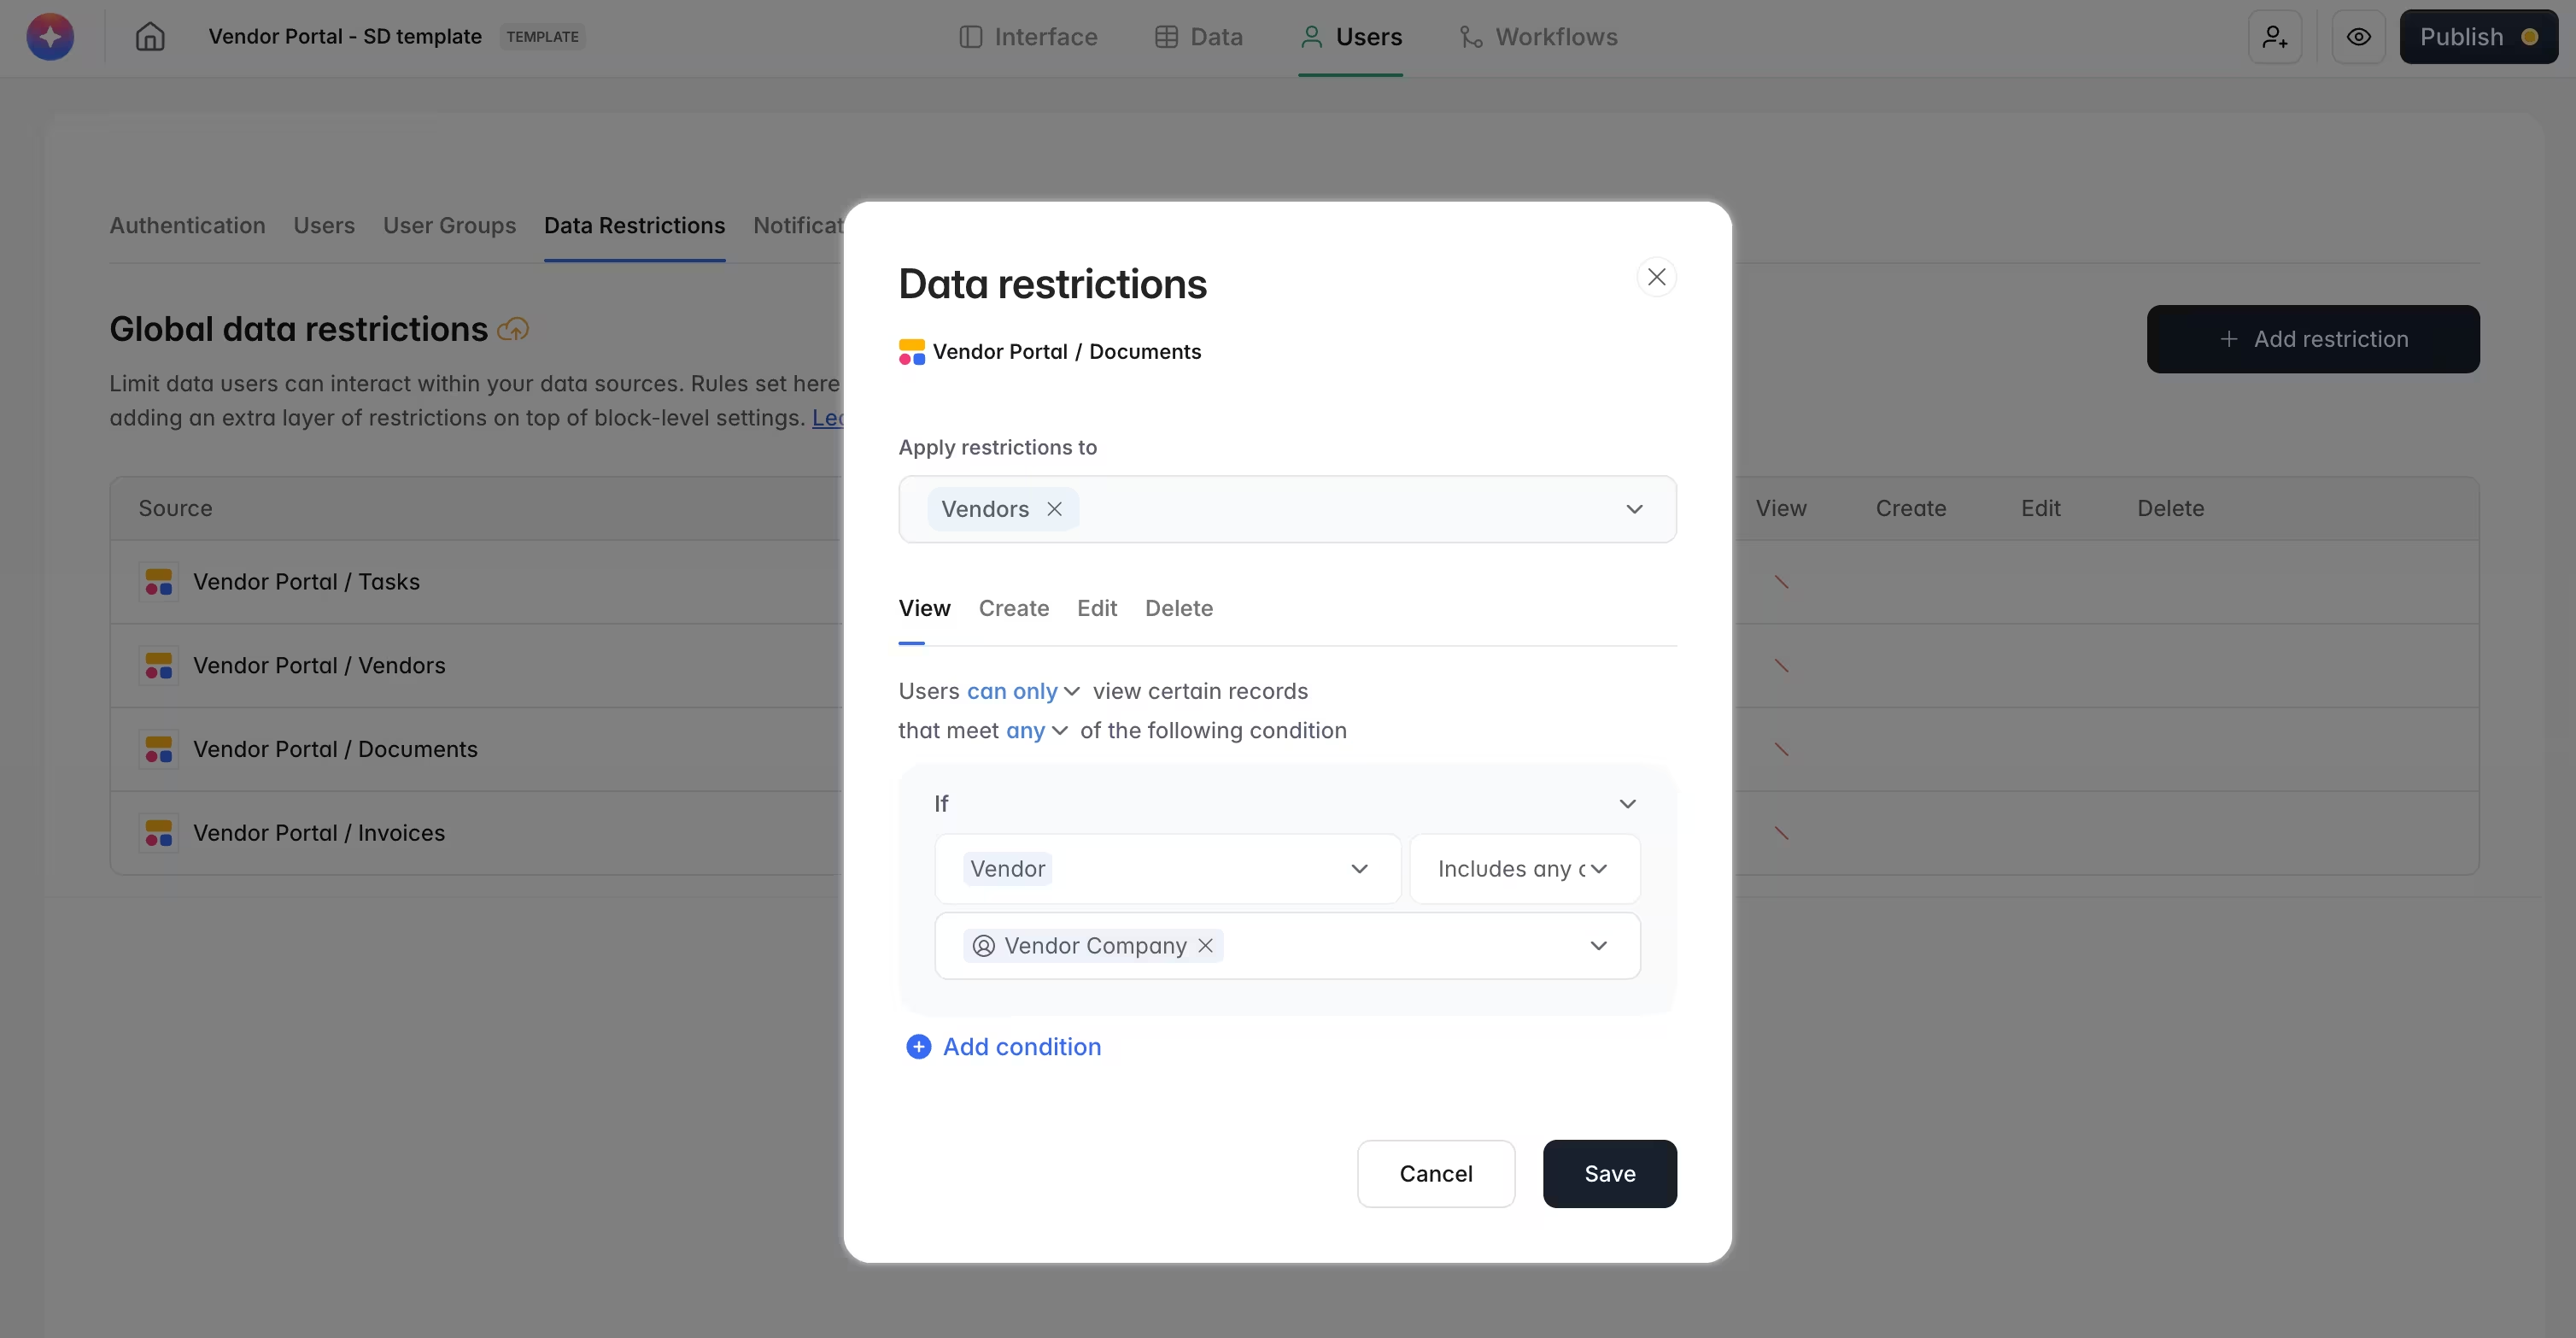
This visual model is also easier to trust than a wall of generated code. As Softr CTO Artur Mkrtchyan puts it:
"The Softr difference is that permissions live in a visible panel, not in generated code. Visual schemas make it simple to verify block-level visibility configurations in a visual editor rather than auditing a black box of generated code."
Softr has a free plan, with paid plans starting at $19 per month.
Share your Airtable base data with Softr
Use Softr to create a visual, permissioned interface for your Airtable data and share it online. To share your Airtable base using Softr, follow these steps:
Login to Softr
If you already have a Softr account, login using your credentials or with Google. Otherwise, create a free account.

Create your app
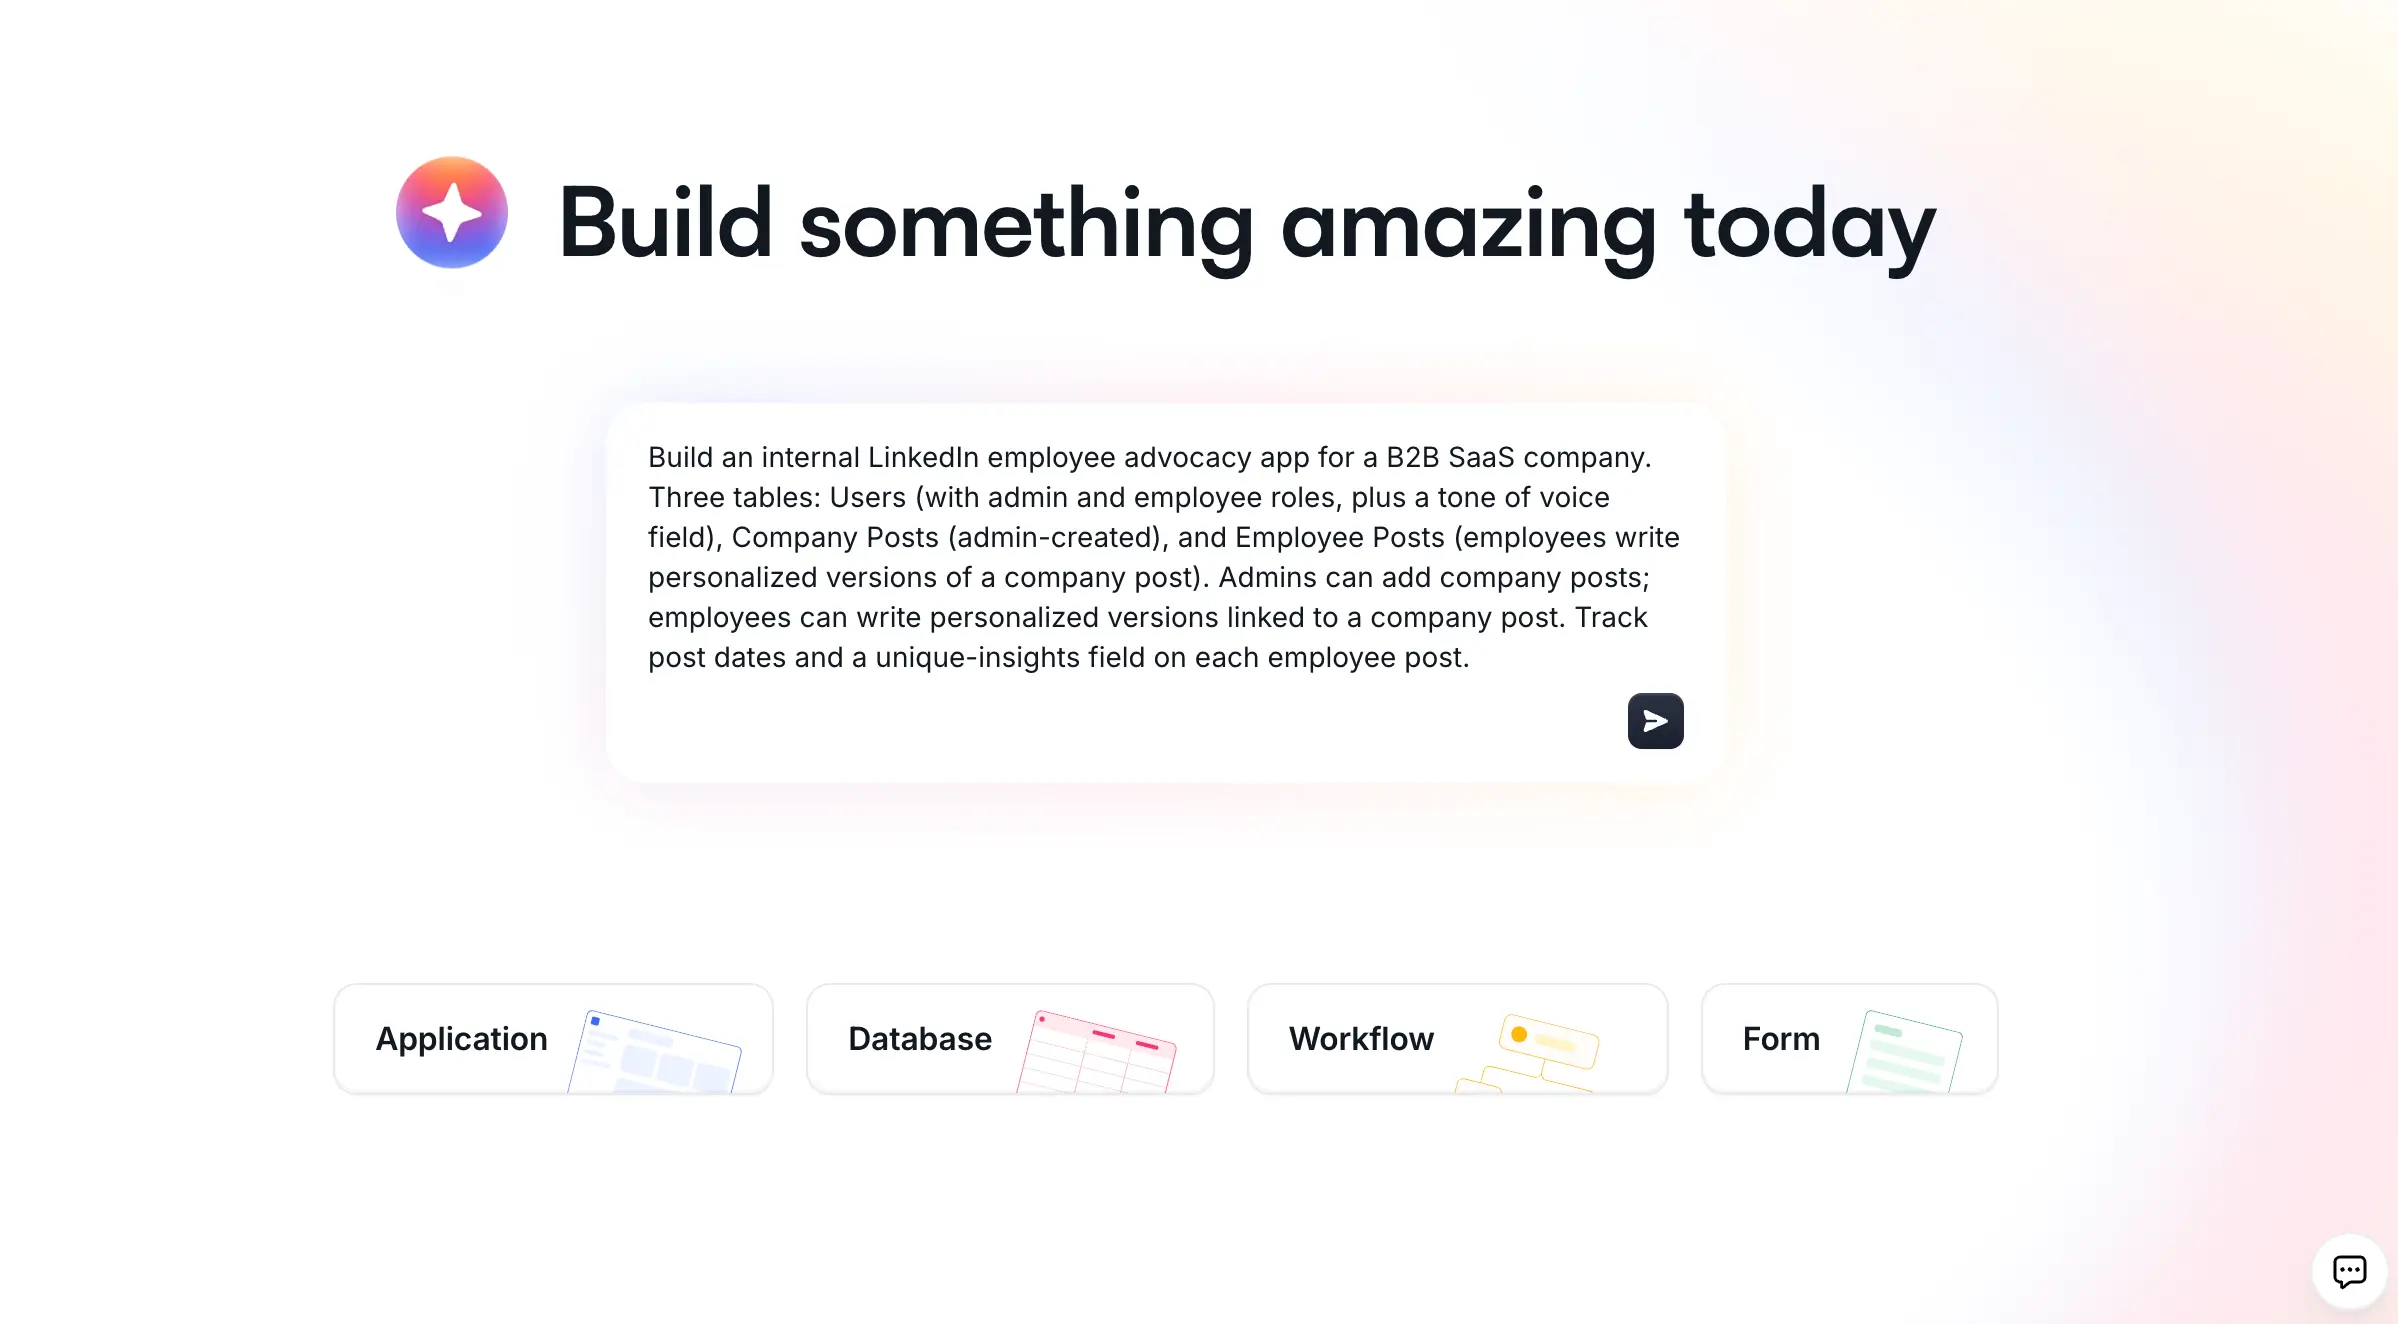
You have a few ways to start. The fastest is to describe what you need and let the AI Co-Builder assemble a complete app for you, pages and blocks included. You can also start from one of the many templates, or build from a blank canvas if you prefer full control.
Connect your Airtable data source
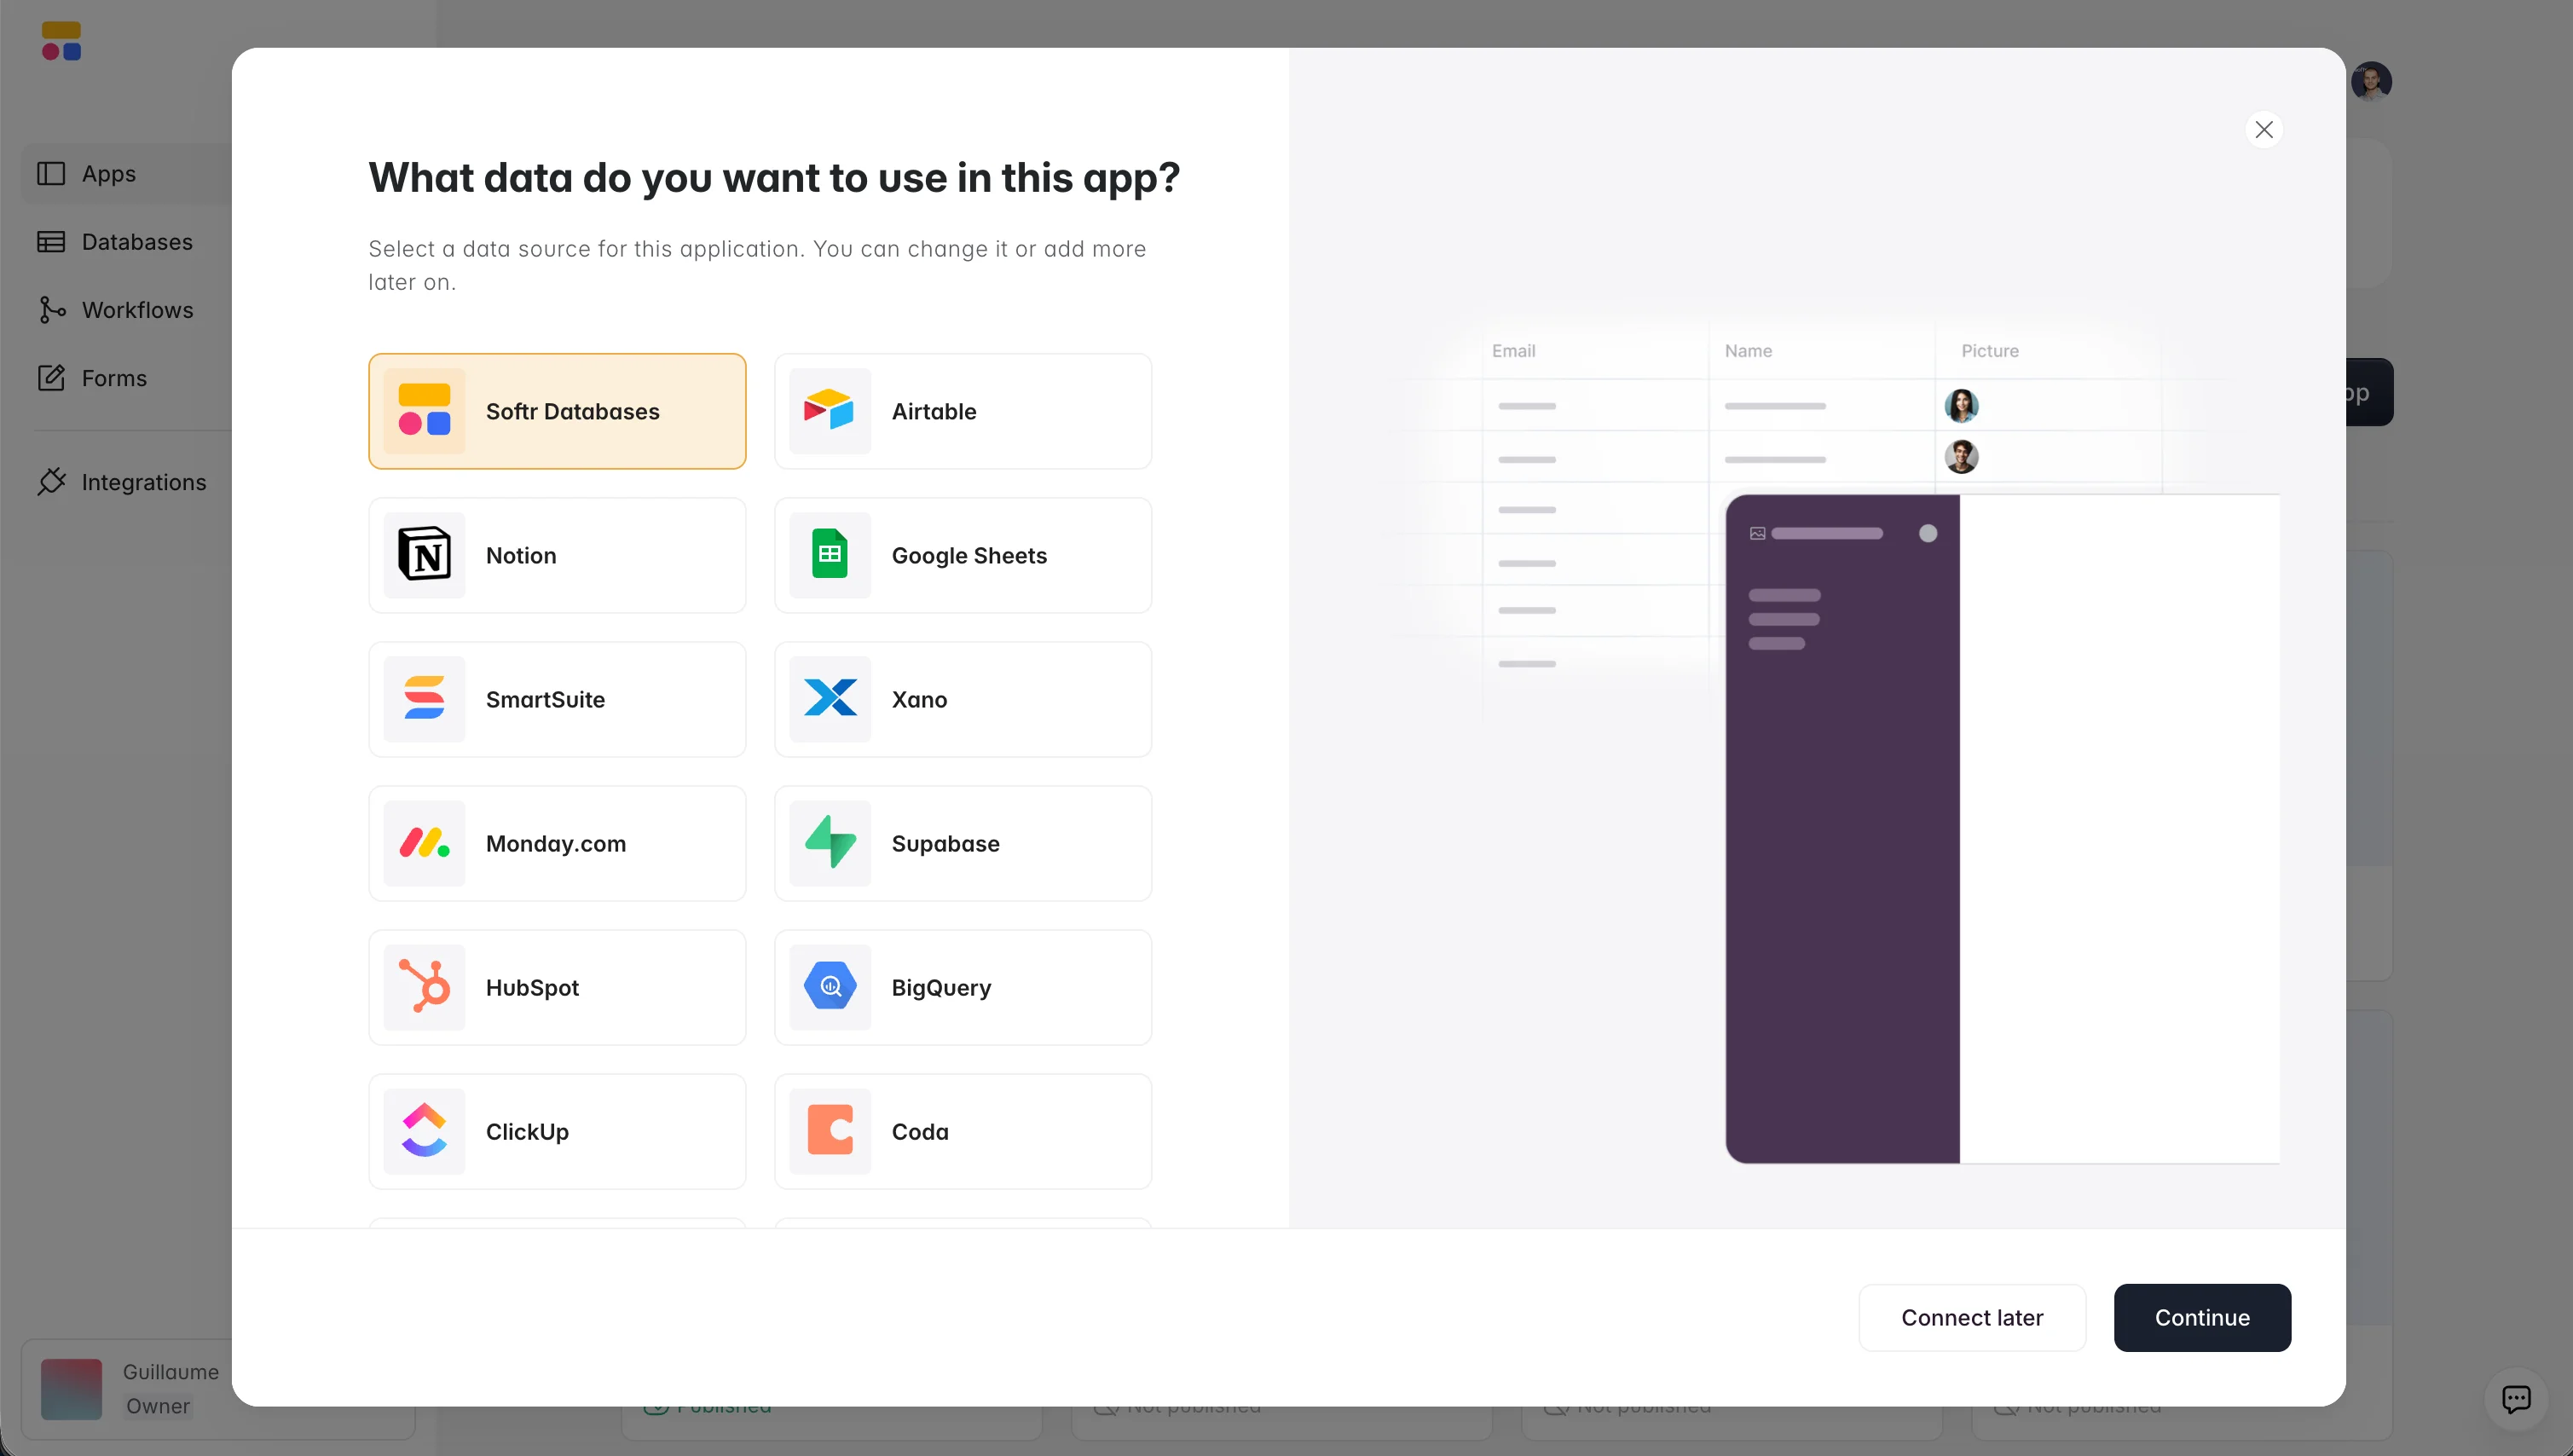
When you set up the app, pick your data source. Softr Databases sit at the top, but you can also connect Airtable, Google Sheets, HubSpot, and 21+ other data sources. Choose Airtable, then authorize the connection so Softr can read your base. Every change in Airtable then syncs into your app.
"I love the ease with which I can link my Airtable database with Softr. Every change reflects instantly. Thanks to Softr, my clients now have a clear portal to see the products we offer, allowing me to adapt our offerings based on their feedback." - Rémi C., Small-Business (G2 review)
Build and secure your application
You can now build and customize your interface on top of your Airtable data: pages, theme, blocks, and more. Add a table, list, or chart from the blocks panel, or ask the AI Co-Builder to add and configure them for you by describing what you need. This is also where you set up user groups and permissions so each visitor only sees the data meant for them.
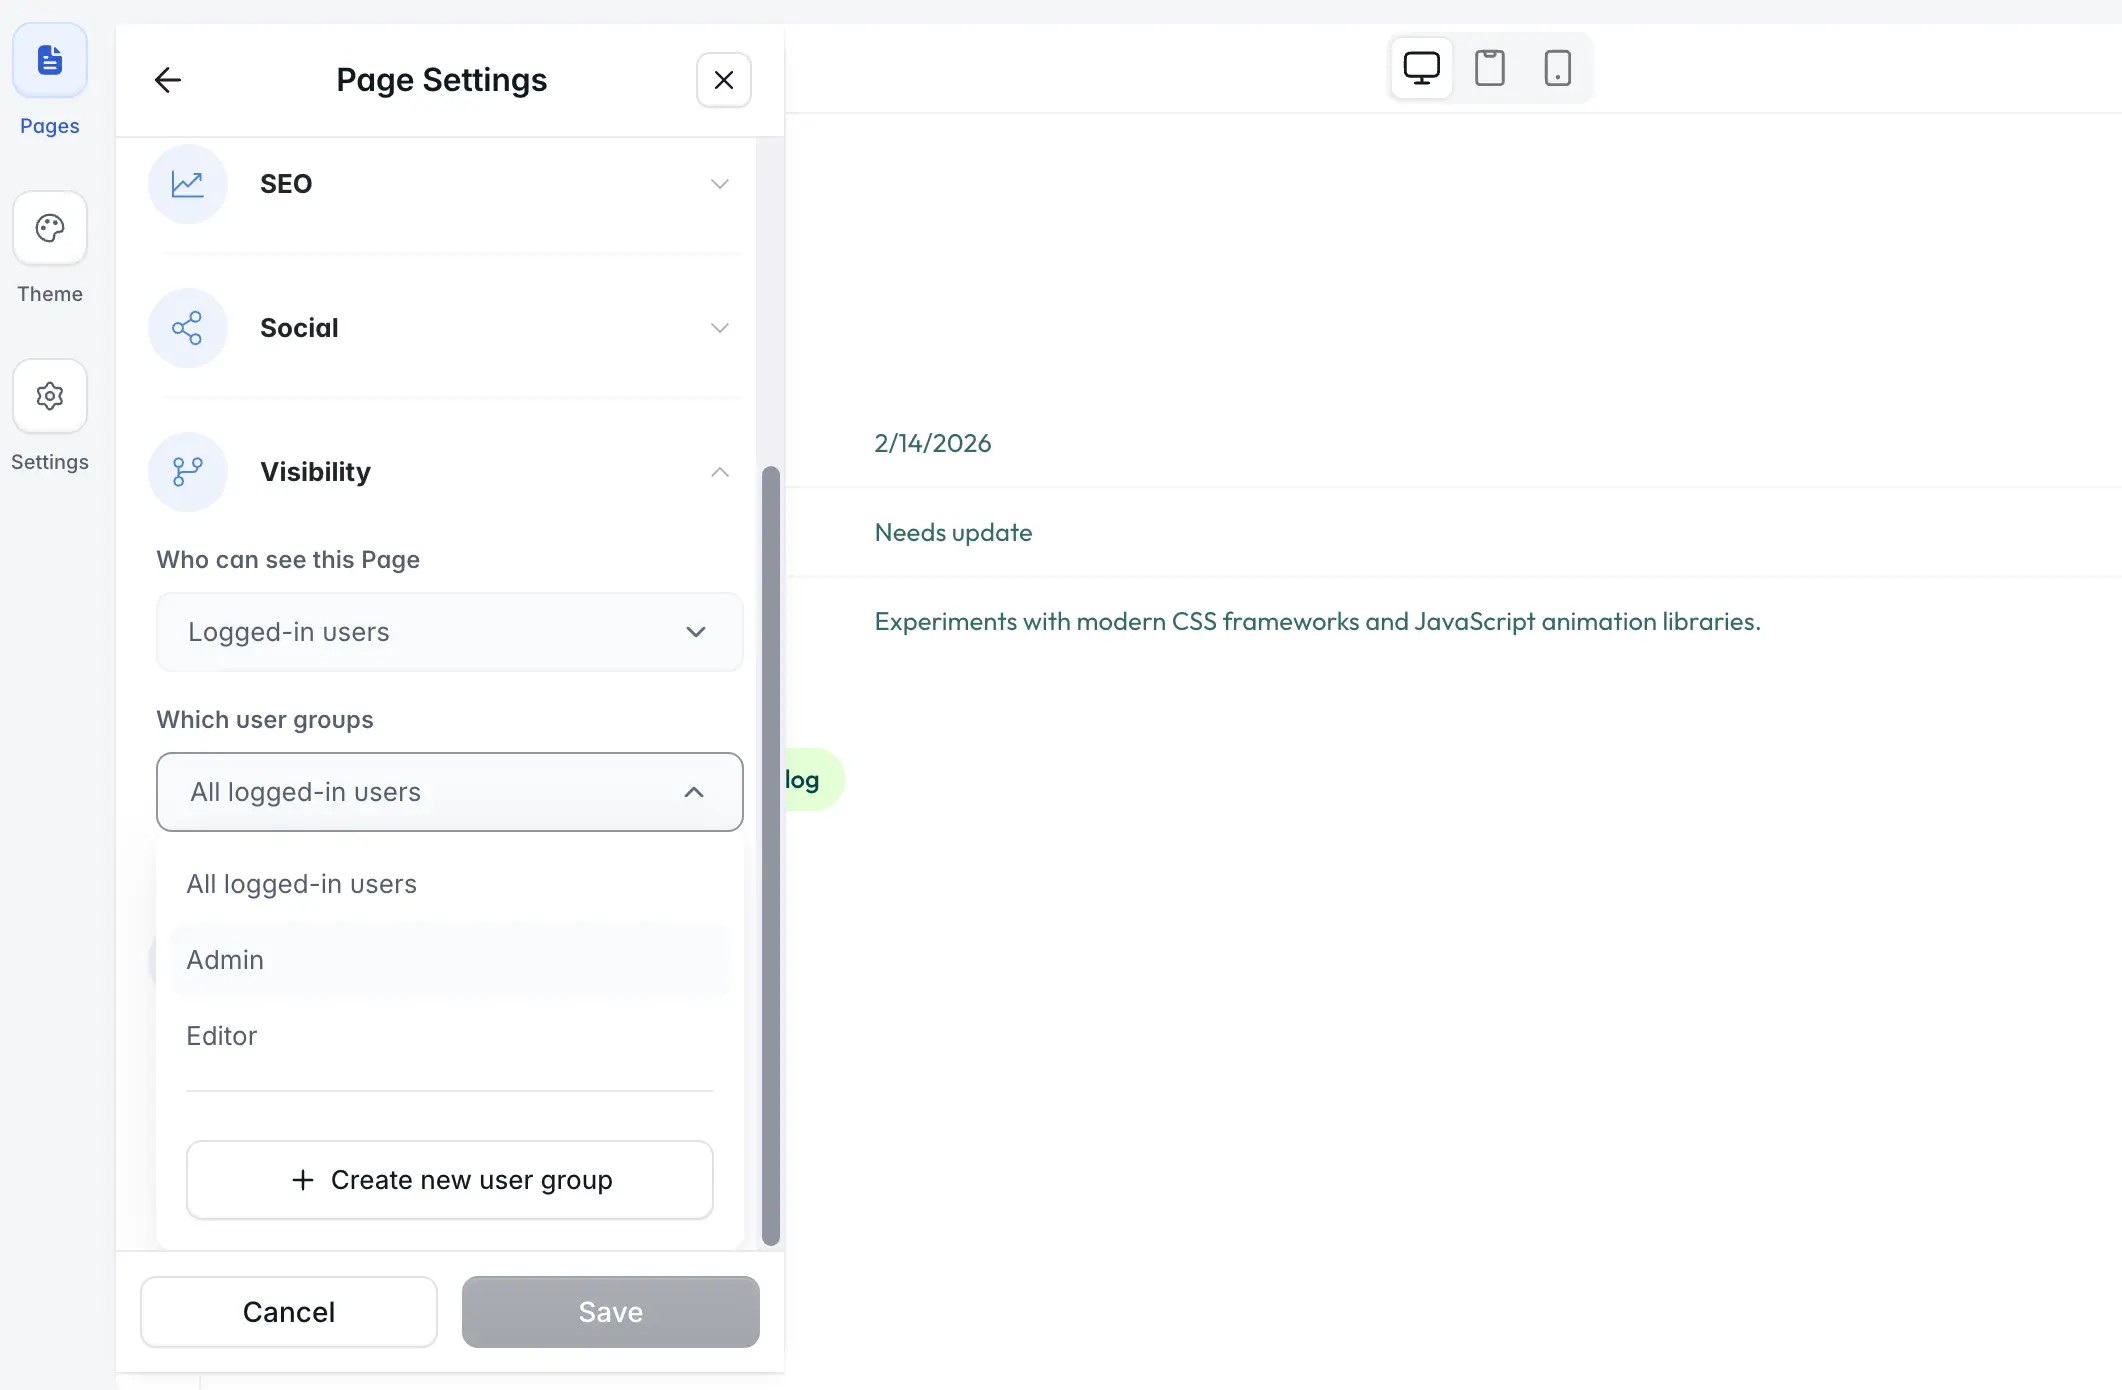
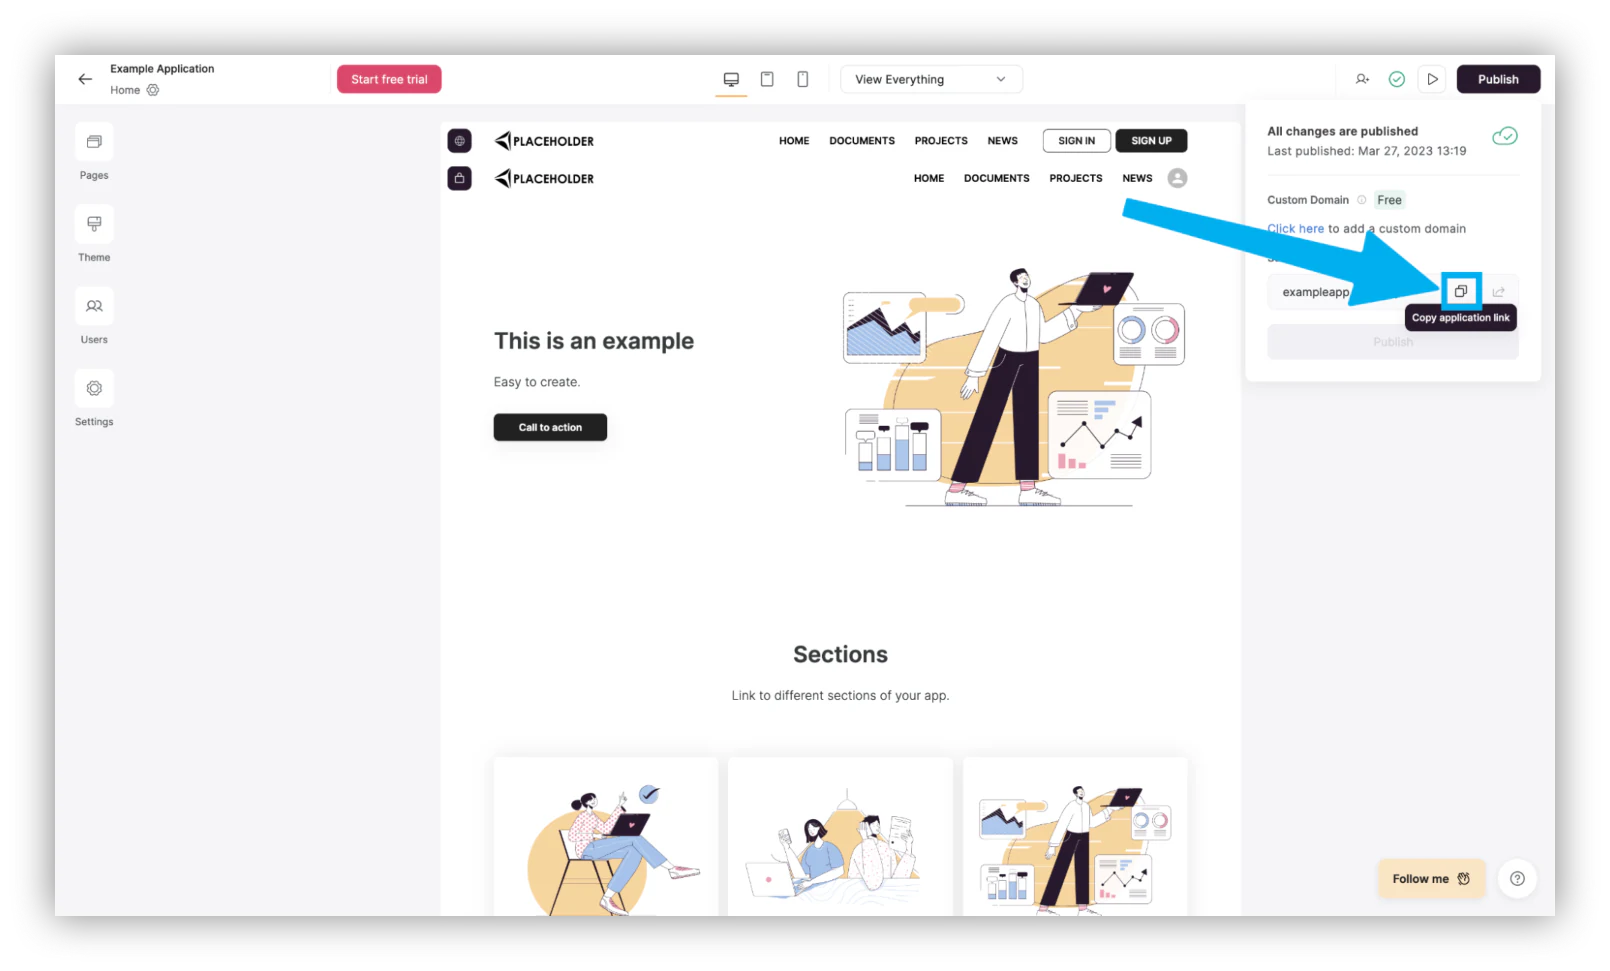
Click “Publish” at the top-right corner of the screen
Once your application is ready, it’s time to publish it in order to be able to share it.
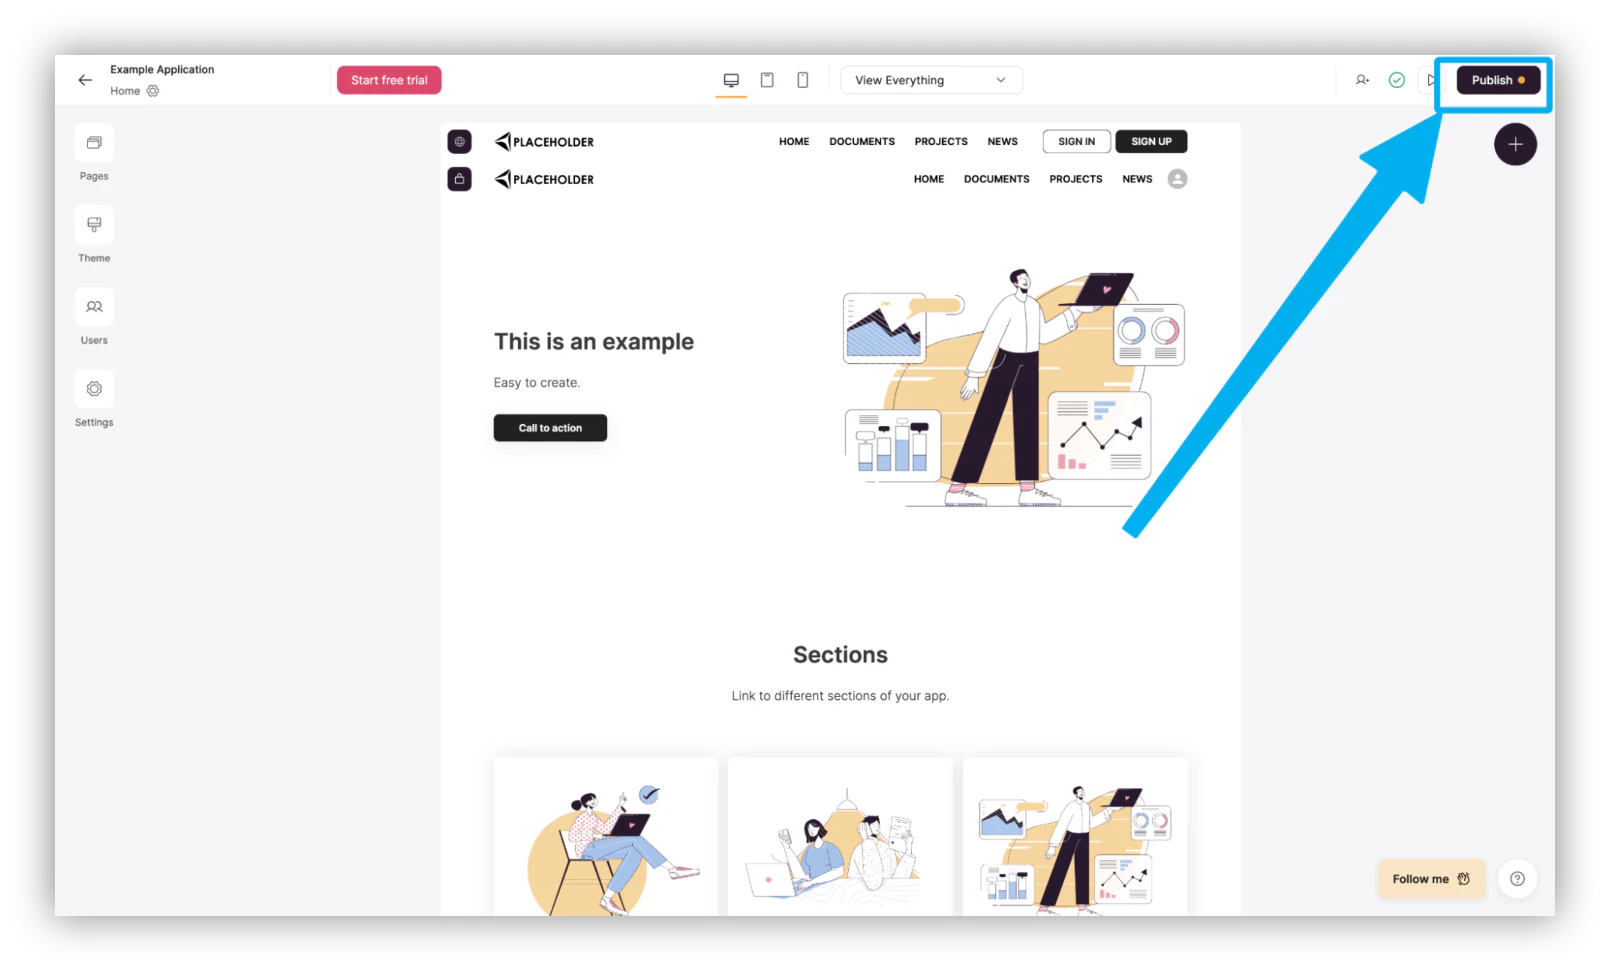
Select your parameters and click “Publish”
You have the possibility to add a custom domain or to use a free Softr subdomain of your liking. Once you’ve decided, you can publish!
Copy your URL and share
Your portal for your Airtable data is now live on the internet. Copy the URL and share it with your clients, vendors, or team. Because access is governed by your user groups, each person who logs in sees only the data you assigned to them.
Move from sharing a base to sharing a portal
Native Airtable sharing is great when everyone on the other end is a trusted collaborator. The moment you are sharing with clients, vendors, or partners, you want each of them to see only their own slice of the data, and that is where a portal beats a raw share link. Connect your base to Softr, set up your users and permissions, and you can have a secure, branded portal live in an afternoon. To get a head start, grab our free client portal template and connect it to your Airtable data.
Frequently asked questions
Can I share an Airtable base without giving people access to all of my data?
Is sharing an Airtable base free?
What is the most secure way to share Airtable data with external users?
Do I need to know how to code to build an Airtable front-end?
Can Softr connect to data sources other than Airtable?