How to set up user groups and permissions for a multi-role app

Picture this: You've built a great database, your pages look clean, and then your first external user logs in and sees everyone else's data.
This happens more often than you'd think, especially with vibe-coded apps or tools that treat permissions as an afterthought. In Softr, permissions aren't something you bolt on at the end. They're woven into the platform at four levels: pages, blocks, action buttons, and data restrictions. This guide shows you how to use all four to build a multi-role app where every user sees exactly what they should and nothing more.
We'll use a real-world content management portal in our example, but the same patterns apply whether you're building a vendor portal, a CRM, or any app with more than one type of user.
And if you want to follow along with a ready-made app, check out the Content Management Portal template.
Permissions as foundation, not a feature
Most app building guides treat permissions as step 7 of 10. That's backwards.
Permissions define the experience. An Admin who sees everything and a Writer who sees only their own assignments aren’t looking at the same content portal, even though they're logging into the same URL. Pages, blocks, buttons, data: everything changes based on who you are.
In Softr, users and permissions work at four levels:
Step 1: Design your Users table

Every multi-role app starts with a single Users table. This is a pattern you'll see in every Softr tutorial because it's the most reliable approach.
Create your Users table in Softr Databases with at least the following fields:
Email(Text, Primary Field) — The unique identifier for every user.Full Name(Text)Role(Single Select) — This is the key field. Options might include: Admin, Writer, Sales Rep, Client, Vendor, etc.
Keep all users in one table, no matter how many roles you have. Separate tables for "admins" and "vendors" create problems: you end up managing authentication in two places, and linking records across tables becomes unnecessarily complex.
"We don't need to split admins and writers into different tables. That's where you run into issues later, because things aren't mapped. Keeping everyone in one table makes it much easier." — Shiran Brodie, Head of Marketing at Softr
Step 2: Sync users and create groups
Navigate to the Users section in Softr Studio and sync with your Users table. This means whenever you add someone to the database, they automatically get app access.
Creating User Groups
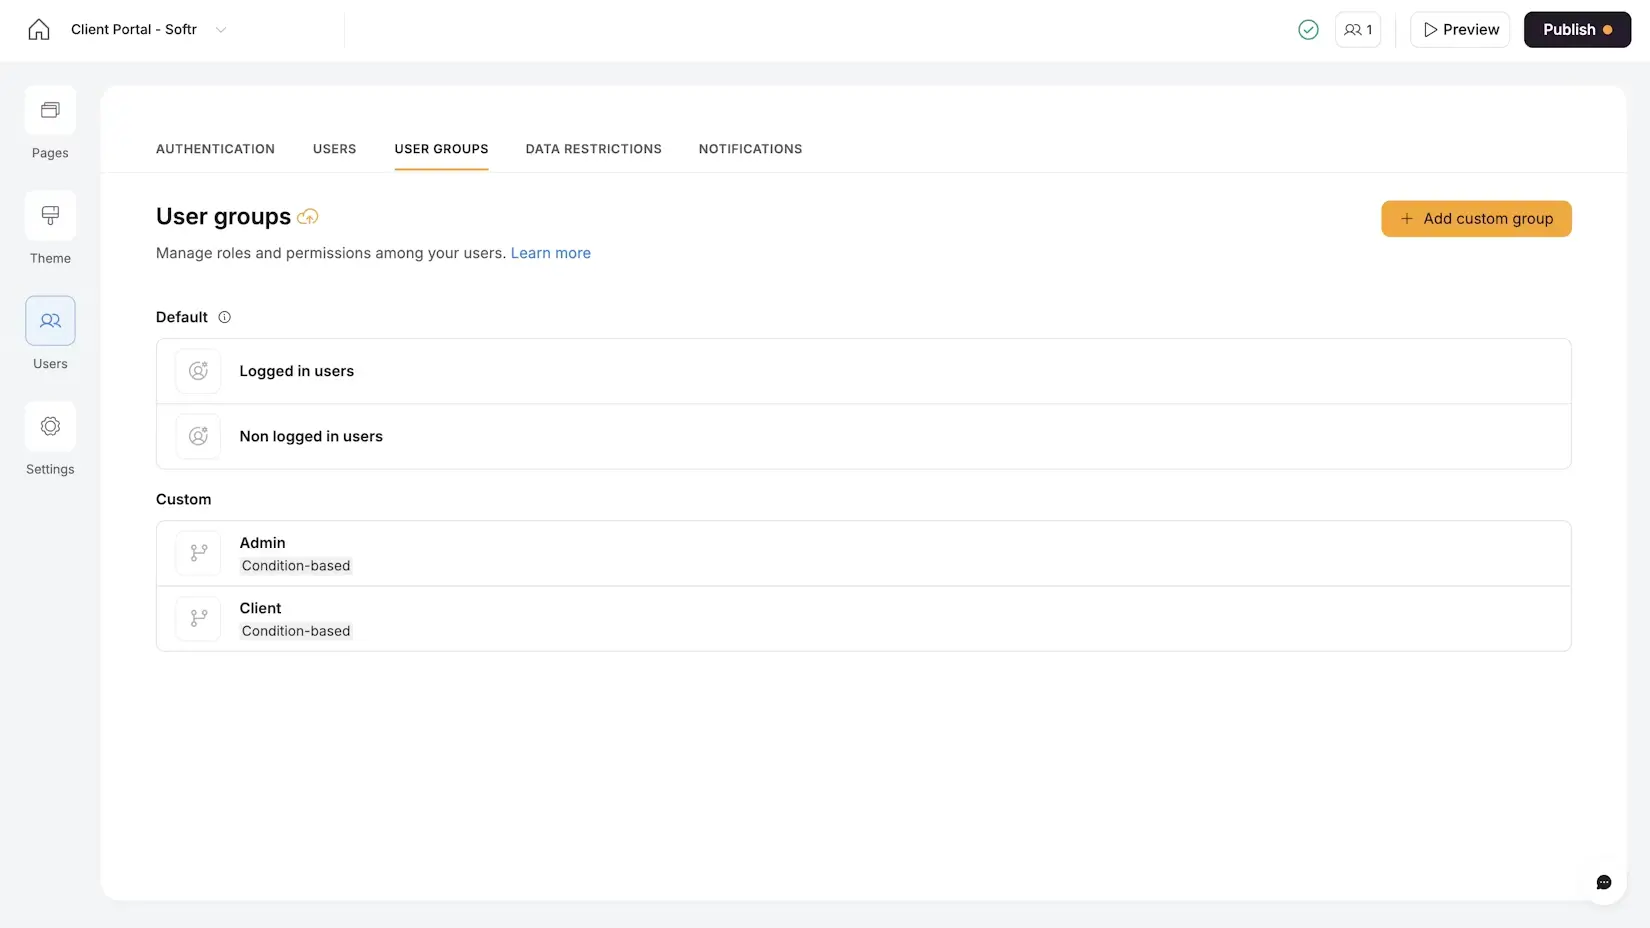
Go to User Groups and create a group for each distinct role. For each group, set a Conditional rule based on the Role field.
For a content portal:
- Admin: Condition is
Role is Admin - Writer: Condition is
Role is Writer
For a vendor portal:
- Admin:
Role is Admin - Vendor:
Role is Vendor
For a CRM:
- Admin:
Role is Admin - Sales Rep:
Role is Sales Rep
Because these are conditional (dynamic), they update automatically. If you change someone's role from "Writer" to "Admin" in the database, their permissions update instantly. No manual reassignment needed.
Static vs. Dynamic Groups
Softr supports two types of user groups:
- Dynamic (Conditional): Automatically assigned based on a database field. This is the recommended approach for most apps. Roles are maintained in your data, and the app follows.
- Static (Manual): You manually assign individual users to a group. Useful for edge cases (e.g., a "Beta Tester" group with 3 specific people) but harder to maintain at scale.
💡 Pro tip: Keep your user groups to five or six maximum. Every group you add means more visibility rules to manage on every page, block, and button. If you need more granular control, combine user groups with conditional filtering rather than creating a group for every edge case.
Step 3: Set up Global data restrictions

This is the single most important security step in any multi-role app. Go to Settings > Data Restrictions.
Global data restrictions act as a firewall at the database level. They apply everywhere in the app, regardless of how individual pages or blocks are configured.
For each sensitive table, add a rule scoped to the appropriate user group:
Content Portal example:
- Assignments table, Writer group: Can only view records where
Writerequals logged-in user's email. - Invoices table, Writer group: Can only view records where
Writerequals logged-in user's email.
Vendor Portal example:
- Tasks table, Vendor group: Can only view records where
Related Vendorequals logged-in user's related vendor (company). - Invoices table, Vendor group: Same condition.
- Documents table, Vendor group: Same condition.
CRM example:
- Deals table, Sales Rep group: Can only view records where
Ownerequals logged-in user's email.
The reason this step comes before building any pages is simple: even if you make a mistake later (e.g., forgetting a filter, misconfiguring a block), data restrictions prevent the wrong data from ever reaching the user's browser.
Step 4: Apply page-level visibility
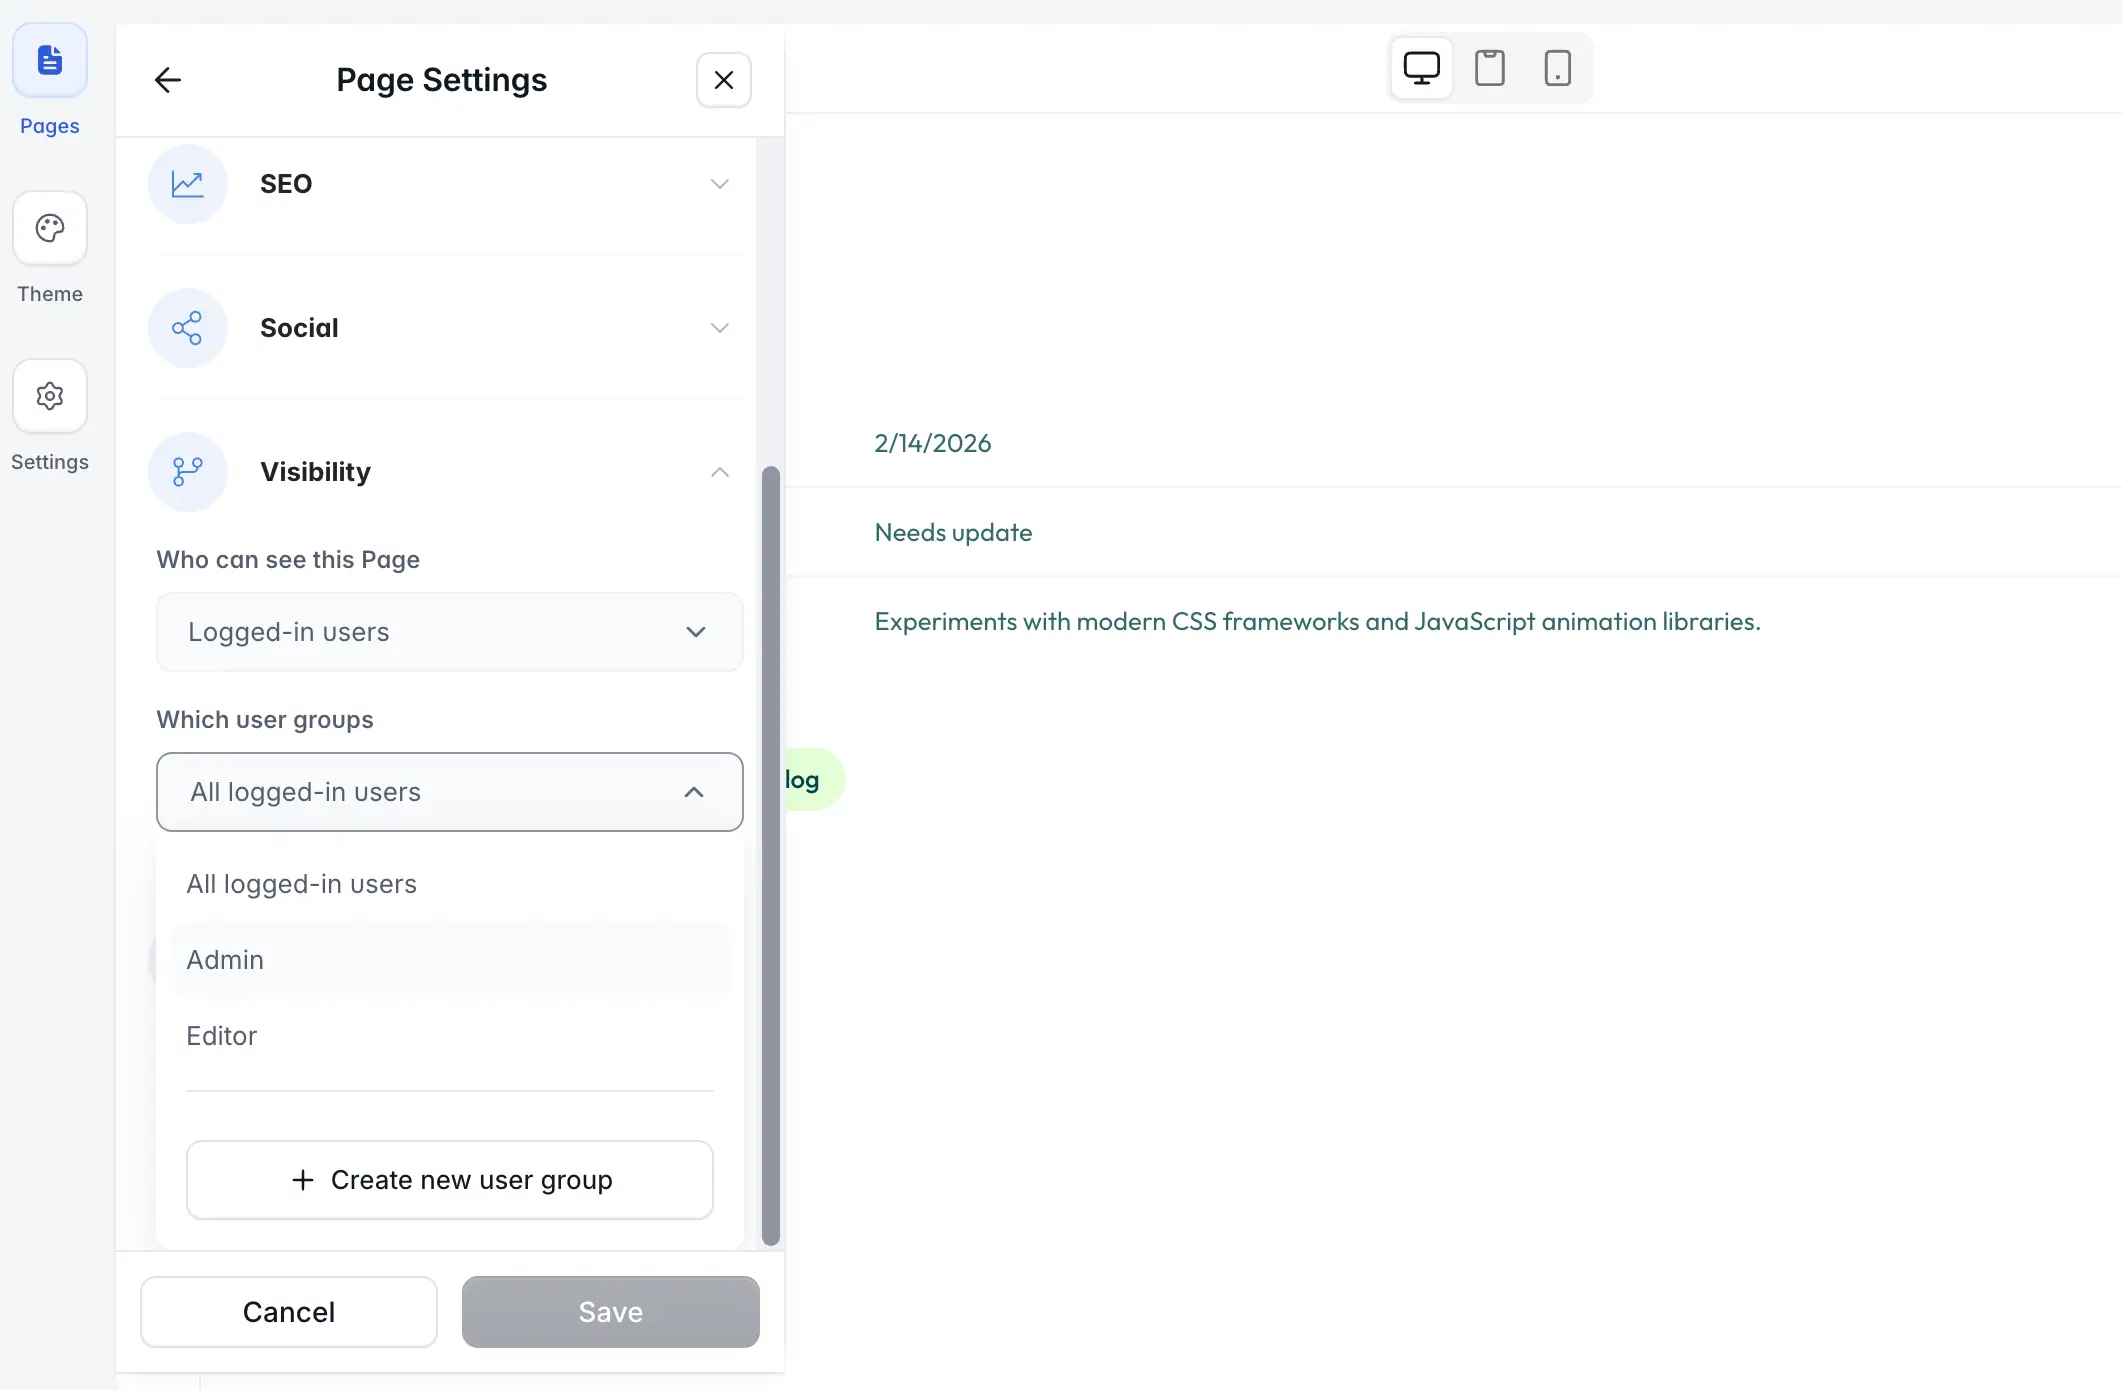
Now configure which pages each user group can access.
In the page settings, set visibility:
- Admin Dashboard → Visible to Admins only.
- Writer Home → Visible to Writers only.
- Shared Detail pages (like an assignment detail) → Visible to all logged-in users (data restrictions handle what content appears).
Page Rules for routing
Use Page Rules to define a default homepage per user group. When an Admin logs in, they land on the Admin Dashboard. When a Writer logs in, they land on the Writer Home.
This eliminates confusion. No one sees a "pick your role" screen or lands on a page that isn't meant for them.
Step 5: Apply block-level and button-level visibility
For shared pages (where multiple user groups have access), use block visibility to show or hide specific sections.
Example: On the Assignment Detail page (shared between Admins and Writers):
- The "Change Status" dropdown is visible to Admins only.
- The "Submit Draft" button is visible to Writers only.
- The "Fee" field might be hidden from Writers if you don't want them to see internal pricing notes.
This creates a deeply personalized experience. Two people looking at the same URL see different controls and information, tailored to their role.
Scaling to multi-company portals
The patterns above work for single-organization apps (your team plus your freelancers). But what if you're building a portal where multiple companies each have their own teams?
Example: An agency managing 20 client companies, each with 5 to 50 users.
In this case, you don't create one user group per company. That would be unmanageable. Instead:
- Add a
Companylinked record to the Users table. - Set data restrictions based on company, not individual. For example: "Vendor group can only view Tasks where
Related Companyequals logged-in user'sCompany." - Users within the same company see each other's data (shared tasks, shared invoices), but cannot see anything from a different company.
This scales to hundreds of companies without adding a single extra user group. The data restriction rules stay the same because they reference a relationship, not a list of names.
💡 Pro tip: This multi-company pattern also works for franchise networks, regional sales teams, or any structure where multiple teams share a portal but must stay isolated from each other.
Common permission patterns
Here's a quick reference for the most common multi-role configurations:
Client Portal
Freelancer Management
Sales CRM
Permissions let you ship with confidence
The difference between a demo and a production-ready app is trust. If you can't trust that your users only see what they should, you can’t share the app with real people.
Softr's permission system is designed so that you set the rules once (data restrictions, user groups) and they apply everywhere. You don't have to remember to add a filter on every page, or worry about someone guessing a URL and seeing another user's records. The platform handles it for you.
That's what makes it possible for a marketing lead like Shiran to build a production app in an afternoon, publish it, invite 12 freelancers, and trust that it works. No engineering review needed.
👉 Try Softr for free and start building your multi-role app today.
Frequently asked questions
- How many user groups should I create?
- What's the difference between page visibility and data restrictions?
- What happens if I forget to add a filter on a block?
- Can different user groups share the same detail page?
- Can I use Softr permissions with external data sources like Airtable?