How to build and customize an interface in Airtable


Airtable is a great way to manage, store, and organize data, but from an interface perspective, a spreadsheet and database hybrid isn't the most welcoming experience, especially for less technical users. If you want to hand a clean dashboard to your team, give clients a portal, or let partners update records without poking around your base, you need a real front-end on top of that data.
This step-by-step guide shows you three ways to build an interface page for your Airtable data:
- How to build an interface on Airtable data with Softr
- How to build an interface with the Airtable Interface Designer
- How to build an interface with extensions from the Airtable Marketplace
If you'd rather skip the build and start from something ready-made, you can grab a free template and connect your own data.
{{cta-1}}
How to build an interface on Airtable data with Softr
The fastest and most flexible way to build an interface for your Airtable data is to connect your base to Softr.
Softr builds complete, secure business apps with AI. It combines interfaces, native Softr Databases, and Softr Workflows for automation, plus an AI Co-Builder that can scaffold an entire app from a plain-language description. You can use it to turn Airtable data into client portals, internal tools, and dashboards that look and behave the way you want them to.
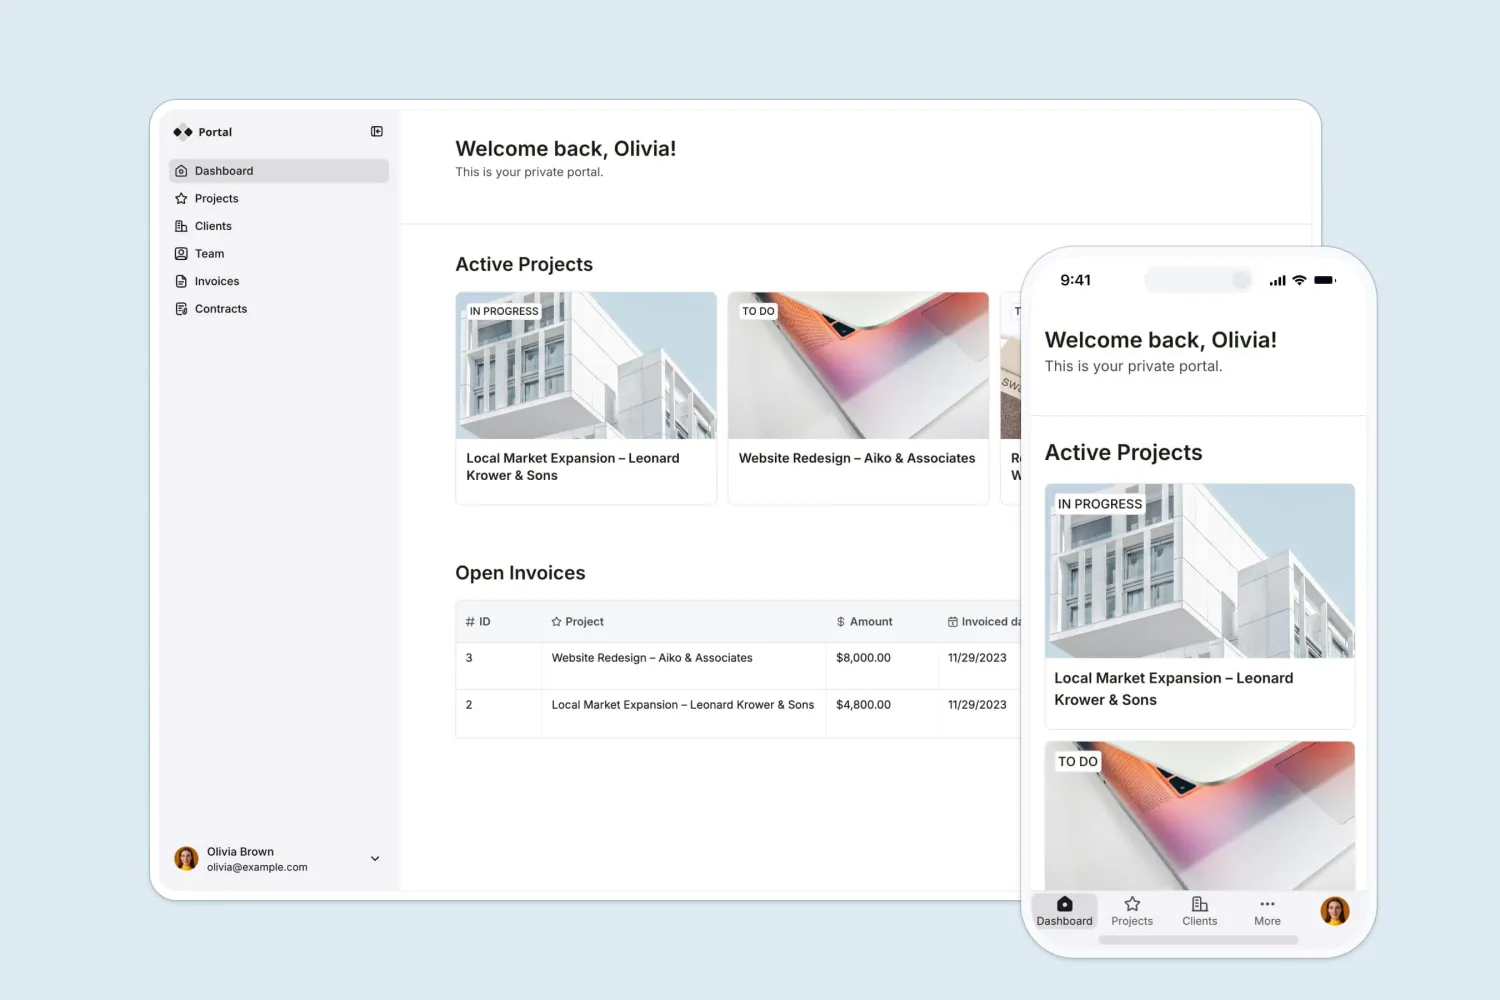
Building a custom interface takes less than 10 minutes and is free to start. Where Softr really pulls ahead is what you can do after the data is connected. You get fine-grained control over design, can apply users and permissions so the right people see the right records, and can share with external users who don't have an Airtable account. That last point is one of the biggest gaps in Airtable's native Interfaces, which we'll cover later.
"I find Softr very intuitive and easy to navigate, which is great for someone who is not a programmer by nature. It integrates very nicely with Airtable and other databases we are already using, making it nice that it just sits on top of the systems we have. I also love the ability to control access globally, which is really important for data security and privacy." — Natalie S., Director of Operations
Follow the steps below to create an interface on Softr based on your Airtable data. If you want to move even faster, you can describe your app to the AI Co-Builder and it will scaffold the pages, user groups, and layout for you, or you can start from a template like we do here.
Step 1: Log in to Softr
Airtable users can easily connect to Softr. First, log in to your Softr account or create an account for free.
Step 2: Click on “Application”
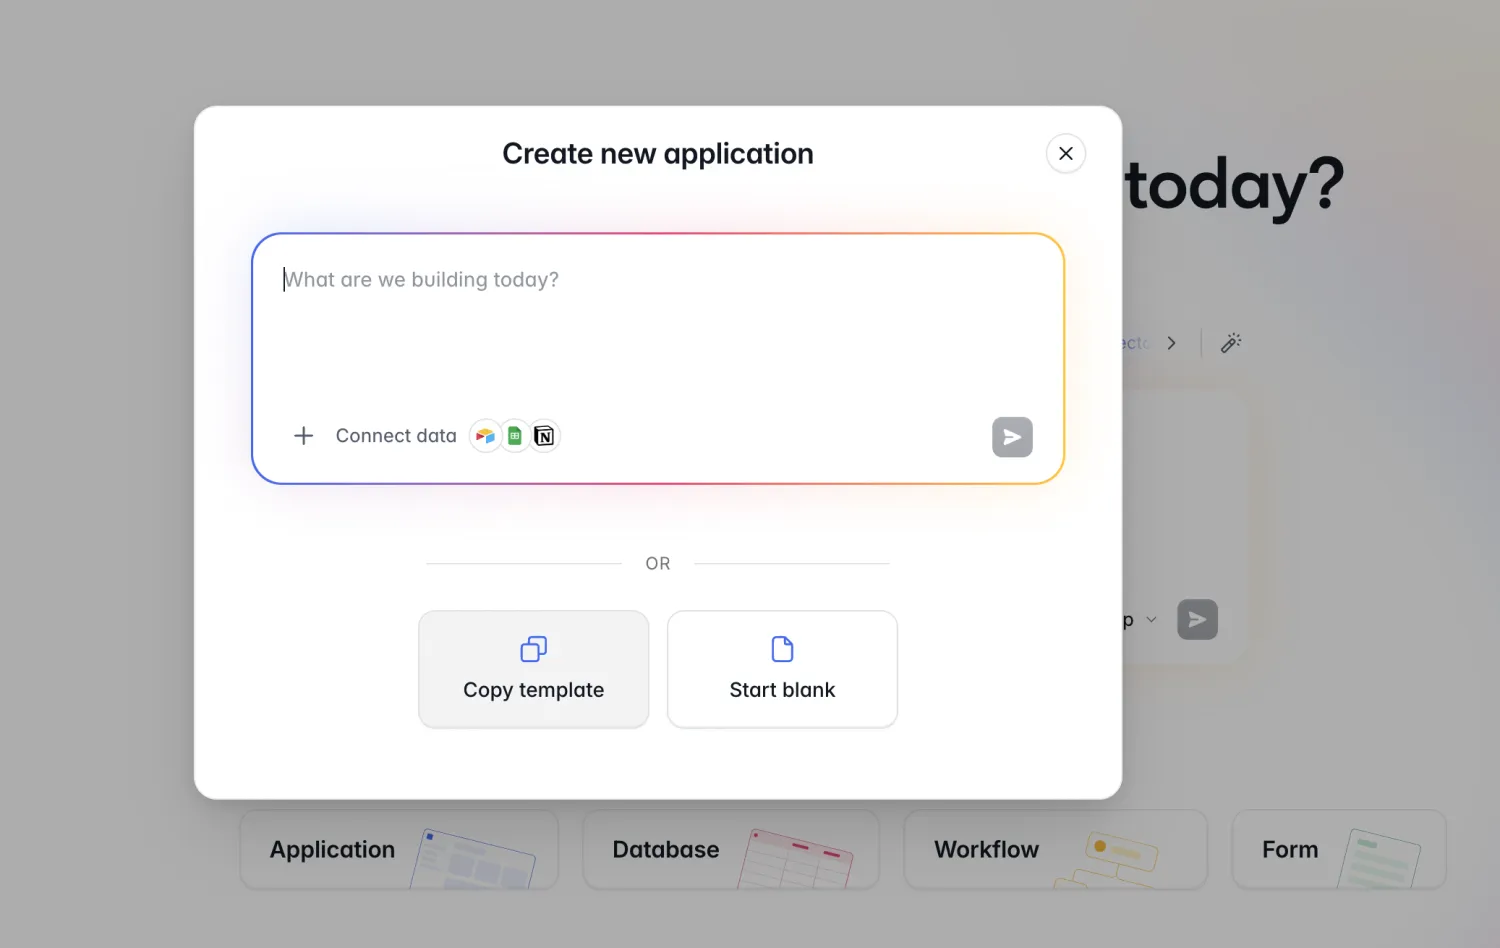
First, let's create an app with Softr. You have three ways to start: describe what you need to the AI Co-Builder and it builds a complete app for you (the fastest path), pick a pre-built template, or start from a blank canvas. The AI Co-Builder asks a few clarifying questions, lets you choose your authentication and theme, and then scaffolds the database, user groups, and pages instantly.
For this example, we'll start from a pre-made template. On the Softr dashboard, click on Application, then select Copy template in the window that appears.
Step 3: Select a template
You can use the search bar to lookup layout options or browse the available templates. For this example, we chose the Employee Directory template. This interface helps organizations view and manage their company and employee information in one place. Select Use Template to continue.
Step 4: Connect to Airtable as a data source
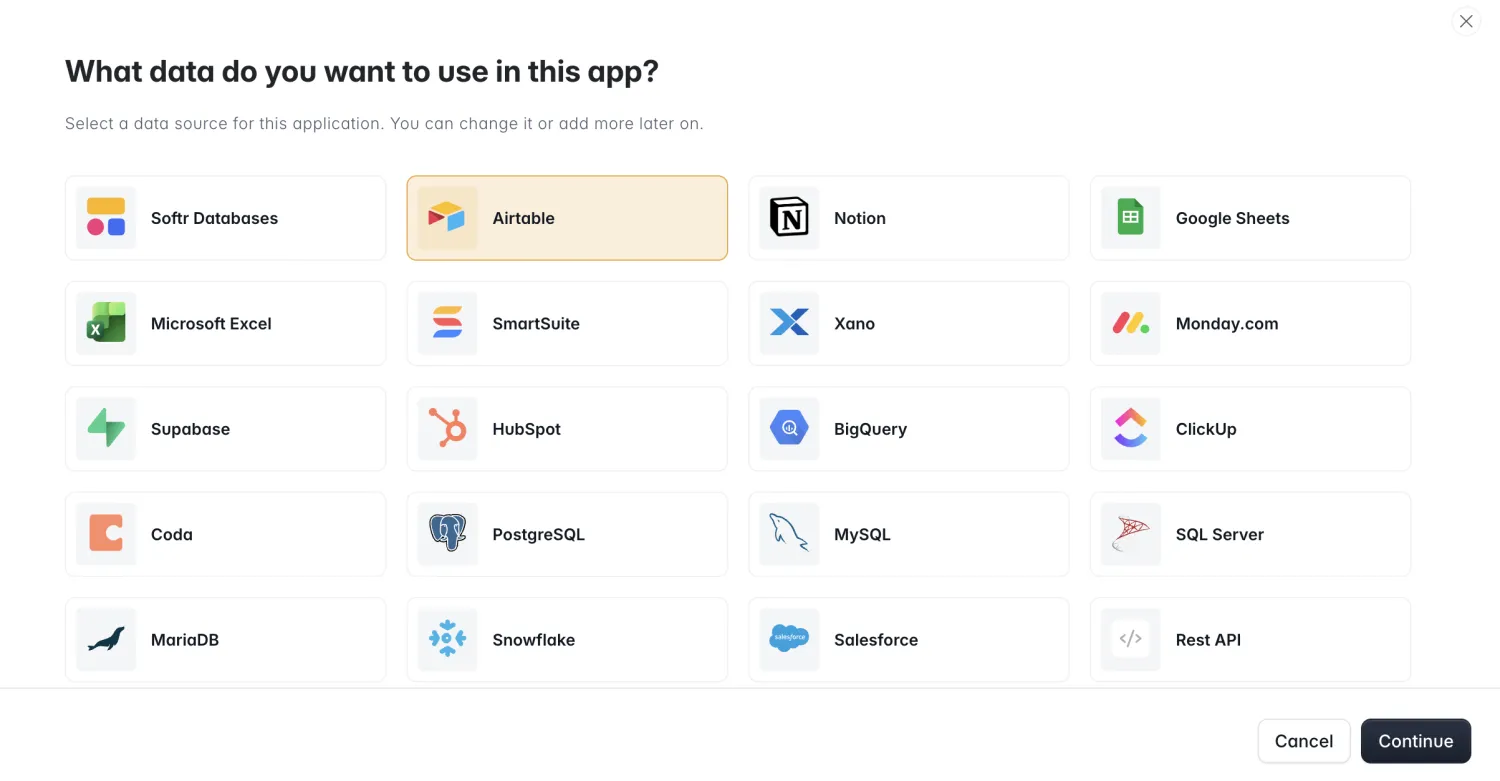
Softr supports 20+ data sources, but when you build an app it uses Softr's native relational database by default (complete with dummy data so you can see how it's structured). For this guide we're building on Airtable, so select the Data tab, click the + icon to add a new data source, select Airtable, and hit Continue.
Step 5: Grant Softr access to Airtable
An authorization page will open in a new tab. You can choose to give access to all your Airtable bases or choose specific bases, interfaces, and workspaces to connect to.
When you've made your choice, select Grant access and you're done. No API keys or external tools needed.
Step 6: Connect your interface to specific bases
With the integration step done, we still need to sync individual blocks in our Softr app to Airtable bases. This takes just a few clicks.
First, select any block in your app. The Source tab will appear on the right. Under Account, select Airtable, then choose which base and table you want to connect the block to. It'll auto-map the fields to your interface, and you can customize as needed.
Step 7: Add new blocks and pages to your interface
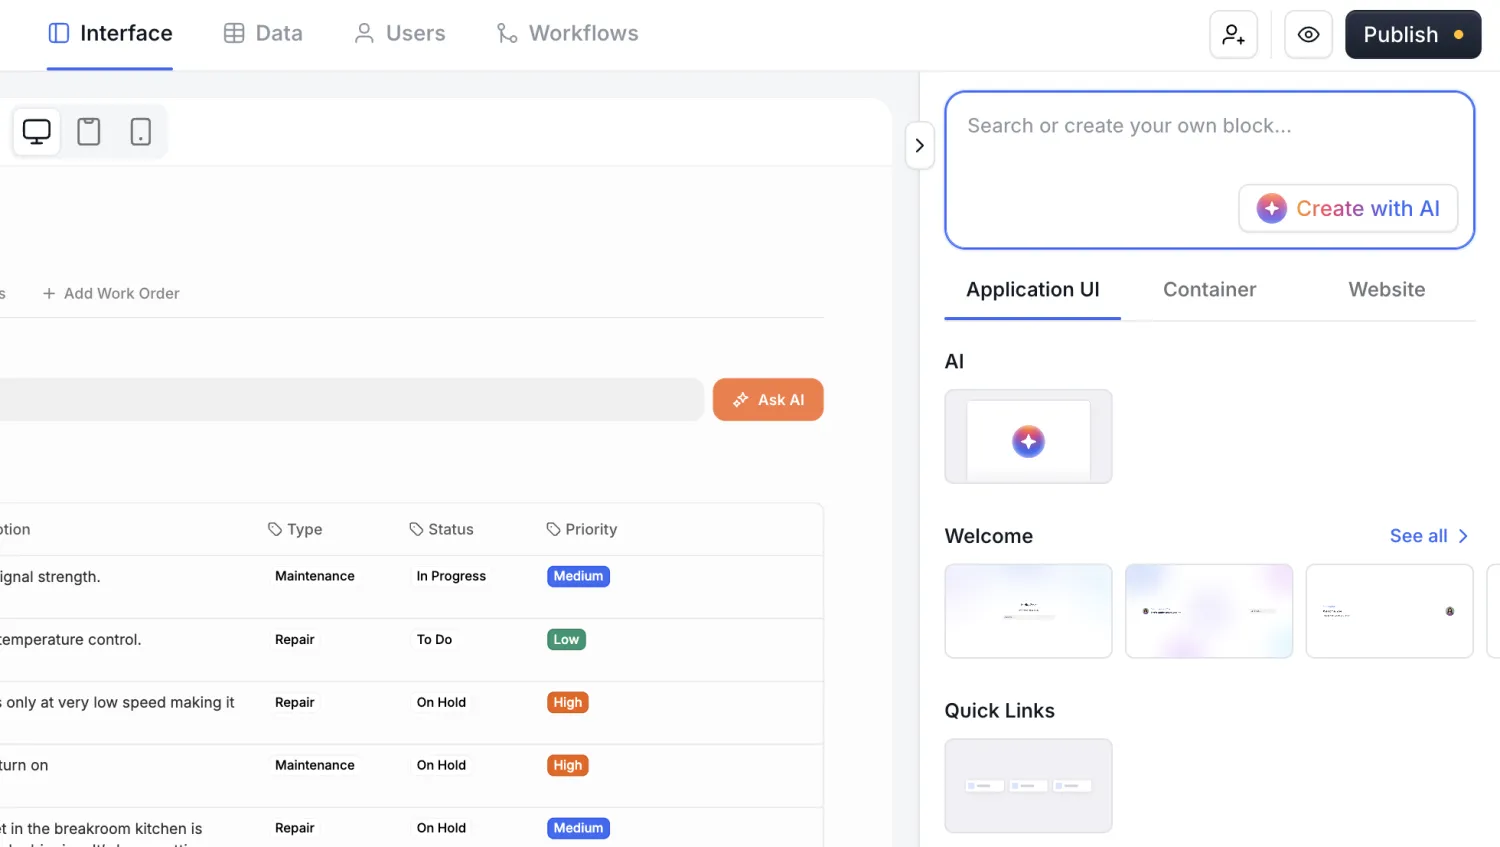
As it stands, your new interface is based on a template, but you have the freedom to change a lot by either prompting AI or using the visual editor. What you add is up to you, but some options include
- Forms
- Tables
- Lists
- Charts
- Kanban boards
- Calendars
- Timelines
- Galleries
- AI chatbots
- Custom vibe-coded blocks
To add a block, click Add block and pick what you want from the panel, or ask the AI Co-Builder to add it for you by describing what you need in plain language. These can all be synced with your live Airtable data (if applicable), or connected to another external data source.
For the cases where you want something fully custom, Softr's Vibe Coding block generates unique, AI-built UI with no design limits, so you're never boxed in by a fixed set of components.
Step 8: Set user permissions and data restrictions
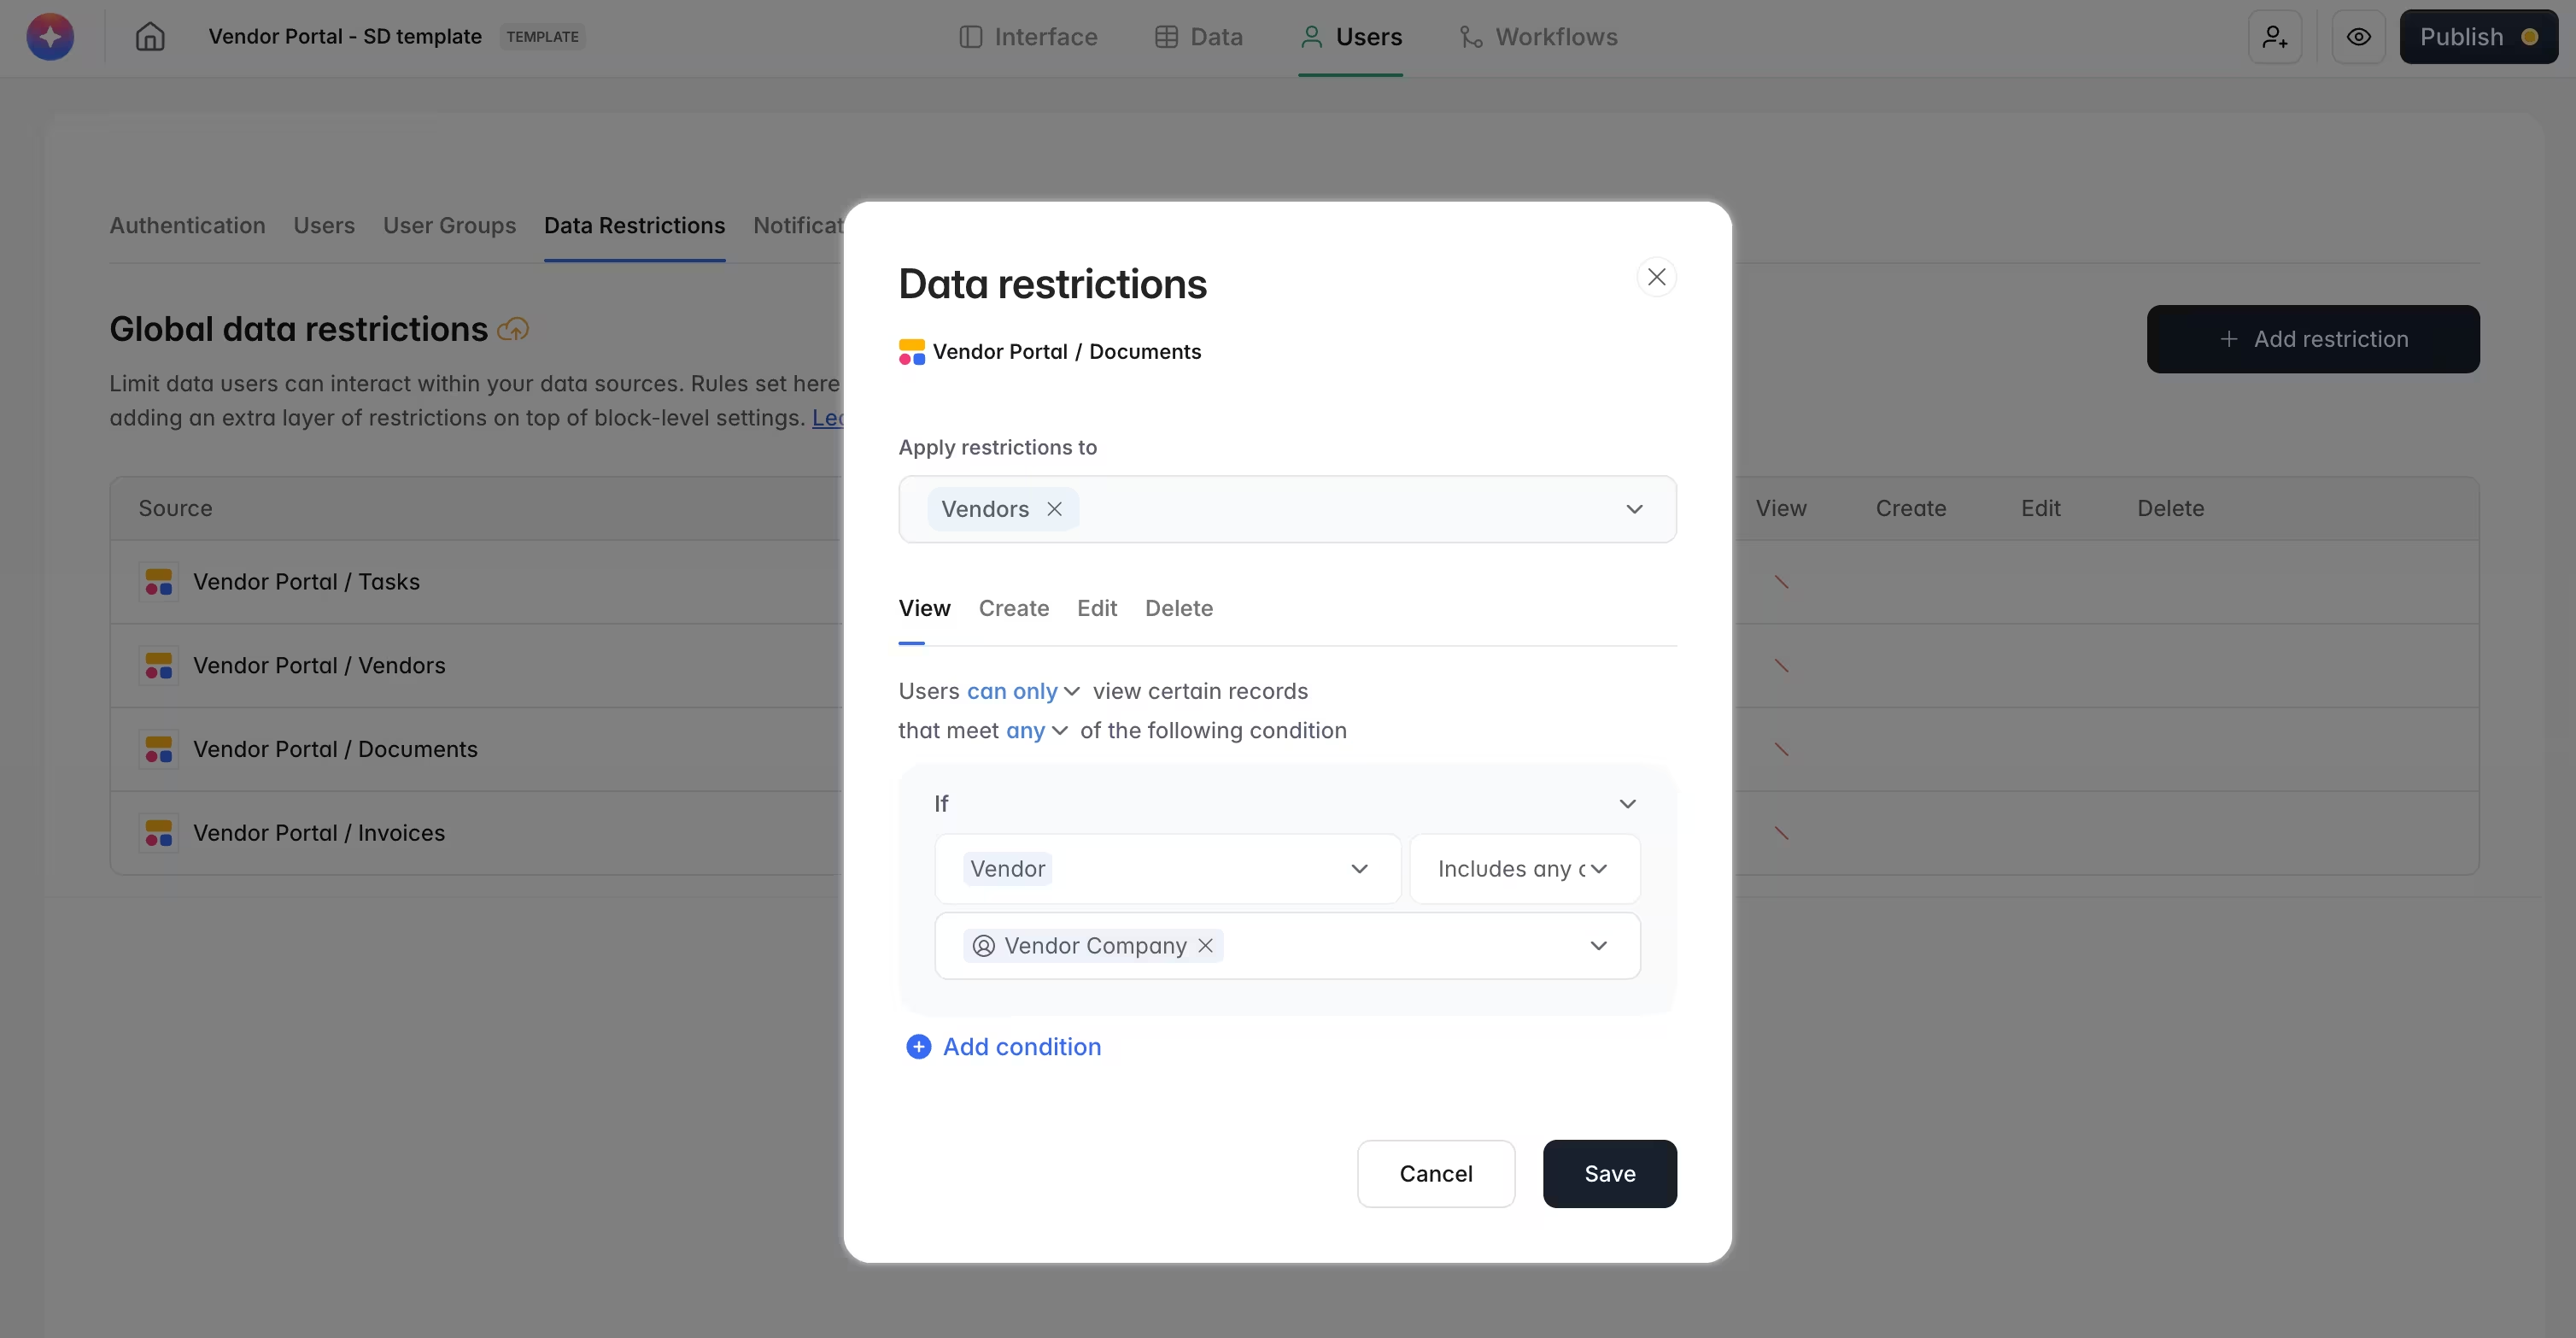
This is where Softr really separates itself from native Airtable Interfaces. With Softr's permissions, you can give external users their own secure logins and control exactly what each person sees, all without anyone needing their own Airtable account. You can set up user groups based on a role field in your data, restrict pages to specific groups, and even limit which records a user can see down to the row level.
Click on any individual block, select the Visibility tab ,and choose which user groups can access that content. You can also do this at the page-level.
In our example app, an HR manager and an employee shouldn't see the same information. We set up the permissions so each user group gets its own access level, which keeps salary data and other private fields hidden from people who shouldn't see them.
Here's another data restriction example from a vendor portal, to give you an idea of what's possible:
Step 9: Publish your interface
Whenever you’re ready to make your interface live and shareable with real users, simply click Publish in the top-right corner.
Softr gives you the option to set up a custom domain and/or subdomain. Once that's set, hit publish again and you're finished (like finished, finished).
How to build an interface in Airtable with the Airtable Interface Designer
Another way to create an interface page for your Airtable data is to use Airtable’s native feature: the Interface Designer.
Airtable's Interface Designer is directly accessible from Airtable and allows you to create a front-end interface page using the data in your Airtable base, including:
- Dashboards and progress updates
- Charts and graphs built from your base data
- Record galleries, lists, and Kanban boards
- Other data visualizations across single or multiple tables
Keep in mind that some options (such as permissions settings and other advanced controls) are only available on Airtable's paid plans. This is also where the native Interface Designer hits its limits for external sharing, since every collaborator you invite counts toward your seat costs and there's no easy way to give clients or partners a separate, locked-down view.
Follow the next steps to learn how to create an interface using the Interface Designer.
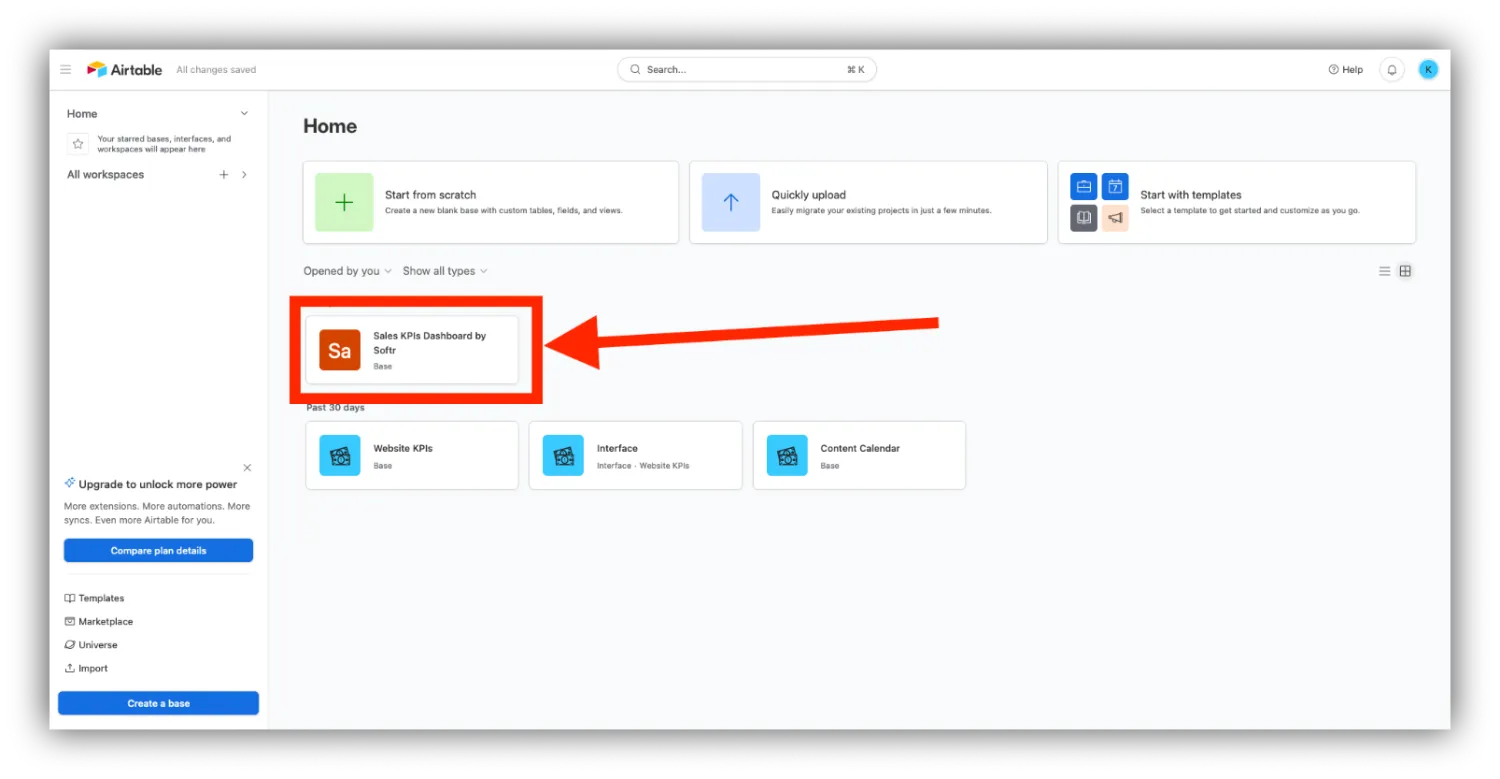
Step 1: Select your Airtable base
In Airtable, click on the underlying base of your choice.
We will build an interface using the data from that specific base. For this example, we’ve selected a Sales Dashboard we recently built with Softr and Airtable.
Step 2: Click on “Interfaces”
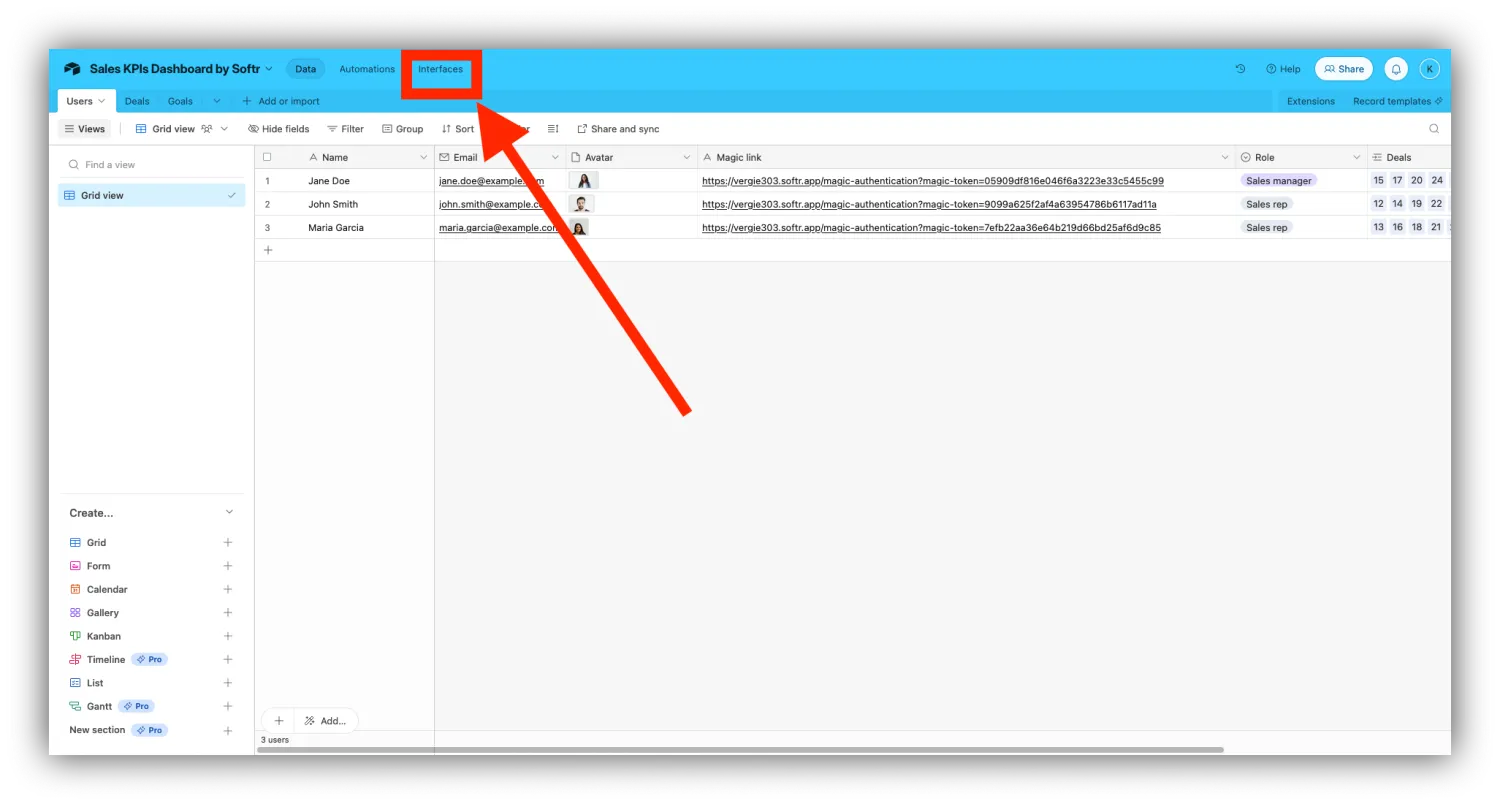
In Airtable's underlying base, select the “Interfaces” tab at the top of the screen.
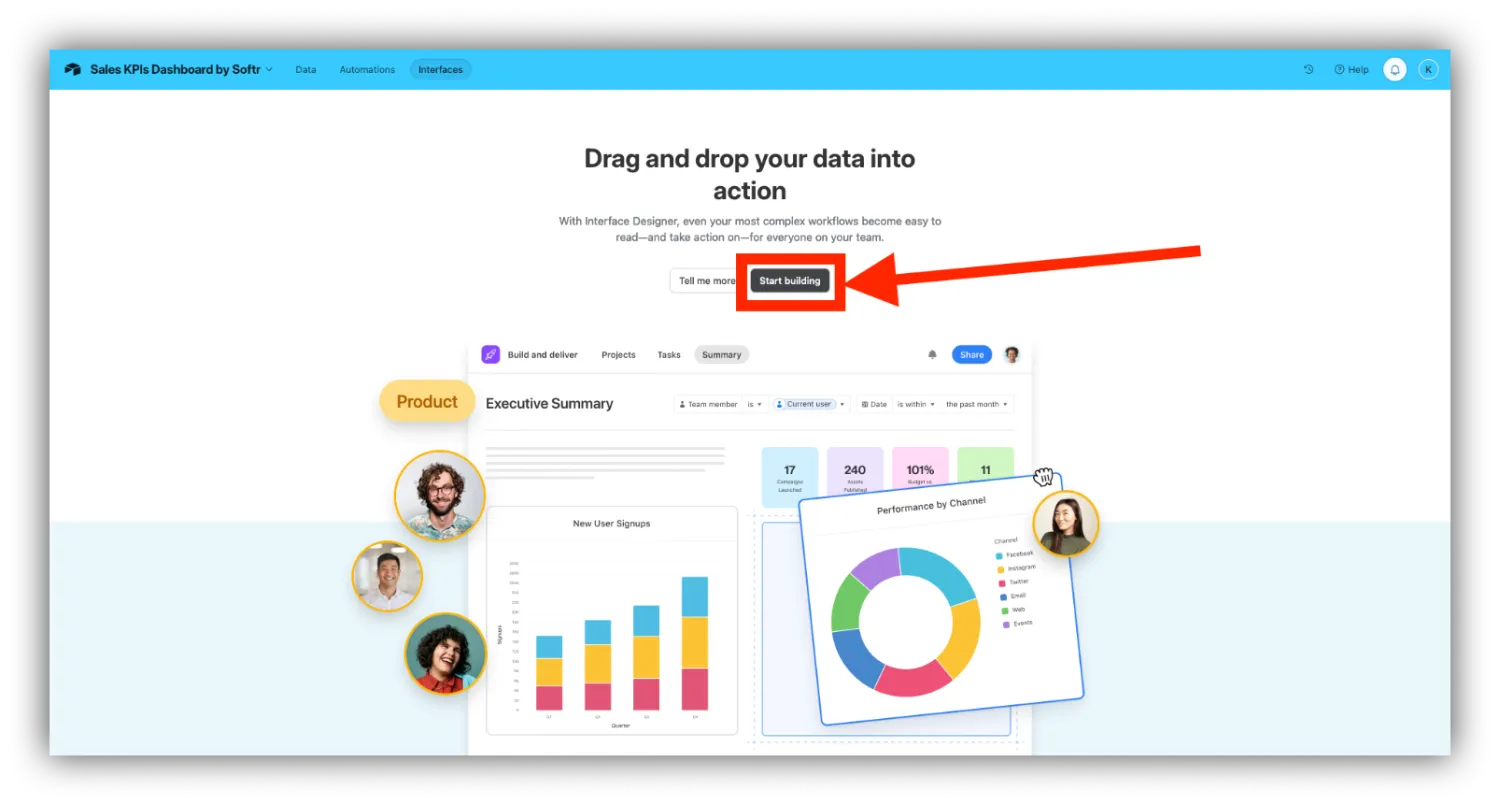
Step 3: Click on “Start building”
Read the description provided by Airtable, and whenever you’re ready, click on the button to start building your interface page.
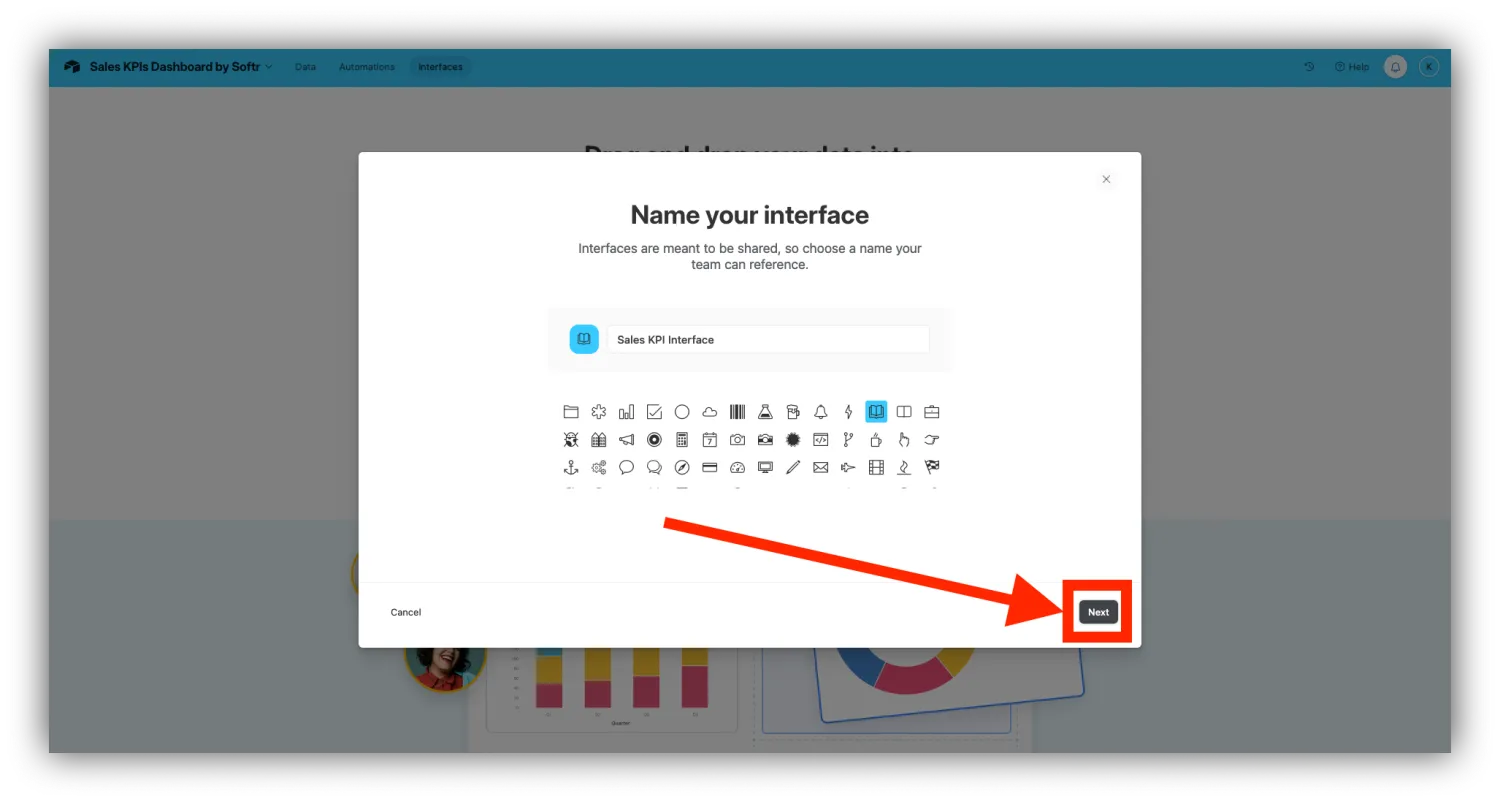
Step 4: Name your interface
Give a name to your interface page, assign it an icon, and click on “Next” to go to the next step.
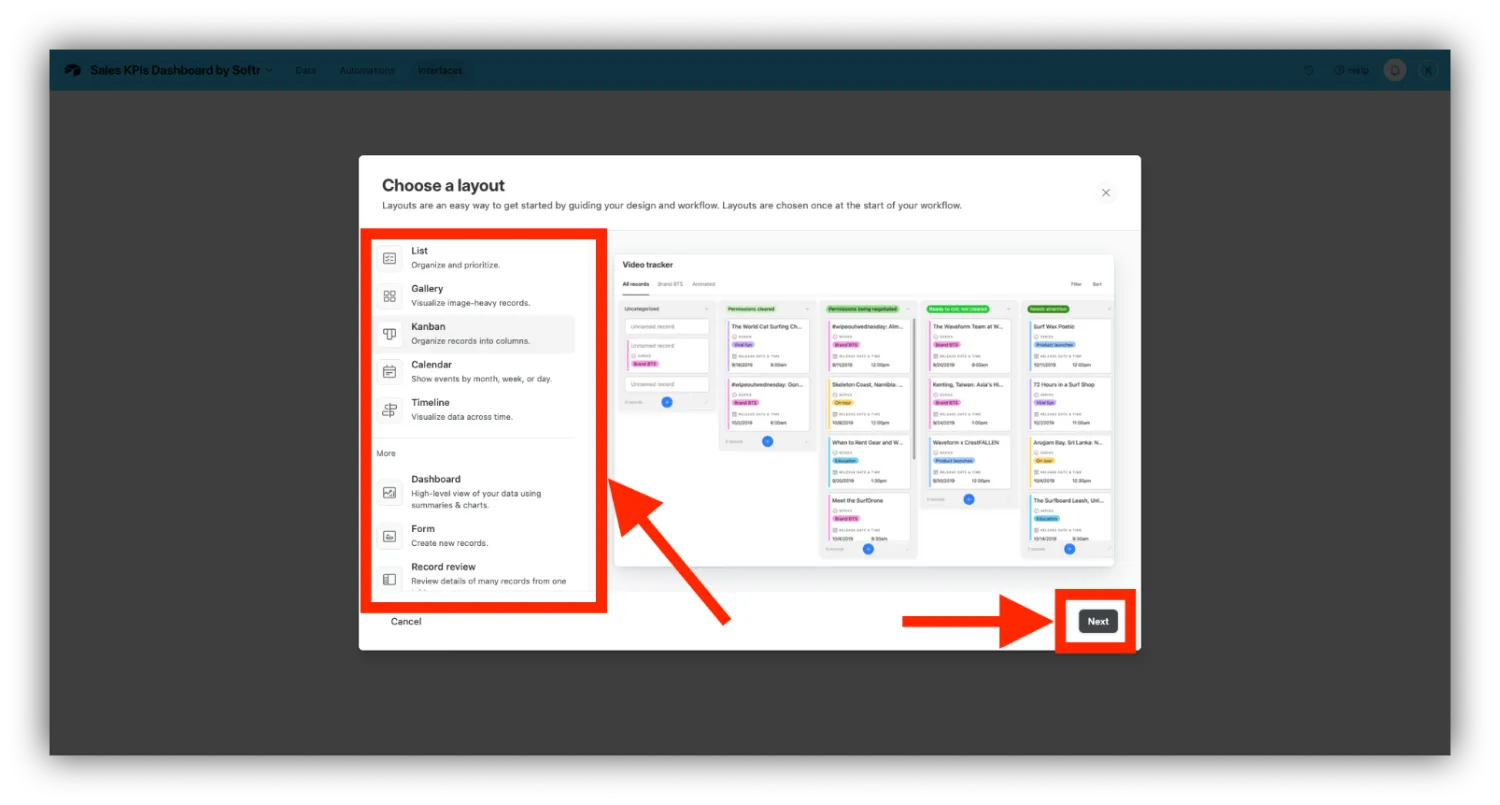
Step 5: Choose your interface layout
You have several choices of default layouts to build your interfaces.
Some of the layout options offered by Airtable include:
- List, a layout to organize and prioritize items
- Gallery, an image-first visualization of your records
- Kanban, a column-based visualization for project management
- Calendar, a time-focused structure including calendar month, week, or day
- Timeline, a linear time-based project visualization
- Dashboard, an interface to show numbers, charts, and visualizations
- Form, to collect and organize input from users
- Record review, to review details of many records at a glance from one table
- Record summary, to get detailed overviews of one single record
- Blank interface, to start with a clean canvas
For this tutorial, we chose to go with a Kanban layout for our interface visualization.
Once you’ve made your choice, click on “Next.”
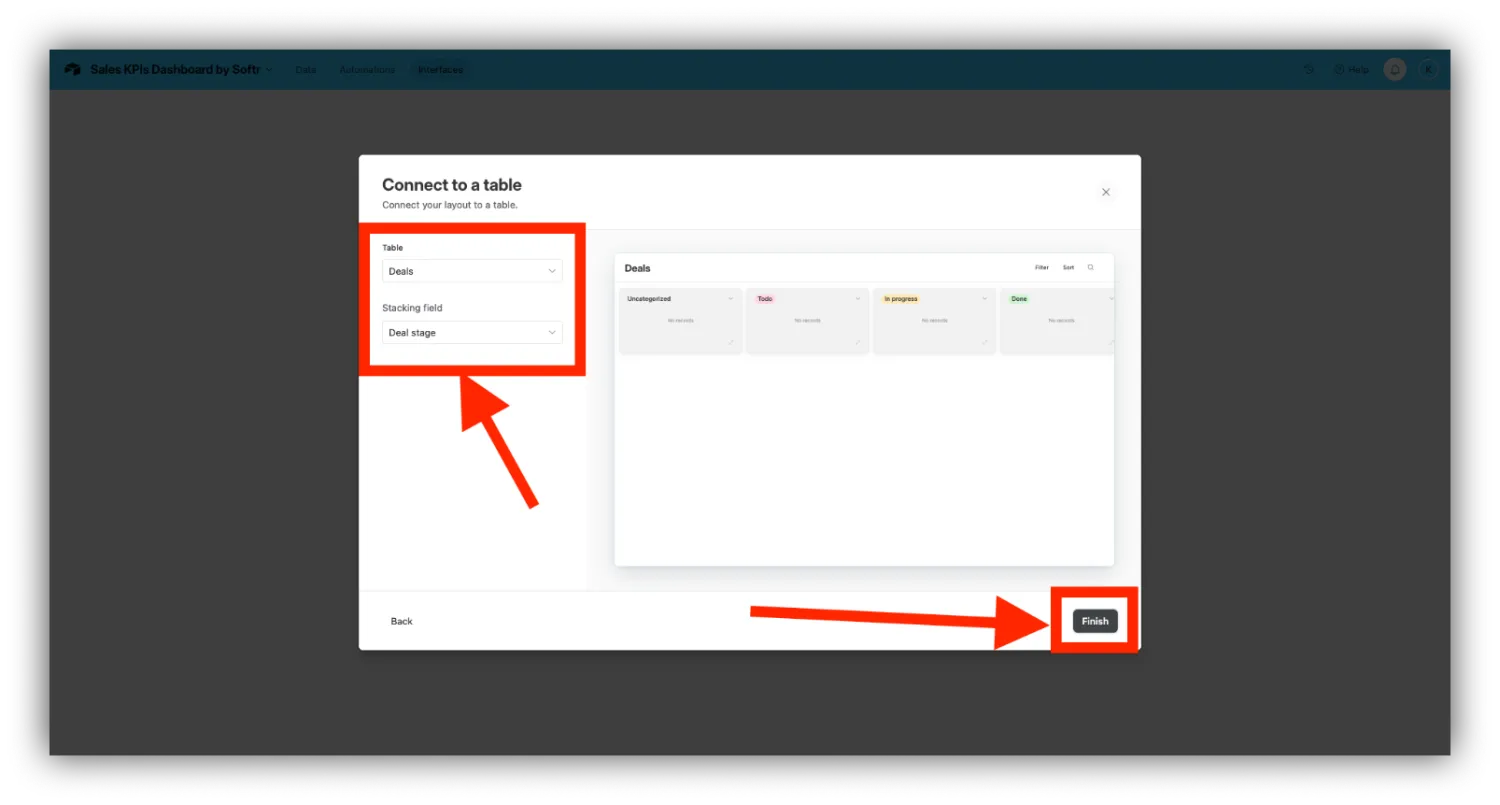
Step 6: Connect your layout to a table
Select which table of your base should be displayed in your interface page.
In this example, we want to showcase the deals in our database on a Kanban board in order to have a bird’s-eye view of where our deals stand.
When you’re ready, click on the “Finish” button.
Step 7: Get more from your Airtable interface
The first iteration of your interface home screen is ready, but you can do a lot more.
Here are a couple of examples of actions you can take with your Airtable interface.
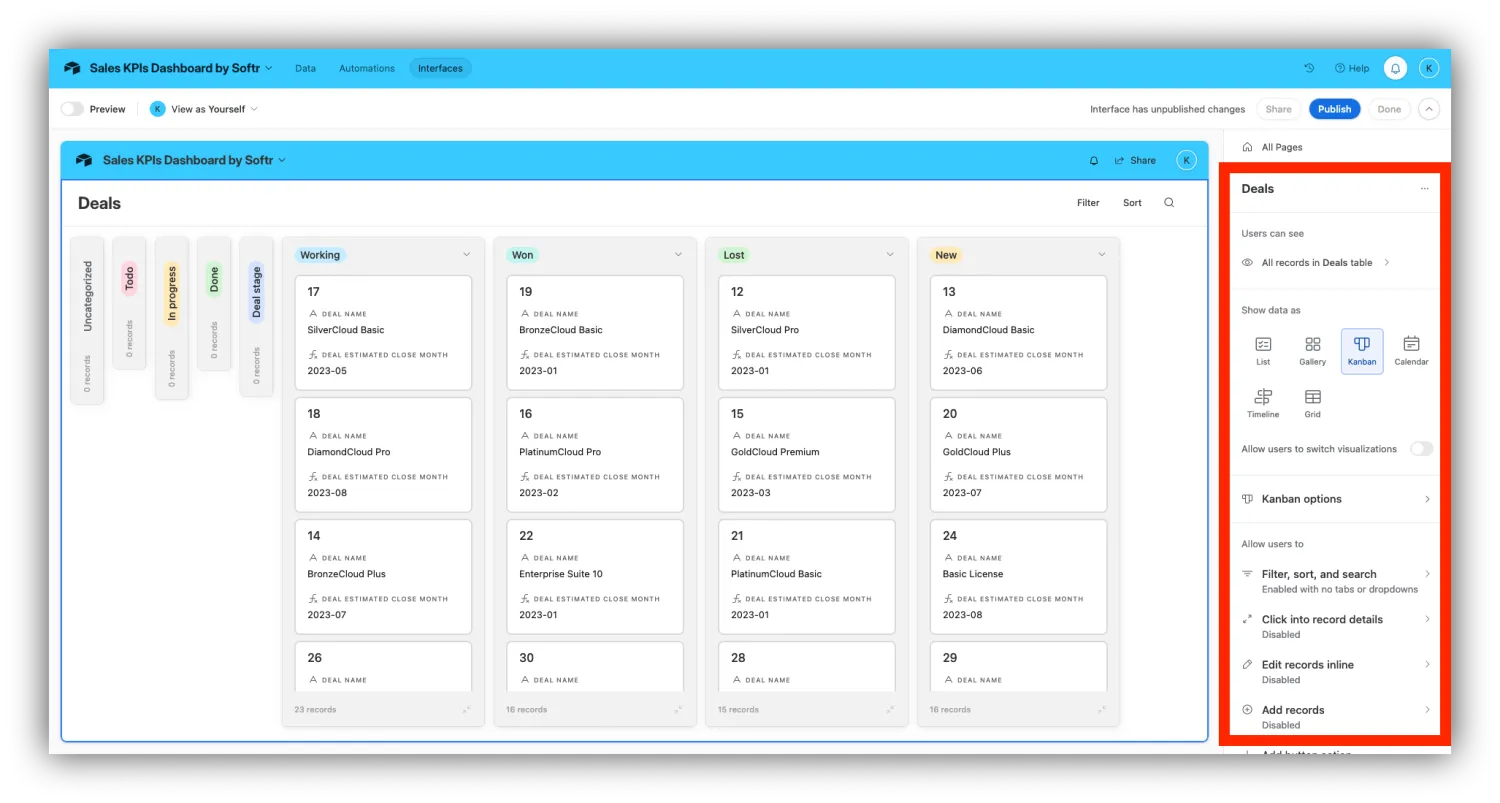
Step 7.1: Customize your interface
This is a great way to take your interface page to the next level. It's especially useful when working with end users that are clients or external stakeholders.
Upon clicking on elements of your interface, use the edit option to modify your design.
This includes changing the design or table layout, changing the types of fields displayed, adding filters, and more.
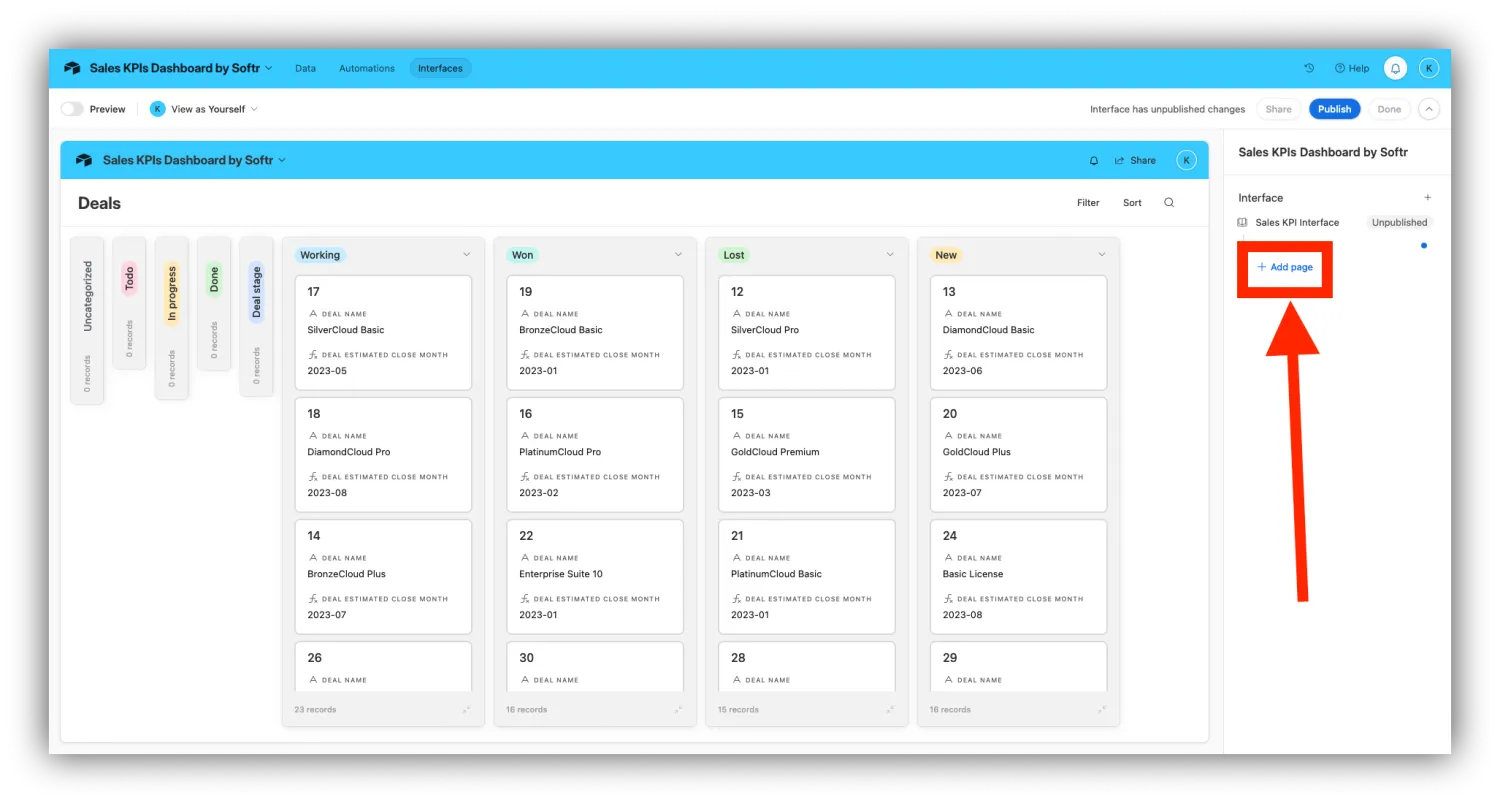
Step: 7.2: Add a page to your interface
Your interface doesn’t have to be a single-page front-end.
By clicking Add page in the right-side panel, you can add more pages and data layers, repeating the process of choosing layouts, elements, and tabs.
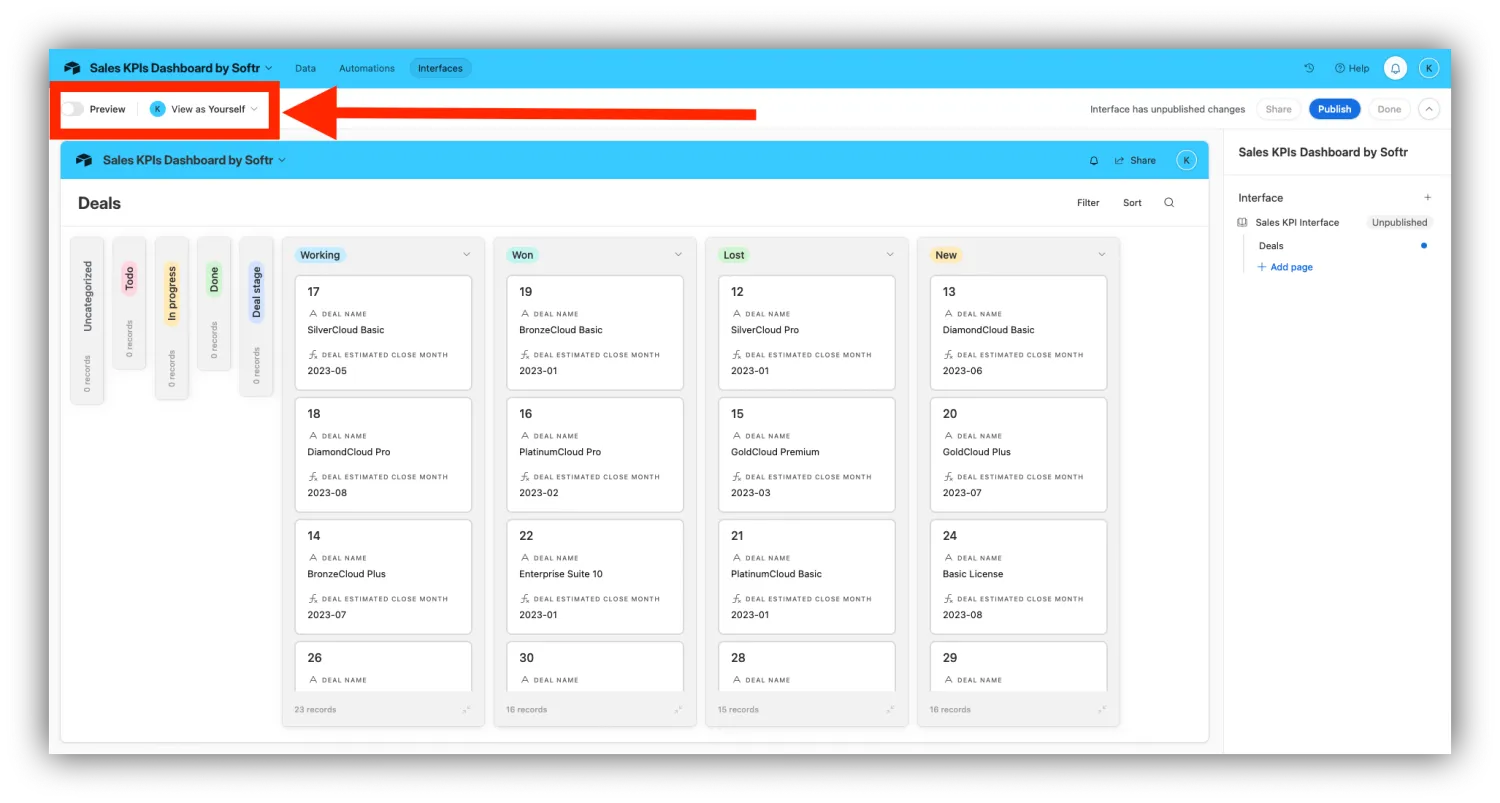
Step 7.3: Generate a preview
As you build your Airtable interface, you can visualize what the final result will look like for end users once published.
To do so, click on “Preview.”
Step 8: Click on “Publish”
Once you’re happy with your interface page, click on “Publish” in the top right corner of the screen.
You’ll be invited to share the interface for more collaboration.
Build the right kind of Airtable interface for your business
The best path for building depends on who within your team needs access. If your interface stays inside your Airtable workspace and everyone already has an account, the native Interface Designer might be able to do the job.
But the moment you need to share with clients, partners, and vendors who don't use Airtable—or you need real control over design and permissions—Softr is the better choice.
"I use Softr to build a customer portal, and it helps us streamline both customer-facing and internal record-keeping. The interface looks great, and the integration with Airtable makes it easier." — Ruby H., G2 review
Ready to turn your Airtable base into a real app? Start building with Softr from a free template, or describe your idea to the AI Co-Builder and watch it come together in real time.
Frequently asked questions
Can I build an Airtable interface for free?
What's the difference between Airtable Interfaces and Softr?
Can I share an Airtable interface with people who don't have Airtable accounts?
Do changes in Airtable show up automatically in the interface?
How long does it take to build an interface on Airtable data?