How to create a custom content calendar in Airtable [+template]

[.blog-callout]
TL;DR
- Airtable's calendar view organizes your content by date, but it's still an Airtable base, so anyone with access can see and edit everything.
- Softr turns that same Airtable base into a dedicated content calendar app, with its own design, permissions for writers, editors, and clients, and a shareable link, no code required.
- You can describe your content calendar to the Softr AI Co-Builder and have it generate the app for you, or start from a ready-made template if you'd rather build it visually.
- If you outgrow Airtable's record limits or per-seat pricing later, you can import your base into Softr Databases without rebuilding your calendar. [.blog-callout]
In Airtable, you can create a content calendar customized to your needs, one that allows you to visually plan your content and collaborate with other people. You will also be able to access your content calendar in Airtable on your mobile phone, integrate it with other tools and platforms, set up automations, and more.
There are three ways to create a content calendar in Airtable:
- Starting from scratch: the slowest method, because you have to set everything up from the ground up.
- Using Softr: the best method, since you start from a template combined with a full web application you can customize, secure with permissions, and share with your team.
- Using a template by Airtable: an alternative method, where you use a content calendar template created by Airtable.
How to create a content calendar in Airtable from scratch
Creating a content calendar in Airtable from scratch allows you to tailor it specifically to your specific needs. However, doing so takes much more effort and time, compared to other methods.
Follow the below steps to learn how to build a content calendar in Airtable from scratch.
Step 1: Sign in or sign up to Airtable
Before you start creating your content calendar in Airtable, you need to have an account. If you don’t have one, you need to sign up to Airtable. However, if you already have an account, sign in to Airtable with your login credentials.

Step 2: Setting up your Airtable base
Next, you need to create a new Airtable base that can organize the data you’ll use to create a content calendar in a proper way. This includes ensuring you use descriptive namings, create the necessary tables, and that each of those tables has the needed fields.
Step 2.1: Create an Airtable base
On your Airtable workspace, you will find the “Create a base” button. Click on it.

Step 2.2. Rename your Airtable base
By default, Airtable will name your base “Untitled Base.” As you think about naming your base, consider the tables that will be part of this base. In the context of a content calendar, you might have tables for “Content Items,” “Authors,” “Publication Channels,” and perhaps “Content Categories” or “Tags”. Each table serves a unique purpose in organizing and categorizing your content. For instance, “Content Items” could list individual articles or posts, while 'Authors' might detail the writers responsible for each piece.
Given the multifaceted nature of a content calendar, having a base with an undescriptive name like "Untitled Base" can be confusing, especially if you plan to have multiple bases in the future.
To name your newly created Airtable base more descriptively, click on its name and type a new one, such as “Content” or “Editorial Calendar.”

Step 2.3: Rename your table
Also by default, the table in your Airtable base will be named “Table 1.” This is not a helpful name, as it doesn’t indicate what data will be added to this table.
As you’ll use this specific table to keep track of your content calendar in Airtable, click on the table name, click on “Rename table,” type a new name, such as “Content Calendar,” and click on “Save.”

Step 2.4: Change the title of existing fields
Fields in Airtable work as columns in a spreadsheet, as they help you categorize your data. The first column is usually reserved for the titles of your content pieces because that’s typically the way people identify each content piece. If your situation calls for a different way, then you can use the first column for whatever identifier you prefer: sometimes, website owners prefer to use the URL of the content piece for this purpose.
In order to change the name of the first column, click on the header of the first field, which will be “Name.” On the dropdown that opens, click on “Edit field.” Then type “Title,” or whatever identifier you prefer, and click on “Save.”
Repeat this step for the other fields you might want in your content calendar. Other than “Title,” common fields for a content calendar include:
- URL: If you’re a website owner, you might want to know where on which URL you published each content piece. When you edit this field, ensure that you choose the field type its URL, so that you can in the future just click on it to load it in your internet browser;
- Status: As you manage your content, you might have some content pieces in the first draft stage, others in the review stage, others live, and so on. So that you know at which stage each content piece is, you can have a field named Status with its type being single select, the ideal field type when you want to be able to select a single option from a preset list of options;
- Author: If the authors that will write the content pieces in the content calendar also have access to the Airtable base, then you can create a field for authors with the field type User. If they do not have access, then you can create a single-line text field to write down their name;
- Due Date: for this field, you can use the field type Date & Time to set the deadline for each of your content pieces.
- Distribution channel: If you publish content in multiple channels, then you might find it helpful to indicate where you’ll publish each content piece. To do so, you can create a field with the field type of multiple select, so that you can indicate where each content piece will be published, such as website, social media, and newsletter;
- Document: Suppose the writers send you their content pieces in a file. You can create a field of the type attachment to upload the files to your content calendar in Airtable.

Step 3: Add your data
With your fields set up, you can now start populating your content calendar in Airtable. To do so, click on a cell and add the relevant details for each piece of content you're planning.
Step 4: Create the Calendar View
One of the features of Airtable is its ability to switch between different views. So far, you’ve been working with the grid view, but you can see the same data with the calendar view, which is particularly useful for content calendars.
Step 4.1: Create a new view
On the left sidebar, you will see a heading with the text “Create…” above a list. There, click on “Calendar.”

Step 4.2: Configure the new view
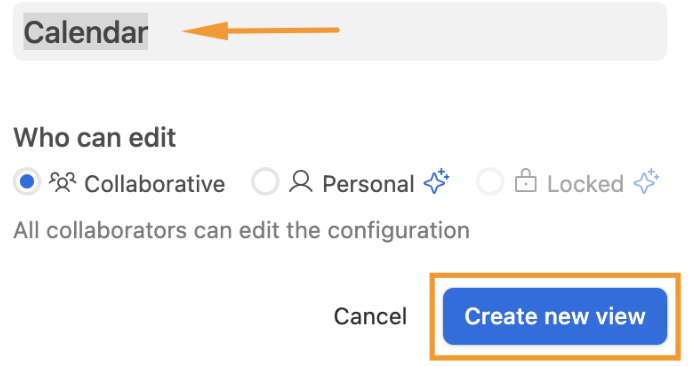
Next, choose a name for the new view. We suggest “Calendar.” Then you can select who can see and edit this new view:
- If you select “Collaborative,” everyone can both edit and view this view;
- If you select “Personal,” only you can both edit and view this view.
Once you’ve made your choice, click on “Create new view.”
Step 4.3: Choose a date field
In order for Airtable to show a content piece on a given date in your calendar view, it needs to know which field should be used to do so. Typically, this will be the “Due date” you created earlier in this process.
To select the date field, click on the dropdown list and select the field. Then click on “Done.”

Step 5: You’ve created a content calendar in Airtable
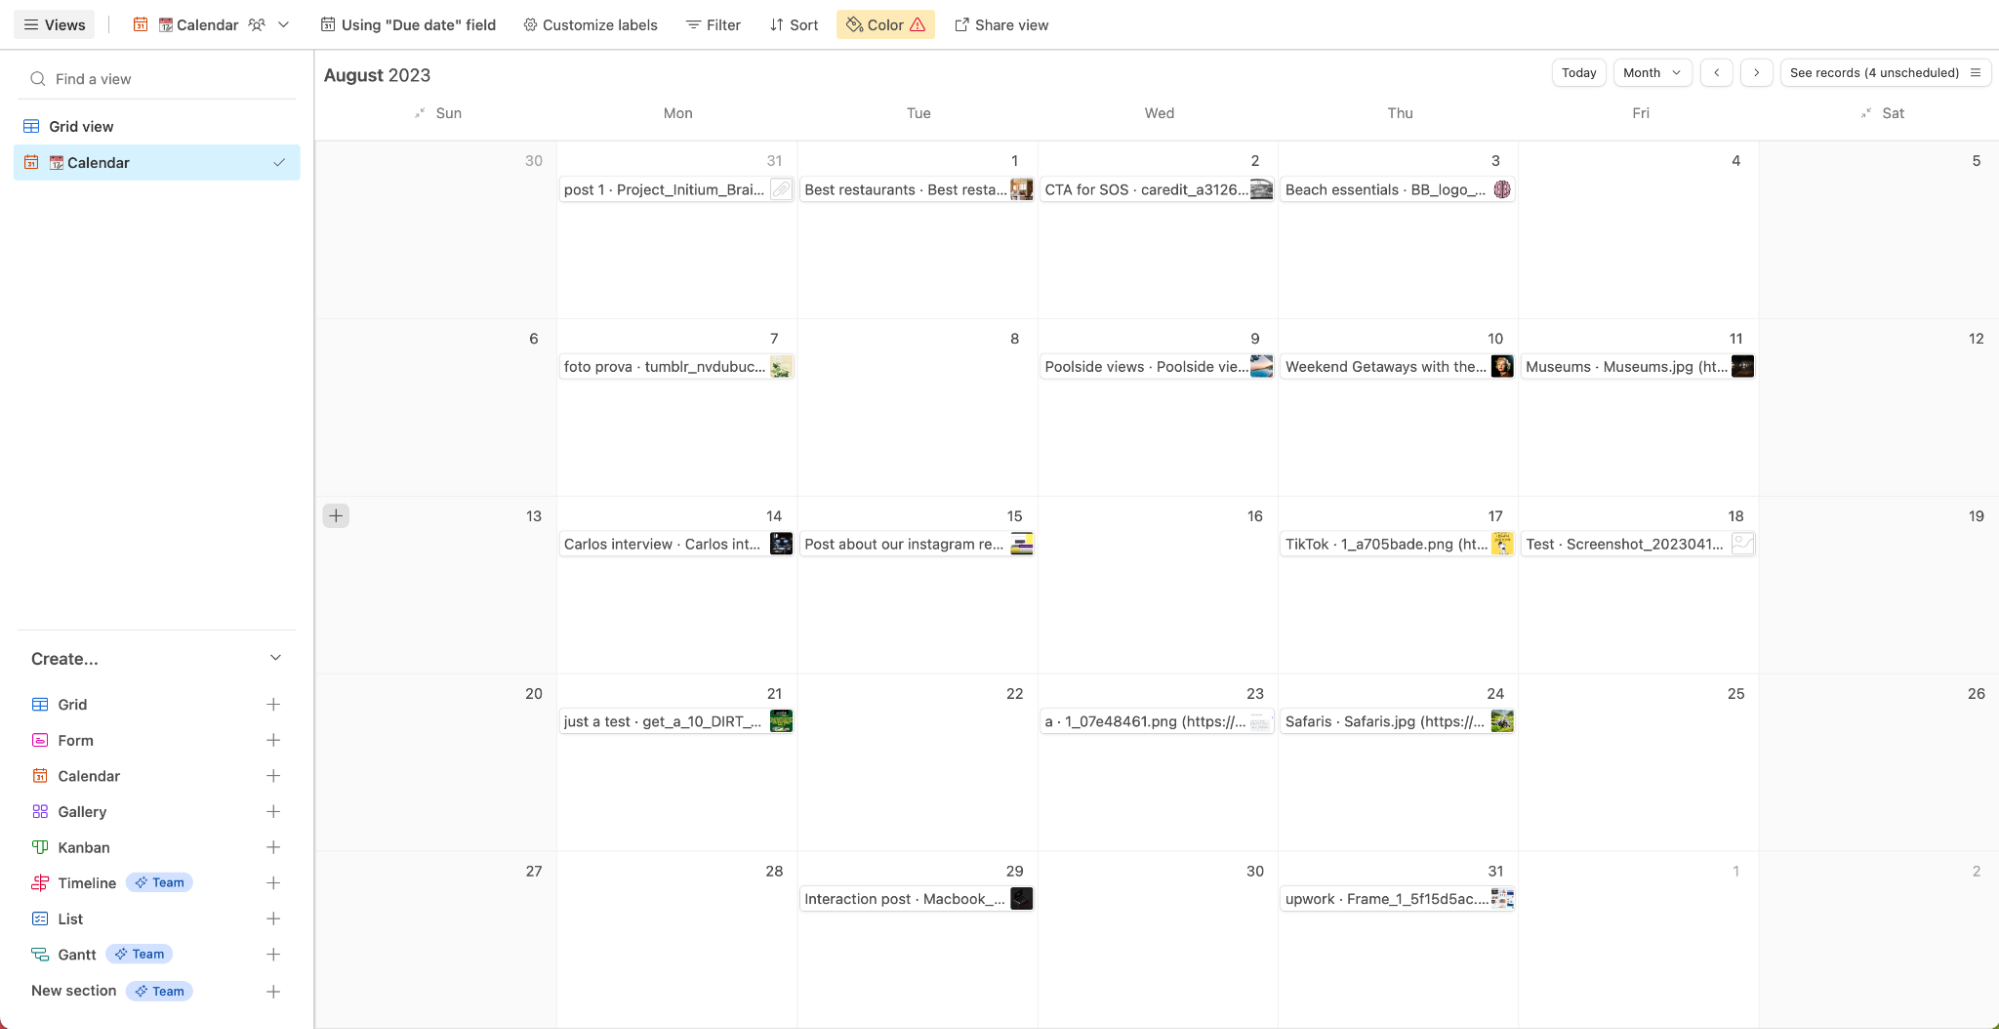
You’ve now created a content calendar in Airtable. You can see all your content pieces laid out in a calendar format, making it easy to visualize your content schedule.
How to create a content calendar in Airtable, using Softr
Softr simplifies the process of creating a content calendar in Airtable, plus you can take advantage of a higher degree of customization, dedicated permissions, and a shareable app your whole team can use. In this section, I'll guide you through setting up a content calendar on Softr backed by the data management capabilities of Airtable.
You have three ways to get there: describe the calendar you want to the AI Co-Builder and let it generate the app for you, start from Softr's ready-made content calendar template, or build the interface manually from a blank canvas. The steps below walk through the template path, since it's the quickest way to see the full setup, but the AI Co-Builder can skip most of these steps if you'd rather start from a prompt.
Step 1: Sign in or register to Softr
First, you will need to log in to Softr. If you don’t have an account, you can sign up to Softr for free.
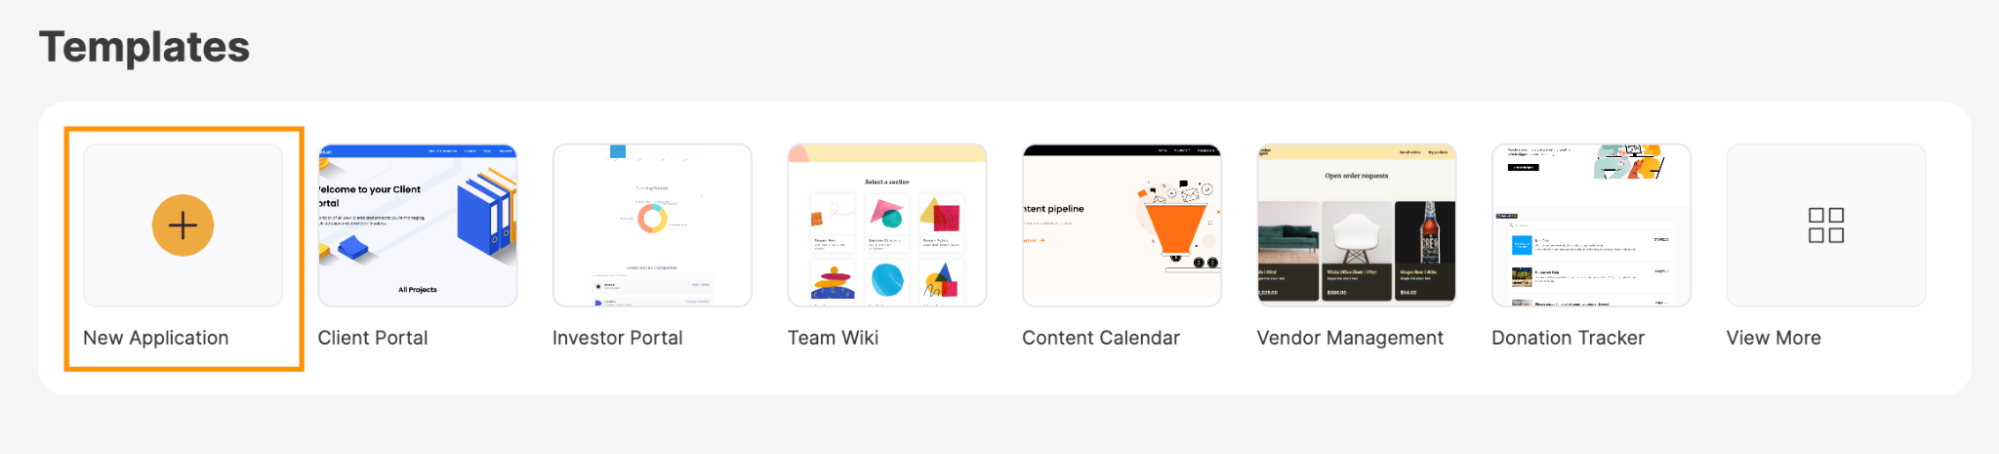
Step 2: Click on “New Application”
With your Softr account set up, it's time to create a new application where your content calendar will be housed.
On your Softr dashboard, locate and click on the "New Application" button. If you'd rather skip templates entirely, you can instead choose “Generate with AI” and describe your content calendar in plain language. The AI Co-Builder will build the database structure, calendar view, and user permissions for you in a few minutes.
Step 3: Search for content calendar template
Softr offers a content calendar template to simplify the process of creating this kind of calendar. To find this template, use the search bar to search for “content calendar.” Then click on the template with that name.

Step 4: Click on “Use Template”
You can now learn more about the template, including its features and functionalities. Once you’re ready, click on the “Use Template” button.

Step 5: Select Airtable as the data source
Once you've selected your template, you'll be prompted to choose a data source. If you want your content calendar to be available in Airtable, select “Airtable” from the available options, and click on “Continue.”

Step 6: Connect to Airtable
Now, you have the choice between using a personal access token or your API key. Follow the steps on the screen or the next few sub-steps below to get your personal access token.

Step 6.1: Go to the Airtable Developer Hub
In Airtable, click on your icon in the top-right corner and then click on “Developer Hub.”

Step 6.2: Create a new token
Click on the “Create new token” button.

Step 6.3: Set your personal token
Name your token and set the scope according to the instructions from Softr.
On “Scopes”, select:
- “data.records:read;”
- “data.records:write;”
- “schema.bases:read;”
- “Schema.bases:write.”
On “Access” select the database you created or other generic options that grant access to all your databases.

Step 6.4: Copy your token
A popup will appear with your new personal access token. Copy it.

Step 6.5: Paste your token on Softr
Head back to Softr, paste your token to the relevant field, and click on “Continue.”

Step 7: Copy the Softr template to Airtable
In order to use Softr’s content calendar template for Airtable, click on “Copy base to your Airtable account.”

Step 8: Add your data to your content calendar in Airtable
On your newly created base, you will have a “Content pipeline” table where you can add the content or ideas you already have.
In each row, insert a content piece, by clicking on each cell and typing or pasting the text or uploading your documents and images.
Step 9: Customize your content calendar
Softr offers a wide array of customization options to enhance the visual appeal and functionality of your content calendar. Let’s look at a few examples.
Step 9.1: Adjust the colors, fonts, and spacing
With Softr, you can personalize the look of your content calendar. You can either choose the colors, fonts, and spacing you prefer, or choose those that match your brand-specific elements.
To make these adjustments, click on “Theme” on the left sidebar.

Step 9.2: Explore the filters
Optionally, you may choose to see content on your content calendar that was written by an author, has a certain status, or any other field from your Airtable base. To do so, on the right sidebar, click on the Content tab, and write the airtable field under “INLINE FILTERS.” If you'd rather not configure filters one by one, you can also describe what you want to see (for example, "let editors filter by status and author") to the AI Co-Builder and have it set up the filters for you.

Step 9.3: Set up the search bar
Though it’s not a requirement, you can also configure the search bar, so that you and your teammates can use it to find a specific content piece. To do so, in the Content tab on the right sidebar, click on the field under “Search by” and choose the Airtable field you wish to use.

Step 9.4: Define what’s displayed on the pop-ups of your content calendar
In your content calendar, when you click on any given content piece, a pop-up will open, so that you can learn more information about it. You can personalize what information is shown on these pop-ups, by clicking on “Add field”, choose the Airtable field you want to be shown and give it a title.

Step 10: You now have a customized Airtable content calendar
By following the steps above, you've successfully created a content calendar in Airtable, enhanced by the customization capabilities of Softr. This combination ensures that not only is your data well-organized and accessible, but it's also presented in a user-friendly and visually appealing manner. Whether you're planning content for the next month or the entire year, you now have a dynamic tool that can adapt to your evolving content strategy.
This same combination scales well beyond a simple editorial calendar. Marketing agency Strupek built a full content experience dashboard on Softr and Airtable, giving clients a single login to review campaign calendars, approve creative, and see performance reporting, and cut their operational costs by 58% in the process.
How to create a content calendar in Airtable, using a template by Airtable
As an alternative to the previous methods, you can use Airtable’s content calendar template.
Step 1: Sign in or sign up to Airtable
Before you start creating your content calendar in Airtable, you need to have an account. If you don’t have one, you need to sign up for Airtable. However, if you already have an account, sign in to Airtable with your login credentials.
Step 2: Create a new Airtable base
On your Airtable workspace, you will find a "Create a base" button. Click on it.
Step 3: Choose Airtable’s content calendar template
On the sidebar on the right side, use the search bar to search for the content calendar template, by typing “content calendar.” Once you've found it, click on it.
This template will load on the calendar view.

Step 4: Add your data to your content calendar in Airtable
On your newly created base, you will have a “Content pipeline” table where you can add the content or ideas you already have.
On the left sidebar you’ll have a view named “2. See all your content in one place”, where you can easily add your content by inserting on each row a content piece. To do so, click on each cell and type or paste the text or upload your documents and images.
Step 5: You now have a content calendar in Airtable
Congratulations on setting up your content calendar in Airtable! With this tool in hand, you've taken a significant step towards streamlining your content planning and management process.

Pick the setup that matches how your team works
If it's just you tracking a handful of posts, Airtable's own calendar view or template gets you there in minutes. Once other people need to see, edit, or approve content, that same base benefits from a dedicated app on top: separate permissions for writers, editors, and clients, a shareable link instead of shared Airtable seats, and a design your team actually enjoys using.
Start from the content calendar template if you want to see the full setup, or describe your content calendar to the AI Co-Builder and adjust the details once it's built. Either way, your Airtable base stays the single source of truth underneath. :::
Frequently asked questions
What's the fastest way to build a content calendar in Airtable?
Can I access my Airtable content calendar on mobile?
Do I need to know how to code to build a content calendar with Softr and Airtable?
What's the difference between Airtable's calendar view and a Softr-powered content calendar?
Can I switch my content calendar's data source from Airtable to Softr's native database later?