[.blog-callout]
TL;DR
- Squarespace doesn't have a native client portal feature, but you can approximate one with password-protected blogs or the Member Areas add-on.
- Protected blogs are quick and cheap, but clients share a password and can only interact through comments.
- Member Areas give clients individual logins, but you're capped at 10 member areas per site, even on the priciest plan.
- For a portal with real permissions, databases, and automations, keep your marketing site on Squarespace and pair it with a dedicated portal builder like Softr, starting from our client portal template. [.blog-callout]
Squarespace is a no-code website builder. You can use it to build blogs, static websites, portfolios, online stores, and, with some workarounds, client portals.
Client portals allow your customers to view all their projects in one place. With a Squarespace client portal, you can give clients access to specific pages where they can see task progress, documents, and invoices, and communicate with your team.
There are two main methods to create a Squarespace client portal:
- Create protected blogs with data about projects and share the password with your clients.
- Create a member area for each of your clients and add all pages related to their projects to their own member area.
In this guide, we'll walk through both methods step by step, weigh their pros and cons, and show you a third option: keeping Squarespace for your marketing site while a dedicated tool handles the portal layer. If you'd rather skip the workarounds entirely, you can start from our free client portal template.
How to create a client portal in Squarespace with protected blogs
Cost: from $16/mo to $65/mo
Time: 1h
You can create password-protected blogs in your Squarespace website and share them with your clients. Then, you can create posts for projects, tasks, invoices, and anything else you want. Your clients can see all these posts on the blog page, and click on the posts they want for more details.
You need a Squarespace subscription to use this method. Here are the current prices for all the Squarespace plans:
- Personal: Monthly billing: $23/mo; Yearly billing: $16/mo
- Business: Monthly billing: $33/mo; Yearly billing: $23/mo
- Commerce basic: Monthly billing: $36/mo; Yearly billing: $27/mo
- Commerce advanced: Monthly billing: $65/mo; Yearly billing: $49/mo
In terms of picking the right plan, you can use the Personal plan for simple static sites. The Business plan suits you better if you require analytics or e-commerce, with a 3% transaction fee. The Commerce plan is better for online stores since it removes all transaction fees and includes e-commerce analytics. The Advanced Commerce plan adds advanced shipping and discount management, which is good if you use promotions or coupons.
Step 1: Create a new blog
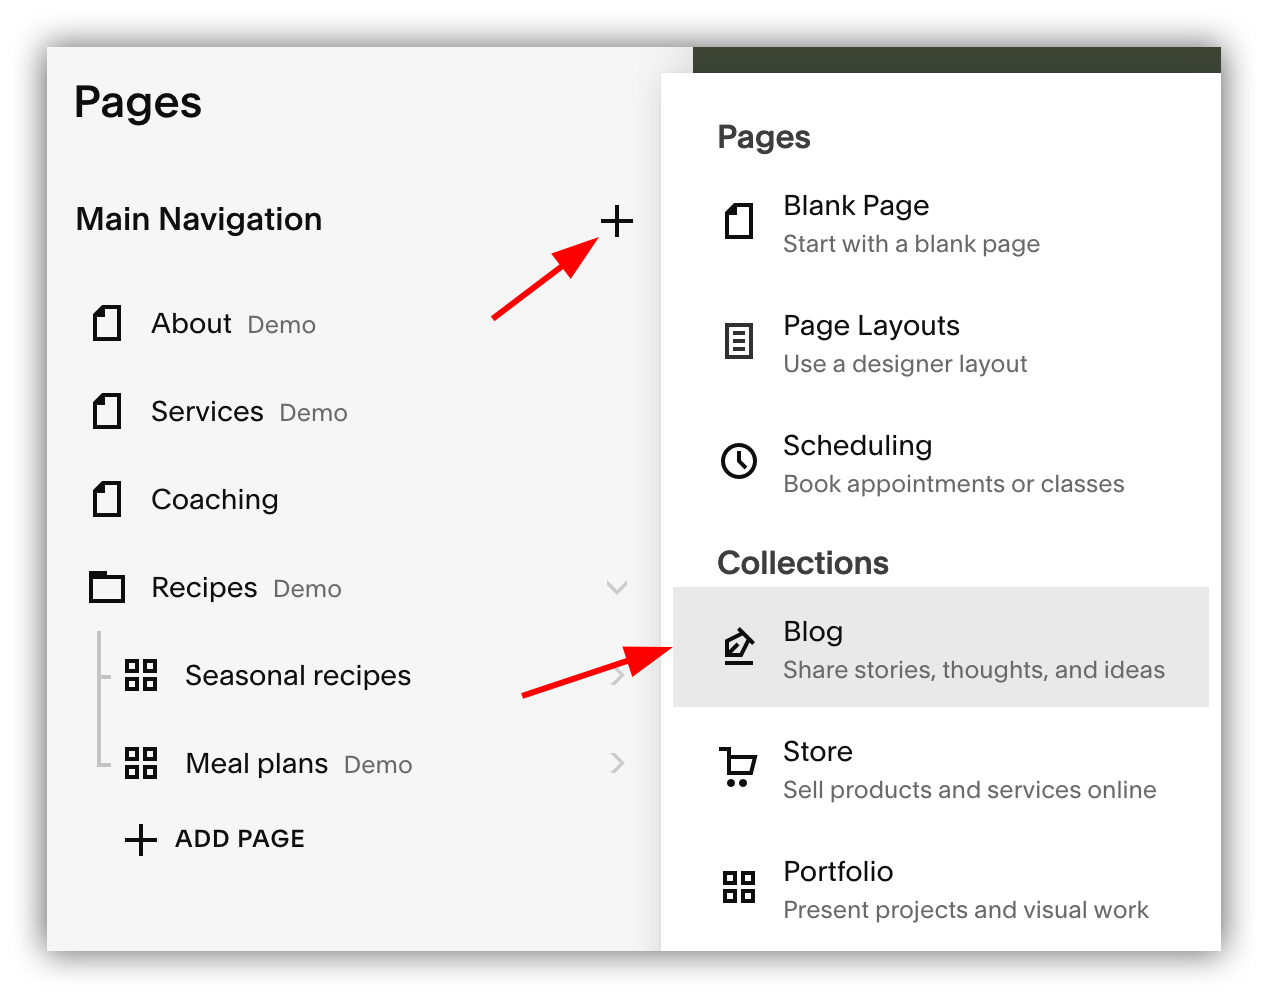
Go to the Squarespace pages builder and click on the + sign to add a new blog. This blog will hold all the content related to a specific client. Select any blog style you want, and you'll be redirected back to the pages list.
Step 2: Add password protection and a relevant name
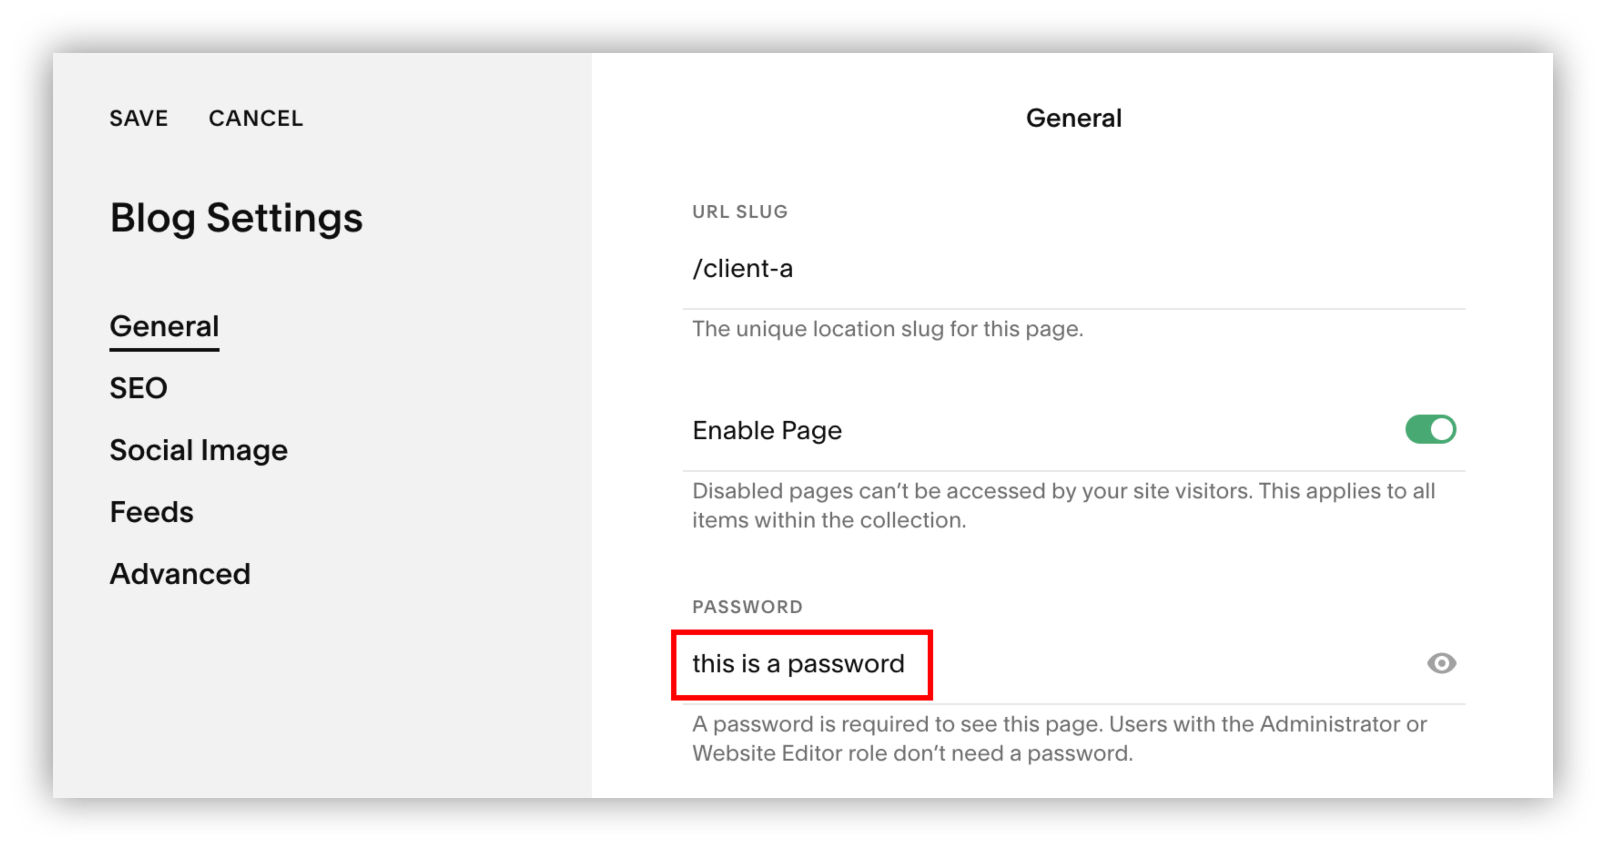
Assign a relevant name to your blog (such as "Client A") and click on the settings icon to set a password for the blog. This is the password your client will use to log into their client portal.
Step 3: Create posts for each client portal entry
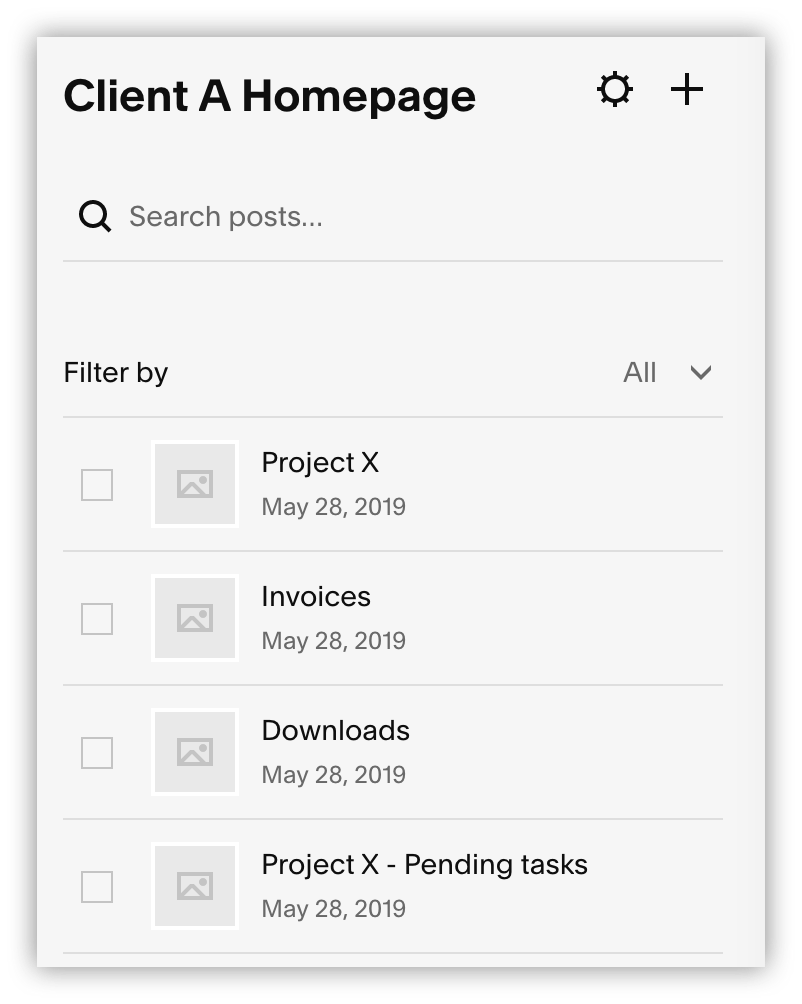
Add posts for each of your relevant reporting aspects. Make sure to enable comments under Settings > Options > Comments on the posts that should allow for client feedback.
Step 4: Send the blog link to your client
Send the blog link along with the password to your client. Don't forget to include usage and feedback instructions as well.
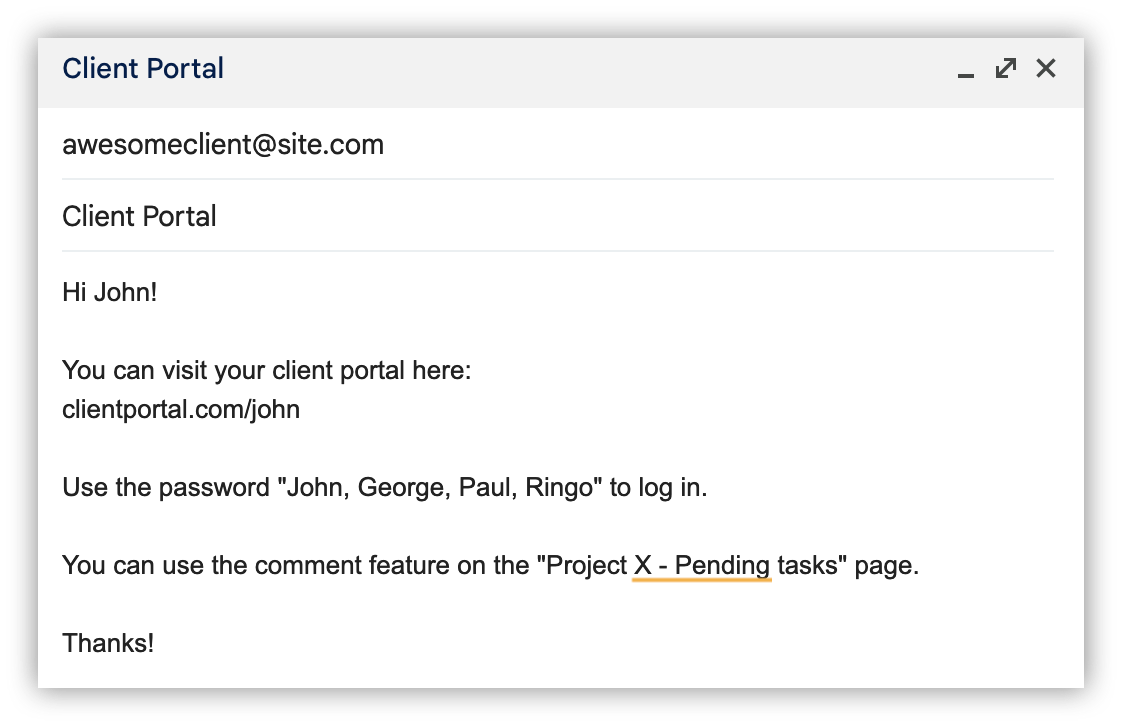
How to create a client portal in Squarespace with member areas
Cost: from $25/mo to $105
Time: 2h
If you want your clients to log in with their own accounts instead of using password-protected pages, you can achieve this through the use of member areas.
The member areas feature allows you to create either free memberships or charge customers for access.
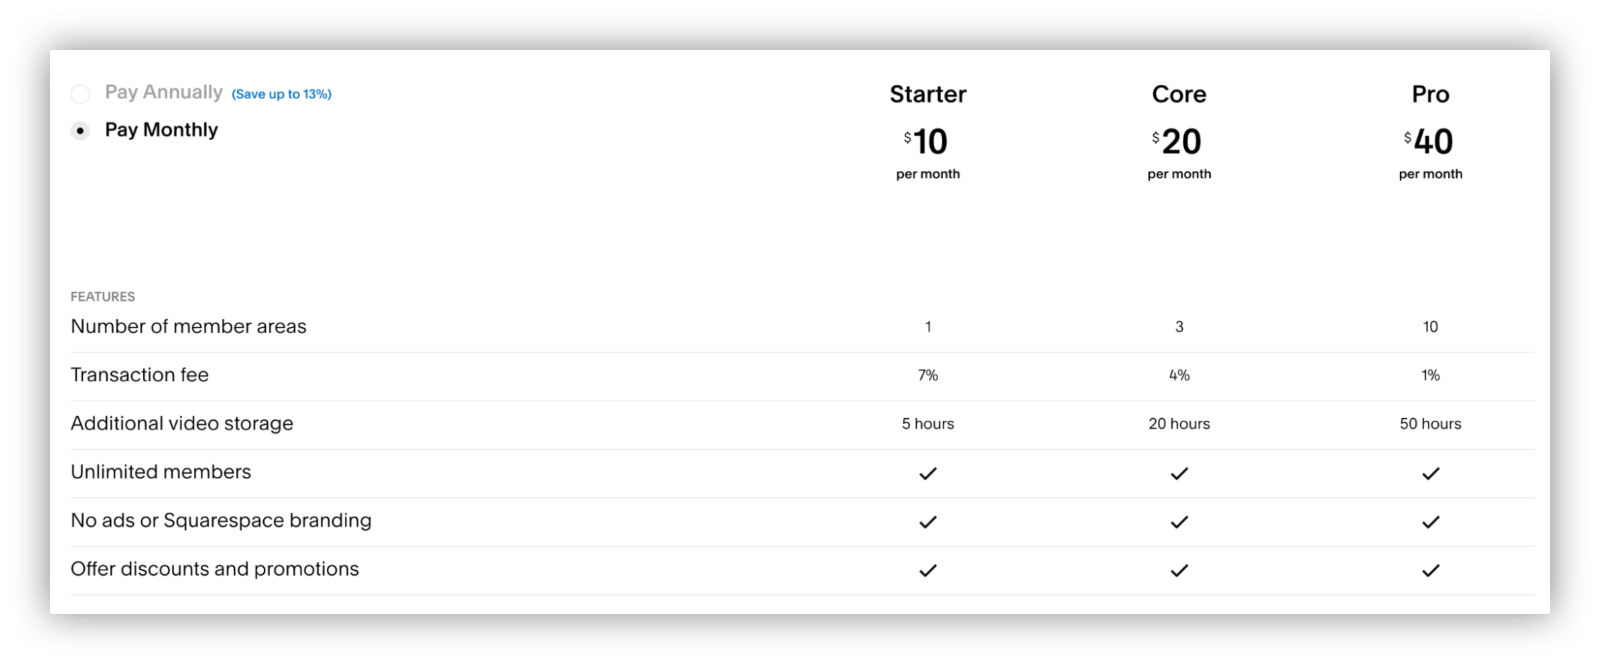
The member area feature is an add-on, so you need to pay for it on top of a Squarespace plan. Here are the membership options:
And here are the prices billed annually:
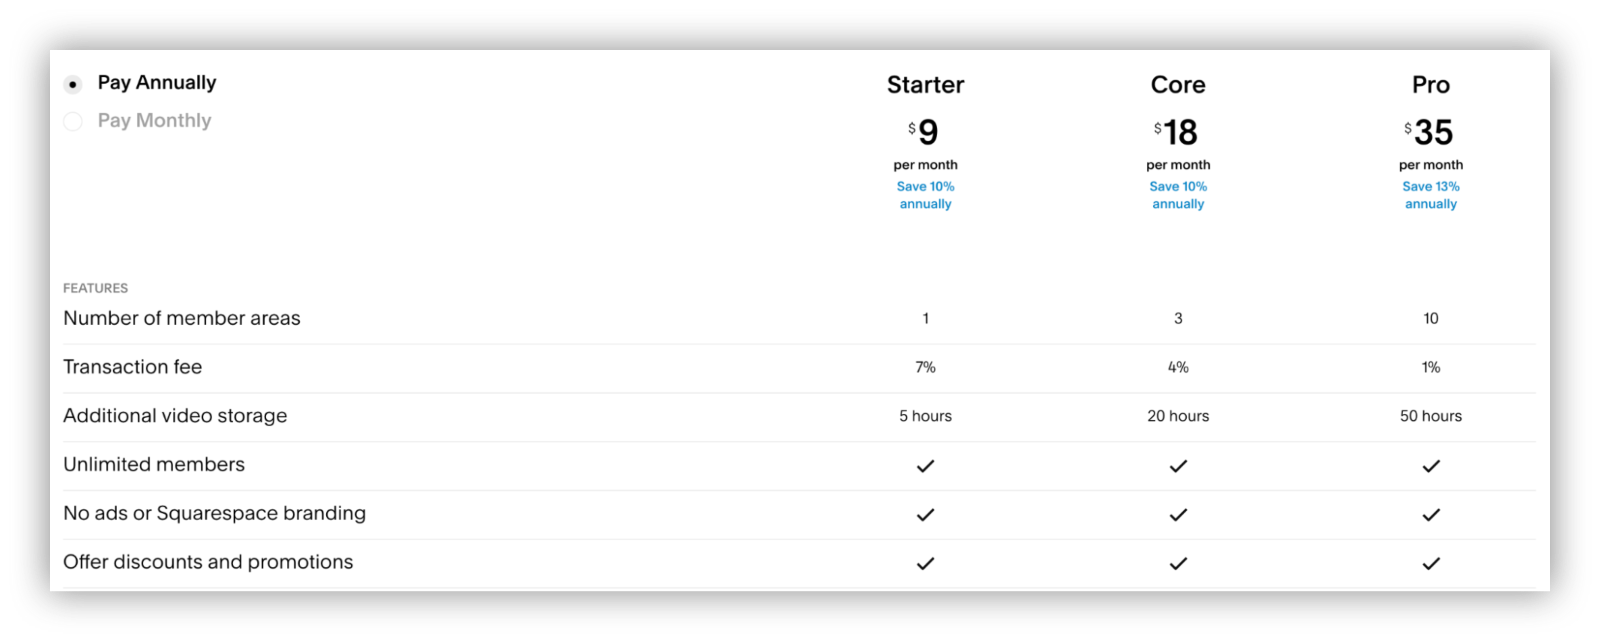
Note that even with this feature on the most advanced plan, you can't create more than 10 member areas. This means that you can only have up to 10 clients in each of your Squarespace client portals. If you need more member areas, you will need to create a new Squarespace website and sign up for the paid plan along with a new Member Area add-on.
Let's see how you can implement the member areas for a client portal.
Step 1: Enable Member Areas
Go to the main Squarespace page > Settings > Member Areas and check the box to enable it. This option prompts you to sign up for a plan. You can pick the one that better suits your project.
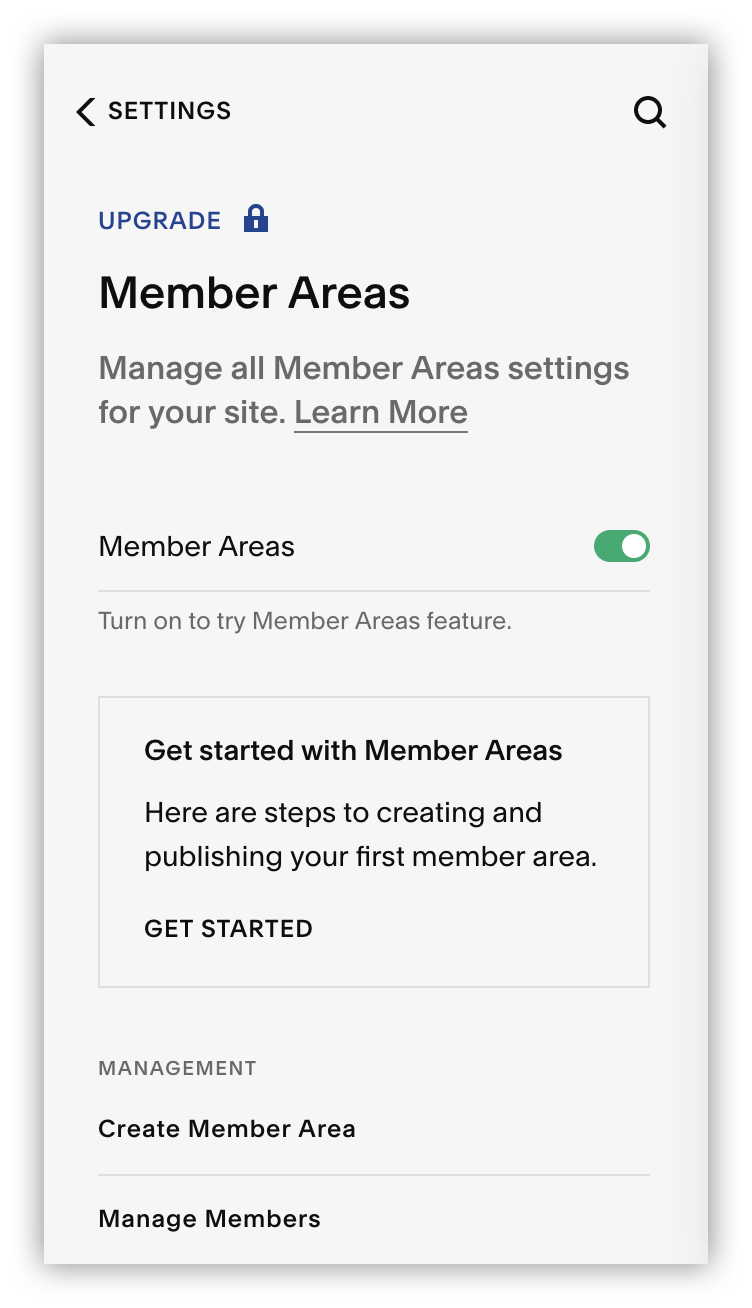
Step 2: Create a new Member Area
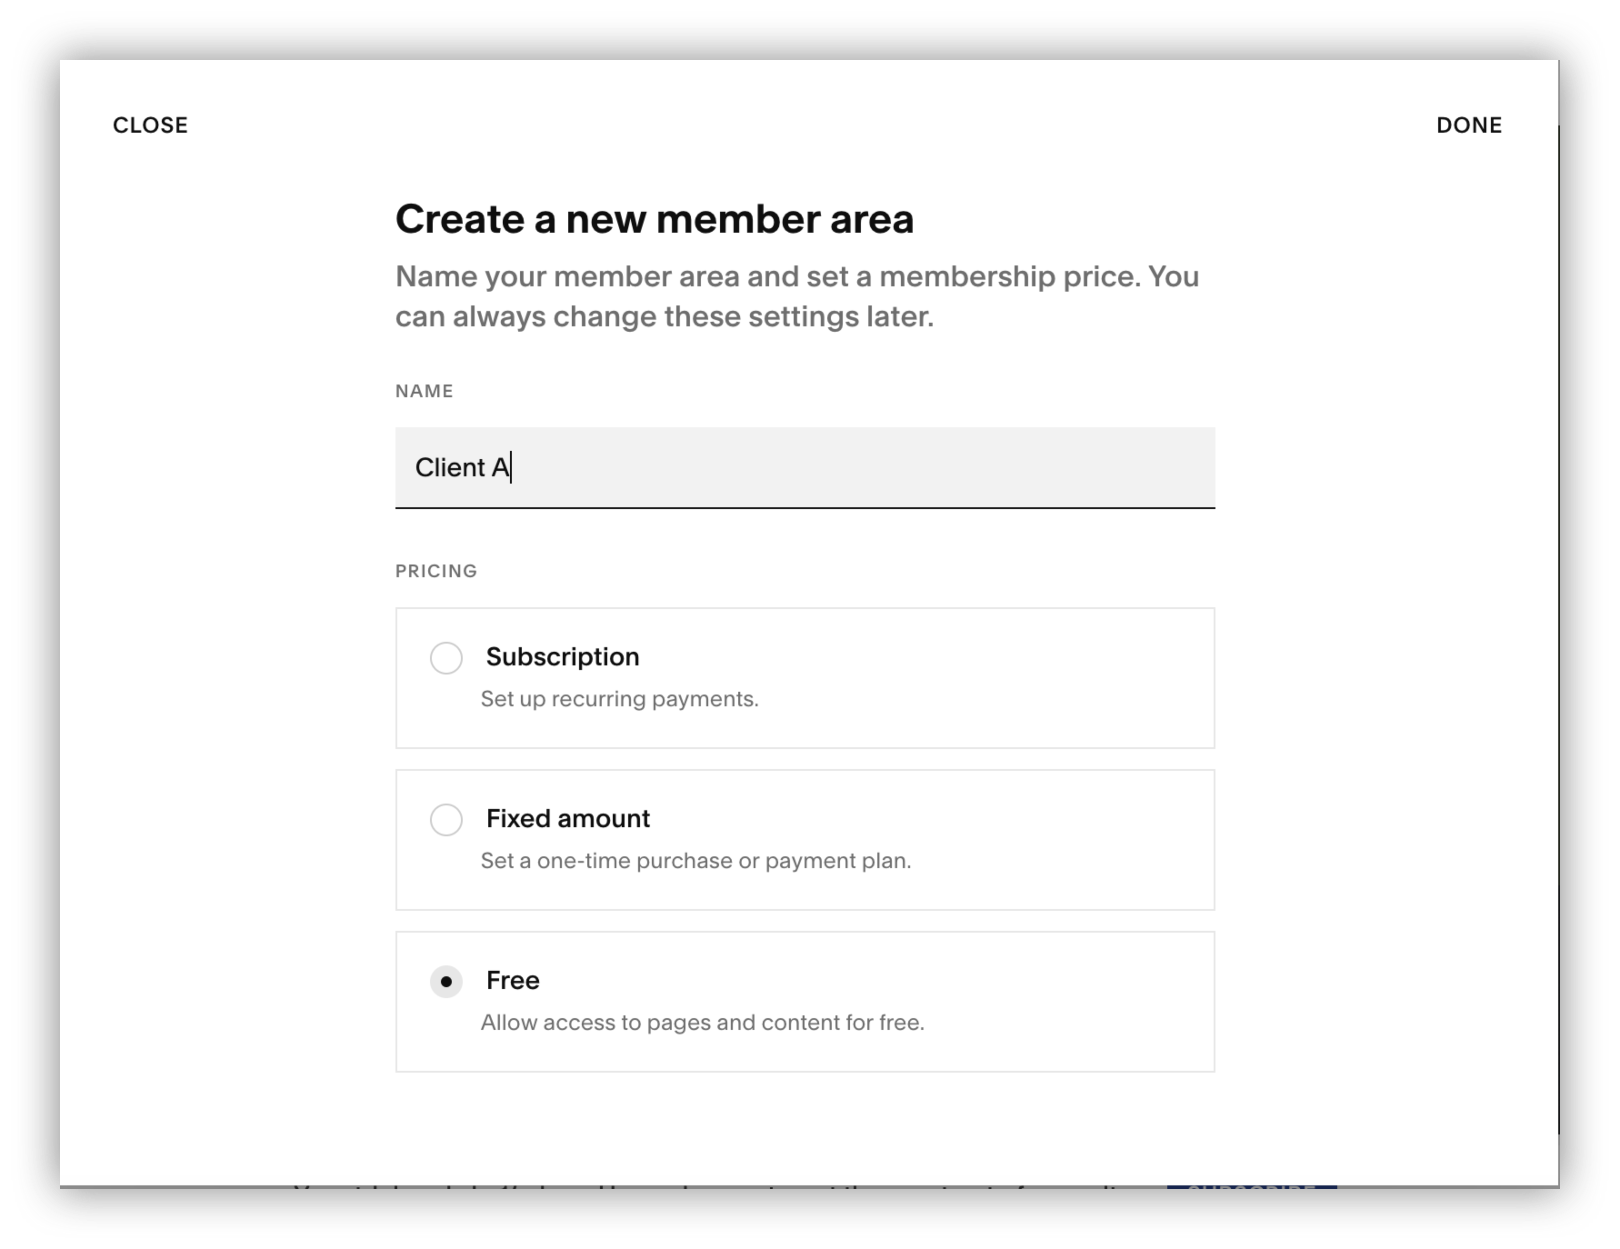
Click on Create Member Area to create a new membership level on your website. You need to create one member area for each of your clients to make sure they only see what is inside their own area.
Step 3: Create a protected blog
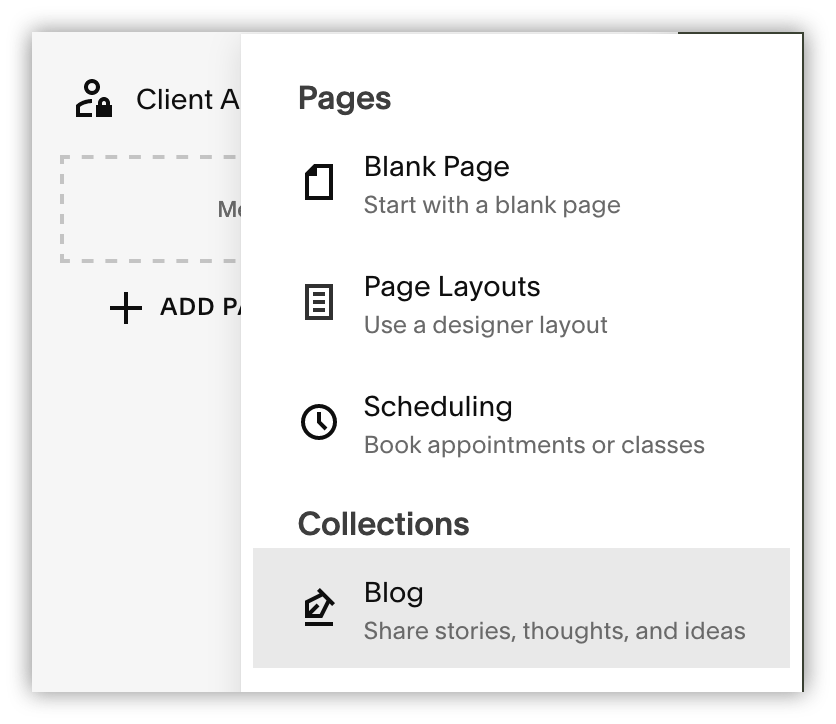
Use the plus icon to create a new blog inside your client's member area. This is the same method as what you saw in the previous approach, using a blog to hold all content for a specific client.
Step 4: Create posts
Create posts for each of the activities you want to track. Remember to enable comments on posts that need client interactions.
Step 5: Create a sign-up form
You need to create a form that adds members to that specific member area. Here is how you can do it.
Step 5.1: Create a new page outside the member area
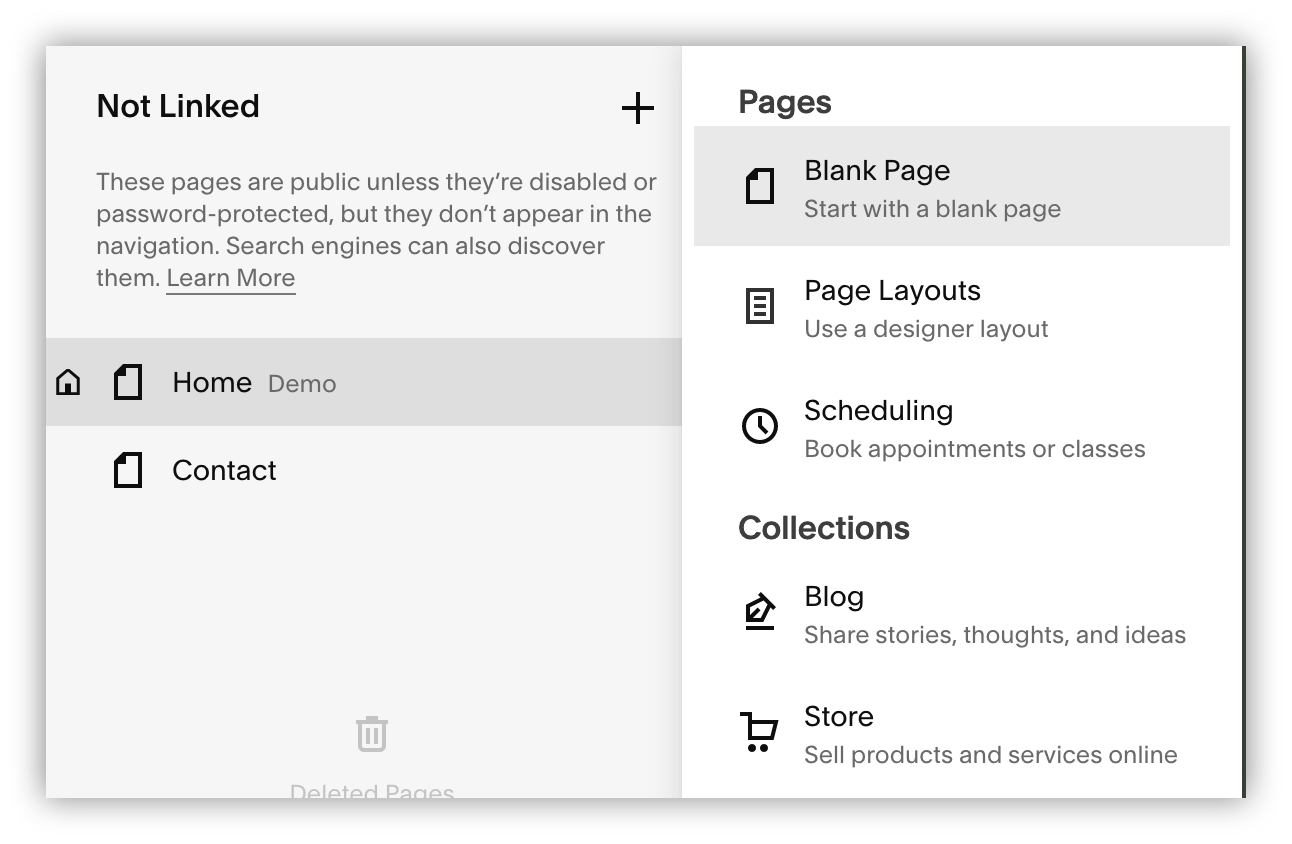
Add a new page to your website that is publicly accessible. You shouldn't add it to your main menu or link to it in any way; otherwise, you might get unwanted sign-ups to your client portal.
Step 5.2: Add the member signup form block
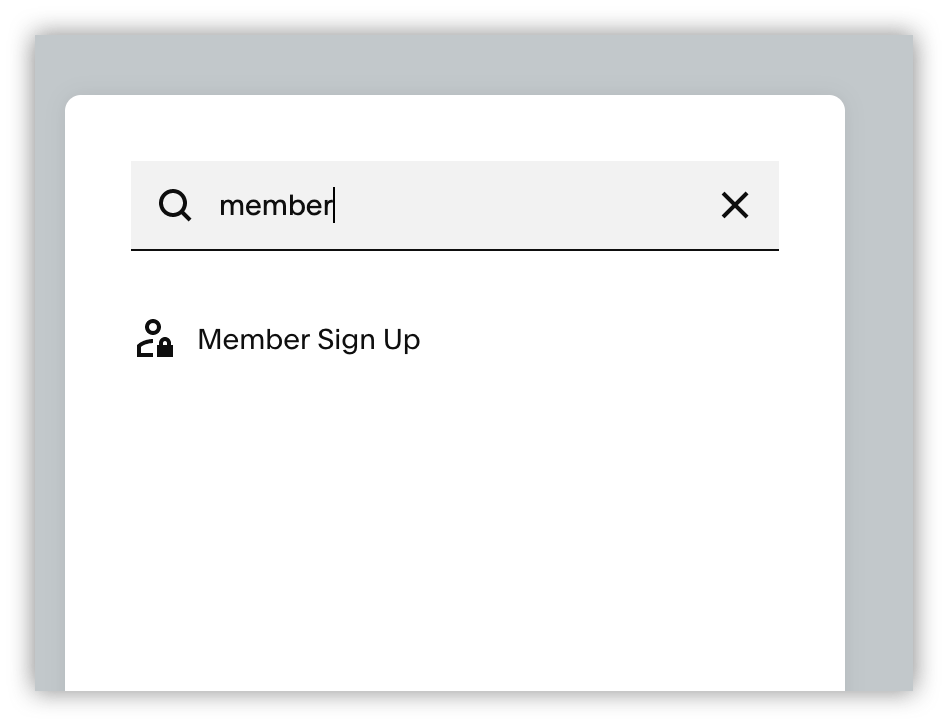
Click on edit, add a blank section, and then add a Member Sign Up block to it.
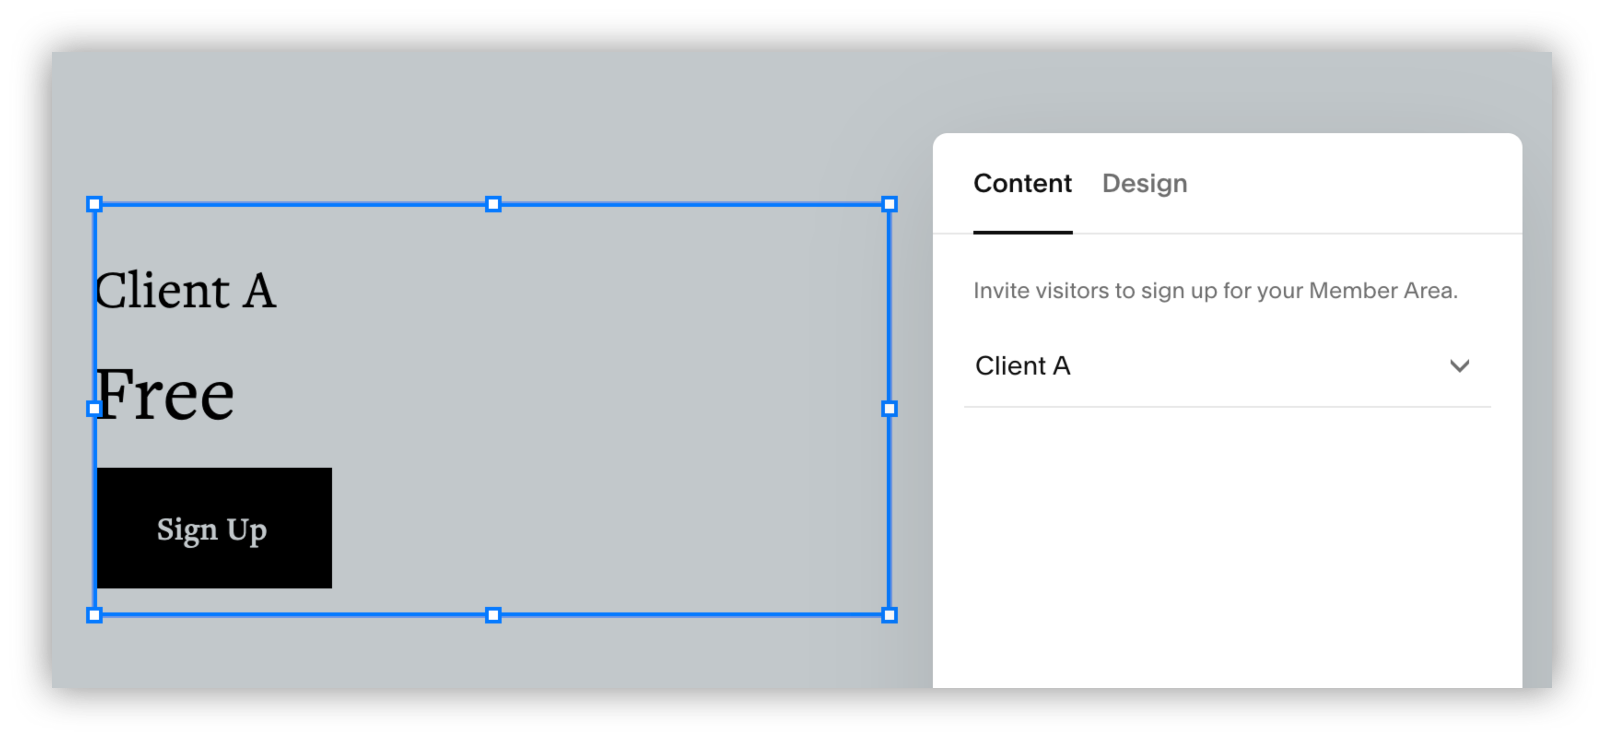
Step 5.3: Pick the Member Area for the form block
Edit the sign-up form to make sure you have the correct member area assigned to it:
Step 5.4: Customize the design elements
Edit the page elements in any way you want. Once you are ready, publish it.
Step 6: Send form to customers
Send the sign-up page link to your customers via email. Make sure to include instructions about their client area and how they can use it.
Step 7: Manage members
Occasionally, check the members who signed up to your client portal to make sure you don't have any unwanted signups.
Positive points of using a Squarespace client portal
If you already have a Squarespace website, this can be a free solution for creating client portals. You can use protected pages and add blogs to each of your clients.
In addition, Squarespace includes a lot of starter templates that you can use to create a good-looking client portal with just a few clicks.
Furthermore, the members management section can be used to create newsletters. This can give you a great way to communicate with clients in bulk, without relying on external services.
Negative points of using a Squarespace client portal
If you don't have a Squarespace website, Squarespace can be a pricey or even an inviable solution. You can only create 10 member areas with the most expensive plan, which can be a low bar for a lot of businesses.
Your clients will be limited to interacting with your client portal using the comments section of your posts. They might not be able to send feedback directly on tasks or even send content (such as attachments) to you using the client portal.
But there's a big hidden limitation on the workflow itself as well. You need to do it in the ways that Squarespace wants you to, and you can't really change it.
You can't manually create members or automatically sign up users who buy a product. Only members can create their own accounts.
A more flexible option: keep Squarespace for the site, build the portal in Softr
Squarespace is great at what it was built for: your marketing site, portfolio, or online store. The client portal layer is a different job, and that's where Softr comes in. You build the portal in Softr, then either link to it from your Squarespace navigation (a "Client login" button pointing to your portal's URL) or embed it in a Squarespace page with a code block. Your clients get one seamless experience, and you stop fighting member area limits.
Softr gives you the full stack a portal actually needs: the interface builder for your client-facing pages, native Softr Databases to store projects, tasks, and invoices, and Softr Workflows to automate things like notifying a client when a deliverable is ready, triggered directly by buttons and forms in your portal. If your data already lives elsewhere, Softr connects to Airtable, Google Sheets, HubSpot, and 21+ data sources in total, including a REST API connector.
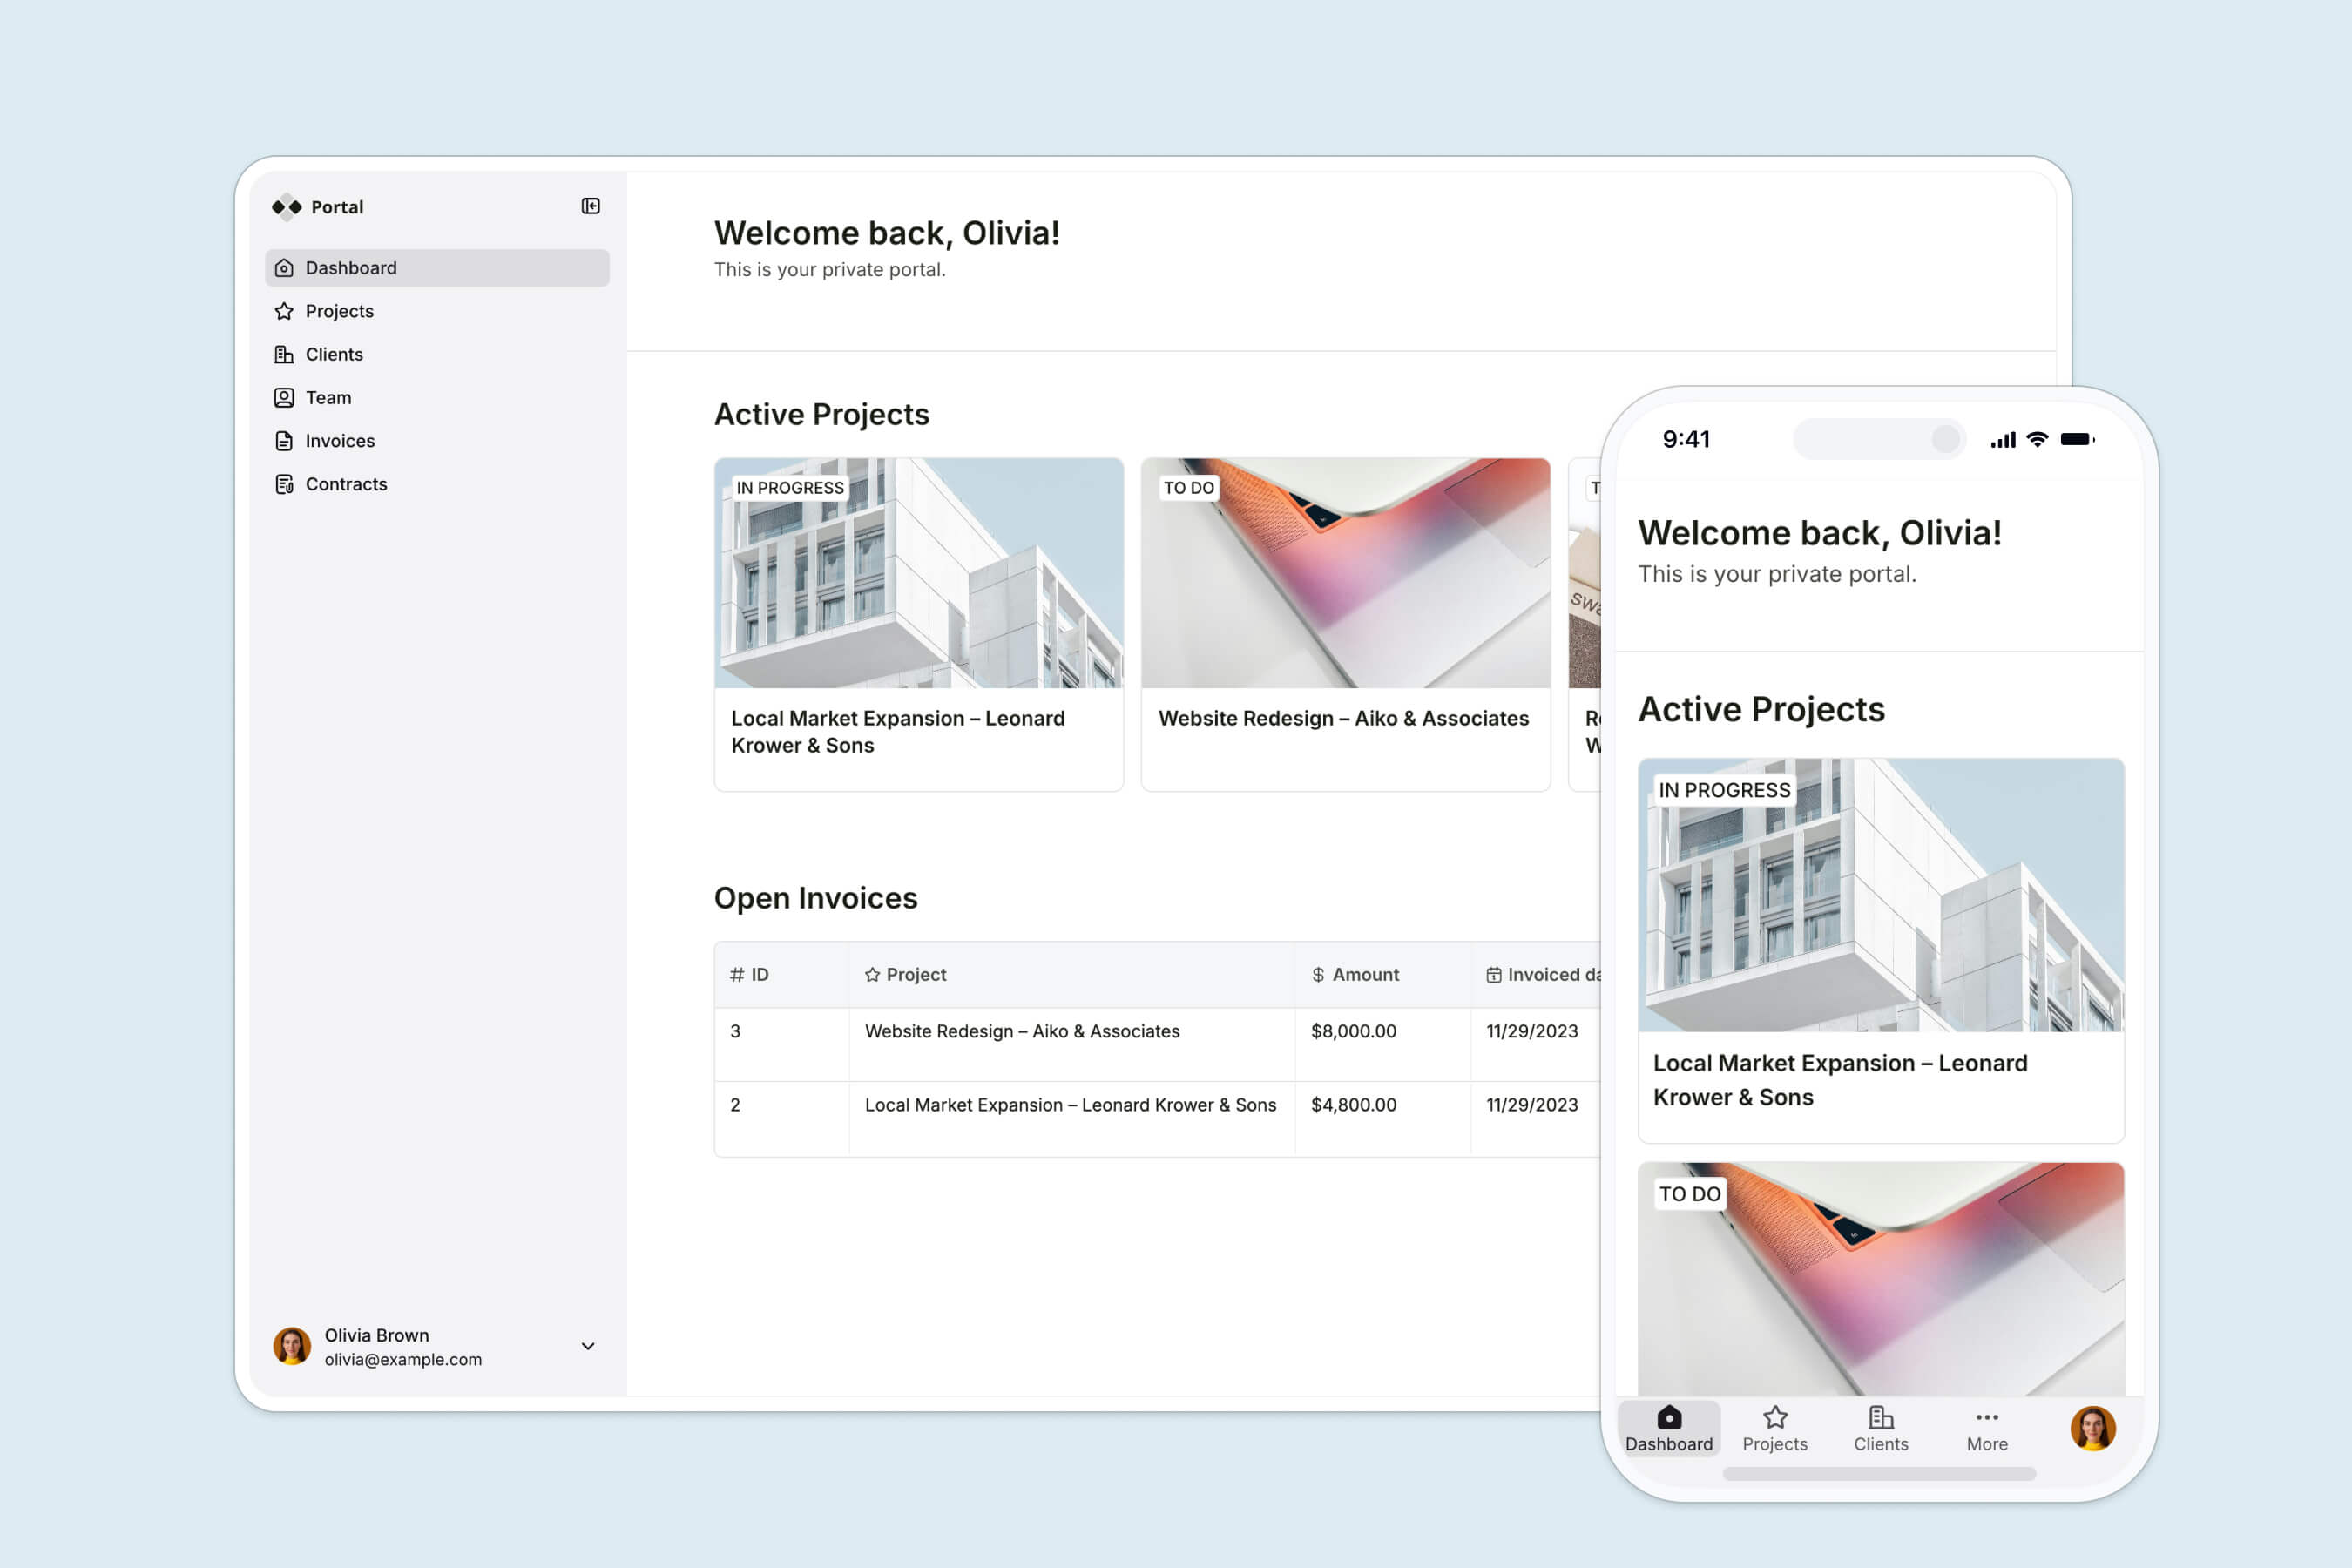
The fastest way to start is to describe your portal to the AI Co-Builder and let it generate the app, database, and pages for you. You can also start from our pre-built client portal template or build from scratch if you prefer full control. Once you're in the editor, you move freely between AI-assisted and manual editing.
Permissions are the backbone of client access
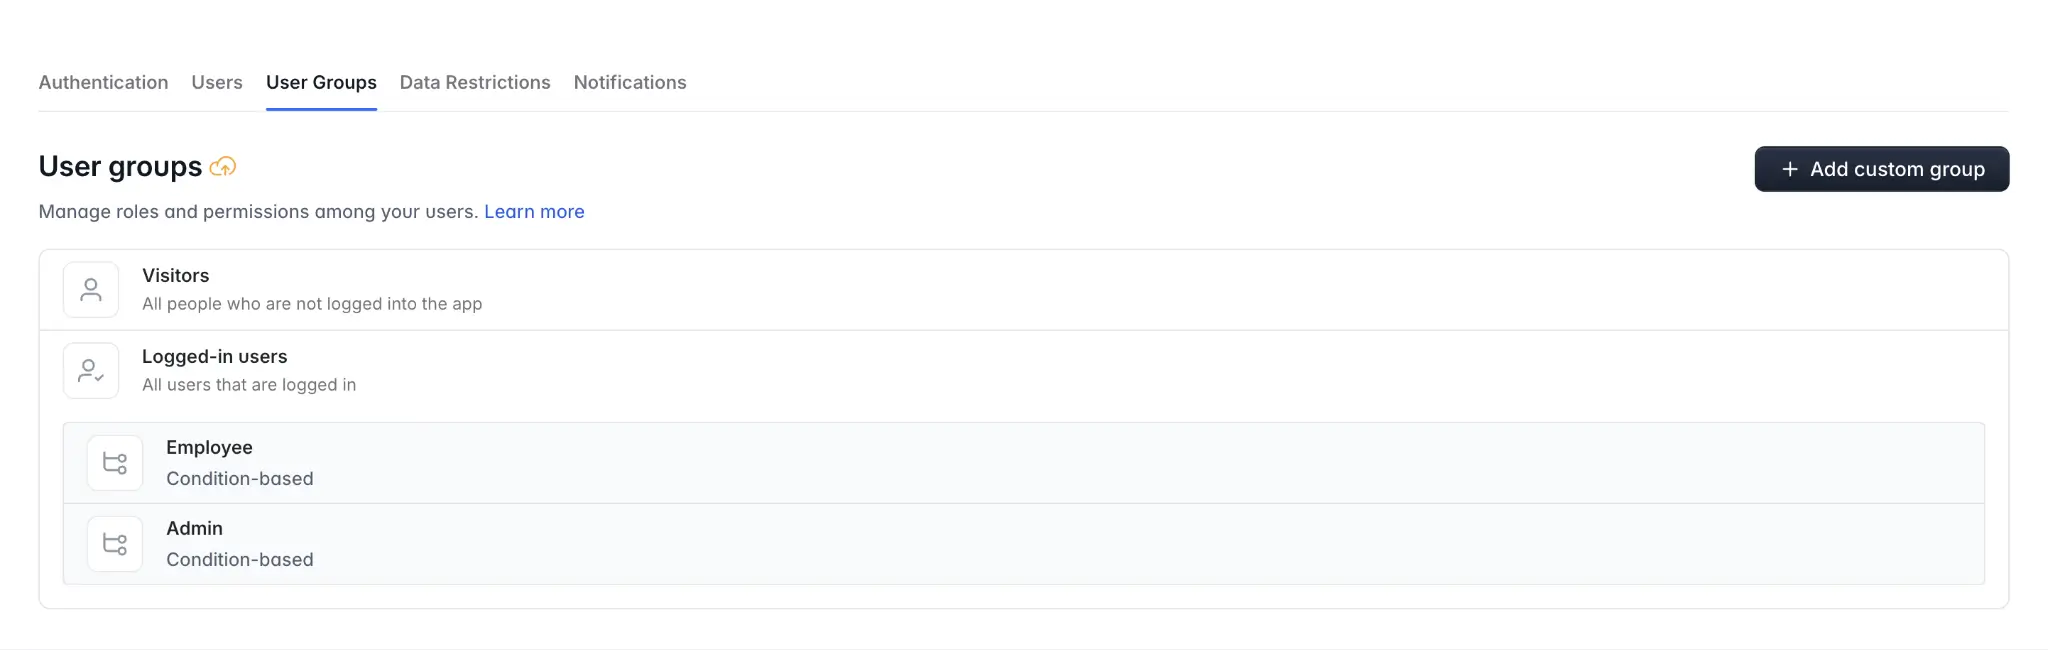
The biggest gap in the Squarespace workarounds is access control, and it's where Softr is strongest. With users and permissions, each client gets their own login, and you define user groups (clients, your team, admins) with conditional rules. A client tagged to "Company A" in your database automatically sees only Company A's projects, documents, and invoices, on the same pages, without you duplicating a blog or member area per client. You can also set visibility per block, so an internal notes section stays hidden from clients entirely.
This is what it looks like in practice for teams that made the switch:
"I like how easy Softr is to use, yet it is flexible enough to cover all of the different use cases that we want. It only took a couple of days to build the entire portal, including permission leveling and custom workflows." - Casey H., Advisor, G2 review
And unlike the comment-only interaction in Squarespace, clients can actually do things in a Softr portal: submit requests through forms, approve deliverables with action buttons, and upload files directly to your database.
"Managing external partners through emails and spreadsheets is a nightmare. A portal allows you to only surface the information that is relevant to them and make approvals on the fly." - Shiran Brodie, Head of Marketing at Softr
For a sense of what's possible at scale, accounting firm Officeheads built the first version of its client portal in under two days and now serves 50+ SMB clients from one app, with per-client user groups instead of one member area per client.
Pick the setup that matches your client list
If you have a handful of clients and modest needs, Squarespace's protected blogs or Member Areas can get you through. The moment you pass 10 clients, need real logins with granular permissions, or want clients to submit and approve work rather than just read posts, you've outgrown the workaround. Keep Squarespace doing what it does best, and let a dedicated portal handle the rest.
Ready to try it? Start from our free client portal template, connect your data, and share a working portal with your first client today.
Frequently asked questions
Does Squarespace have a client portal feature?
Does Squarespace allow client login?
How many clients can I support with Squarespace Member Areas?
Can I embed a Softr client portal in my Squarespace site?
What should a good client portal include?