How to master the client onboarding process (+ free template)


[.blog-callout]
TL;DR
- Client onboarding is everything that happens after a contract is signed: collecting information, sharing tools and documents, and setting expectations.
- A strong process is structured, consistent, trackable, and repeatable, so your team isn't reinventing the wheel with every new client.
- The 6-step process below covers pre-onboarding setup, welcome and kickoff, delivering materials, milestone tracking, handoff, and review.
- A client onboarding portal centralizes all of it: intake forms, documents, timelines, and progress, in one branded, secure space instead of scattered emails and spreadsheets.
- You can describe the portal you need to Softr's AI Co-Builder and get a working version in minutes, or start from the free template and customize it yourself. [.blog-callout]
You've closed the deal, and now comes the crucial next step: delivering a smooth, professional experience that builds trust from day one.
But if you're like many small teams, you're still piecing resources and tasks together with email threads, shared drives, and half-finished checklists. That makes onboarding slower and more stressful than it needs to be.
"Managing external partners through emails and spreadsheets is a nightmare. A portal allows you to only surface the information that is relevant to them and make approvals on the fly." - Shiran Brodie, Head of Marketing at Softr
A strong client onboarding process with a smart system behind it can make all the difference. In this guide, we'll walk you through a proven six-step client onboarding process, how to quickly build a branded portal for your clients, and the best ways to keep the onboarding process consistent.
What is client onboarding?
Client onboarding is the process of getting a new client set up and ready to work with your team. It covers everything that happens after a contract is signed: collecting information, sharing tools and documents, and making sure everyone knows what to expect.
A strong onboarding process is:
- Structured: Everyone knows the steps and who owns what.
- Consistent: Each client gets a high-quality experience.
- Trackable: Teams can see progress and flag issues early.
- Repeatable: You're not reinventing the wheel every time.
A solid onboarding process gives your team an organized way to give clients exactly what they need to start working with you. You can document the process in a checklist, or, even better, build a no-code portal that lets both your team and your clients keep track of onboarding resources, tasks, and timelines (more on that below).
Here's what happens as a result of a strong onboarding process:
- Faster time to value: Clients get what they need sooner and start seeing results faster.
- Productive teamwork: Clear steps and shared tools help your internal team stay aligned, so nothing gets missed or duplicated.
- Less friction: Defined roles, expectations, and communication channels reduce back-and-forth and prevent delays.
- Stronger retention: A well-run onboarding builds trust early on, making clients more likely to stick around long-term.
The 6-step onboarding process
If onboarding feels messy, it's usually because the process isn't clearly defined or easy to follow. These practices help you cut confusion, speed things up, and give clients a more consistent experience, without adding more work for your team.
Step 1: Pre-onboarding setup and collecting documents
Before looping in the client, align internally.
Most onboarding problems start with poor prep. Before involving the client, make sure your team is aligned on the steps, who owns what, and where everything lives.
Use a shared checklist or portal view to keep things on track internally.
Why it matters: You avoid delays, missed steps, and back-and-forth emails later on.
You'll want to gather or share key assets like:
- Contracts
- Brand files
- Login credentials
- Intake forms
- Payment details
💡 Tip: Create a quick intake form for your portal and connect it to your backend as a fully controllable way to onboard new clients.
Step 2: Welcome message and kickoff
Once you're set with important info, it's time to bring the client into the process.
This is your first real interaction after the contract is signed. Usually, a welcome email or a kickoff call sets expectations and next steps.
Why it matters: A clear, confident start builds trust and helps everyone get on the same page.
- Send an intro email, or schedule a kickoff call
- Include the timeline, next steps, who's who, and how invoicing or financial planning will work
- Introduce a portal or central system (more on that below) and how they can access all the necessary info within it
- Introduce key contacts and communication channels
- Outline the next steps and timeline
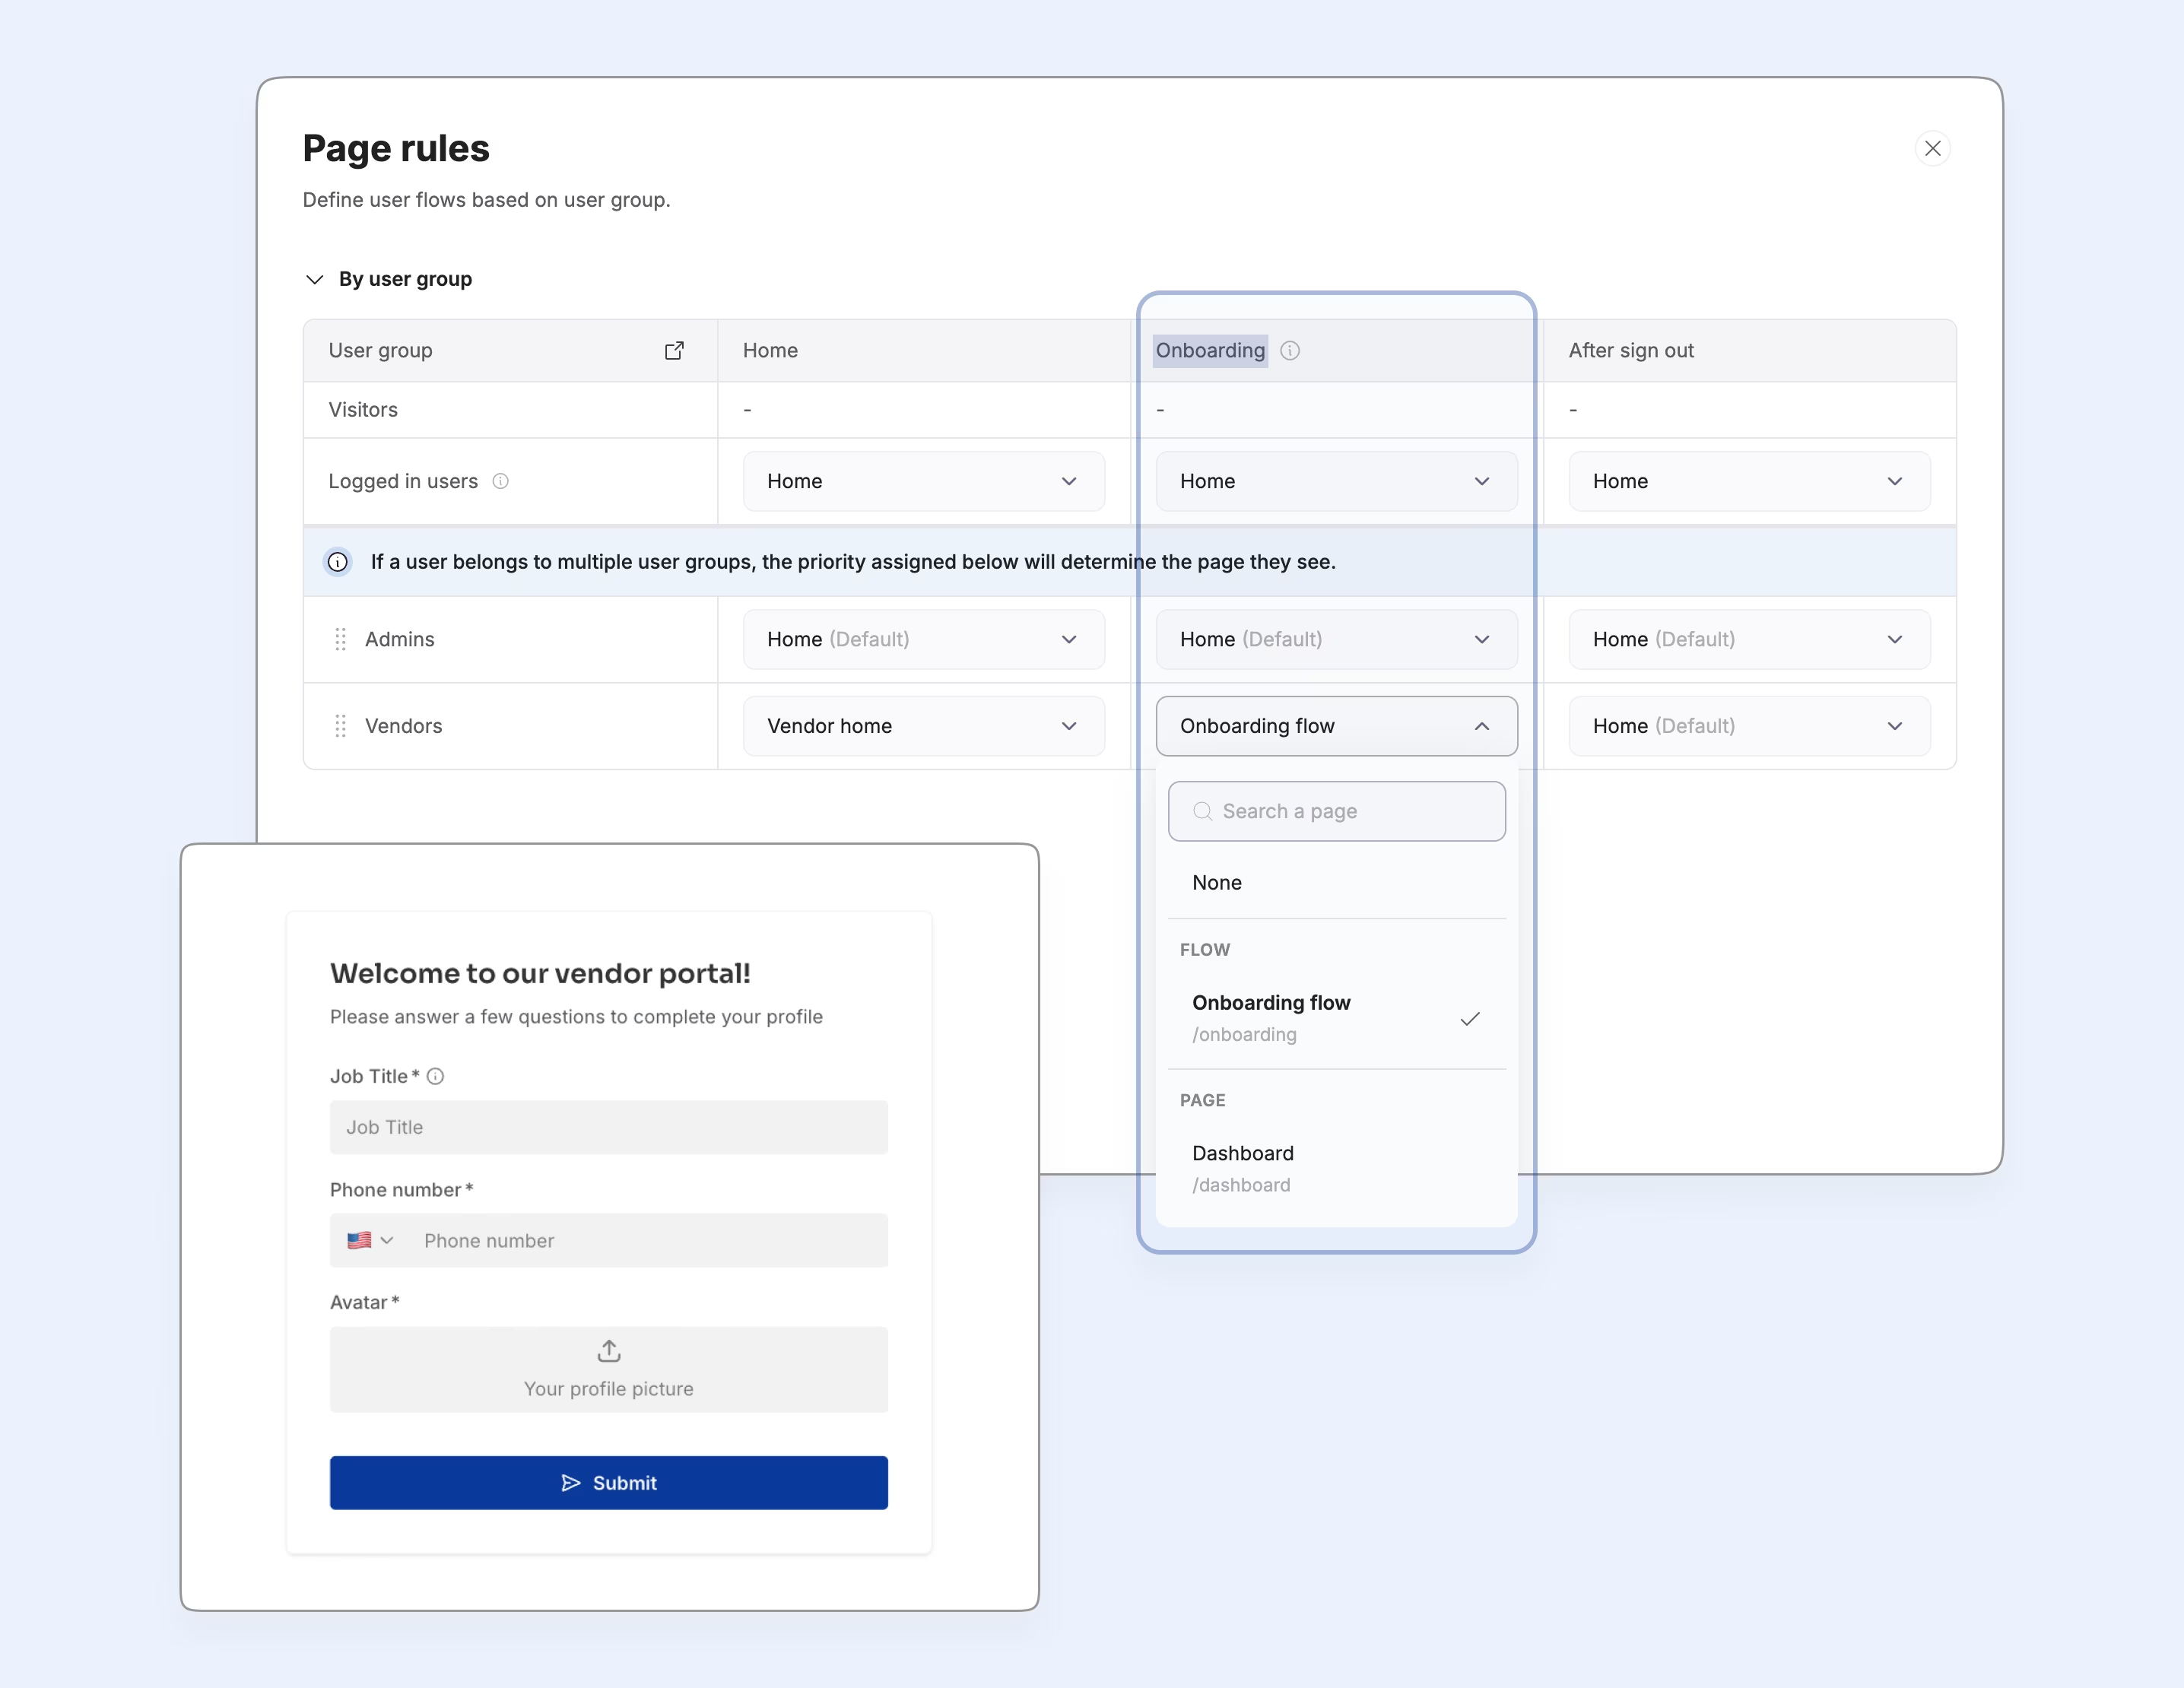
If you're onboarding through a portal, this is also the moment to set up an onboarding flow that requires clients to complete a short profile before they see anything else. Softr's users and permissions system lets you gate a client's homepage behind a mandatory intake form, so nobody skips a required step by accident.
Step 3: Delivering onboarding materials
With expectations set, now it's your turn to deliver what the client needs. Ideally, all of these materials live in one secure space, like in your client portal, so you don't have to come back to this step each time a client needs anything.
Why it matters: When clients have the right info at their fingertips, they're more confident and less likely to hit roadblocks.
Give clients what they need:
- Onboarding guide, checklist, or SOP
- Training videos or walkthroughs
- Tool access and setup instructions
Tip: With Softr's free client onboarding template, you can embed these resources directly in the portal for each client's dedicated page view:
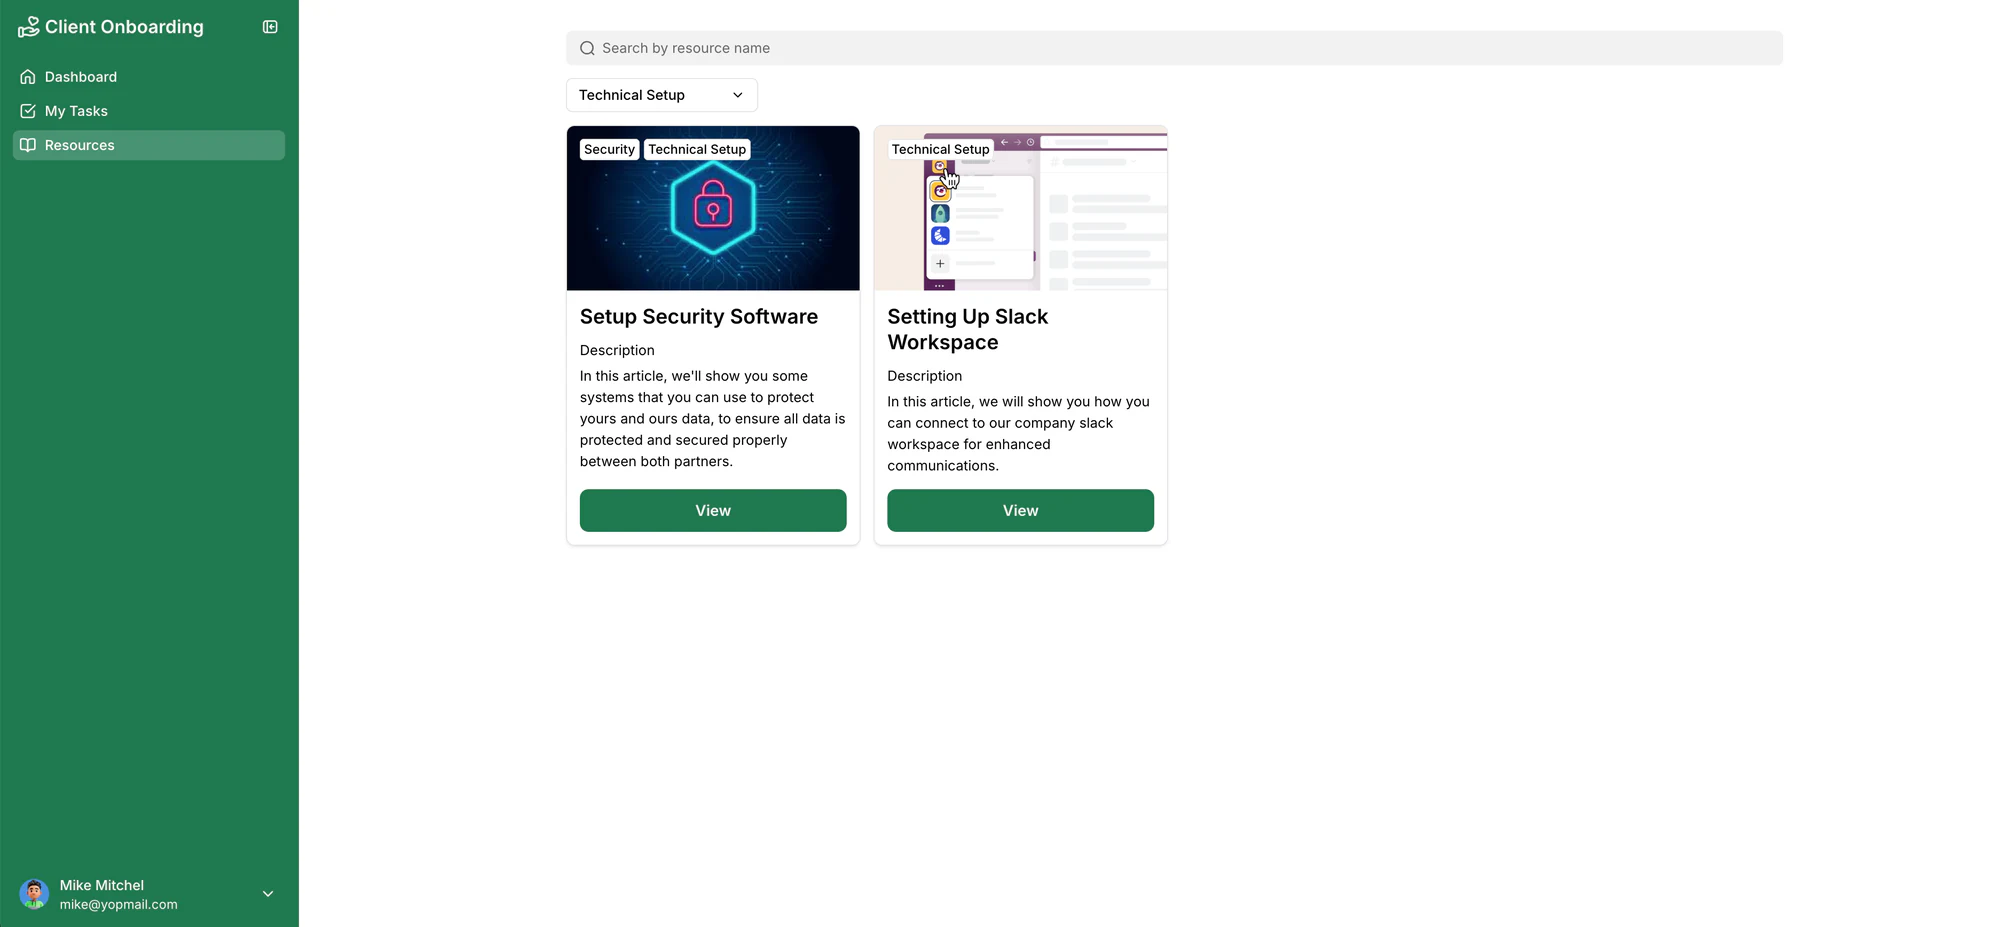
Professional services firms with a lot of recurring document requests benefit the most from this step. Accounting firm TASC built a client document portal with Softr for 80+ clients, replacing manual email requests and Google Sheets tracking. The portal now handles 3 to 10 document requests per client every month, automatically, without back-and-forth.
Step 4: Milestone tracking and check-ins
Onboarding isn't just a one-time handoff. Use this stage to keep clients in the loop with task updates, status views, and shared next steps.
Why it matters: Clients know what's done, what's coming, and who's responsible, without needing to ask.
Help clients track milestones and show what's happening behind the scenes with:
- Project timeline, Kanban, or calendar views
- Status updates or check-ins
- Visibility into what's done and what's next
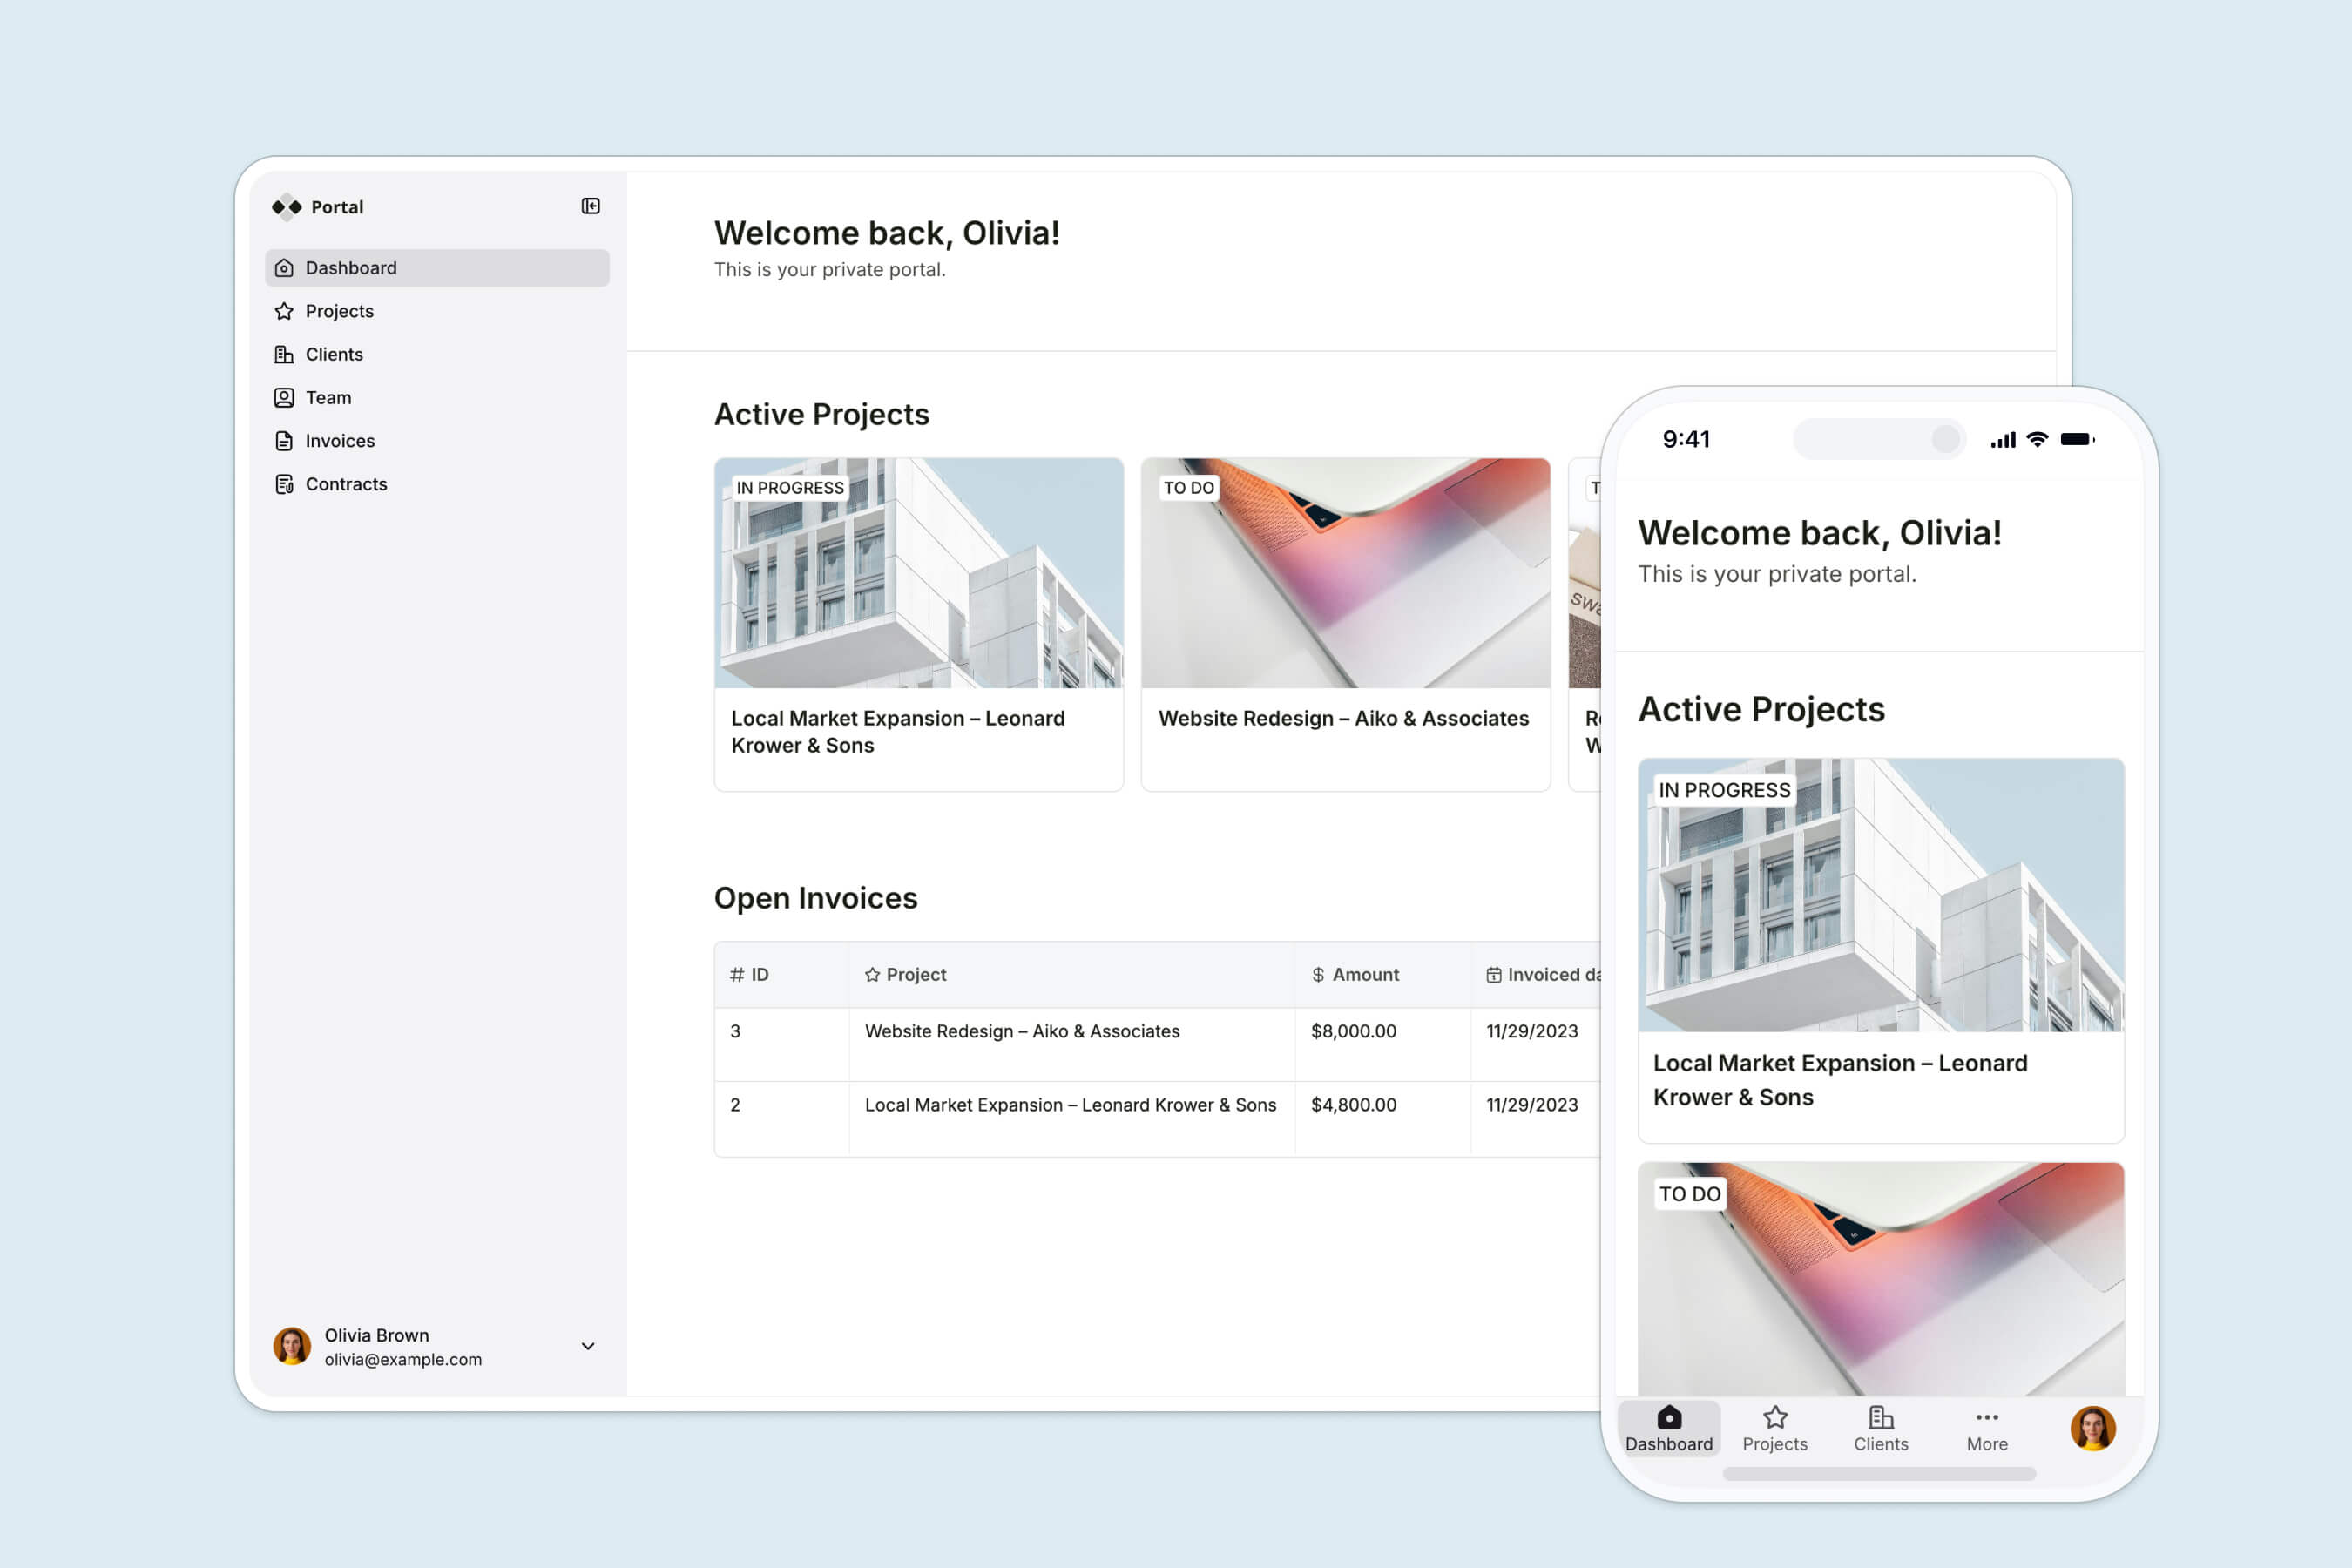
Here's how that looks in action: With Softr, FUGA built a branded client portal connected to Airtable, allowing artists, labels, and partners to securely access the right information at the right time, along with videos and process docs that make it easy for clients to use. The result: reporting that used to take two people half a day a week now happens instantly through client self-service.
Step 5: Handoff to delivery or support
Once onboarding is complete, make it clear who the client will be working with moving forward, and what's next. This is the point where onboarding wraps and the client transitions into day-to-day work with your account team.
Wrap up onboarding with a clear shift into the ongoing relationship.
- Confirm that onboarding is complete
- Introduce a long-term point of contact (account manager)
- Document remaining action items
- Update the portal and expand its usage (for example, from client onboarding to a full client portal)
Step 6: Review and improve
Every onboarding experience is a chance to get better. No process is perfect. Wrap up by reviewing what worked, collecting feedback, and refining your process. Take a few minutes to review how onboarding went, what worked, what didn't, and how you can improve next time.
Why it matters: A repeatable process only gets better if you refine it over time.
After onboarding, review internally and ask for client input.
- Send a quick feedback form or survey
- Identify bottlenecks or missed steps
- Use these insights to improve your template or portal
Client onboarding portal example and template
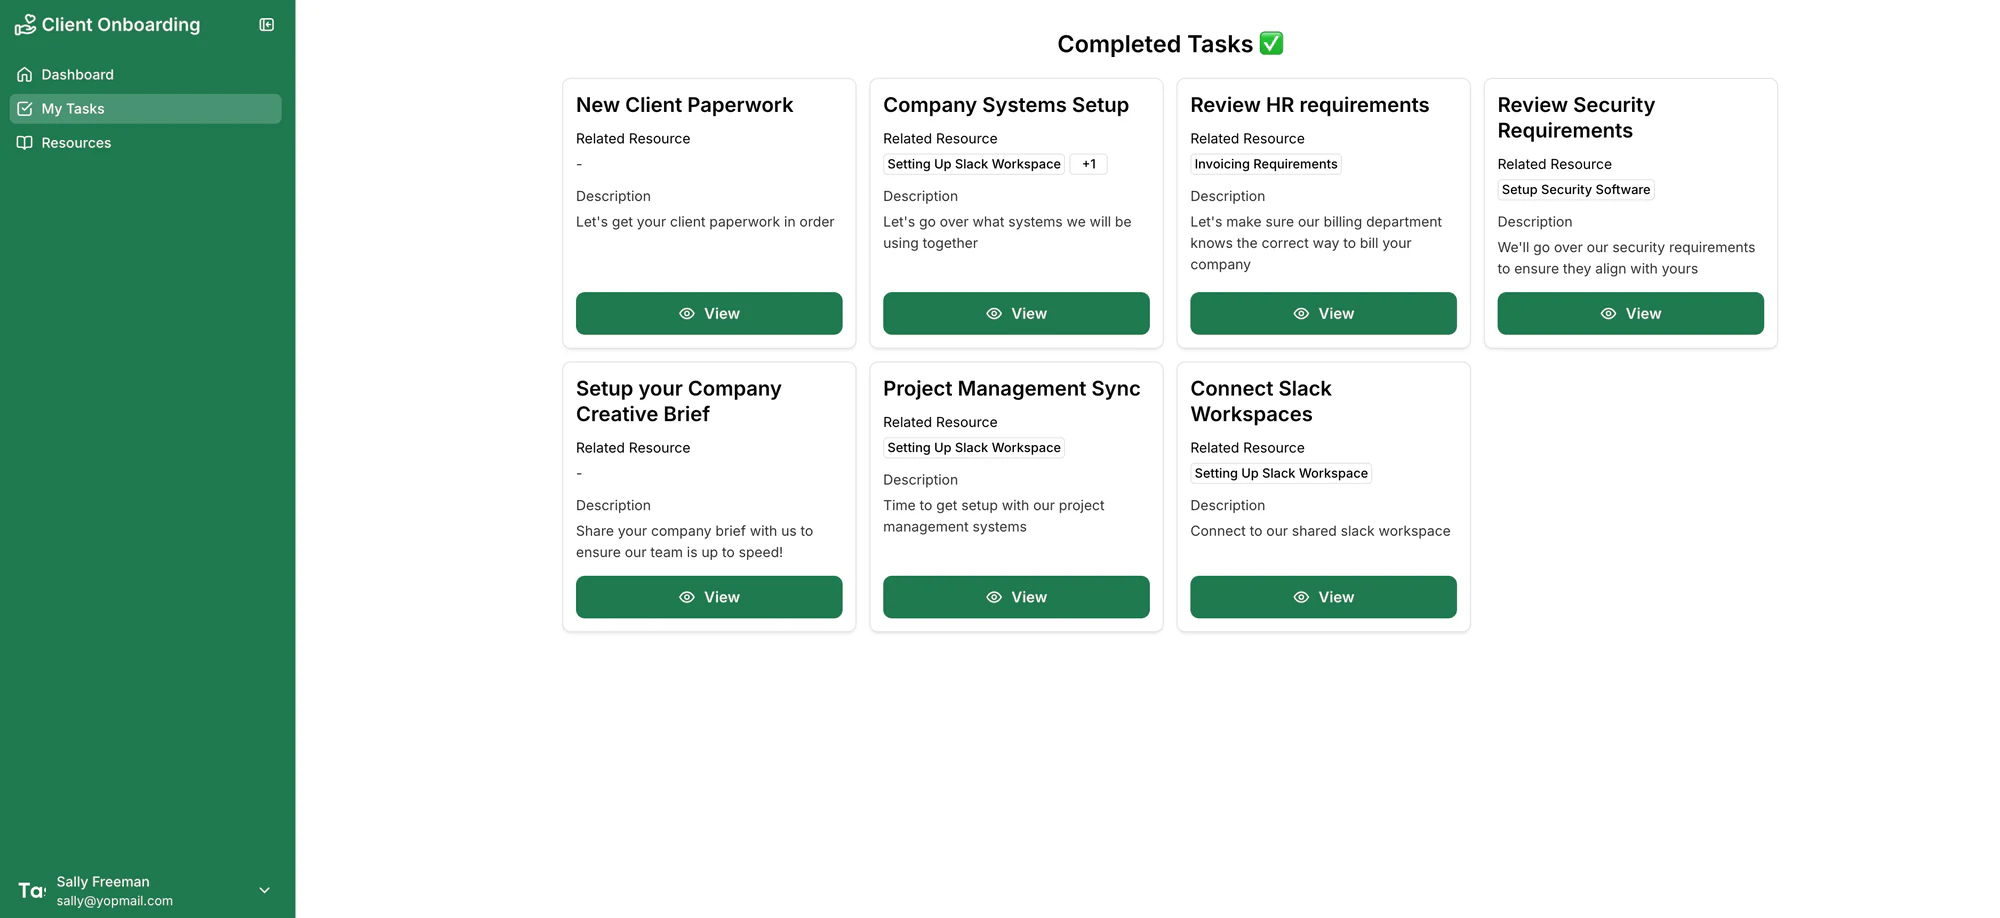
If you're still managing onboarding by piecing together checklists, one-off emails, and folders that only half the team can find, there's a better way.
With Softr, start with a client onboarding template, drag in the features you need (like document uploads, forms, or dashboards), and publish a professional-looking portal in hours, not weeks. You can also describe the portal you want to Softr's AI Co-Builder and get a first working version generated for you, database and permissions included, then fine-tune it from there.
For onboarding specifically, Softr helps you centralize everything in one place: intake forms, contracts, onboarding guides, tasks, and more.
- Display personalized data: Show onboarding checklists, deadlines, or files based on the client's stage or user role via customized dashboards. Admins get an overview of all the clients in the onboarding process or accounts relevant to them.
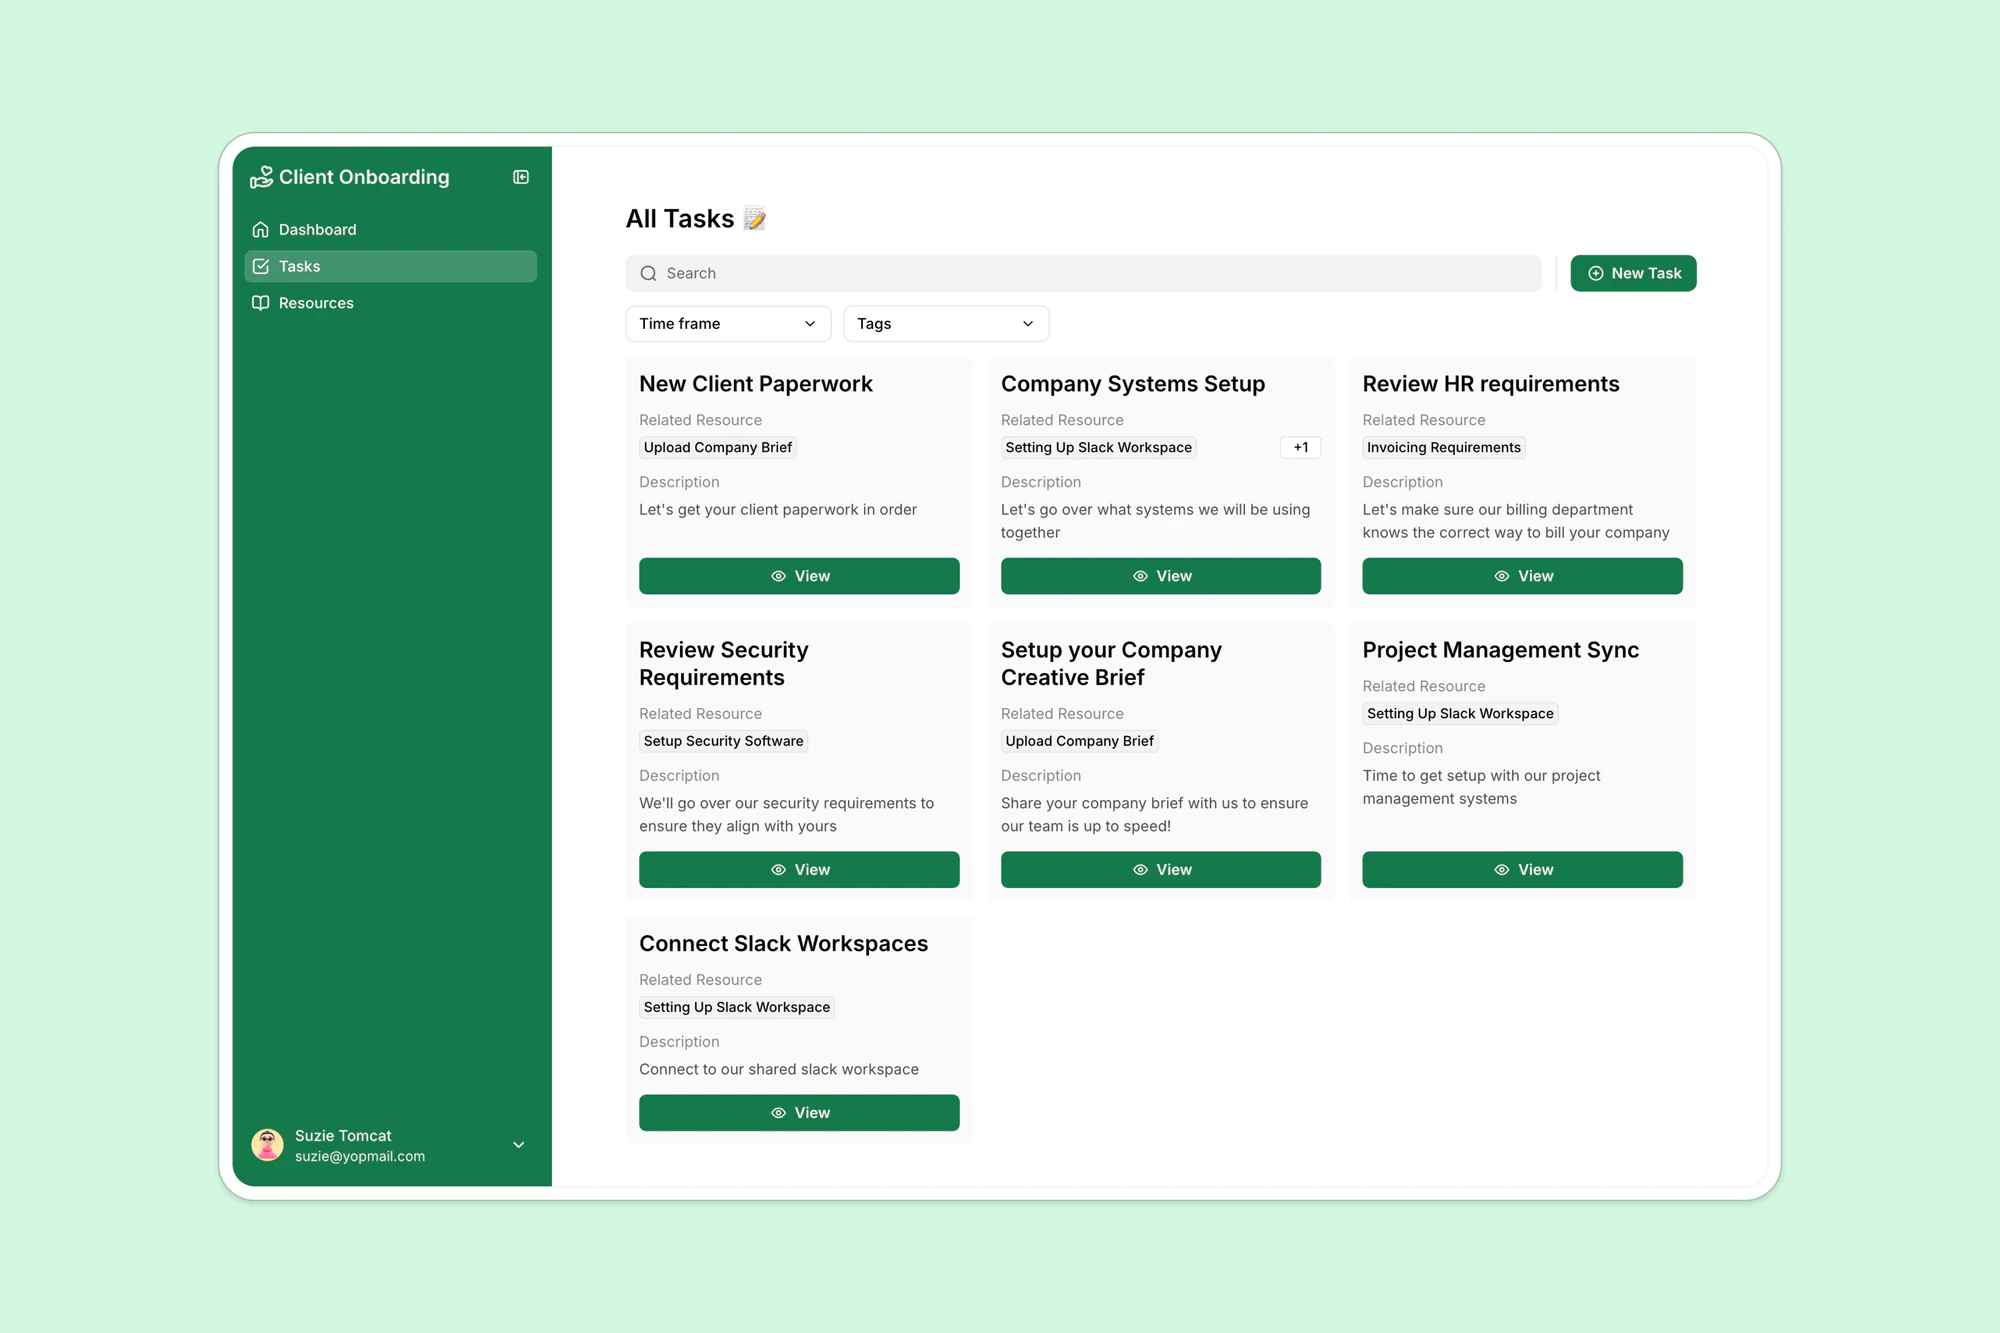
- Share resources: Share process docs, videos, FAQs, and more in one central location for clients to self-serve.
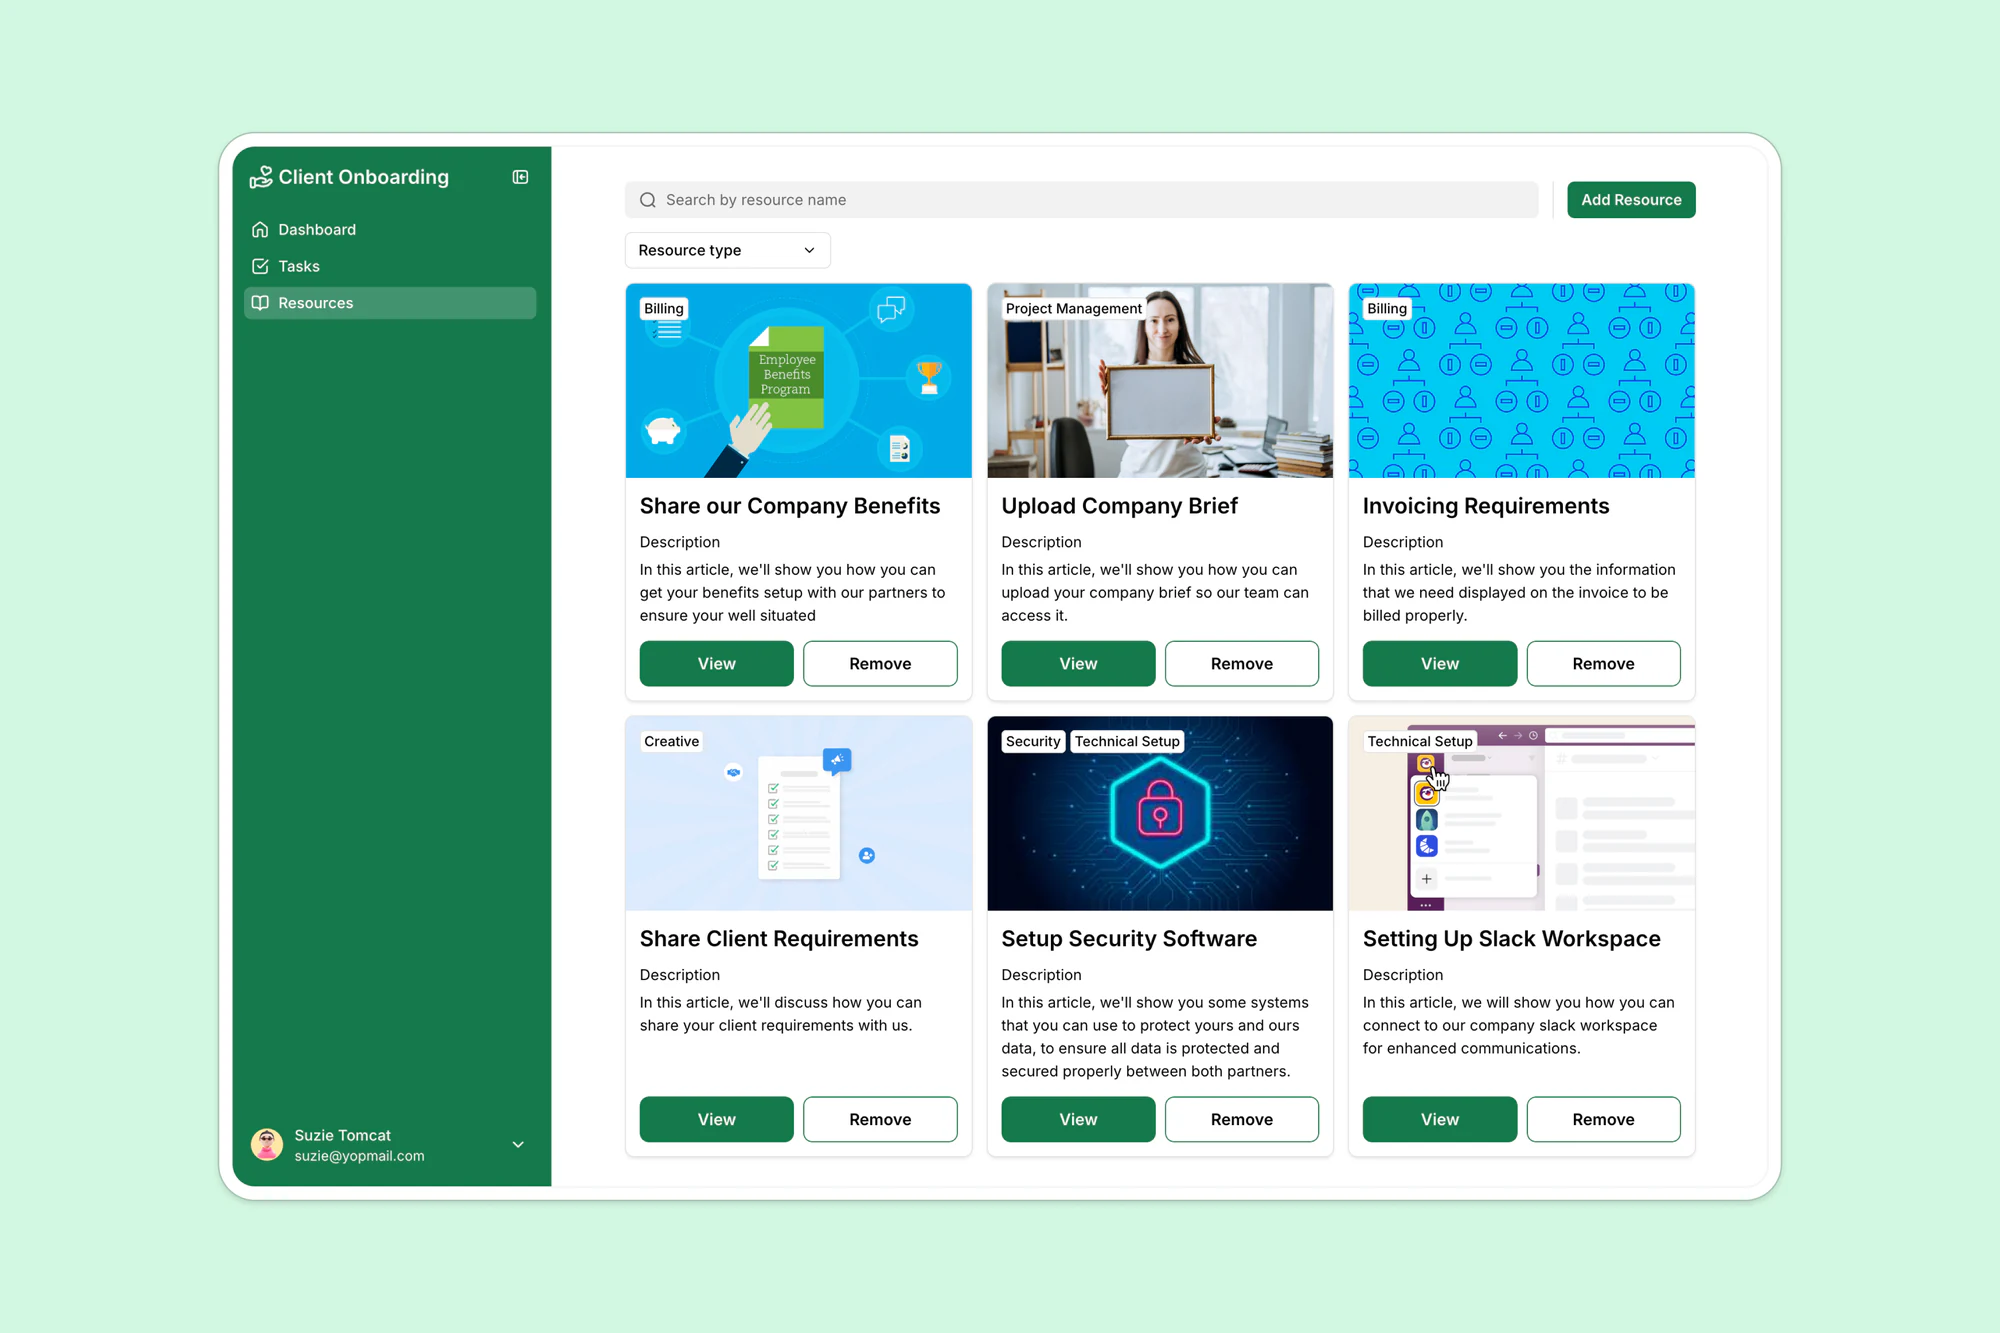
- Get instant admin oversight: Track onboarding progress across all clients, flag overdue tasks, and quickly spot where clients are getting stuck.

- Allow feedback forms and comments: For post-onboarding and beyond, help clients leave feedback through secure forms or comments on specific tasks or docs, so you can centralize communication in one spot.
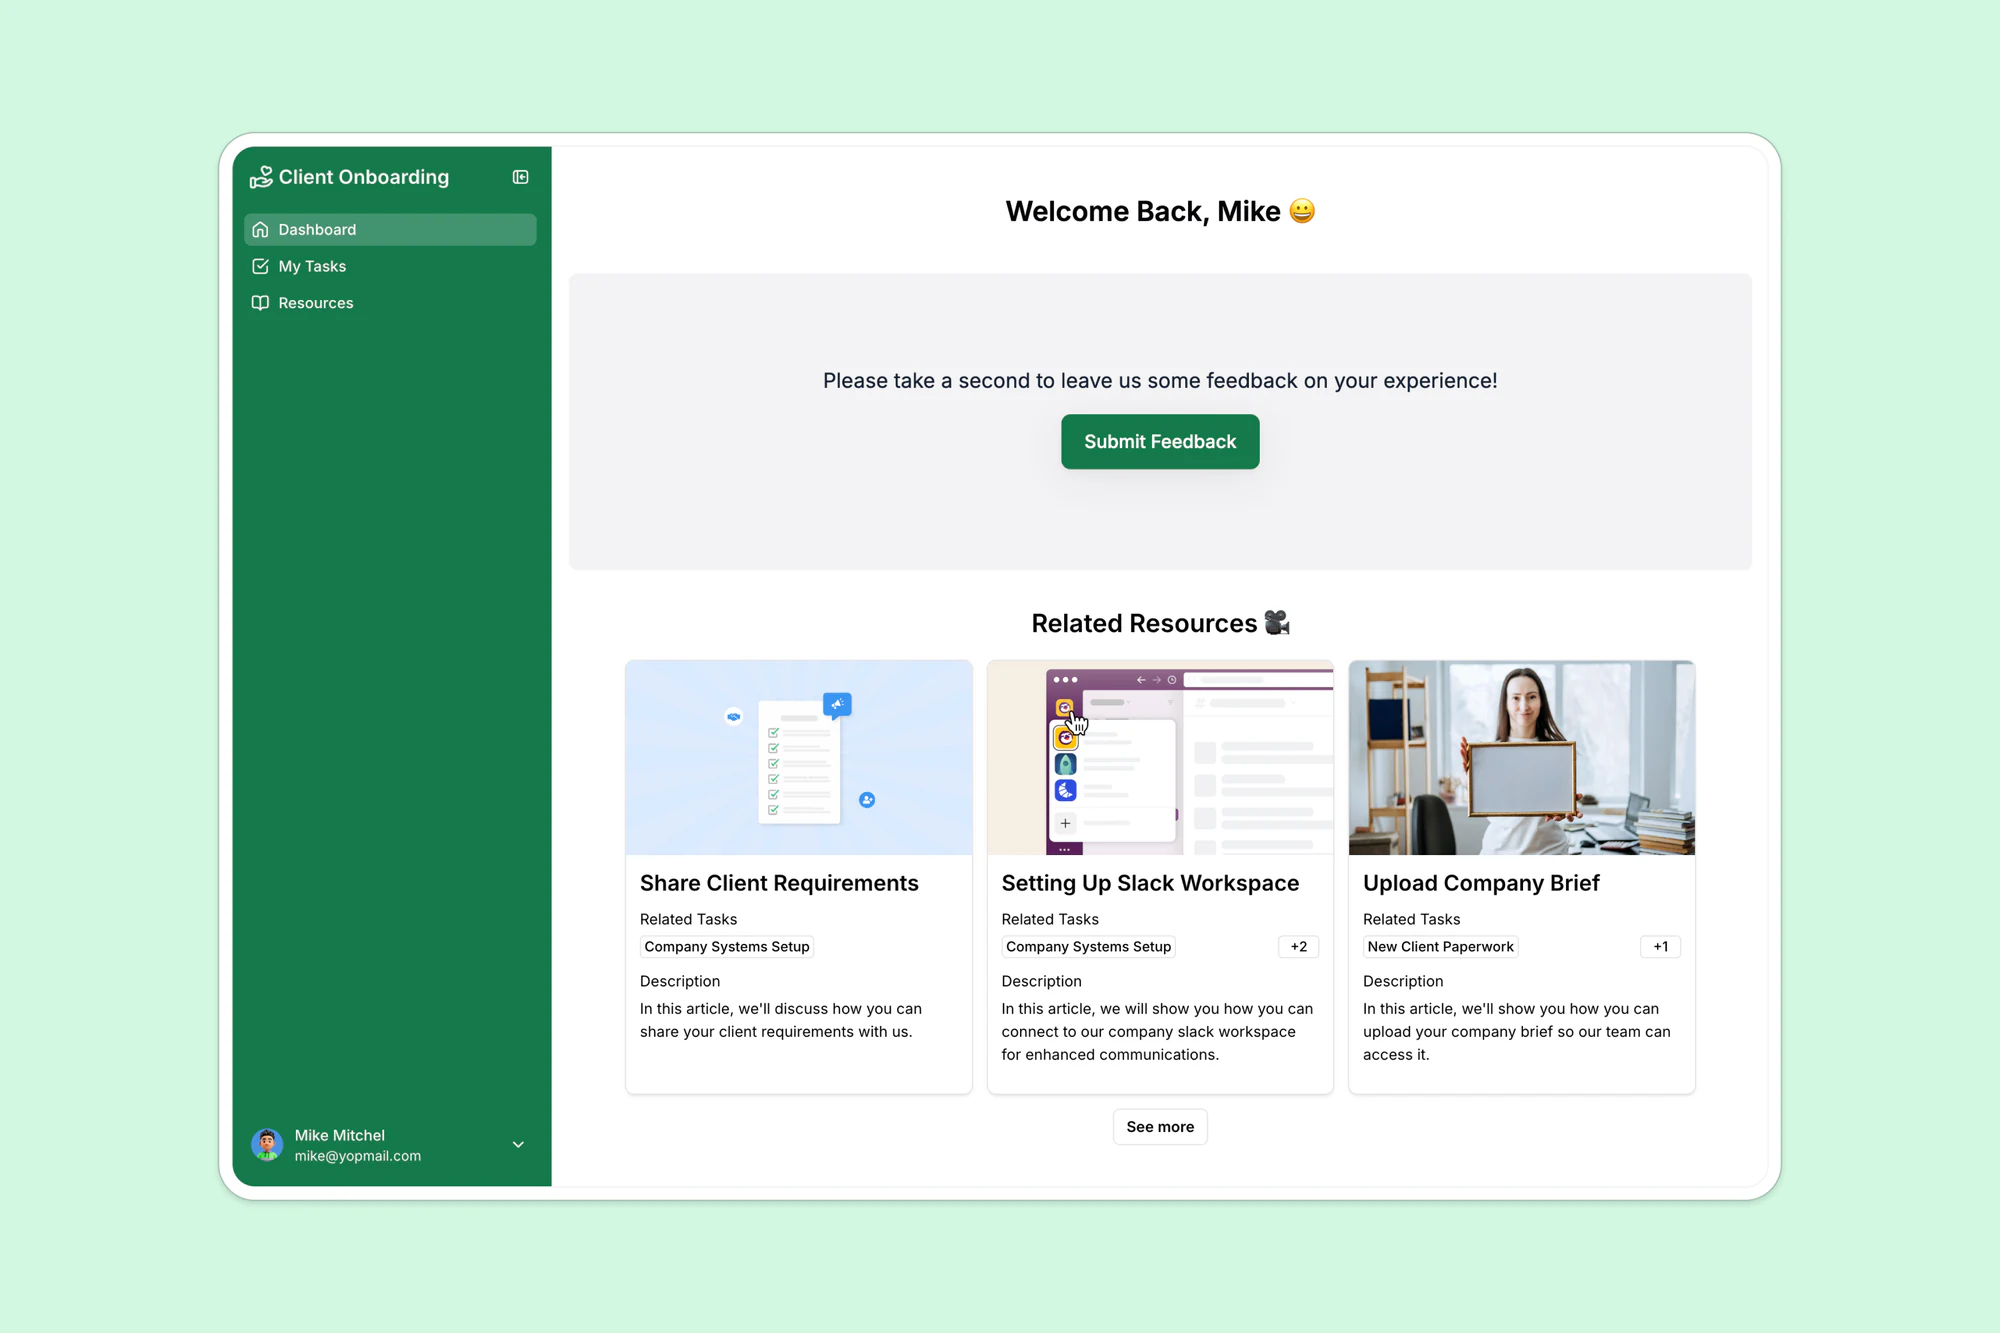

- Provide a mobile-ready experience: Give users a seamless experience across desktop and mobile, and turn your portal into a downloadable app with Softr's PWA feature.
How to set up your client onboarding portal with Softr
To make it easy for you to set up a client portal, you can start with our client portal template, ask the AI Co-Builder to generate one from a description of your process, or build it from scratch. Here's the template path:
- Click "Use template" to open the client onboarding portal in Softr Studio.
- Sign up or log in to your Softr account (it's free, no credit card needed).
- Connect your data using Softr Databases, Softr's own native database, or an external source like Airtable, Google Sheets, HubSpot, or any other tool with a REST API (21+ data sources in total). The template comes with sample data to help you structure things.
- Map your data to the necessary pages and blocks, or ask the AI Co-Builder to do it for you by describing what you need.
- Set up custom user groups like admins and clients.
- Set conditional visibility and permissions so each client, team member, or admin sees only what's relevant.
- Publish your portal and customize it as you go.
- When all is set, share the portal URL with your clients.
Check out this detailed course on how to build a client portal and create a client portal that gives each client access to the right files, forms, and updates, without giving them access to your entire backend or another external tool they have to learn.
Automate the client onboarding process with Softr
Onboarding shouldn't feel like starting from scratch every time. By setting clear expectations, centralizing your materials, and giving clients an easy way to track progress, you're not just saving your team time, you're showing clients they made the right choice.
However, most teams still handle onboarding with emails, PDFs, and shared drives. Softr replaces that mess with a real-time client portal, connected to your backend, personalized per client, and easy to update. Softr is:
- Fast and easy to set up: Describe your portal to the AI Co-Builder and get a working version in minutes, or start with a ready-made template that includes secure logins, forms, and dynamic blocks. Use the drag-and-drop builder to fine-tune your workspace in minutes, without the overhead of a complex system.
- Built on data you can trust: Use Softr Databases as your native backend, or connect real-time, 2-way sync to 21+ external data sources such as Airtable, Google Sheets, and SQL databases. Changes made in the data source reflect in the portal, and vice versa, avoiding content duplicates, manual copy-pasting, and data loss.
- Backed by custom role-based permissions: Build a custom client onboarding portal by defining granular access for different user groups, so internal teams, clients, and partners only see what's relevant to them.
- SOC 2 Type II and GDPR compliant: All user data is stored and hosted in Europe, keeping your client data secure and compliant.
Give your onboarding process the structure it's been missing. No code required. Try Softr for free.
Frequently asked questions
What is the 4-step onboarding process?
What are the three stages of customer onboarding?
What is a client onboarding roadmap?
What's the difference between onboarding and implementation?
How long should client onboarding take?