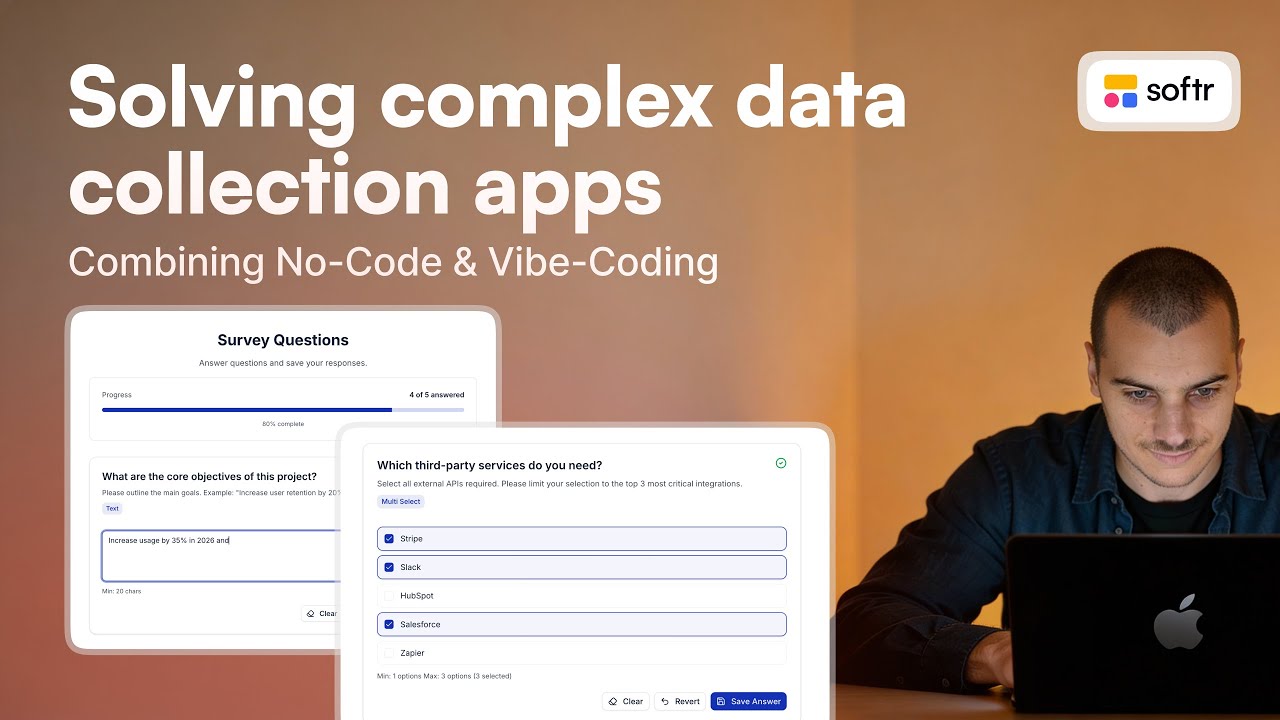
Transcript
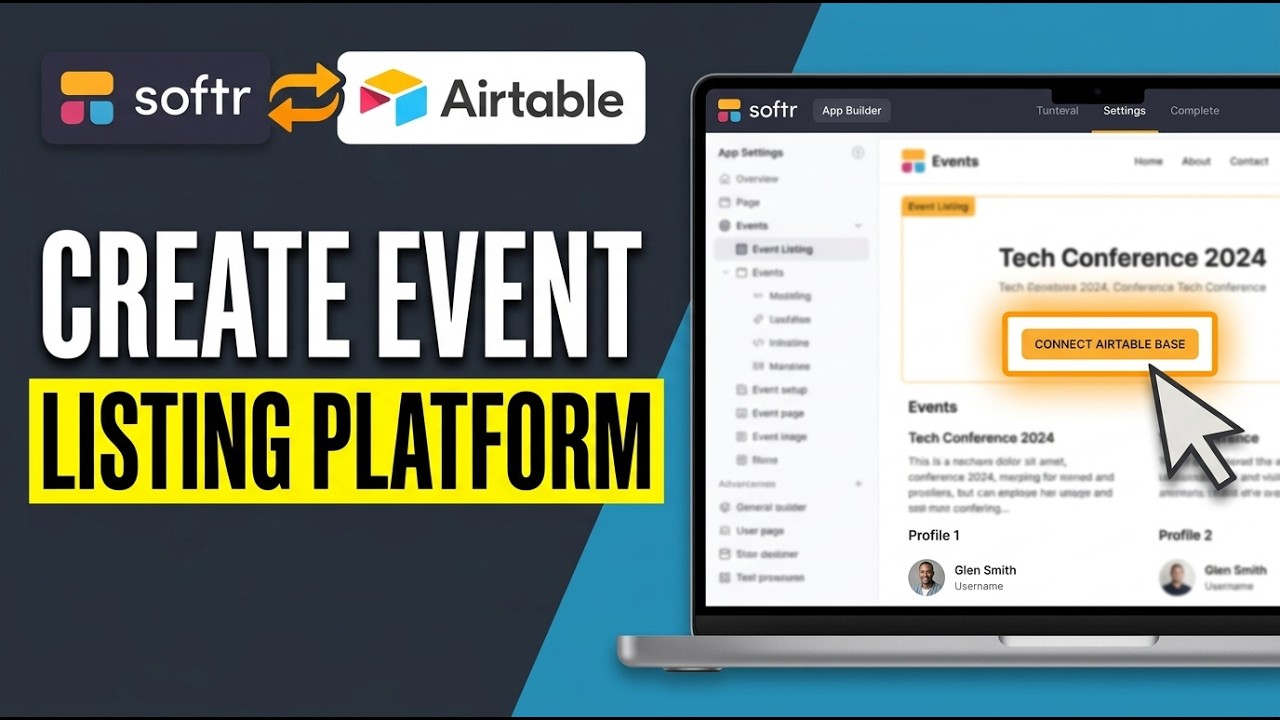
Today, I'll show you how to create an event listing platform with Softr and Airtable. By the end of this walkthrough, you'll have a simple, functional site where your events are stored in Airtable and automatically displayed on a web page built with Softr. We'll start on the Airtable side because that's where all of your event information will live.
[.blog-callout]
Note from Softr: While connecting to external sources like Airtable is a great option, Softr Databases is our powerful, native way to manage data directly within Softr for maximum performance without relying on third-party tools.
[.blog-callout]
First, open Airtable and create a new base. You can start from scratch with a blank base. Think of this base as your central database for events.
Give it a clear name so you can recognize it later when you connect it to Softr. Inside this new base, you'll see a table. This is where each row will represent a single event.
Now, set up the fields you'll need. Create a field for event name using a single-line text type. Add a date field and make sure it's set to the appropriate date format so it's easy to sort and filter later.
Add another field for location, again as text, where you can enter things like venue names or cities. Next, create a description field. A long text field works best here so you have enough space to describe the event details such as agenda, speakers, or any special notes.
Finally, add an image field. In Airtable, you can use an attachment field type for this, which lets you upload an image for each event, like a flyer or promotional graphic. Once your fields are in place, start entering some event records.
Each row should be one event with all the details filled out: name, date, location, description, and image. Add at least a few events so that when you switch over to Softr, you'll immediately see how they look on the page.
Now that your data is ready, go to the Softr website in your browser and create a new app.
[.blog-callout]
Note from Softr: To save time building your app from scratch, you can simply open the AI co-builder and prompt for what you want. It instantly generates complete apps, allowing you to tweak things manually afterwards.
[.blog-callout]
When Softr asks for a data source, choose Airtable and follow the prompts to connect your base. You'll need to allow Softr to access the base you just created and then select the specific table that holds your event records. Once connected, Softr will be able to pull those events directly into your site.
With the data connection in place, it's time to design how your events will appear. In your Softr app editor, add a new block and choose a list or grid block. These blocks are designed to show multiple records, which makes them perfect for event listings.
After adding the block, point it to your Airtable table so the block knows which records to display. Map the fields from Airtable to the elements in your block. For example, set the title element to show the event name, the date element to show the date field, a text area for the description, and an image component for the image attachment.
You can also decide whether to show the location and how prominently you want it displayed. Take a moment to customize the layout so it matches your style. Adjust colors, fonts, spacing, and card design to make the event listings clean and easy to read.
When everything looks good, use Softr's preview to check how the site behaves, scrolling through your events to make sure the information is correct and readable.
Finally, when you're happy with the layout and content, publish your platform from within Softr. Your event listing site will now be live, automatically displaying the events from your Airtable base. Any changes you make to the events in Airtable will be reflected on your Softr site, giving you a simple, no-code event listing platform that's easy to maintain.