Transcript
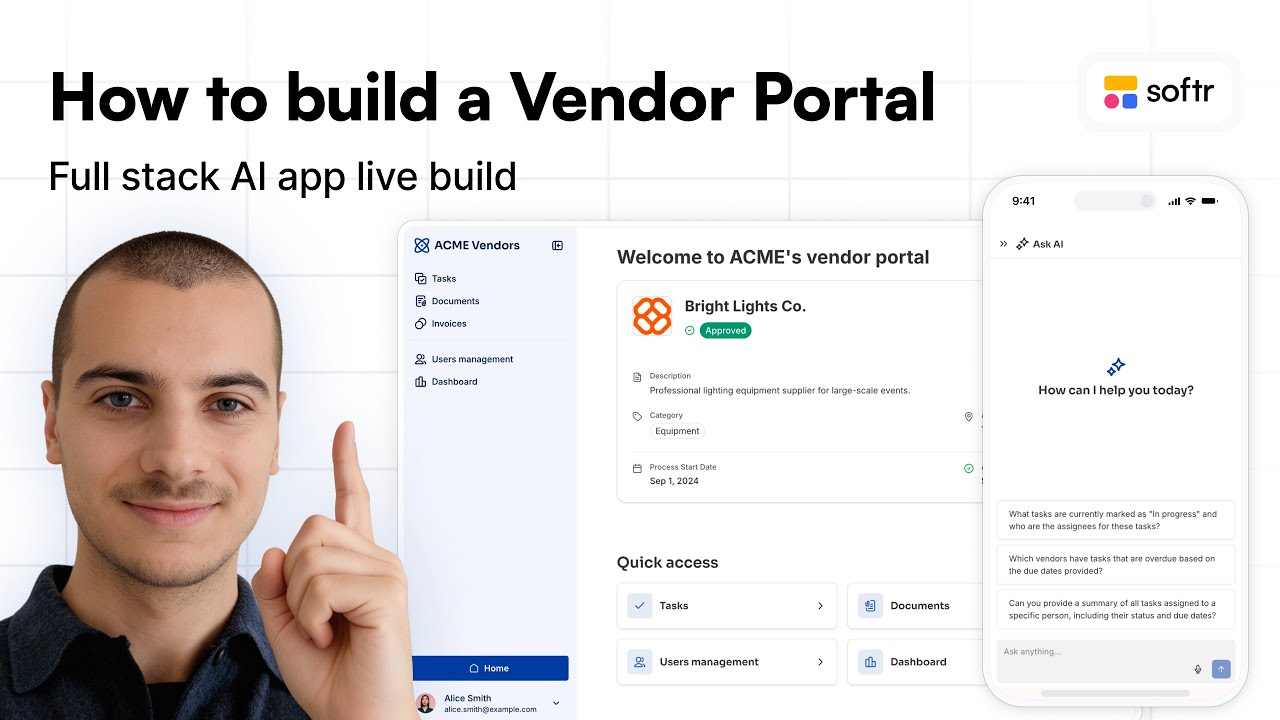
Welcome to this session. I am Guillaume Duvernay and I will show you how to build a vendor portal from scratch using Softr, a full-stack app builder that contains a database, interface, and workflows. Here is a preview of what we will be building.
This is the admin part of our vendor portal, where you can track all your vendors, their tasks, and metrics in a dashboard. Whenever we open a vendor, we see all their related tasks, documents, and invoices. On blocks with a lot of data, we have enabled Ask AI, a native AI chatbot that provides answers and insights based on the data in the block.
Looking at the vendor experience, logging in shows an onboarding block to ensure we have all their necessary information before they access the app. Vendors see a summary card displaying their status and company information. From there, they have quick access to review tasks and manage components like uploading invoices or chatting with their team.
Admins can collaborate to track tasks, documents, and invoices. To make this even more collaborative, a user management system allows vendors to request access for additional team members, such as legal staff. Admins can then review, approve, or reject these user requests directly.
We will streamline vendor onboarding through this digital experience where vendors track approval status, complete tasks, store documents, and submit invoices. We will configure two user groups: admins who implement the portal, and vendors invited to collaborate in their workspace. Softr makes it easy to tailor experiences for each user group and ensure logged-in users only see data they are permitted to view.
To build this app, we need three core components powered by Softr: Softr Databases to store records, an interface for user interactions, and Softr Workflows to automate actions like sending email reminders on task due dates. Mapping out your tables as distinct objects helps clarify the setup before building.
In our database, we will have tables for users and vendors, along with connections linking users to vendors, documents to vendors, invoices to vendors, and tasks to users. Each table requires specific properties. For example, the users table needs fields for email and name, while the invoices table requires fields for invoice title, a file field for PDF attachments, a number field for the amount, and a status field to track payments.
We will begin creating these objects as tables in Softr Databases. Starting from the Softr dashboard, we can build the application from scratch using all three integrated components.
I’m creating an app from scratch, so I can choose what data to connect: Google Sheets, Notion, or any REST API. Softr can connect interface components to that data; for example, records in a Notion table can display in a calendar block. In this case, we’ll use Softr Databases because it’s native, included in Softr, and gives the best performance.
The app starts with some utility pages and blocks. Click the dynamic block, then connect it to a source by selecting Create new database. Rename the app and database the same way; we’ll use one app and one database, although one database can connect to multiple apps that share data.
Next, create the objects as tables. Start with the users table, since every app has users and we’ll connect them to Softr user settings later. Each column is a field that categorizes part of the table’s data.
Remove the default fields and make email the primary field. Your primary field should be as unique as possible: first name is not a good choice because you could have two people called Jane, making filtering and searching unclear. Email is a great unique identifier; for companies, a website is also good, and sometimes a company name works because vendors are unlikely to share one.
Add a user record with an email, then add a short text field for full name. Add a select field called role, with admin and vendor options. We’ll keep admins and vendors in the same table, then later create user groups based on this role, such as an admin group for everyone with admin selected.
Don’t create separate tables for admin users and vendor users; keep all users in one table. Before adding more user fields, create the other tables we need: vendors, invoices, and tasks. We need those tables to create related records.
For example, create a vendor record, then add a related record field in users called Works at and connect it to the vendors table. Don’t allow multiple linked vendors because each user works for only one. This is mainly for vendor users; admins won’t be assigned to a vendor.
When you open the vendors table, Softr automatically creates a mirrored field, showing the connection. You can right-click it to add lookup fields and automatically pull data from the other table, such as team members’ first names. If you link another vendor user to the same company, the lookup automatically lists all connected users.
I’ll remove that lookup for now, but related fields are one of the most important principles in relational databases like Softr Databases. They make your data structure robust and scalable, and are more organized than Excel because a field only accepts its defined values instead of, for example, a date appearing in the wrong type of column. I already planned the fields for each table, so I’ll implement those now.
It is a good opportunity to go through the different field types. For example, we have a native field for phone numbers which automatically enables for any country, and in forms later you can validate the format. We have the same for URLs and multiple other native fields that make it easy to scale this database.
Another field we will add is the avatar, which uses a file type. As we import a picture, we can map that to the avatar field of Softr so users see their avatar icon in the interface, or we can display it in a list of vendor users. I am going to add all the remaining fields now, starting with a user status.
In the app, vendors will be able to invite their team members and we will let an admin approve that to maximize security. If you are in a pending state, your account is not active yet and must be approved by an admin before you can log in. When configuring a select field, we can assign specific colors for each value so those color codes reflect within the app.
We have two types of text: short text for things like addresses or job titles, and long text to store more content like a vendor description. Where it gets really interesting is using an AI agent on a select field like vendor category. We can activate the AI agent to automatically fill the right category based on the vendor description.
We add a prompt right here asking for the vendor category and tagging the vendor description. I will select a model like GPT-4o mini because this is a simple task. You could enable web search to find external company information online, but here we base it purely on the provided description.
We have settings for when to run this AI agent, whether triggered manually, when a new record is created, or when an existing record's vendor description is updated. This database AI agent gives superpowers to your database because it can continuously refine, clean, enrich, or reformat data. If you have a PDF field, it can also extract elements to store in text or pull an amount from an invoice.
Now I will add some date fields to track the journey from applying to becoming an approved vendor. We will have the process start date to track the moment you entered, and the approval date which I can create by duplicating the field. Next, we use a related record field to link related documents to the vendor.
This connection ensures that in the interface and app settings, users only see the documents belonging to their company. I did the same linking for tasks and invoices. Every time you add a link field, a mirrored field is created in the other table, so remember to rename that mirrored field to vendor or related vendor.
Now I need to add a field for the number of open tasks by looking into the related tasks. I will add three sample tasks with statuses like To Do, In Progress, and Done, mapping them all to the same vendor. To count open tasks at the vendor level, we will count the related tasks that are not marked as done.
If we have a detail page that lists all the information we have about a vendor, we can directly display that data. I will add a rollup field called number of open tasks and select the related record field tasks to pull that information from. We can pull the name and count it using formula options to calculate or retrieve data from the related tasks.
We will add record options to filter and specify that we only want tasks that are not done. I can create the condition manually where status is not done, or write it in natural language to the AI helper by typing tasks that are not done. Saving that shows two open tasks for Acme, and if one task becomes done, the count updates to one. Rollups are great for running calculations and counting, allowing us to see the number of open tasks directly from this table even though tasks live in another table.
We will apply the same logic to count total outstanding invoices for each vendor. Looking at invoices, we count all records where the status is none of rejected and paid, meaning they are outstanding. In our case, we have one.
Regarding select fields, a single select field can also become a multi-select. That is not needed here for document type since that is usually one value, but enabling multi-select allows picking multiple values without replacing the previous selection. Other useful fields include created at, which natively timestamps when a record was created, and last updated at, which captures the timestamp when the record or selected fields were last edited.
We use separate tables for invoices and documents because we want to treat them as distinct objects. Documents cover general files like contracts and service descriptions, while invoices need individual tracking. With invoices, we can add a currency field for amount, allowing our interface to display charts summing amounts per vendor, a property typical documentation does not need.
Now that the infrastructure is complete, I added placeholder data across all tabs in our database to make the app look real and easier to build. Back in the studio, having a block connected to the data source ensures this database appears in the data tab. This lets us quickly access it from the top panel whenever we need to add a new field while designing the interface.
Next, I will open user settings to configure Softr's built-in user system. We can sync it directly to our data source by mapping it to the users table we created. I map the user email to our database email field, name to full name, and map the avatar field.
In our app, users have an active or pending status because vendor users can invite colleagues, but those invites require admin approval. To handle this, we configure the sync rule so it only syncs records where status includes active. This ensures pending users do not get an active app user account until approved.
We will also be able to create a workflow where whenever someone is approved, we send them an email inviting them to log in for the first time. Because they haven't set a password yet, it will send them a one-time password to connect and set up their password. All our users have been pulled, and I will remove the test user. It is properly connected to our database, meaning whenever we add a new record with active as a status, it will be created as a user.
We have specific settings for user granularity. We are enabling login because this app has private pages only for logged-in users. For authentication methods, we will allow login via a one-time code sent by email because some users have not set up a password yet. You could also enable Google sign-in to make access even easier.
We are disabling sign-ups because this is not a public app where anyone can create an account, keeping full control over accounts through our admin validation system. For security, we will keep the setting that asks everyone to re-login after 90 days. Next, I will go into user groups to set up admins and vendors, which allows us to control page access or restrict actions like deleting records.
I will add a condition-based group called admins, using the role field we planned in our database to determine if they are an admin or a vendor. Another group will be vendors, with the condition that their database role is vendor. Some apps require more granularity, such as vendor admin and vendor collaborator, so I recommend planning user groups before building your app.
Softr also provides a convenient security feature called data restriction to decide app-wide who can view, edit, create, or delete data based on user groups. I will select our data source Vendor Portal and the tasks table. For the vendors user group, we can set that they can only view tasks where the assigned vendor company matches the logged-in user's company.
This prevents anyone from seeing unauthorized data and removes the need to manually configure filters across every block. I will add this rule across the different objects in our app that require security layers. In our case, restricting view access ensures vendors cannot interact with, edit, or delete records they should not access. Admins will retain visibility and access to all records across all vendors.
Heading back to the interface, we have global app settings. In settings, you can add a Softr subdomain like acme-vendor-portal and customize the favicon or upload a company logo. Under integrations, you can directly connect Google Analytics, or enable progressive web apps so mobile users can add the portal to their smartphone home screen. You can also configure localization and time zones for global teams before moving to the theme tab for global design rules.
For example, the headings font family will directly apply app-wide, so whenever you want to change it later on, you do not have to update every block individually. You also have color settings for main paragraphs and the accent color. If you pick a darker blue, buttons and accent elements across the app update immediately. You can choose between three app sizes, sticking with M or using L for extra readability, and adjust the corner roundness on buttons and bordered elements to a subtle style.
Now we can create our interface. The left panel organizes pages into main app pages and utility pages. Utility pages come pre-built out of the box, including login, password reset, and 404 pages that you can customize with your own copy and icons. We will start fresh on our homepage by removing the default pre-created pages and blocks.
We will use this homepage for our admins to manage vendors, check tasks, and view documents alongside charts and quick links. To keep things clean, we will create a separate page for vendors called vendor home. In the page rules, we can set vendor home as the default for the vendor user group, avoiding complicated block visibility rules.
To build the admin experience, I will add a container block configured with tab containers to avoid cluttering the app with separate pages. In the first tab, named all vendors with a list icon, we will add our first block. There are four main types of blocks: dynamic blocks connected to data sources, static blocks like heroes and buttons, layout containers like tabs and columns, and the Vibe-Coding block.
We will add a table block and connect it to our pre-connected database, selecting the vendors table. Under the source settings, you can add conditional filters or sort alphabetically by vendor name. In the content mapping tab, each database field corresponds to a table column.
We will display the process start date and category, reorder the status to show as the second column, and adjust column widths while removing the address. In our database, we can also add a rollup field called number of team members linked to team members that counts all emails, then add that column to our table. Finally, we can configure search settings to allow searches by vendor name and address, remove default filters, and add a dedicated filter for vendor status.
It will automatically pull all the values from our data source to display them as a filter to easily navigate our table. We have a category tag, which is a good filter option, and we can sort the values alphabetically to make it easier to use. We can also decide how many records to show per page, or choose infinite scroll to continuously load records as we scroll down.
In the actions settings tab for this block, we manage everything related to user interactions. We natively have an add record top bar button, allowing users to add a new record to the vendors table. By selecting fields here, we decide which fields can be manually filled when creating a new record.
We can personalize the Add Vendor button with an icon and include the vendor name and all relevant fields. The category is auto-filled by AI based on the vendor description, so we do not have to ask for it, reducing the manual effort to add a record. We can also make fields optional, such as the approval date if they are not approved yet.
We will also enable an expand record action so that hovering over a record reveals a button to open a details page. We only need to design this single vendor details page once for all vendors, as it will automatically pull values from the selected record. In the added item details block, we have similar configuration options to choose which fields to display in content sections.
In the style tab, I can add a container that visually improves the look on a white background. For now, we do not have vendor logos, so I will disable that and pull the vendor name, description, and category. In the next section, I will add the status, start date, and approval date displayed as columns.
Below that, I will add another stacked section with the address, number of team members, number of open tasks, and outstanding invoices to provide some KPIs. Next, we can configure an edit record button to modify vendor information, choosing fields like the vendor name and address. We will add a separate edit record button focused strictly on status fields—vendor status, process start date, and approval date—to keep the flows distinct.
We can also enable a delete record button to remove a vendor directly from the interface. Returning to our homepage, we can preview the app to review what we have built. Clicking a vendor opens the details page in a sliding modal, keeping navigation easy without leaving the homepage.
From the modal, we can test editing vendor information, updating status settings, or deleting the record with a confirmation modal prompt. We can also test our status filters, the search bar, category filters, and the Add Vendor button. To take this further, we can track the tasks vendors must complete across different statuses using a kanban block.
We see that it has already been classified and categorized by task statuses. We are showing the task as an object and can customize how these cards look, adding the due dates, assignee, and a label to know who is working on it. For the kanban block, you can adjust stylings and column widths. When we preview the block, we can natively drag and drop cards to change the status easily, which we will also implement for vendors to track their own tasks.
In the actions tab, we have logic for adding new records, which we can rename. As an admin, we decide which vendor gets the task, but the vendor assigns it to their team members, so we are not setting the assignee here. We also want to open the task to see the full description and related vendor. We will add an item button that opens a details page when clicked, automatically creating the tasks details page so we can refine it.
We have the description and due date inside this container, and we can style it. As an admin, we can edit the task description, due date, status, and title, but probably not the vendor since tasks are usually deleted rather than reassigned. We will also add the delete record action to delete a task, which automatically redirects to the homepage because the detail page no longer exists.
Below the task details, we can display the related vendor using an item details block connected to vendors. We add a conditional filter setting the vendor name to the current record's vendor, which ensures we always show the related vendor for that specific task. We can title this section Related, remove the vendor mention above, display the vendor name and status, and add an action to open the vendor detail page for more information.
Instead of an item button, clicking anywhere on the kanban card can open the task detail in a sliding modal. Previewing this lets us see the description, due date, assignee, and related vendor, which we can click to see vendor information. We will set the vendor button to also open in a sliding modal so the layout stays consistent.
We will replicate this approach on the vendor page to display related tables using a tabs container with tabs for tasks, documents, and invoices. Under tasks, we can copy over the component we built and move it inside the tasks container. Since it initially shows all tasks, we add a conditional filter where the vendor matches the current record's vendor name, ensuring only their tasks appear.
We can do the same for documents by adding a grid block linked to documents with the appropriate conditional filters. We will add a filter by type and a search bar to search through different fields.
We will not add an option to upload documents here on the admin side, as vendors will upload new documents on their side. Let's do the same for invoices using a table block sorted by invoice date from newest to oldest. We will display a few elements and enable clicking to expand and see the record detail, copying the task block setup so we can easily view vendor information directly from an invoice.
Back on the vendor detail page, we need to adjust how we add tasks. Since we are already on a specific vendor's detail page, manually selecting the vendor is unnecessary. We can turn this input field into a hidden input and map its value automatically to the current vendor name or directly to record.record ID, ensuring any new task is automatically attributed to that vendor.
Returning to the homepage, we can make the interface smarter. For tasks, since we have over 20 records with plenty of information, we can add Ask AI to our action buttons. Ask AI is a native Softr feature that provides an AI chatbot interface capable of answering questions based on the data in that block.
[.blog-callout]
Note from Softr: Ask AI can read all connected data source fields to provide fast, contextual answers directly within your application interface.
[.blog-callout]
In the AI settings, we can configure the AI to read through all fields from the source and add custom instructions to fine-tune the response style. Trying this out provides pre-formatted questions or allows custom queries, such as asking who owns tasks to help balance the team's workload.
To make the admin interface even more insightful, we will add a third tab for analytics and dashboards. Using chart blocks, we can pull metrics mapped to our vendors table to count all vendors. We can set this to three columns and add another metric chart filtered to vendors where the status is approved, which accurately reflects in preview mode.
We can also add column charts for invoices, pulling data from the amount field to show the sum of amounts grouped by invoice date, filtered for records where the status is paid. That completes the first version of our admin app, and next we will build the vendor experience from scratch so the two experiences remain completely separated.
Before building the vendor portal, I added an admin feature to view pending requests to join vendor teams. Vendors can invite colleagues, such as legal team members, which creates a user record with a pending status and vendor role. This view lets admins visualize those pending vendor users and approve or reject them.
For the invited by filter, we can add a condition restricting options so the user role must be vendor, hiding admin accounts from the dropdown list. For the actions, I configured a one-click update button that immediately changes the status to active instead of using an edit record button with a confirmation modal.
Simply clicking that button will accept and switch their status, triggering an automation that sends an email to the invited person. I have also added a delete record button. We will configure the exact same setup in the vendor detail page, where I added a tab called users.
In the section title, I can map the vendor name dynamically. Opening EventPro services will display all team members from EventPro services, adding dynamism to a static field. We can set up a filter styled as tags so we can easily sort through user statuses.
I have already added the option to invite a new user. Submitting that will automatically assign the correct vendor company based on the opened record. The status automatically becomes active without extra confirmation because an admin initiated the invite, and the role is automatically mapped via a hidden input set to vendors.
For this list of users, we will add a one-click update action button to approve the user with an icon. We will change the visibility settings so this button only appears on records where the status is pending. We can also add a delete record button called Remove user, either for all records or exclusively for pending ones.
Now we are ready to build the experience for our second user group, the vendors. While admins have their entire navigation on the homepage to view vendor-related documents, vendors will log in and only see information related to their specific company. We will first implement an onboarding flow, which is a native Softr feature used to enforce data collection before granting full access.
When a vendor is invited, they will be required to provide information like an avatar picture, phone number, and job title so admins know their contacts. Once onboarded, vendors can access the rest of the application. Instead of storing everything in homepage tabs, we will build dedicated pages for tasks, documents, invoices, and team management.
For invoices, we will provide a full form to add a new invoice rather than a small top button, alongside a dedicated list or dashboard. We will also include detail pages for tasks and invoices, and potentially documents and team members. We can reuse detail pages across user groups by setting specific blocks to be visible only to admins or vendors. Finally, we will enable commenting on tasks and invoices so vendors and admins can collaborate directly.
Let's jump into building the vendor experience, starting with the onboarding block and then the homepage. We will use a different homepage than the admin's homepage because they do not share anything in common. In the studio, we can create as many onboarding flows as we need. Since admins do not need an onboarding flow, we will assign this flow to our vendors user groups only so they see it before joining the homepage.
Next, we decide on the flow type. We can either complete their user profile to edit fields in the user table, or create a new record. In our situation, the company hosting the portal creates the vendor first and invites the team, so we will use the complete user profile option. It automatically maps to the user table in our database.
Now we add steps to the flow, customize static text, and map the fields we want to collect: job title, phone number, and avatar picture. You can add placeholders and tooltips to fields, allowing users to hover over an icon for extra guidance. After mapping the fields, customize the button icon and configure the completion action with a personalized success message redirecting them to the vendor homepage.
With the onboarding flow assigned, let's design the vendor homepage. We want to display a card showing vendor information, especially visual status tracking to show where they stand in becoming a certified vendor. If you had additional statuses like negotiation or legal review, visualizing completed and upcoming steps helps the vendor understand their journey.
Whenever you need something customized and Softr lacks a specific block for it, use the Vibe-Coding block found under AI. You prompt with natural language to build a brand new block from scratch. It connects natively to your data source, so we select the vendor table and set it to display the vendor of the logged-in user.
We prompt it to design a minimalist card displaying their details and address with icons for each piece of information. After generating the block, you can send follow-up prompts to refine the design or request adjustments. We will ask it to adjust the width so it takes the full available width of the page.
Next, we will create dedicated subpages for each object: a tasks page, a documents page, an invoices page, and a user management page. Back on the vendor homepage, we add a quick links block to provide visual navigation to these key pages alongside the main navigation panel. We configure the first link to open our newly created tasks page.
Lastly, we add a kanban of all tasks and filter it so it only shows tasks where the task assignee is the logged-in user. This gives collaborators quick access to their assigned work right from the homepage. We can clean up the card configuration by hiding the assignee and vendor fields since they are already known.
We already implemented global data restrictions, which means that when a vendor logs in, they only see tasks related to their connected vendor entity. We do not need an additional condition here because it is enforced at the app level. Even if we forget to add a filter, it will still respect those rules.
In our case, only admins assign tasks to vendors so they can progress through onboarding and approval. We will not add an option for vendors to create a record from here; they can just view them. When clicked, it opens the task detail modal, which is the same page we configured for admins.
Reusing this page means we do not have to recreate a separate detail page for vendors, but we can still tailor the layout to each user group. For example, logged-in vendors already know their own entity, so they do not need to see the related vendors block. In the visibility tab, we set who can see this block to logged-in admins only, meaning vendors will only see the first block.
We also have options to edit or delete the task. Vendors should not delete assigned tasks, so we restrict the delete button visibility to admins only. For editing, vendors should only change certain fields, not the description, title, or due date. We create a separate edit record button called change status, which only affects the status field and is set to visible only for vendors.
Previewing as a vendor logging in for the first time displays the onboarding block. The fields are pre-filled because that data exists in the database. After submitting, we access the portal and only see our vendor's tasks due to the global rule, and the second block remains hidden with only the change task status option visible.
To enable collaboration between vendor users and admins on this item details block, we go to actions and enable comments. This native Softr feature lets you place a comment block directly on the page or inside a sidebar panel. We can place it below so admins see the vendor first and then the related comments, and we can also configure parameters like attachments.
For documents, AI can automatically classify the document type by looking at the file. In our documents setup, we turn this into an AI agent field, toggle it on, set the prompt to classify this document, and tag the file column. When a new file is added, it is automatically recognized, allowing us to make the manual type input optional with a tooltip.
Invoices are more sensitive than standard document uploads because they have amounts, statuses to track, and require discussions. Clicking an invoice opens the full details rather than relying on a horizontal table. This view enables action buttons for editing, deleting, and commenting, alongside a dedicated interface with tabs for importing new invoices.
In the first tab, we'll have our list of all invoices. We'll enable filtering by status as tags, naming the first one "all", and add another tag for new invoices where we place a dedicated form instead of a simple add record action. I'll map the destination table to invoices so submissions automatically add a new invoice record to Softr Databases.
Because vendors are already logged in, we won't ask which vendor to assign it to. Instead, I'll grab the logged-in user's vendor company to assign it automatically. When a form has many fields, you can turn it into a multi-step form to make the experience smoother, putting initial information on step one, details and files on step two, and optional notes on a subsequent step.
After configuring the form, you can define post-submission actions like displaying a success message or a thank-you screen. Back on the invoice details, we hide the block from vendors and enable the comments feature. When reusing this form setup to invite users, we need the linked vendor, status, and invited by fields.
We pass those three values through hidden inputs. The vendor company auto-populates from the logged-in user's company, status defaults to pending for approval, and invited by captures the logged-in user's email so admins can track invitations. Next, we design the vendor dashboard.
We will show KPIs for open and completed tasks, document totals, document breakdowns, and invoice charts. Once approved, the relationship centers on transactions, making it valuable to track invoice totals and status breakdowns to spot unpaid balances quickly. You can build this using native metric, column, and line charts, or use the Vibe-Coding block for custom visualizations.
The final step for our interface is configuring the navigation bar block. Softr lets you customize its appearance and adapt it across user groups. You can either design distinct navigation bars for separate pages or use a single navigation bar and control link visibility by user group.
Because our detail pages open in modals without dedicated nav bars, there is no page overlap, making it simple to build separate navigation bars for each user group. For the admin homepage navigation bar, the homepage link is all they need since their entire interface is accessible from that single view. Out-of-the-box user account settings handle profile management, and you can switch between side layouts or top layouts depending on your app structure.
For internal tools, we usually have a bar on the side, making it convenient to navigate between pages. I'll rename this navigation to admin nav so I remember what it is about. On our other homepage, seeing that it was also linked to that admin nav, I'll create a new navigation and call it vendor nav.
Here we want to link to all the pages we created so that from the invoices page, for example, you can directly access documents. I'll remove projects and add tasks, documents, and keep these three as primary. In secondary, I'll link to user management and dashboard, which are utility pages not directly about managing company interactions. I'll remove home from the top and add it as a button labeled vendor home, giving a clear distinction between the homepage button, the three main navigation items, and the two utility pages. Then I need to go to pages like tasks and switch their navigation to vendor nav as well.
Once finished with the app, the last step is to publish it, making it live under that subdomain URL. If you open it without being logged in, the default page is the login page since we did not configure a public homepage. Entering a valid account email sends a one-time code to your inbox based on our user settings so you can log in.
We have completed the database and interface side, but we are missing workflows to automate the app. We have two main workflows to build. The first triggers when a vendor requests to invite a team member and an admin accepts them, sending an email to that newly approved user with a link to the login page.
In our database table for users, we can use the status field as a trigger when someone moves from pending to active. In Softr, we go to the workflow builder, hit start from scratch, and select Softr Databases as a data-related trigger. We set the condition so that for our vendor portal in the users table, role is vendor and status is active, meaning they have been approved or invited by an admin.
We will rename that step to "when vendor user gets approved". The next action is send an email, which is built into Softr Workflows. You can configure your sender email, and for the recipient, we map data from the trigger step using the user's dynamic email field.
For the email subject and body, we reference dynamic variables like full name and include the verified URL of the login page. You can also map a reply-to email address if vendors have a specific admin point of contact. Once configured, give the automation a name and turn it on.
Our second automation sends a reminder email one day before a task due date if it is not completed. This is also based on database conditions. In our vendor portal tasks table, we set the trigger for when the status is any of To Do or In Progress and the due date is tomorrow.
Then we would send an email to the assignee for that specific task containing the task information. I want to tag the full name of the assignee, but since the task was the workflow trigger, I only have task data here. So I'll add a Softr Databases action in between to find a record in my users table where the email matches the assignee.
By fetching all the information about that user, which I will rename find user data, I can reference data from this second step and pull in their full name. This avoids having to create a lookup in your database because you can directly fetch the required data inside your workflow. While I could write that email manually, our database stores the title and description, making it a great opportunity to personalize the message with advice on completing the task.
I'll add a Softr AI action with a custom prompt to write a personalized email based on both the user and the task context. In the prompt, I set clear instructions regarding format, goals, and the relevant items needed for context. When I click continue and test, we can review the generated email draft to ensure everything looks accurate.
Instead of writing the email body manually, I'll reference the AI results directly in my email action. You can fine-tune your prompts with more formatting instructions or switch the AI model to something like Claude Haiku depending on your needs. Once configured, we can push the workflow live.
You can also build additional Softr Workflows, such as notifying the admin team when a vendor completes 100% of their assigned tasks. That signals admins to review tasks, update statuses, or assign new requirements prior to final vendor approval. Similar automations can send reminders for uploaded invoices, alert teams about upcoming due dates, or deliver Slack notifications instead of emails.
Taking a step back, we built a vendor portal with distinct interfaces for two user groups: admins and vendors. Admins get quick access to vendor profiles, invoices, users, and tasks, alongside AI insights and team approval workflows. They also gain high-level visibility across key metrics and KPIs that can be expanded over time.
Vendors receive a personalized onboarding experience starting with the onboarding form and a homepage featuring a visual recap card with direct links. From there, they can submit documents, review or submit invoices via the navigation bar, and invite team members from legal or sales. They can track their progress using dashboards and collaborate directly with admins on tasks and invoices via a commenting system.
All of these pieces connect dynamically through automated notifications to keep both teams aligned throughout the vendor relationship. I will publish this app as a template in the Softr template library under vendor portal, accessible directly from Softr.io/templates or within the studio when creating a new app.