Transcript
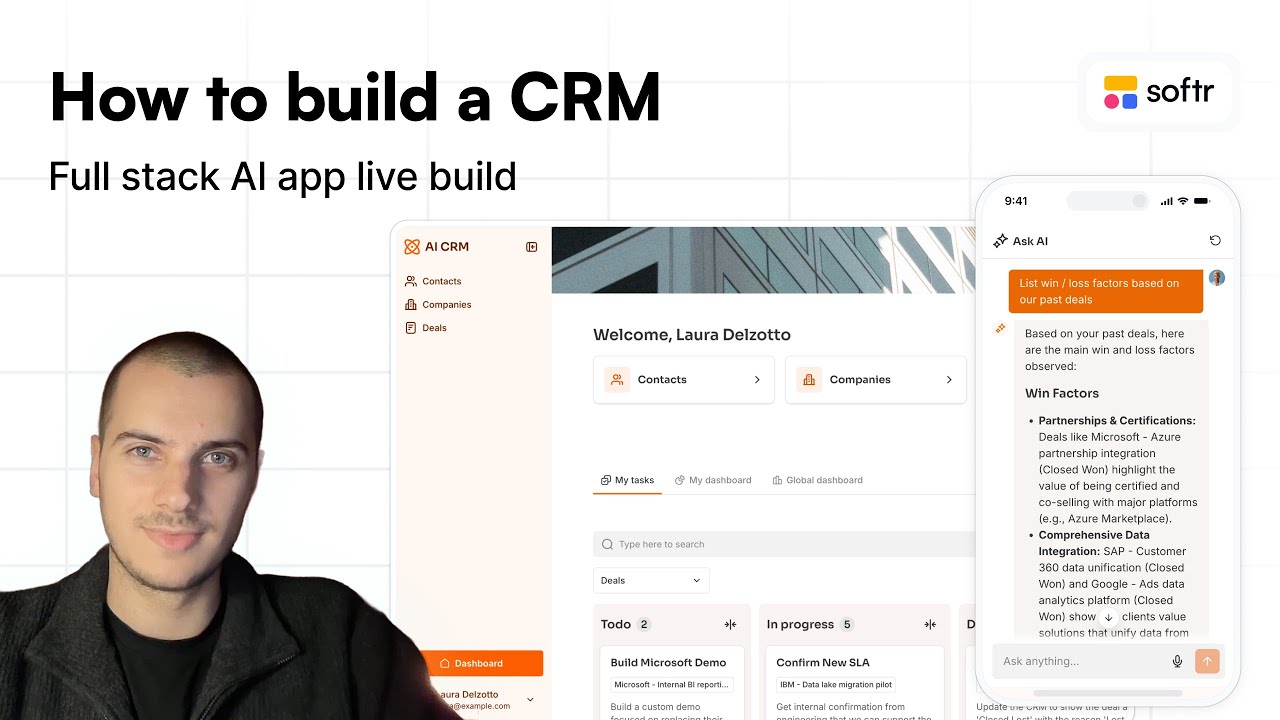
In this tutorial, we will go through all the steps to build this AI-enabled CRM. This is the final app where a sales rep has a way to manage tasks, view individual dashboard elements, and access company-level dashboards. From here, they can manage contacts, companies, and deals.
If I open a deal, I can go in and quickly hit summarize, which summarizes all past interactions we have had with this company. That gives an easy insight that a sales rep can use to find one of the contacts and send an email directly from the CRM. Looking at past interactions, we can also use AI to ask questions, since the AI has access to all of our conversations.
Looking at one of our companies, we also see insights that have been populated by AI in our database. The same applies to the number of employees and the industry. All of that is automatically enriched thanks to our AI workflows and database agents, which make the CRM efficient for sales teams so they do not have to find information manually.
Whenever a new demo request comes in, a new deal is created with all the information needed to get back to the prospect. The CRM is very user-friendly. In contacts, there is a tab with all my contacts, as well as a view of all company contacts showing who the contact owner is.
When looking at the main features of this app, there are two sides to the application. The first side is available to visitors who are not logged in. On the homepage, we will have a demo request form where prospects can get in touch, talk to sales, and explain how they would like us to help.
The rest of the application will be private and internal within the company to handle prospects and relationships. We will have contact, company, and deal management. We will create deals whenever we get a new demo request, matching them with existing or new contacts.
We will track interactions to keep data on past discussions, manage tasks, and view analytics and dashboards. We will also include AI-powered insights and tools to empower sales reps to follow up with prospects directly by email from the app. To manage both the public visitor side and the private internal side, we will use the user system powered by Softr.
In our database, we will have a table listing all app users and defining their roles. In our case, we will have admins and sales reps who have different interfaces and access to different features. The database is connected directly to the interface, bringing the interface, the database, and the workflows together.
To structure the data for our app before building the interface on top, we will start with a table for users. I always recommend starting with a users table containing fields for user email, name, and role. We can then connect users to other objects in our app.
Our app will feature objects for contacts, companies, and deals. This is typical for B2B setups where you need to link multiple contacts, such as the head of procurement, the CFO, and another stakeholder, to the same company. Having separate objects ensures we do not try to fit multiple emails into a single company record.
Deals represent commercial opportunities with a company. Having a dedicated deals object allows one company to have multiple deals, such as an initial low-cost pilot alongside a second deal currently in negotiation. Both records can coexist clearly as separate objects.
I have also added two more objects for tasks and interactions. Interactions will have one record per email exchange or meeting, storing what happened alongside a timestamp. This lets us read through the history or use AI to understand past interactions, consolidating interaction summaries directly at the deal level.
Lastly, the tasks object helps the team manage their to-do list. For example, a task could be following up with a contact after a demo request, or checking in again once the finance department confirms a quote.
These six objects compose our database, and the power of a relational database like Softr Databases is that we can easily interconnect them in a scalable way. We are ready to build an interface on top of this database, so let's jump right into the database design. I have already prepared a detailed list of all the fields needed for each object, such as the deal amount, expected close dates, or interaction dates.
I am now in the Softr studio, starting by creating an app and choosing Softr Databases as the data source. You could connect other data sources or services with a REST API, but we will go with Softr Databases for the best performance when connecting to your interface. If you already have your data in Notion or Airtable, you can also connect directly on top of those.
Softr automatically creates some initial utility pages and blocks. I will connect a dynamic block to a new database, starting from scratch to link our interface directly to the data. I'll give a clear name to both the app and the database, which exist as two distinct components in the tabs.
Next, I will add one table per object: Users, Contacts, Companies, Deals, Interactions, and Tasks. With these six tables matching our objects, we need to create the fields for each table and establish connections between them. This process is straightforward in the studio.
The first column is always the primary field, where it is best to use values that are unique. For the Users table, I use email as the primary field and set its type to email because two people cannot share the same address. I will remove the unnecessary default columns and add a short text field for the full name.
To assign different roles to users, I will use a select field with options for admin and sales rep. We can also add a file field for an avatar so team profile pictures appear across the interface. Then, we can set up relations to link tables together.
Under relations, I will create a related record field called Assigned Contacts connected to the Contacts table, which automatically mirrors the connection on the other side. Following our schema, I will also add relation fields to connect users with deals and tasks. Finally, I will add the record ID field.
In Softr Databases, a record is a row in our database. Each row receives a unique identifier, ensuring that even if two rows share identical names among 10,000 entries, each can be individually identified. We can add a bit of dummy data with emails and avatars as a baseline to test the app.
Moving to the Contacts table, I'll remove extra columns and set up the email field. I will rename the auto-generated relation to Contact Owner to define which sales rep owns the contact. Then, I will add fields for first name, last name, job title, and a dedicated phone number field.
Lastly, our contacts need to be connected to companies so we know where they work. I will add another related record field called Company and map it to the Companies table.
What I will add here is a constraint to prevent a contact from being mapped to two different companies. In the context of this CRM, we consider that a contact can only be assigned to one company. If you want to reorganize, we can also drag and drop our columns.
I will add another related records field because contacts need to be connected to interactions, such as all the emails exchanged with them. This time there can be multiple interactions, so I am keeping that toggle on, and that will be all for now. Moving to the companies table, we will keep this text field and rename it to company name.
We automatically have the link to contacts here, which is perfect. We will add a URL field to store company websites and a select field for industry values. Having this as a select field will enable us to offer a filter in the interface later, helping users find all companies assigned to a specific category.
Let's add our own taxonomy of industries here. The value of creating your own CRM lies in this personalization, because you are not stuck with a predefined list of industries that doesn't match your prospecting approach. Now is where it gets really interesting.
Within our database, some fields will take manual inputs, like getting a company name from a submitted form. There are other elements where we want the help of AI and web search to bring in deeper insights about a company. We will add an AI agent field, which is a feature in Softr Databases that automatically generates AI-based insights under specific conditions, such as record creation.
We want a research field here to provide an activity description, which is where we will write our AI prompt. We can ask for three concise bullet points describing the company's activity, map the company name field using the @ symbol, and link the website field as well. I will also enable web search so the AI agent can find online information that matches our guidelines.
We can use AI to refine the prompt, and then decide exactly when this AI agent should run. Rather than running whenever any record is created, we can set it to run only when a website is available. If sales reps want to research the company manually, they can also edit this value by hand.
Let's test how this works by adding a company named IBM along with its website URL, which will automatically trigger the insight generation. The agent returns the three requested bullet points. If we want to adjust the formatting, we can refine our prompt to specify markdown format and get the exact output we need.
We can add another automated field by duplicating this one, setting it to output a number for the employee count. We can prompt it to return the most accurate number of employees found online for that website. While web searches might not always provide an exact figure, it gives a clear indication of whether a business is an enterprise or an SMB.
Testing this with Softr returns an accurate result alongside the generated activity description. Adding fields that do not require manual entry significantly increases the value of the database. Next, we will connect the companies table to deals with a related record field, allowing multiple deals per company.
We will also add the native created at field from Softr to get an automated timestamp for each row. This allows admins to track how many companies are created each month and build charts based on that data. With the company data structure ready, we can move on to deals.
[.blog-callout]
Note from Softr: The AI Co-Builder can generate full database schemas and complete apps from a single prompt. Everything remains fully customizable by hand afterward if you prefer not to configure each field manually.
[.blog-callout]
In the deals table, the connection to users represents the deal owner. We will link the company field to only one record, ensuring a deal is never assigned to multiple companies. From here, we can set up the standard deal properties.
We will have a number field for the amount, and we will call it ARR for the amount of annual recurring revenue this deal represents. Let's actually make it a currency field in US dollars. This is even more specialized than a basic number field, so if we enter 10,000 here, it will automatically be nicely formatted.
For deals, we want a pipeline, so we definitely want some stages to help us know the status of each deal. I will choose a select field here and call it deal stage. Here we can add all the properties we need, such as new opportunity, negotiation, closed won, and closed lost.
This setup is pretty simple, but you could definitely add more granularity. In our case, new opportunity means we just received a demo request from that prospect. Negotiation means we have started getting back to them and are in conversation, and the final outcome is either winning or losing the deal.
This allows us to keep track of all the opportunities we lost and gather useful analytics based on that data. Our CRM also directly hosts a demo request form to allow prospects to submit inquiries. In many use cases, this form would actually live on your website.
We will add text fields here for the demo request email, the demo request first name, and the demo request last name. We will also include a long text field for the demo request message. In this CRM structure, we consider that every single demo request automatically creates a deal, so we simply capture these as fields directly on the deal record.
Later, we will create an automation that takes this email and checks whether we already have an existing contact with that address. If so, it will make the connection. If not, it will create a new contact and generate the related company.
I will also add a date field for the demo request date, including the time. To help manage the deal, we can also add a close date field. That will represent the exact date we are supposed to close in the future if the deal is open, or the date it actually closed if it is marked as closed won.
It is also useful to establish a relation to tasks, as we had planned. We will manage tasks at the deal level whenever there is something specific to do for that deal, so we will create that connection here. We will also add a file field just in case, allowing the team to store documents like quotes or slide decks.
Next, I would like to include a long text field called interactions digest, which will be based on all the interactions for this company. There are two ways to build this. We could compose the full content here with a formula that puts the name of the interaction and the description into one field, allowing us to look it up and pull all the data to this level.
Instead, we will build that with an automation. At the deal level, we will have a button that searches for all interactions connected to the deal through its contacts and creates a summary. That gives a clear understanding of where things stand, the real status of the deal, and potential next steps using AI-powered insights.
Rather than using a separate AI agent, this field will be populated automatically through an automation, a concept we will cover later. Lastly, we will add created at and last updated at fields to track record history. We can also add a long text field called deal description where we can note that the prospect wants a specific product or use case.
We now have a solid structure for our deals containing all the information we need, which we can populate through automations and display in our interface. Now let's move to the interactions table. We will give it a title and a select field for the type, with options like email and meeting, though you could also add calls or notes.
The description field will hold the actual content, such as an email subject and body, so we can present those nicely. We can also add options for direction, indicating whether an interaction was inbound or outbound. For the title, instead of writing it manually, we can use a formula to generate it automatically.
We will use AI to help create a formula that displays the direction, then a separator, then the type, and finally the contact name. Adding the date timestamp makes each interaction title clear and unique. That gives us enough structure to store all interactions, so the last table we need to prepare is tasks, where we will include a title, description, and status.
And we already have the link to the user and to the details. The first version of our database for our AI CRM is ready. We see that we have a very good data structure, for example with those interactions, because they are well connected to the other objects and they are well documented.
I would say that this database is now AI-ready because we will be able to build a lot on top of that. We will be able to build some database agents and workflows that will be getting information, filling new fields, or sending emails. So what we could do is add some more data here so it starts to look like a CRM that is actively used, but the skeleton is definitely there. I will now bring some more placeholder data in so we are ready to move to the interface building phase.
Now I have added some more placeholder data so we can really get started. I am going back to the interface tab where we find some pre-configured blocks and pages. Since I have already connected this to the first table when I created it, my interface is now officially connected to the data source.
[.blog-callout]
Note from Softr: You can also use the AI Co-Builder to generate full app pages, CRM layouts, or complete database schemas directly from a prompt. Everything generated remains fully customizable by hand afterwards.
[.blog-callout]
Now what I have to do is go into users. Softr creates a test user by default, and you could manage your users right from this tab. What is very powerful, however, is connecting the user system from Softr to a table in your app.
In our case, we have built this users table, and we then map the columns for the email, the name, and the avatar. If I hit sync here, it will sync this to the database. If I go back, I have all my users, and I can go ahead and remove the test user.
I can also go into the auth settings and decide how things work. For example, I could enable sign up, but because this is an internal tool, I want full control as an admin over who can sign up. I could also use domain restrictions, or enable options like Google sign-in.
If I go into user groups, we said earlier that we have two types of users: admins and sales reps. We created a field for that role in our table. I will create the admins user group based on the condition that their role is admin, and then create the second user group for sales reps.
Based on that, I can also directly set my brand styling. I can choose a font for the titles, apply a specific gray color for text, and choose an accent color like orange. Softr automatically handles contrast so button text stays readable, and you can adjust the app size and corner roundness so it looks good out of the box.
Moving on to settings, this is where I can rename my app and select a specific Softr subdomain like AI CRM. I could also upload a logo or add a custom domain, but for now I will keep the general setup. All the utility pages needed, like the login page, account settings, and reset password flows, come natively out of the box without needing to build them manually.
We already have a home page, and looking at the visibility settings, only logged-in users can currently access it. In our case, we want visitors to see this page because it will hold our demo request form. I will make it accessible to everyone, and then create a dedicated home page for logged-in users to separate the visitor and internal experiences.
We will not need these existing placeholder blocks, so I will replace them with a hero block. Below that, I will add a centered form block for the demo requests. We will connect this form to the deals table so that submitting the form automatically creates a new deal record.
For the form fields, we will ask for an email, first name, last name, and a message, and update the labels accordingly. We can add placeholder text and customize the submit button with an icon and a personalized success message. We will also set the hero button to scroll directly to the form section.
When we preview this, clicking the hero button jumps straight to the form. Submitting an email and details creates a new line in our database. To capture the submission time, we can simply add a hidden input field that automatically passes the current date and time.
To finalize this page, we will make these blocks accessible only to visitors in their visibility settings. This ensures that when logged-in users land on this page, they will not see them. I will add a call to action available only to logged-in users that links directly to the app home page. When we preview as a visitor, we see the public content, but when logged in, we see the button directing us to the app home.
On our homepage, we want one page per object, including a directory for contacts, one for companies, and one for deals. We will add quick links that enable navigation across these different pages. Right now, we do not have these pages created yet, so I will go ahead and create empty pages for contacts, companies, and deals.
Returning to the app home, I can now configure those links. We will add a welcome message that dynamically references the logged-in user's full name, along with a cover image at the top. This gives us our navigation setup right on the main dashboard.
Next, we can add some dashboards to our CRM homepage. It works well to add column charts for our deals, filtering to show only deals where the stage is closed won. We will display the sum of the amount grouped by close date on a monthly basis, showing the closed won amount per month.
Duplicating that chart allows us to show the total count of deals closed each month instead of the sum of the revenue. Now we have two clear visual metrics on the dashboard. Previewing the page, the charts display nicely with our existing data.
Now we will build the contacts directory page. Since there can be many records, using a table block connected to the contacts data source is ideal. In the source tab, we select the data to pull, add the creation date field, and sort to show the newest entries first.
In the content tab, we configure the visible fields like company, email, and contact owner. To save space, we can add a formula field in the data source to combine first and last name into a single full name field. We can then display that full name directly, adjust the company field width, and set the creation date to relative time.
We will add the title All Contacts above the list. Softr provides a native search bar that lets users search by email, first name, and last name, and we can add company search as well. For filtering, we can add dropdowns for company and contact owner, setting a condition to only list owners whose user group role is sales rep.
We can configure pagination to display twenty records per page or enable infinite scroll. In the actions tab, we manage how end users interact with this block. We will enable the add record action, name it Create Contact with an icon, and configure the input fields such as name, email, company, contact owner, job title, and phone number.
To view full details for an individual record, we will add an item details block on a dedicated page. Clicking the setup button automatically creates a new page called Contacts Details mapped to the contacts data source. On this page, we can hide unused image fields, display the full name as the title, and organize the remaining properties like company, owner, email, phone number, and interaction count.
Back on the contacts list page, previewing the app confirms that we can add new contacts through the creation form. Clicking a record opens the detailed view in a modal, showing all configured contact information alongside an edit button that we can customize next.
We will go back into Softr Studio here under contact details. Here we will allow our end users to edit contacts, deciding again which fields they can modify. Design-wise, because our app background is quite white, I will add this container style to make the information very visual.
Now I will build using the same principles for companies. We will use a different kind of listing block, selecting the grid block here. Ideally we would have the logos of the companies displayed, which would be a great way to showcase them.
Let's sort them by company name in the content section. We will display the industry field, which is very convenient. It could also be interesting to add a roll-up field based on our contacts to count all the related contacts.
[.blog-callout]
Note from Softr: You can quickly build complete CRM layouts and interfaces using the AI Co-Builder, or get started immediately with an AI CRM template. Everything generated remains fully customizable by hand afterwards.
[.blog-callout]
That number of contacts is something we can display directly in our block or as a suffix. Lastly, we can display their website. Let's also add some filters, such as the industry, and the search function works great here too.
We can also allow users to create a company from here. Similar to contacts, we will allow users to open that company to see more details. I will select the item button type to open the details page, pick an icon, and configure the page to open in a modal.
Now we want to display all the contacts that work at this company right below the company information. For that, we will use some advanced filtering rules that Softr makes super easy to implement. I will copy the contacts block over to our company detail view and move it down.
I will remove displaying the company name in the list since we already know it. We will add a conditional filter to only show contacts if the company field matches the current record on this item details block. This automatically filters the list to show only the contacts working at that specific company.
We can test this out since the studio preview is not entirely dynamic. Before testing, I will remove the manual company filter from the block and update the create contact action. We will not require the user to select the company manually, but instead pass the detail page company name as a hidden input value.
When we create a contact through that form, it will automatically be assigned to the correct company. In our test, we only see the four contacts associated with this company. Creating a new test contact confirms that it gets linked to BMW automatically.
Going back to the studio, I can also add an action button to delete the company so that all CRUD actions are available. We can use user groups to ensure only admins can see and use this delete button, since deleting is a sensitive action. Now let's replicate this workflow for deals.
We will structure deals a bit differently by using a tabs container. This lets us house specific visualizations and different blocks across separate tabs. We will have a first tab for the pipeline and another tab for deal creation.
Inside the pipeline tab, I will add a kanban block, which is one of the most convenient ways to track a deal pipeline across funnel stages. We will connect this kanban block to our deals table and group the cards by the deal stage field. Each stage becomes a column showing relevant information like the deal owner at the bottom.
For filters, we can filter by deal owner or by company. When it comes to actions, users can drag and drop deals to advance them to the next stage. We will disable inline deal creation on the kanban block itself because we want a dedicated, spacious form for sales reps to input comprehensive deal information.
Going back to our pipeline, we can configure the click action on a card to open a deal detail page with deeper context. Below the deal details, we can use tab containers to show a tab for company information, another for all related contacts, and another for interactions.
I will be using a list of companies here, but I will only show the company to which the current record is linked, displaying just that single item. By removing the search bar, the filters, and the see more button, we can show key information about the related company, like their industry description, activity, and creation date. We can also add an action button at the item level so clicking it opens that company in a modal, allowing you to access related company details right from the deal.
We will do the same for contacts by copying the block we created and moving it into all contacts. The condition will state that the company is the same as the current record's company, allowing us to filter properly. We will set the right criteria to make sure only matching records display.
Next, we need to show all interactions logged for contacts belonging to this company. I will use a table connected to the interactions data source, filtered to show only interactions related to this company. To make this matching work, I will go into interactions and pull in the company of that contact using a lookup field.
With that lookup in place, we have enough data to map interactions to our deal. We set the filter condition so the company includes any of the current record's company. After switching the layout from a table to a list, the conditional filter remains intact.
Instead of showing the entire content of each interaction immediately, we can place the details in an expandable secondary section so it takes up less vertical space. The list will mainly display the title, with options to search contacts and filter by contact, interaction type, direction, and user. Let us preview what we have so far on the homepage.
Navigating to deals, the pipeline is visible and we can drag deals from one stage to another. We can open a deal, edit details like the deal name, and view or open the related company. In the contacts and interactions sections, clicking into an entry lets us view the full logged history.
Now we can introduce a powerful AI feature called Ask AI by adding a top bar button. Ask AI is a built-in assistant that answers questions in a chat interface based on the data within that block. We can customize the welcome message, style, tone, and specify whether it answers using all fields or only configured fields.
In the instructions, we tell it to answer based on the list of interactions. The assistant reads through the data to suggest prompt ideas automatically, and we can sort by timestamp to see the newest messages first. Testing it out shows that the assistant already understands our records.
Users can access these AI features simply by enabling Ask AI, and this can be added to any block listing records. For instance, on a long list of contacts, Ask AI can identify the best contact to reach out to. We can also add Ask AI to the kanban block in deals.
Setting Ask AI at the kanban level allows it to answer questions across all fields, like identifying why deals were closed or summarizing common patterns. Because the responses are grounded in the actual data on the page, the model does not hallucinate, saving sales reps valuable time.
Finally, we can fine-tune our other pages by bringing these blocks over. We can add the related company block to the contact details page with a filter for the current record's company. Below that, we can list the interactions for that specific contact by filtering where the email matches the current record's email.
Now we have even more insights at the contact level, and it really starts to look like a very useful and AI-powered CRM. What we can also add now is we will take the nice kanban that we had and add it to our company detail page. We will add some containers here to organize them nicely, so first we will have all contacts.
I will be placing these in here. We can now even remove this title. Before previewing our app again, I would like to go back to our homepage for logged-in users to improve the navigation.
I will remove some of these links and simply add the pages that we have. It starts with contacts, and then we have deals, also with icons. I will actually make this navigation the internal navigation, whereas the public homepage will not be using this layout.
We will be using a new navigation bar that looks a bit more like a normal marketing website, with the layout positioned at the top. We can call it public navigation, and there will not be any user menu this time. We will just have our logo because most actions are already available on the page.
[.blog-callout]
Note from Softr: The AI Co-Builder can generate complete pages, database schemas, and navigation layouts directly from a single prompt, while leaving every block fully editable by hand afterwards.
[.blog-callout]
Going back to our app home, we can add some other layouts here. I will add a three-column layout with some charts and metrics inside it. For example, it could be interesting to show the total number of contacts.
We can aggregate this by counting all of them, which shows we have 38 contacts. We will put this in a container and add another metric for the number of companies, as well as the number of deals. We could actually make it four columns since we still have space for the pipeline value.
I will add a filter based on the deal stage so we only show the open deals that are not closed. The value we refer to here will be a sum formatted with a dollar prefix. We could also add a pie chart for our deals showing our won versus lost ratio.
We will count all the deals grouped by deal stage, filtering by the stage to show only the closed ones. It does not show up immediately because we need to preview it, but let us give it a try. We now have our new navigation bar, cover image, navigation links, and analytics dashboard elements that we can easily access.
We can see our ratio of closed-won deals here. Opening any contact shows the related company and past interactions. If we find someone with multiple interactions, we can ask AI to summarize long email threads very easily.
Moving to companies, we have a clean layout where we see all related contacts and all deals with a pipeline that we can manipulate easily. When opening a deal, we have detailed information and the ability to edit it. If logged in as an admin, a user could also delete deals.
I added a few additions off-camera to make the interface even more convenient. We now have tasks here and two different dashboard views: one filtered for the sales rep and a global dashboard. Admins do not own any specific tasks or deals, so they will see all tasks and all dashboards.
Clicking on a task displays all related deal information and allows users to leave comments using the native comment system in Softr. For companies, we mapped a new logo field. For contacts, sales reps can now toggle between seeing all assigned contacts or all contacts.
When it comes to deals, we have a view to see interactions alongside related tasks. Finally, opening a contact displays past interactions and includes a form to send an email. We will create the automation that sends this email whenever the form is submitted.
Back in the studio, taking a look at the database for interactions, I added three new columns: a checkbox to indicate if an email needs to be sent, a subject field, and a body field. In the contact details block, I mapped the email subject and email body fields to this form while keeping the remaining fields hidden.
When sending an email, the direction is outbound, the recipient is the selected contact, and the author is the logged-in user. The form also captures the timestamp and sets the email-to-send checkbox to true, which helps us configure the trigger for our automation.
Whenever a record has this checkbox marked as true, we want to send the subject and body to the contact from the related user email. In the dashboard under workflows, we will start from scratch and select the trigger for when a record meets certain conditions in our interactions table.
The condition is that this checkbox is true. Whenever this checkbox is true, and it checks that for new records, we will be triggering our workflow. Next, we can test here to see what data we have available, and then find the action that will enable us to send an email.
Here is where you will be able to set a specific sender email if you want. We will map the email that should receive it, which should be our contact email. For the subject, we will simply map that, or hit the at sign to find the subject, and for the body, we will add what we had as the email body.
We will make sure that all replies go to the logged-in user who was actually sending this email. Looking back at our database, we need to properly map the content of that interaction. For that, we will use a Softr Databases update record action because the record already exists and we just have to edit a value.
We will select this table again. We are asked which record we want to update, which we have from the first step since it is the record that triggered the automation. I am selecting the record ID, and in the fields, we want to dynamically edit the content.
We will add a subject, map the email subject that we had, and add the email body. If we test that, we will see that our record just got the proper documentation for how we store this data. This is very important because we mapped an AI chatbot field that goes through interactions to understand what is happening within this deal.
Having this text properly logged in this way will help our AI have all the information available to answer your questions precisely. Once we are done, we can simply turn this one on. Now, whenever someone fills out this form, it will send an email to the selected contact.
Now let us build the automation to handle new demo requests from our form. We want to check our CRM to see if this contact or company already exists, and if so, match it with that new demo request. If this is a new contact, it will add them to our contacts CRM and create the new company record for that new deal.
We will go back into our automations and start a new one based on records that meet conditions. We will select our deals table this time because submitting the form directly feeds the deals table and maps to fields specific to demo requests. Our trigger will be when a deal has a demo request email that is not empty, which means the deal was created through the demo request form.
When we have a new demo request, we will use Softr Databases to find multiple records in the contacts table. We will look for records where the email matches the demo request email. If we check that, we can see if a record already exists, and we will add branches to handle the flow properly.
There are two conditions. If a record ID is found and not empty, it means we already have that contact in our CRM and the company is already created. In that case, we do not have to do anything else because we already know that contact.
In case the record ID is empty, we will use Softr Databases to add a new record because it is a new contact. I will go into contacts and create that new contact, mapping the email, first name, and last name from the demo request form. Using the at symbol for the triggering record, I will map those values so new contacts are created automatically.
Now we also need to create the related company, because if we did not have that contact, we did not have the company either. In our form, we did not ask for their company name, because this is something we can find ourselves using enrichment. We definitely want to make sure this form is as easy as possible to fill in.
I will add an AI step here with a custom prompt, using a small model with web search enabled. I will ask it to look at the domain of the email and strictly return the exact company name it is related to. If we test that, we will see that the AI is capable of going from a domain name to a company name.
Right after that, we can use Softr Databases to create a new record for that new company. The fields that we are able to fill in now are the company name and domain.
And for the industry, if you remember, we had created some AI workflows in here. I also enabled this one that will, based on the company name and domain, find the industry, the description, and the number of employees. We do not have to generate those, as we will just be sending these two, but we will also already map the contact that we have just created because we want to connect them.
For the company name, I will reuse the outputs of our AI step here. For the domain, we would like to return the domain that we had from the email. Because we got the email of the contact, we can find the domain name of that company by taking everything that is after the @ symbol in their email.
For that, I can use a custom code node. Since I am not familiar with code, I will ask the AI Co-Builder to help. I will say that my first node was able to return the email of the demo requester, and now I need help with the code module to write the code that extracts the domain name from that.
The AI has written the code, and I will define this email variable. This is now supposed to extract the domain that we had. Thanks to AI, we could get some help to extract the domain and use it here.
For the contacts, I will run it once to test. Here, I can simply map the contact that we created a bit earlier. I will map it using the ID, and this will automatically create that new company and connect it to the existing contact that we had.
To summarize what we have for our AI CRM, it is demo request handling. What we could add as a last step would be to add a Slack message and post that in a channel. In the sales channel, I can now say new demo request email.
This workflow is now able to notify my team whenever I get a new demo request. It also matches and avoids manual manipulations in my CRM to see if we already know this company or contact, making sure that my data stays clean.
Now let us look into a last workflow that was very interesting to build. I have created this for our deals, where we have this list of interactions that we had with deals. I have built this new button that, when clicked, shows a waiting screen for a couple seconds and displays three bullet points that summarize the status of this deal based on all the interactions as well as their initial requests.
In my deals item details block, I have added a new button that does not create or edit a record, but runs a custom workflow. We are sending the deal ID data to this workflow so that we will be able to reuse that data within the workflow. We have linked this to a workflow that starts with the run custom workflow trigger, which means you have to connect that to an app as we have done here.
[.blog-callout]
Note from Softr: You can explore the ready-made AI CRM template to see preconfigured workflows and deal management in action, or build custom logic directly with Softr Workflows.
[.blog-callout]
Whenever a user clicks, it will pass the deal ID that we can reuse within the workflow. First, we have an option to show a waiting screen, and we have three different styles available. We can also customize the text that you see after 10 or 20 seconds to let your user know that something is happening in the background.
As a first step, we are going to fetch all the data from that deal using the deal ID sent through the button so that we can reuse it later in the workflow. We could have passed all that data alongside the deal ID, but we can also do it that way. Right after that, we will search all the interactions that match the same company to get all the context.
We get these six interactions that have all their content stored. That is our way to be AI ready with this app, because now we are able to pass the list of all records that we found to an AI. We tell it to summarize the interactions we have had and take into account the initial demo request message, which we are also mapping here.
We add some formatting guidelines so that we always have these three bullet points. What happens next is that we are updating the deal record to store that digest summary right where we have a dedicated property mapped. That is what we see when there is no data, and that is what we see when data arrives.
Once this workflow is over, we show a success message saying that the summary is ready. Navigation-wise, we stay on the same page and reload all the blocks on that current page, which makes sure the page is refreshed and we see the latest summary. If there are a couple more meetings or emails exchanged, the rep can go in and hit summarize whenever they need to refresh.
Overall, if we look at what we have built, we now have a fully customized CRM for our company. It really matches our taxonomy of industries, our processes, and our customizable pipeline stages. We have all our users set up, including an admin view that lets them access the global dashboard, manage all tasks, and more.
For non-logged-in users, we have a sales form that automatically creates a new opportunity when submitted. It matches the submission with existing records in the CRM or creates new ones and enriches them automatically. The sales reps get notified in Slack and can immediately jump in to find the prepared data, write follow-up emails directly within the interface, and respond quickly to prospects where response time is critical.
We have built around eight pages in total, and they cover all our needs. On each page, we display all the relevant information across connected records because our structure is properly linked using Softr Databases. Reviewing the features we set out to build, visitors can submit forms, we manage all contacts and automated deal creation, we handle tasks, we leverage AI-powered insights, and we manage email sending directly.
We are making this template available so you can simply copy it and adapt it to your company, reusing the entire infrastructure we built. You also now know how to build your own custom application with Softr. It is an effective solution for internal tools, but you can also build external portals, such as customer portals with data restrictions, user groups, and permissions built right in.
Softr acts as a full-stack builder because you get properly structured data storage with Softr Databases. You have the interface builder to design your app experience, and you have Softr Workflows to automate logic, making your app dynamic and your team more productive.