Transcript
We have a really fun session talking about Coda and Softr, showing you how to build with the two and answering questions along the way. We are going to be building a vendor portal together and covering a lot of cool functionality.
I run community and education here at Softr. I have been building in the no-code ecosystem for the last five years now. Here with me is my good friend Scott, the Coda guy.
I have been building on and with Coda for nearly seven to eight years now. I actually started in public education as a high school teacher, using Coda to solve my own problems and organize my data. I really fell in love with the way Coda acted as a database, an automation tool, and a user interface, which allowed me to pivot out and start my own agency.
Now we serve hundreds of clients who use Coda to run their businesses. I am really excited about the Softr integration because I have been hoping for years for something like this to support our Coda work for client portals, vendor portals, and more secure ways to slice Coda data.
We work with everyone from preschool soccer programs, bakeries, and mom-and-pop shops all the way up to professional sports teams and large tech enterprises. Coda is a really versatile tool that can serve as a wiki for SOPs and team documentation, but it also acts like a relational database similar to how Airtable functions.
All day long, we are dealing with data in a collaborative setting, often internally with teams planning events or managing projects. A major use case for Softr is in the agency world, where teams manage tasks for multiple clients in one Coda system but need a secure way to share only a single client's tasks with that specific client.
Today we are going to be building a vendor management portal. The data lives in Coda, and we are going to build the interface together in Softr. Imagine that we are the owners of a wedding or conference venue working with various vendors.
Each vendor needs to apply to work with us, sign agreements, and send invoices. With user authentication, each vendor can log into their portal to view only their own data, check the status of pending items or invoices, and never see anyone else's information.
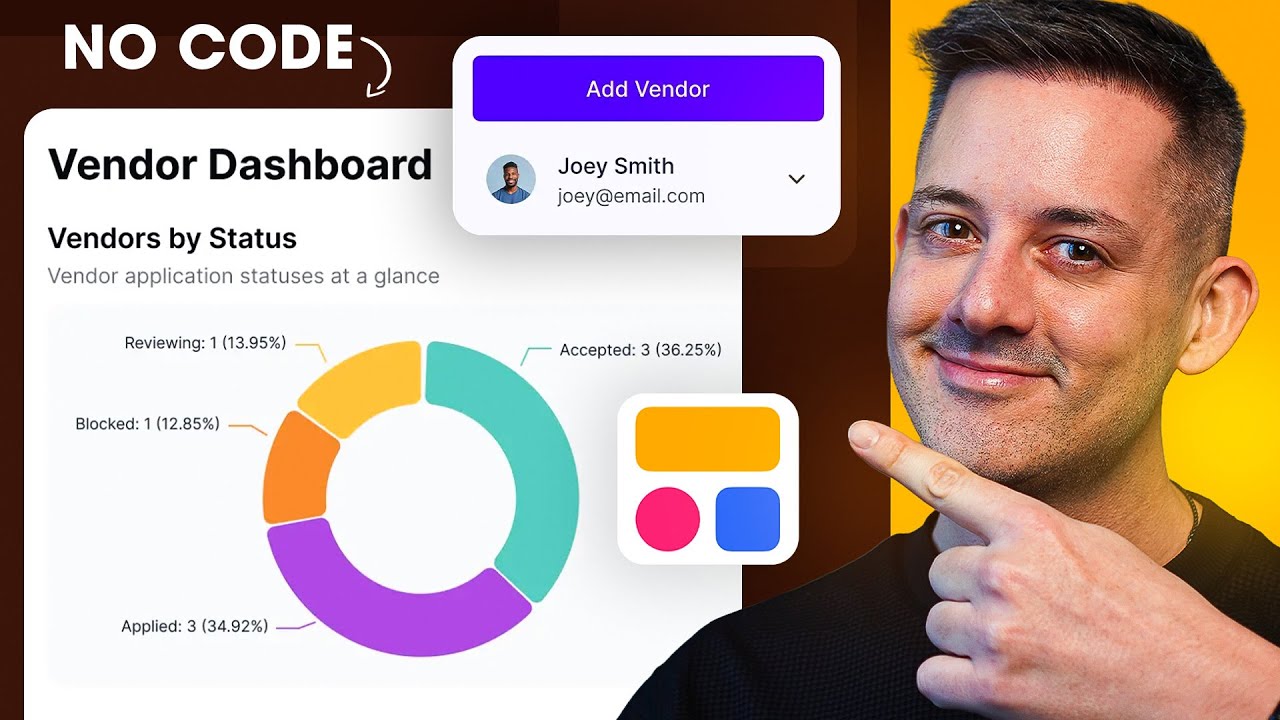
Looking at the vendor management application dashboard we will build, we can see the statuses of all incoming vendor applications, such as which ones have applied or been accepted. We will also track invoice totals from quarter to quarter and view all of our vendors filtered by their statuses.
We will build as much of this as possible together today, and you can ask questions along the way. This is an interactive experience, and we have Scott here for any Coda-related questions. Specifically for this build, we are going to set up user authentication, a user permissioning system, and a two-way sync with Coda.
Whenever you edit data in Coda, it will be reflected in Softr. Whenever you edit data in Softr, it will be reflected in Coda in a very quick synchronization process. We will build the vendor listing page, create new vendors using action buttons, and look at conditional forms.
Scott, why don't you pull up your screen and walk us through the database we have in Coda? Give users a quick overview of what Coda is and how you interact with that interface.
Coda is a collection of documents, and inside a document, you have multiple pages that can connect to each other. Each page can hold data. We have three core pages here: users, vendors, and invoices.
Stepping into the role of owning a wedding venue, I have a database of all my vendors. It acts similar to a spreadsheet or Airtable, allowing me to add columns, track dates, and use different column types. I can expand rows to see details, and the tables link to each other.
Vendors have multiple invoices, so the invoices table connects back to the vendors table. We also have users linked to vendors and invoices, so you can see all that data in one place and create new invoices directly from there.
The challenge with storing all this data in Coda is figuring out how to share it securely with external vendors. We need a way for a vendor to see only their specific invoices without exposing the rest of the document.
Coda does have ways to do this natively using integrations, which are called packs. A Coda document can interact with other Coda documents, allowing you to create a separate document for a single client and pull in just their invoices. However, if you have ten or more clients, manually building and maintaining individual portals does not scale well when you need to make updates across all of them.
Now I will pull up my screen and start building this portal in Softr from scratch. In the final app layout, we have navigation for the dashboard and vendors, the ability to add a new vendor, two summary graphs inside a container block, and our main listing.
We are going to start fresh inside Softr. We will select Coda as our data source and connect directly to it.
And right away, it starts to build a basic app for us. Now I need to start connecting this to Coda and bringing it to life. In Softr, we have a block system with a ton of different blocks that you can use to build your app.
We have dynamic blocks, which allow you to take data from Coda and connect that data directly to the block to display it. In this case, I'm going to go over to this list block, set the source to Coda, and pull in all of my vendors from that document. It then starts to map the information automatically.
This is a list block, but from the preview I showed earlier, we want a grid format. So I'm going to go up to the block type and switch it to a horizontal card. Now we can start mapping all this information as we bring everything together.
It is already pulling directly from that Coda doc, fully synced and ready to map. To connect it, you go to the source section and add a data source. If you choose Coda, you grab your API token from Coda, paste it in, and select the specific document and table you want to pull from for that block.
[.blog-callout]
Note from Softr: Softr integrates with more than 17 external sources, and Softr Databases is the native way to hold data inside Softr with better performance.
[.blog-callout]
You can also combine multiple data sources on a single page. For example, you could have one block pulling vendor details from Coda and another block displaying a graph connected to Stripe. You can also connect data from multiple separate documents on the same page.
Now I will start mapping the fields in the content area of the block so it looks much better. I will select the vendor logo field and adjust the cover media state so that it is properly contained. Then I can toggle additional fields on or off depending on what we want to display.
I can hide the address and categories, but keep the manager visible. Since this is pulling live data from Coda, any new column added in Coda will appear as an available field toggle here. We can map the website and vendor logos right back in place.
For the website field, we can add a text label. For the application status, we can display a status label, switch the format to a tag, or remove the label entirely. You can also adjust formatting with heading styles depending on the visual hierarchy you prefer.
Next, let us look at setting up the navigation header. Clicking on the pre-built navigation block allows you to position it as a side nav, top nav, or both. In this case, we will configure it as a top navigation bar.
After choosing the layout, you define which pages should appear in the menu. Over on the left-hand panel, we can manage and rename our pages. We will update the home page to serve as our dashboard and rename the pre-built list page to become our vendors page.
When building a secure portal, an admin needs to log in and view all vendors, while an individual vendor should only see their own record. We are building a portal for both user groups so everyone can manage their information securely in one place.
Eventually we will tie it to usernames and passwords, and that will secure the data. That brings us to our users area. We have made it easy to add user authentication, which you can just toggle on and off.
Right now we are not allowing anyone to sign up, but we can enable it so that anyone can sign up or restrict it so only people with certain domains, like softr.io, can register. In this case, maybe we want to disable open sign-up and invite vendors ourselves. We create the users directly and give them usernames, which can be handled automatically.
You can also toggle on the setting to automatically send invitation emails once a new user is created. Another option is using a conditional form where someone requests access, and you receive a notification asking if you want to accept them. For now, I will keep open sign-up enabled so I can show you the pages that are generated automatically.
When we return to the interface, we can see that a sign-up page has already been created for us. We can go in and customize it to suit our use case. The sign-up, login, and password reset flows are all built out of the box just by enabling sign-up.
Looking at our user database, each record in the users table has a role, such as manager or contact. In Softr, we build distinct experiences for different audiences using user groups and permissions. We can create dynamic, condition-based user groups tailored to specific content.
To configure a group for contacts, we first need to ensure our users are synced with our data source. We previously connected a block to Coda, but we had not yet connected our user table. Now we are mapping the user table to Coda by linking the email, name, and avatar fields.
[.blog-callout]
Note from Softr: Softr integrates with more than 17 external sources, but Softr Databases provides a native way to manage your data directly within Softr for even faster performance.
[.blog-callout]
Once mapped, Softr syncs and pulls in all the users from Coda, allowing us to access all fields on the user table for permissions. Now that the sync is complete, we can return to user groups and set up condition-based rules. We configure a rule stating that whenever the role field equals contact, the user belongs to the contact group, and we do the same for managers.
If you change the role name in your database from manager to another term, the user group rule must be updated to match it exactly. When you add a new row in Coda, that user appears in Softr almost immediately, usually within 60 to 90 seconds, because the system monitors endpoints to process updates quickly.
With user roles configured, we can adjust page-level visibility in our application. For instance, we can set the visibility of the vendors page so that only users in the manager group can see it, while contacts cannot access it at all. This logic is handled on the server side to ensure complete security as we continue building out the dashboard.
If we look at our app here, we see that the colors are different. We have this orange accent, so I am going to go back into Softr and head to my theme settings. I will adjust our accent to match that orange color and save the changes.
Now we have our orange color applied, and I can go into styles to adjust how this should look. It is also worth noting that this comes fully optimized for mobile out of the box. Everything you see is already built with mobile in mind, including responsive navigation, so it is ready for both desktop and mobile.
Next, I can go to the general settings area to rename the application. We can call this Vendor Management, pick an icon like a truck, and upload a custom logo if needed. Going back to our pages, we can update the navigation labels to Dashboard and Vendors.
We also have this form page set up. I am going to add a button that links directly to the form page and label it Add Vendor. This allows an admin to create a new vendor directly from the interface.
We can also set visibility permissions on that button so it is only visible to managers. That ensures only the appropriate user groups have access to add new vendors. Moving along, we have dynamic text configured to welcome the logged-in user.
When we preview the app, we can see the users synced directly from Coda. I can preview the application as any of those users and inspect the user groups they belong to. In this case, I want to preview as an admin to verify that the manager-restricted elements appear correctly.
The logged-in user data renders dynamically, displaying the specific user name. While we are testing, go ahead and delete that test record on your end so we can watch it update here. Once deleted in Coda, the change reflects automatically in the portal.
We have covered dynamic blocks, which pull data from external sources like Coda. Softr also includes static blocks, such as quick links, hero sections, feature grids, and call-to-action sections, which you can customize as needed. Additionally, we have container blocks to control layout.
There are two main types of container blocks available. A column container block lets you place blocks side by side, which works well for displaying two graphs simultaneously. We can simply drag our chart block directly inside that two-column container.
Next, we can build a tab container block. Inside the container settings, we select tabs to organize our records into categories like All Vendors, Applied, Rejected, and Blocked. We can then place our data list inside each corresponding tab.
To show different subsets of data per tab, we configure conditional filters on each block. In the right-hand panel, we set the condition where the status field matches a specific value, such as Applied. Since these values are case-sensitive, we enter the exact text to match the source data.
We can duplicate that block, move the copy into the next tab, and update the conditional filter to Rejected. We repeat the process for the Blocked tab to complete the categorized view. These conditional filters run on the server side, ensuring that unauthorized or filtered data is never sent to the client browser.
Even though it was super easy to set up our user groups and permissions, now we have an experience where it is very safe and secure for users with specific roles to have customized experiences behind authentication. We have done this in 30 minutes, so we are cruising along nicely.
I can add some different logos in here to make everything look good. We have our filters and our icons set up. Within this all vendors section, we also have the search bar and the ability to add records.
If we go to content, we can toggle the search bar on or off. What is really cool is that we can choose which fields we want the search bar to search by. For example, I want to be able to search by name, related manager, and status, and the search bar will filter by all of those options.
We can also add filters to only show records by manager, which will pull in all those values automatically so we can filter accordingly. Action buttons are how we use actions in Softr to open pages, export data, or create new items. There is a top-level action button to add new records, or we can configure individual item buttons to edit a record directly or trigger actions like an API call.
[.blog-callout]
Note from Softr: Softr integrates with more than 17 external sources, and Softr Databases is the native way to hold your data inside Softr with better performance.
[.blog-callout]
We have integrated comments using the specific item, which I will add. I will remove the top-level add button for now since we do not need to add records there. I am going to copy this block and move it right inside that column container so we have two of them side by side.
Let us preview again and see where we are. We have our updated navigation, we are logged in as the admin user, we have our two graphs side by side, and we have our vendors list. If a vendor is still showing, we have a two-minute caching system, so it might just be cached temporarily.
We can also delete records directly from Softr. Under action items, we can set an item button to delete record, which deletes it straight from Coda. When you set up an add or delete action, Softr automatically generates the modal popup for you, mapping the fields cleanly.
When we test deleting a record, it updates in real time and disappears from the view. Testing the search bar by typing a name like ProTech brings up the matching record right away.
Looking at questions from the chat, someone asked about using a summary card block to customize card labels independently of field names. Summary cards are primarily used for quick links where you can customize static elements or pull in dynamic data from the logged-in user record. You can get creative with how you build that experience depending on your use case.
Next, let us configure one of the charts before moving on to conditional forms. I will click on this chart and go to the source settings to connect our Coda data. If an option does not show up immediately, we can add a new pie chart component.
I will copy this from our dashboard app demo to bring it over. If you have blocks configured in different apps, you can easily copy and duplicate them into any other app in your workspace.
Now we will move this inside the column container here, and I will go through how we set this up. We go to content, select a donut chart, count all records, and group by the status. It takes all of the vendors by status from Coda, grouping them and counting them to provide an easy way to visualize your data using our graph system.
Let's get into the conditional form. On our conditional form page, we have the ability to sync it with a data source, or send submissions directly to Zapier, Make, email, or webhooks. In this case, we want to sync it with our data source to create new vendors.
[.blog-callout]
Note from Softr: Softr integrates with more than 17 external sources, and Softr Databases is the native way to hold data inside Softr with better performance.
[.blog-callout]
I can customize this centered form as needed. We can set up the questions, add a label like "add vendor," and include a description explaining that this form allows you to add a vendor to your application. Then we can go in and add the specific fields we want, such as name, date, status, website, address, and categories.
When you submit this form, you are adding a vendor. In Coda, vendors are linked directly to users, and this newly created vendor can automatically be tagged against the logged-in user submitting the form. Softr automatically brings these fields in, and you can adjust the field types accordingly.
For the categories type, we can do a quick select with options like wedding and commercial so users can easily select choices. You can also configure how that is laid out. Alongside visible fields, you can add a hidden field to attach the entry to a logged-in user.
To pass hidden data, you can select the logged-in user, page URL, URL parameter, or a custom value, sending that value along with the form submission to link it. Passing the logged-in user's email allows Softr to access fields on the user and tag the record appropriately.
Because this is a conditional form, you can build logic where answering one way directs the user to specific questions. For example, caterers can see different questions than video production teams. You can set visibility conditions so fields only appear when criteria are met, and you can configure custom endings or redirect actions based on user input.
If you make changes to your Coda base, such as adding a column or changing a column type, you simply click refresh on your data source in Softr to fetch the updates immediately. Once refreshed, the manager field appears, and you can autofill it with the logged-in user's email to link the record. We can also use page rules so that after sign-up, certain user groups are automatically routed directly to the add vendor form.
That way they have to go to this page automatically after sign up to add their vendor for the first time. Then we can restrict them and say they do not have access to any other pages until approved, after which they would join a different user group. You can use user groups and page rules to build a really customized experience, sending users to specific pages depending on the user group they belong to.
Ronald asked me to share how I ensured the manager column appeared properly. For those new to Coda, I will set up a quick example with people and pets. If you have multiple tables in Coda, such as a table for people with DJ and Scott, and a table for pets with Sally the dog, Joe the frog, and Samantha the turtle, you can link things together.
In the pets table, the owner column links back to the people table via a relationship column. In Coda, users are tied to vendors, so this is how you ensure a vendor gets tagged properly against a user. Inside Coda, you can link these bidirectionally so you can see the pet and who owns it, as well as the people and their associated pets.
If you look at these two columns, one has an icon with a chain link and the other does not. Inside Softr, this is treated as an editable column, whereas in Coda, it is technically an editable formula column. Because it has formulas on it, Softr originally treats it as non-editable.
To fix this, you can switch how these behave by going to edit and advanced settings within the formula column. Once switched, the relationship changes so Softr is able to read it as an editable column. That is the niche Coda fix for aligning editable permissions between both platforms.
That wraps up the core build. In the last forty-five minutes, we created an entire application using Coda, complete with user sign-up, login, and profile management. We set up user groups so specific users only see certain pages, buttons, or data, and configured dynamic and static blocks for vendor listings, search functionality, item button visibility, charts, navigation, and conditional forms.
This demonstrates the power of combining Softr with Coda to showcase data in a visual, user-friendly interface. For example, an agency could manage operations by building a client portal where clients log in to view related tasks, invoices, or time logs. Because user groups operate at a granular level, you can hide time logs for fixed-project clients while displaying them for hourly clients within the same portal.
This functionality works well for dashboards too, allowing you to combine different data sources, like marketing campaign metrics, inside a client portal. To control editability on individual fields in Softr, such as making three columns editable and three view-only, you configure that directly using conditional fields.
We would use that on an item details block. If someone says they got a new website or domain and want to update it, they can. But what if you do not want them to change their status, because they should not have permission to do that?
You can go right into the item settings and click edit record. From there, you can choose exactly what fields they are allowed to edit. For instance, you can specify that they can edit their website and their name, but nothing else.
When we preview it, they do not even have the option to edit the other fields. You can go in and edit those specific fields, and the update is immediately reflected for the user. Behind the scenes, it sends an API call back to Coda to update that record.
The Coda API is generally a little slower and not quite a high-performing API like Supabase. If you are working at huge scale or doing mass transformations with this integration, you might hit rate limits. If an edit fails and Coda returns an error, Softr will display that error so there is no confusion.
We also handle a lot in the background by caching the data from Coda and programmatically storing it. This means we do not have to make an API call for every single action, which speeds up the entire experience.
[.blog-callout]
Note from Softr: While Softr integrates with more than 17 external sources, Softr Databases is the native way to hold your data inside Softr with better performance.
[.blog-callout]
Whether you are using Coda, Monday.com, HubSpot, REST APIs, or Softr Databases, you can build portals. You can build CRM systems, dashboards, HR client portals, and internal tools using Softr with whatever data source you have.
If you are new to Coda, you can find tutorials under the Coda Guy on YouTube covering advanced functionality. There is also the Coda School at codaschool.io for power users who want to leverage Coda to its fullest extent, as well as SimpleDocs for agency coaching and custom builds.