
[.blog-callout]
✨TL;DR:
- Google Sheets can work as a super lightweight CRM for small teams, but it has no granular permissions, no real interface for your team, and no automation for follow-ups.
- The fix is to keep your data and add a real app on top. With Softr, you connect your Google Sheet (or use a native Softr Database), and get dashboards, pipeline views, user permissions, and automated workflows.
- The fastest path is to describe your CRM to Softr's AI Co-Builder, or start from the free Sales CRM template and connect your sheet.
[.blog-callout]
A customer relationship management (CRM) system helps you manage and analyze customer interactions and data, with the goal of improving relationships, retaining customers, and driving sales growth. The problem is that dedicated CRM software can feel complex and expensive for a lean team. That's why so many teams start with a Google Sheets CRM instead.
In this guide, we'll show you both stages of that journey:
- Using Google Sheets as a CRM with our free spreadsheet template;
- Turning that spreadsheet into a real CRM app, with a proper interface, user permissions, and automations, by building on top of it with Softr.
Option 1: How to use Google Sheets as a CRM with a template
In this section, I'll guide you through the process of setting up your CRM system using Google Sheets, with the help of our template. I'll walk you through accessing the template, understanding its layout, customizing it to your needs, and managing your CRM data effectively.
1. Access the template
The next steps will guide you on how to access and copy our free template to your Google Drive. You will also learn how to set up the access permissions.
1.1 Visit our Google Sheets’ template link
Navigate to the link of the Google Sheets CRM template. This link will take you directly to the template, which is hosted on Google Drive and is almost ready for you to use and customize.
1.2 Make a copy of the spreadsheet
Open the Google Sheets template provided by Softr, access the File menu, and click on Make a copy.

1.3 Rename your file and change its location
Optionally, you might want to rename your file and change the location where you want to save it in your Google Drive. When you’re done, click on Make a copy.

2. Modify access permissions
To guarantee that your team can access your CRM in Google Sheets, you need to modify the access permissions. Follow the next steps to do it.
2.1 Click on “Share”
On your newly created spreadsheet, click on the Share button, which is positioned in the top right corner.

2.2 Choose “Anyone with the link” under General Access
Once you've clicked on Share, a dialog box will appear. Look for the General Access section in this box, click on the dropdown menu, and select Anyone with the link. After making this selection, click on Done.
Alternatively, you can choose to share directly with someone, inserting their email in the field Add people and groups, and choosing their individual access level.
Keep in mind that this is where the spreadsheet approach shows its first limit: access is all or nothing. Anyone with edit rights can see (and accidentally break) everything, from deal values to formulas. We'll address that in Option 2.

3. Adjust the settings
3.1 Open the Settings tab
On the bottom of the screen, you’ll find a list of tabs, the last one is Settings. Click on this tab.

3.2 Edit the categories and options
This tab is where you can customize the categories and options that will appear in your CRM. For example, in the example below, the options for the category Contact Type are ALL, Potential Customer, Current Customer, and Other. Feel free to edit these categories and/or their options, according to your organization's needs.

4. Add your data
At this stage, if your business already has existing data on companies, people, and opportunities, it's time to incorporate this information into your new CRM. This step involves populating the relevant fields in the spreadsheet with your data, ensuring that each piece of information is placed in the correct column.
4.1 Add the existing companies
Navigate to the Companies tab in the spreadsheet. Here, you'll find several fields where you can input your company data. These fields include the name of the company, phone number, company’s website, and address.
Start populating these fields with the relevant information for each company in your database.

4.2 Add the existing people
Next, switch to the People tab in the spreadsheet. In this sheet, you'll see various fields where you can enter your contact data. These fields include the person's name, company (in a dropdown list), email, title or job position, and more.
Begin filling in these fields with the corresponding information for each person in your database.

4.3 Add the existing opportunities
Finally, move to the Opportunities tab in the spreadsheet. This sheet provides fields for you to input your opportunity data. These fields include stage, value, close date, status, priority, and source.
Fill these fields with the appropriate information for each business opportunity in your database.
5. Understand the dashboard
The dashboard is a useful feature of your Google Sheets CRM that provides a visual representation of your data and key metrics. It's divided into two main sections: Sums and Charts.

5.1 Understand the Sums section of the dashboard
The Sums section of the dashboard provides a summary of key metrics in your CRM: sales value, total number of people, total number of companies, total number of opportunities, number of opportunities by stage, and value of opportunities by stage.
These sums give you a quick overview of your CRM's current status, allowing you to understand your sales performance and customer relationships at a glance.

5.2 Understand the Charts section of the dashboard
These charts offer a graphical view of your sales pipeline, making it easier to understand your progress and identify areas for improvement. By visualizing your data, you can gain insights more intuitively and make data-driven decisions more effectively.

6. Personalize your CRM
One of the key advantages of using Google Sheets as your CRM is the flexibility it offers. You can easily customize your CRM to better fit your specific needs and business processes.
For instance, you might want to add additional fields to each tab. Let's say you want to evaluate each account manager's opportunities. You can simply add a new column to the Opportunities tab for 'Account Manager'. Once you've added and populated this column with data, you can then create a new table or chart in the Dashboard tab to analyze this information.
Remember, the goal of personalizing your CRM is to make it work for you. Don't hesitate to add, remove, or modify fields, tables, and charts to better align with your business needs and goals.
When a spreadsheet CRM stops being enough
A Google Sheets CRM is a great starting point, but most teams hit the same walls within a few months:
- Permissions are all or nothing. Everyone with the link can see every deal, every value, every note. You can't give a sales rep access to only their accounts.
- Rows and columns make a poor interface. Reps update deals by hunting through cells, which leads to broken formulas, overwritten values, and stale data.
- Follow-ups stay manual. There's no native way to send an email when a deal changes stage or to alert the team when a big lead comes in.
This is where Option 2 comes in: you keep your data, and you put a proper business app on top of it.
"In roofing, there were not many good CRM options, except for one that cost thousands of dollars a month. Instead, I used Softr to build our own CRM that rivals the expensive ones. I do not pay for features I will not use, and simply build the ones I want, exactly how I want them." - Verified User in Construction, G2 review
Option 2: How to turn your Google Sheets CRM into a real app (recommended)
With this method, I'll guide you through the process of adding an interface on top of your Google Sheets data with Softr. Softr is a full-stack platform for building business apps without code: it combines an interface builder, native Softr Databases, users and permissions, and Softr Workflows for automation. For this tutorial, we'll connect Google Sheets as the data source, since that's where your CRM data already lives, but you can also import your sheet into a Softr Database for faster performance and AI-powered data enrichment.
1. Access Softr
The first step is to access the Softr platform. Visit the Softr login page, where you can use your credentials to log in or sign up for free.
2. Choose how to start your CRM app
Once you've completed the registration process, you'll land on the Softr dashboard with three ways to start:
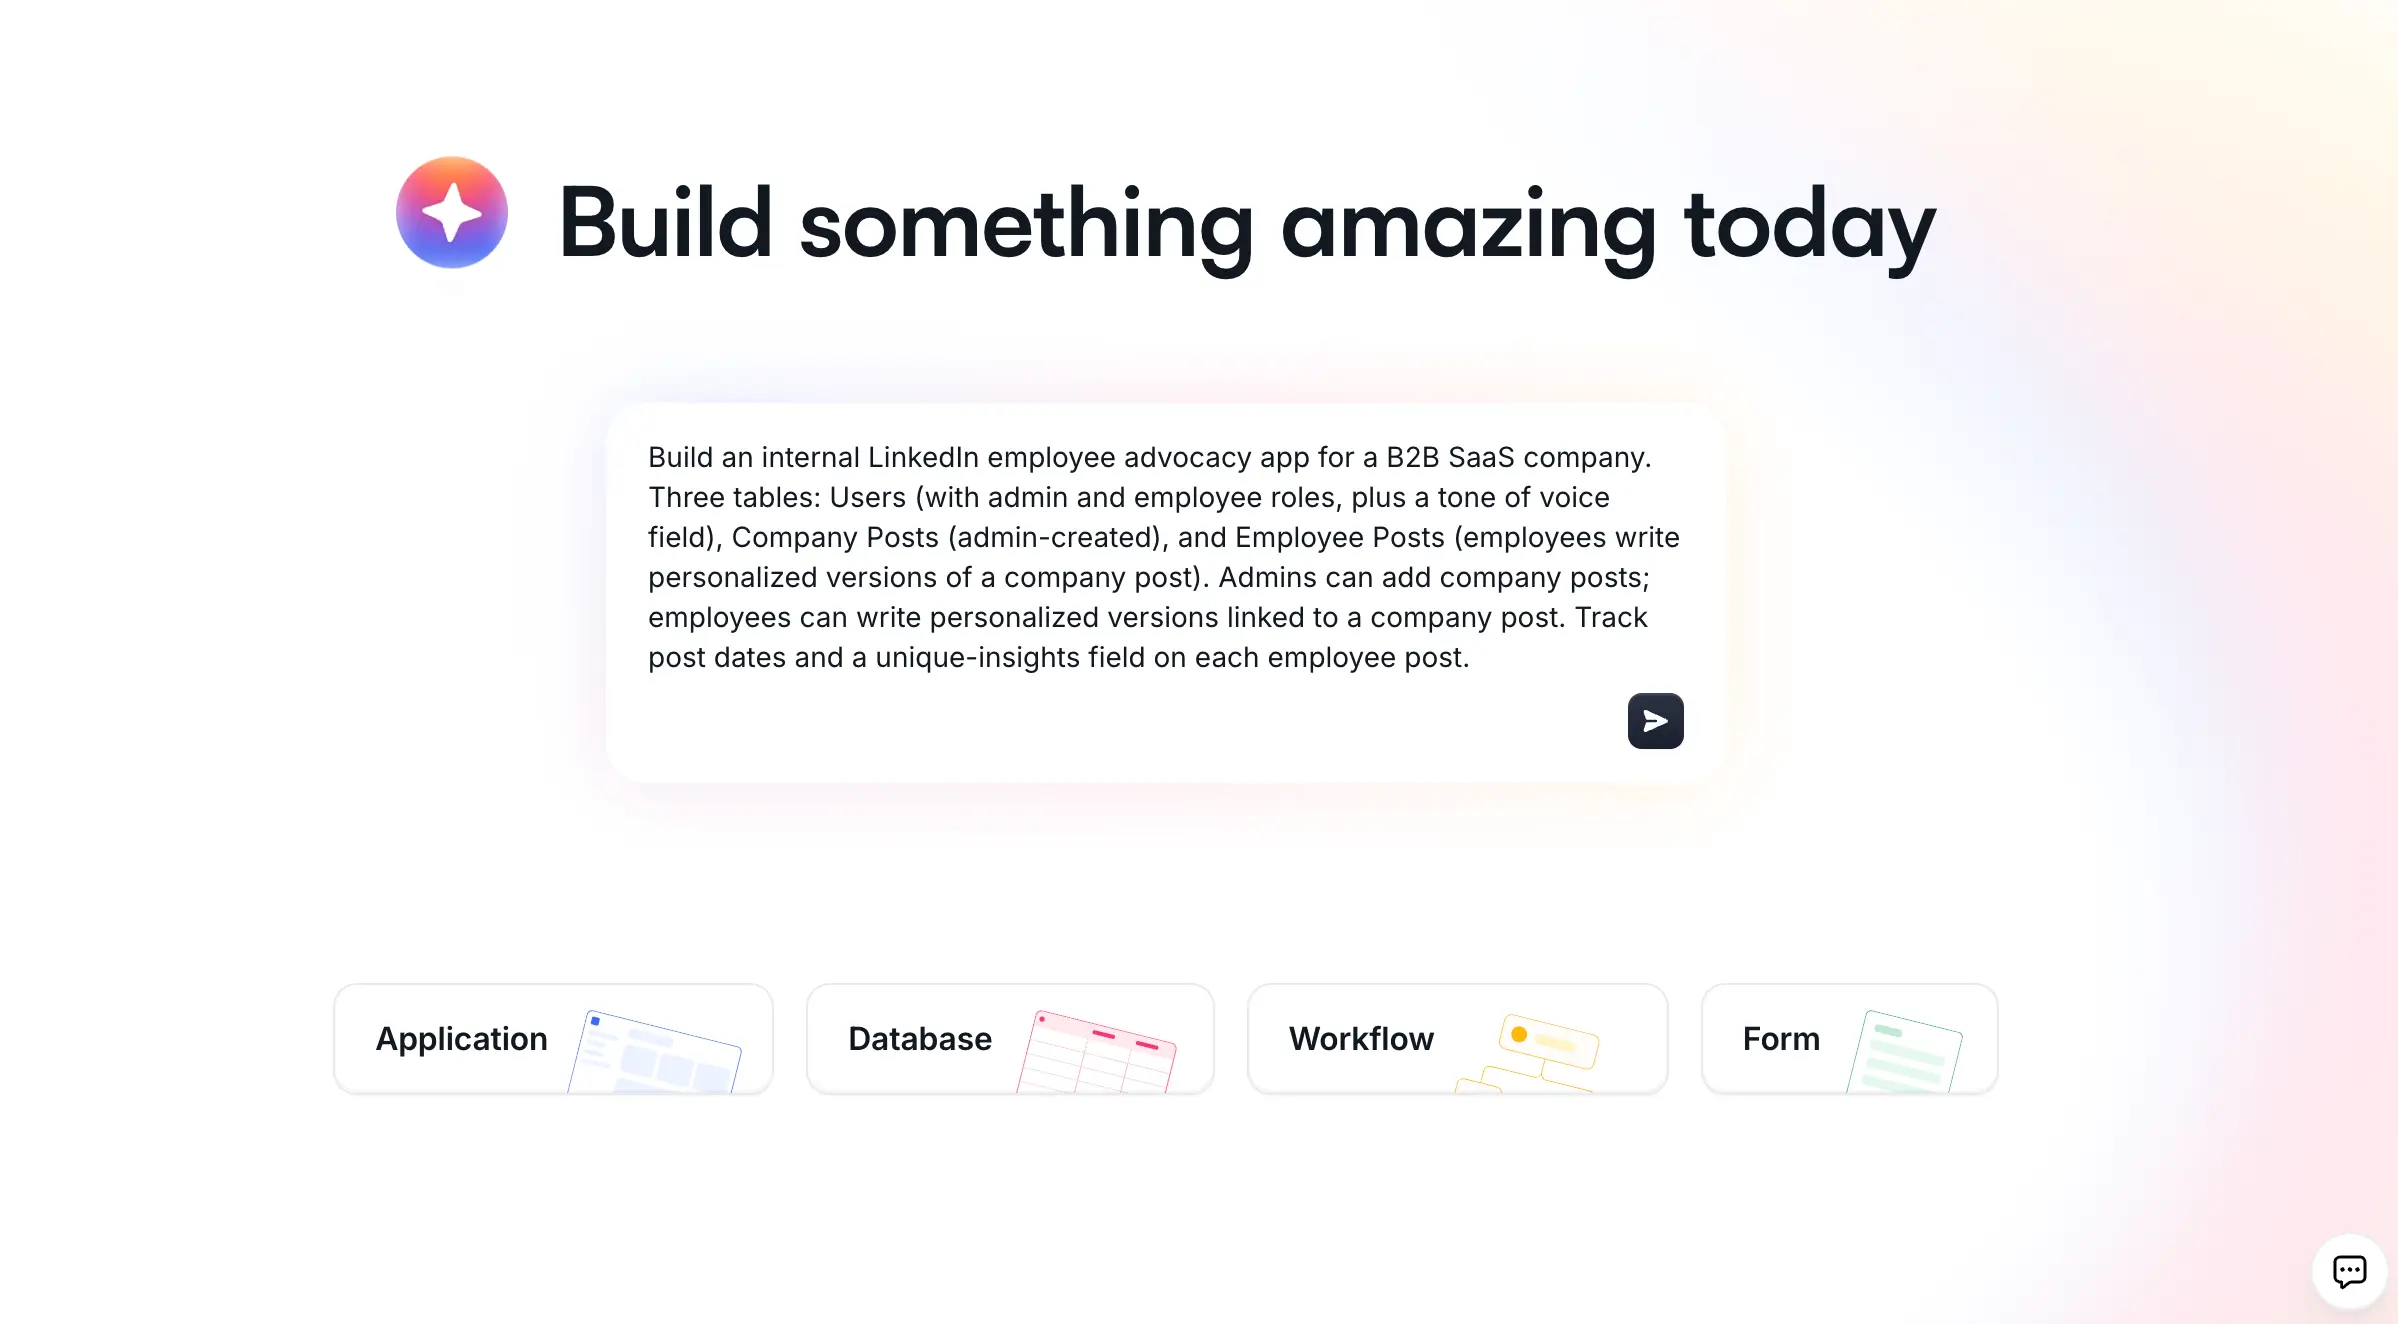
- Generate with AI (fastest): describe your CRM in plain language ("a sales CRM with companies, contacts, and a deal pipeline, where reps only see their own deals") and the AI Co-Builder builds a complete app for you: pages, blocks, user groups, and navigation.
- Start from a template: pick the pre-built Sales CRM template and connect your Google Sheet.
- Build from scratch: assemble the app manually with full visual control.
Since this tutorial follows your existing Google Sheets data, we'll take the template path below. The steps are nearly identical if you generate with AI and then swap in your sheet as the data source.
2.1 Browse the available templates
Softr offers a variety of pre-designed templates to help you get started. To browse the best templates for your CRM, look for the search bar with the text Search templates. Click on it and type 'CRM'.
2.2 Select the CRM template
On the search results you will find a template named 'Sales CRM', just click the Preview button on it, once you move your cursor over it.
On the new screen that pops in, select Use Template.
3. Connect Softr to your Google account
After selecting your template, the next step is to connect Softr to your Google account. This is necessary for integrating Google Sheets as a data source for your app. Softr connects to 17+ data sources, including its own native database, Airtable, HubSpot, and SQL databases, so your CRM can grow with your stack.
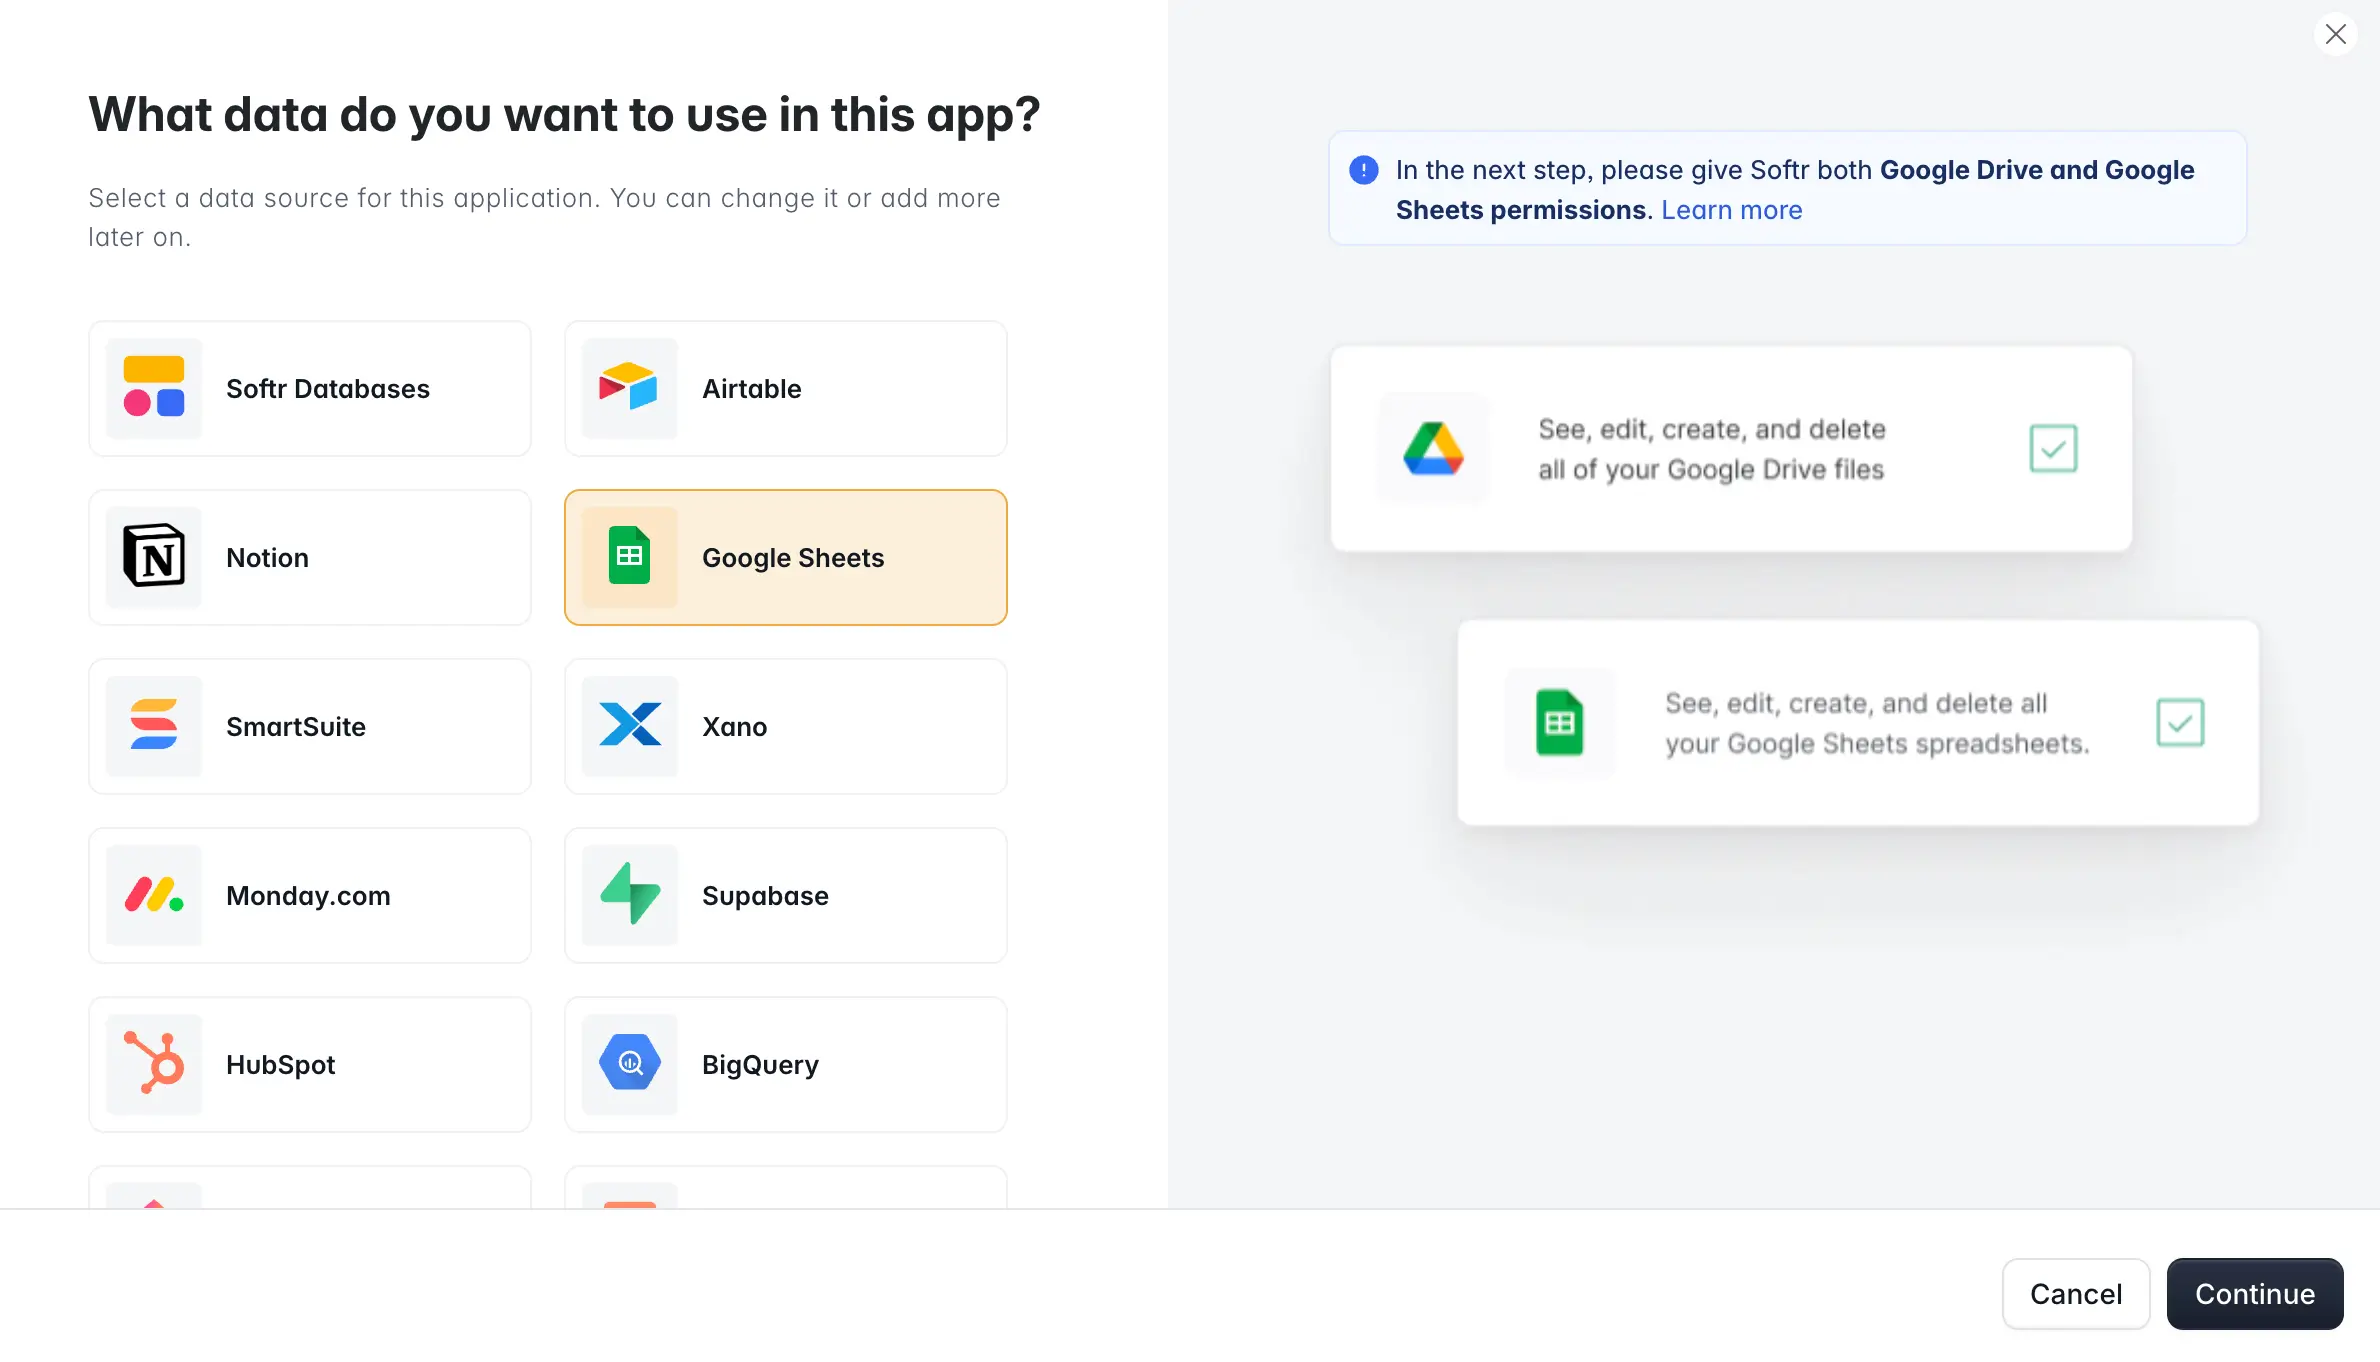
3.1 Select “Google Sheets” as the data source
Select Google Sheets from the list of available data sources on the left side of the screen.
3.2 Sign in to your Google account
You'll be prompted to sign in to your Google account. Do so.

3.3 Authorize Softr to access your Google Sheets data
Follow the prompts to authorize Softr to access your Google Sheets data. You should make sure all the checkboxes are ticked.
4. Finalize the setup and launch your CRM
Hit the Go to application button to finalize the setup process and take you to your new Softr app, ready to be customized and filled with your CRM data.
5. Check and adjust your database
Now that your Softr app is set up and connected to Google Sheets, it's time to check and adjust your database. In order to do so, you can access it through Softr, by following the next steps.
5.1 Change to another page
On the left menu, click on Pages and select, for instance, the page Contacts.
5.2 Select a block that is integrated with Google Sheets
Click on the list block, so that a panel will appear on the right side of your screen.
5.3 Open the Google Sheets file
On the panel on the right side, click on the table icon highlighted below, so that the Google Sheet file linked to your CRM application opens.

5.4 Replace with your own data
While the Google Sheet template may come with sample data, you'll want to replace this with your own. To do this, on the Google Sheets file, replace the sample data with your own.
You can maintain the same structure as the sample data to ensure everything works seamlessly, or you can add new columns if needed (remember that you'll need to make the necessary adjustments to your app). This guide about using Google Sheets as a data source will help you.
Once you've updated the data in Google Sheets, Softr will automatically sync and update the data in your app.
6. Personalize your CRM
With your data in place, you can now start personalizing your Softr app to match your brand and specific needs. On the menu on the left, you'll find an option to edit your theme (adjusting colors, fonts, and sizes) through the Theme button. You'll also find a button called Settings, where you can set up a custom subdomain for your CRM, upload a favicon, and more.
You can also make structural changes by hand or with AI. Want a kanban pipeline view, a revenue dashboard, or edit buttons on your contacts table? Add the blocks manually, or describe what you need to the AI Co-Builder and it makes the changes for you, right inside the editor.

7. Add users and set permissions
Once your CRM is customized to your liking, it's time to add users. These could be your team members, clients, or any other stakeholders who need access to the app. These users will be, by default, linked to the 'Employees' tab of your Google Sheet file.
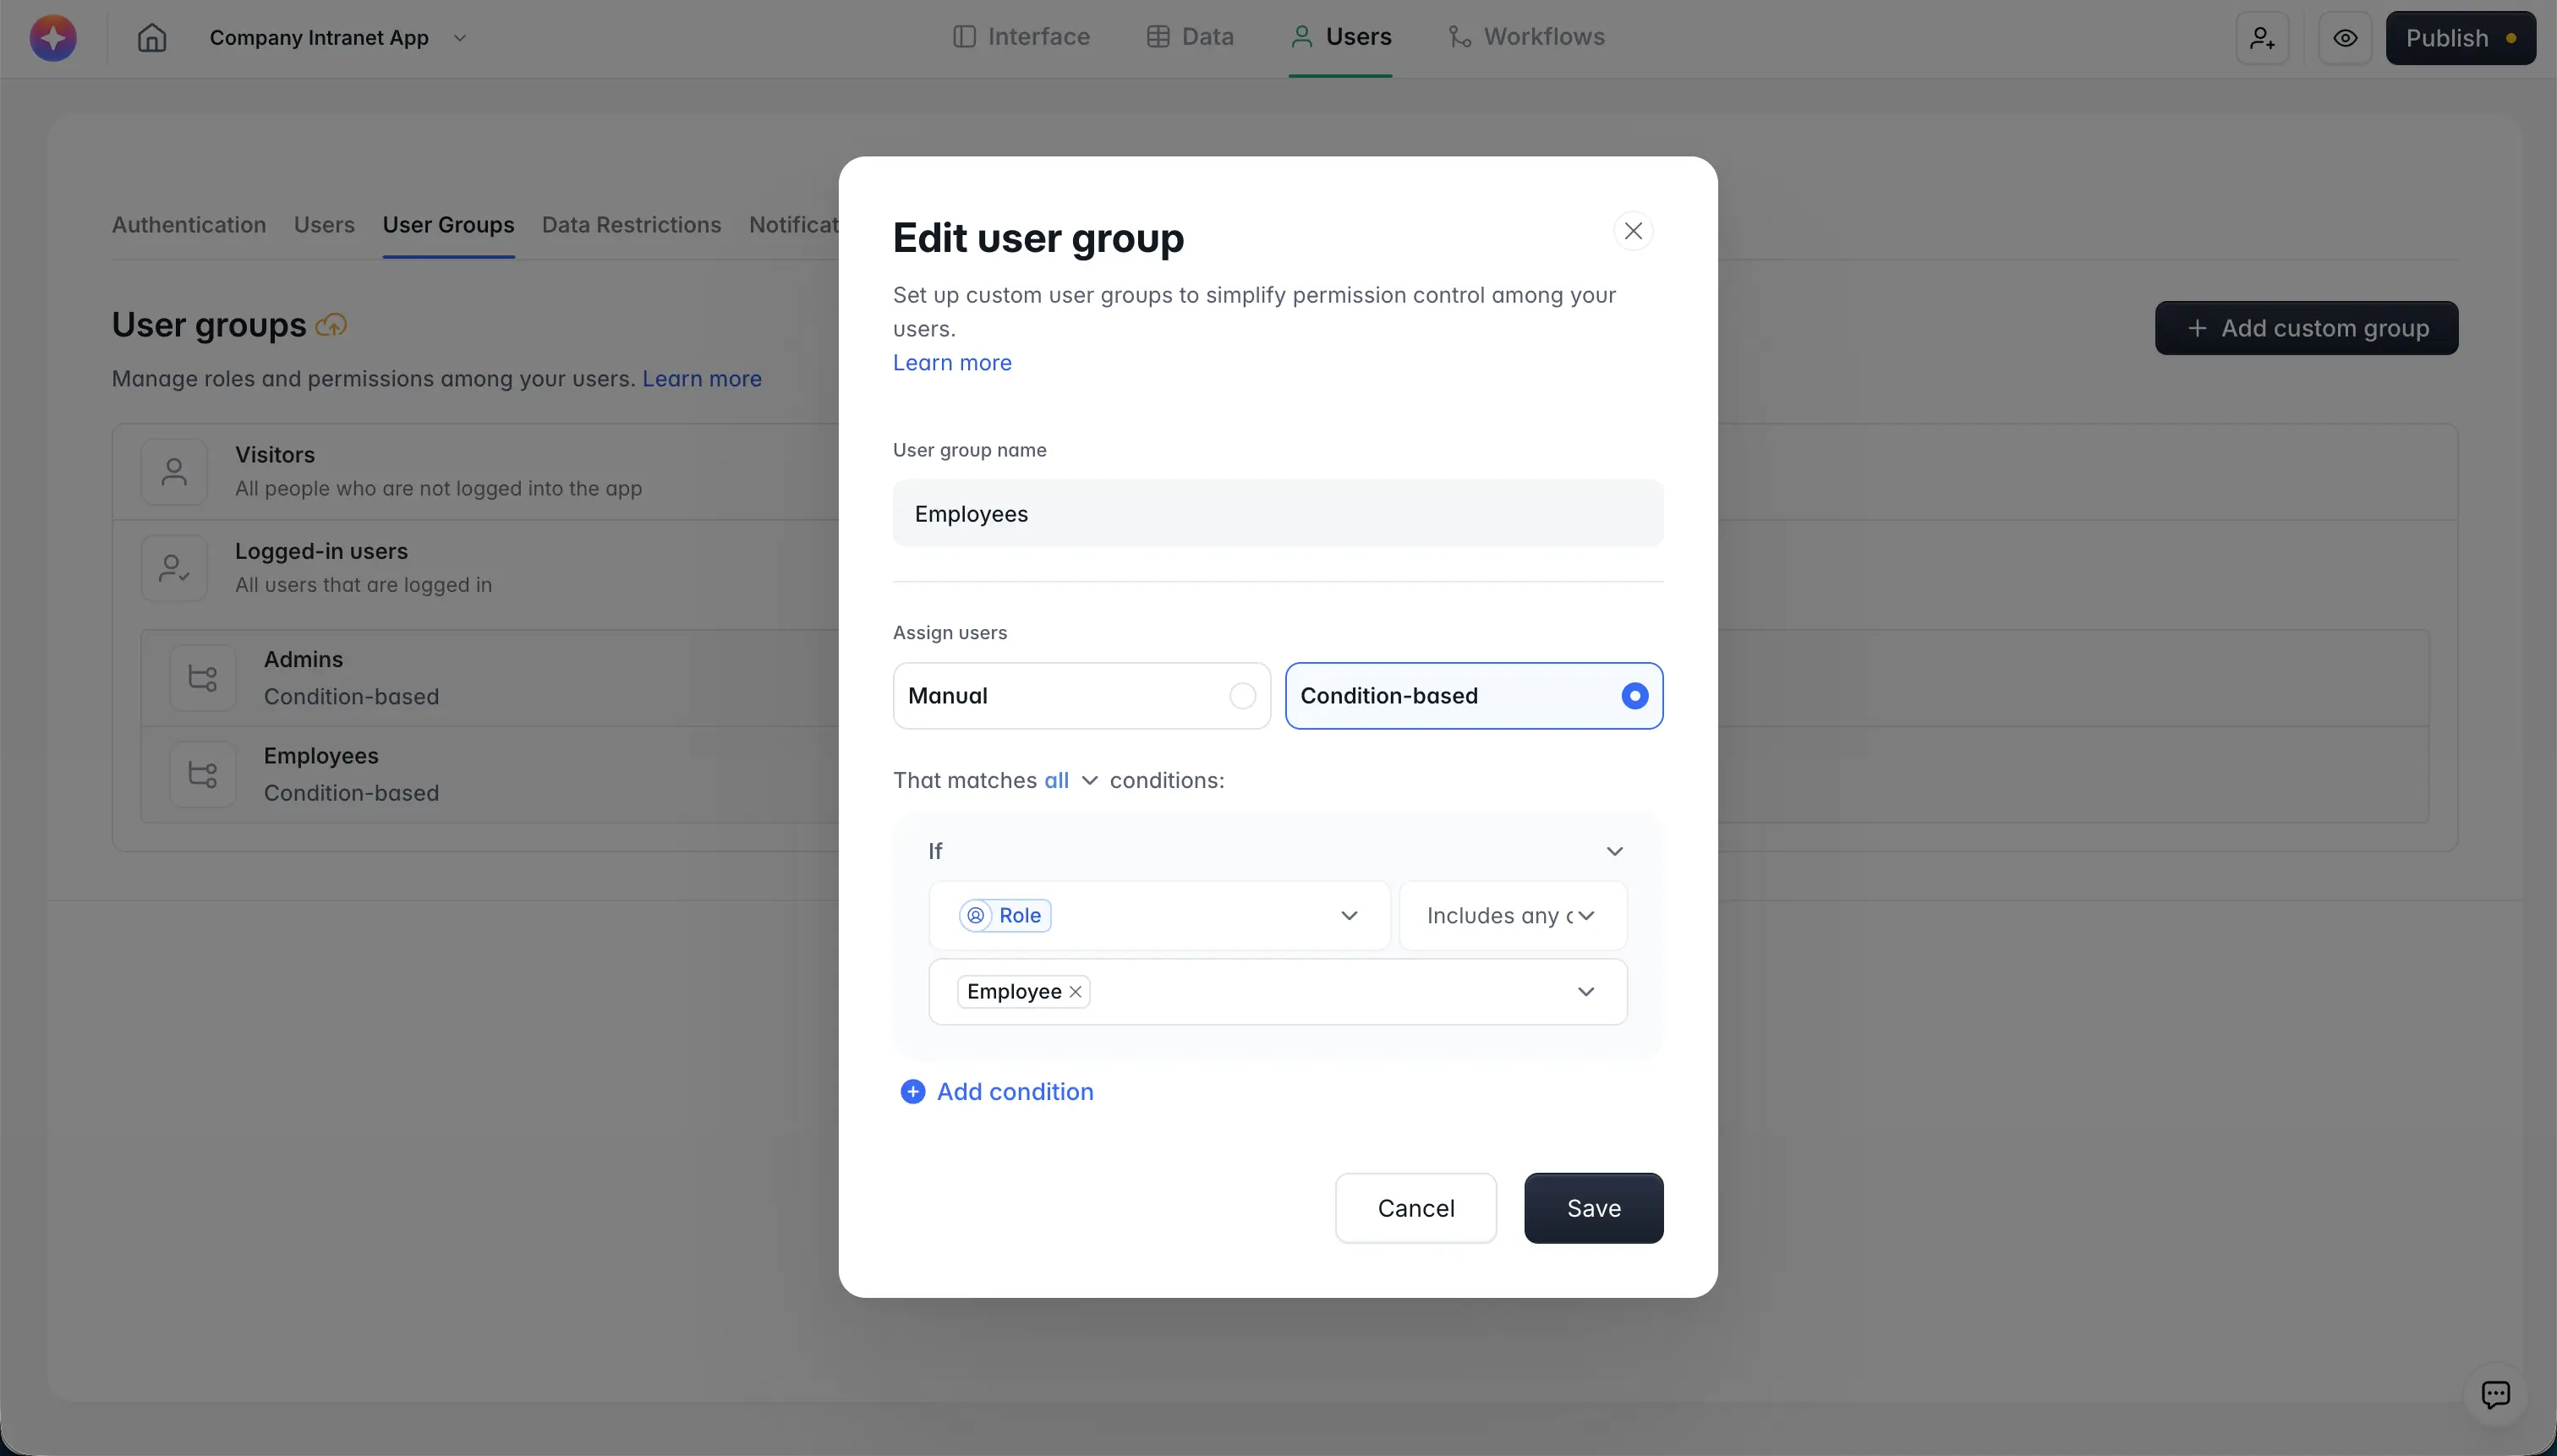
This is also where the app approach pays off compared to a shared spreadsheet: you can create user groups (like Admins and Sales Reps) and use data restrictions so each rep only sees their own accounts and deals. You can set this up manually in the Users panel, or ask the AI Co-Builder to configure the groups and visibility rules for you.
7.1 Navigate to the Users panel
On the left side horizontal menu, click on Users.
7.2 Add users’ details
Click on Add user(s) to add users. Then you have two options:
- Enter their name and email addresses: you'll be able to choose if you want to generate a temporary password sent by email to the new user, or generate a link that allows that user to log in without a password;
- Upload a CSV file with all the users' data, by clicking on IMPORT USERS.
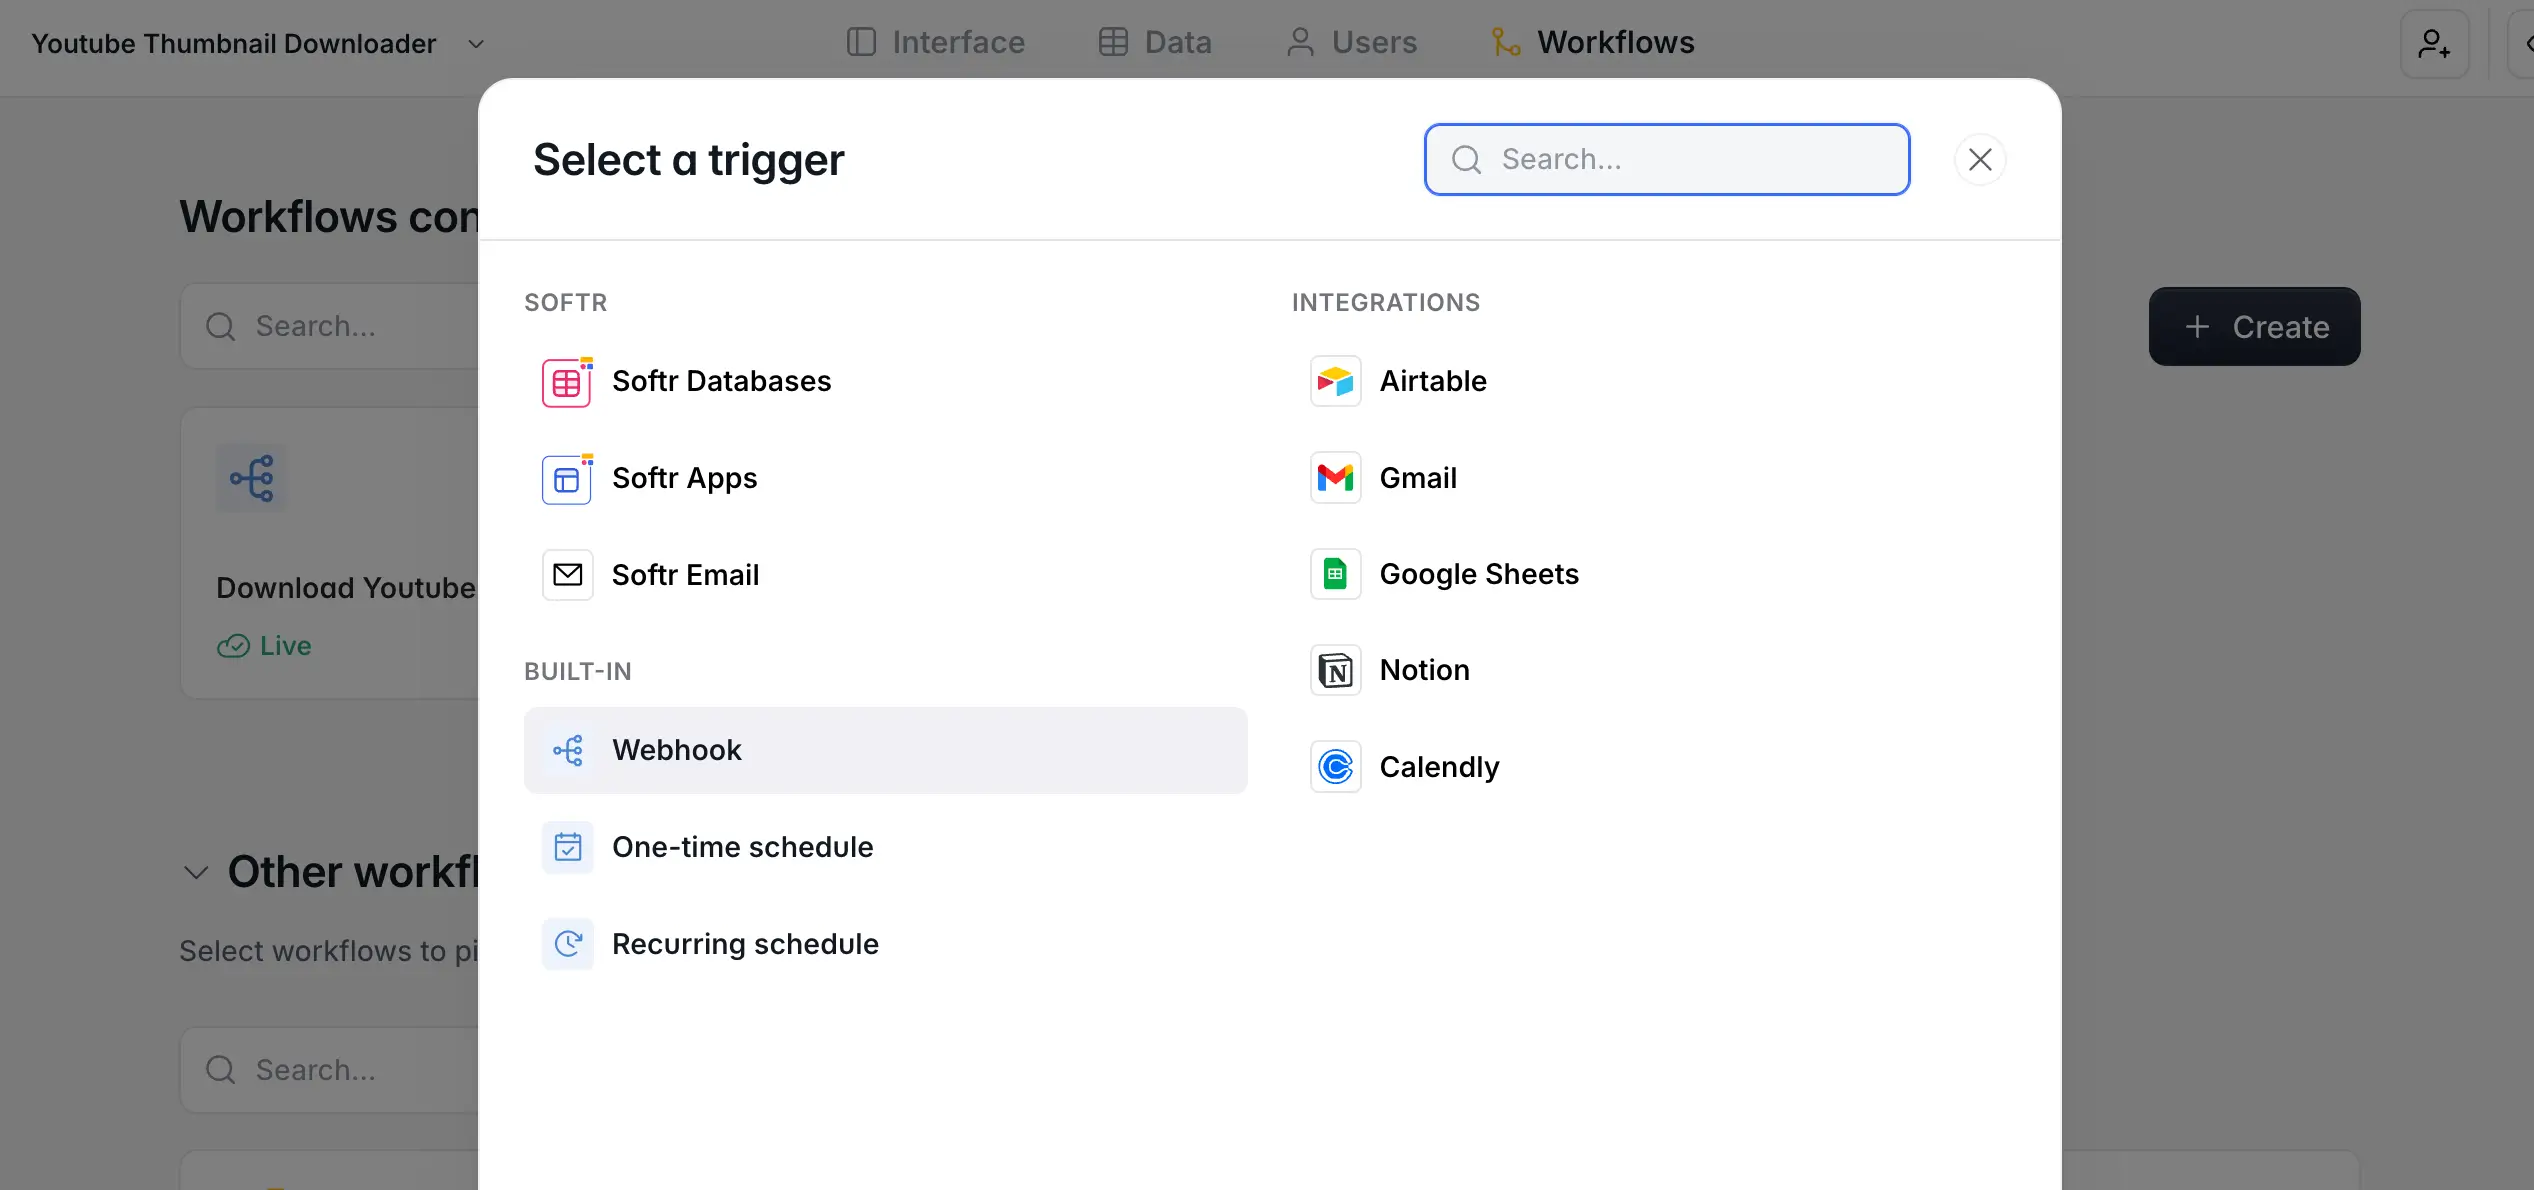
8. Automate your follow-ups with workflows
A CRM is only as good as the follow-up it drives. With Softr Workflows, you can automate the busywork natively, without stitching in an external tool: send a follow-up email when a deal moves to 'Proposal sent', notify the team in Slack when a high-value opportunity is created, or assign new leads to a rep automatically.
Workflows can be triggered directly by buttons and forms in your app's interface, which makes them faster and more reliable than external automations. Click New workflow and configure your trigger, or describe the automation you need to the Workflow AI Co-Builder and it builds the logic for you. And if you already rely on Zapier, Make, or n8n, Softr has native integrations for those too.
9. Make your CRM available to others
With your CRM set up, customized, and populated with users, it's time to publish it. Publishing your app makes it live and accessible to your users.
Click on the Publish button, located at the top of your Softr Studio.
Once your app is published, you can share the URL with your users. They'll be able to access the app, view the data, and make changes or updates (depending on their permissions).
Congratulations, your Google Sheets CRM is now live and ready for use!
Start with the sheet, grow into the app
Google Sheets gets your CRM off the ground in an afternoon, and that's exactly what it's for. When your team grows and you need permissions, a real interface, and automated follow-ups, you don't have to start over: connect your sheet to Softr (or import it into a Softr Database) and build the app on top.
Ready to skip ahead? Start from the free Sales CRM template, or follow this step-by-step video tutorial to build yours.
Frequently asked questions
- Is Google Sheets good enough to use as a CRM?
- Can I connect Google Sheets to Softr?
- How do I control who sees what in my CRM?
- Can I automate follow-ups from a Google Sheets CRM?
- Should I use Google Sheets or a native database for my CRM?