[.blog-callout]
TL;DR
- There is no direct integration between Google Forms and Airtable, but you can bridge them three ways: with Airtable automations, with Zapier, or with Make. This guide walks through all three, step by step.
- Each of those methods asks you to recreate your fields, match them by hand, and maintain a connection between separate tools.
- If you want to skip the glue, Softr gives you a native form that writes straight into Softr Databases or your existing Airtable base, then lets Softr Workflows act on each submission automatically.
- Airtable is just one of 17+ data sources you can build on top of in Softr, so you keep the same app whatever backend you choose. [.blog-callout]
Airtable is a great platform to use as a backend for your projects, while Google Forms is a proven, simple way to publish good-looking, front-facing forms to collect data from users. Some teams prefer it to Airtable's native form feature for its familiarity and clean public look.
In this article, we look at three ways you can connect your Google Form with Airtable: first by using Airtable automations, then by using two automation platforms, Zapier and Make. Before we get there, it is worth knowing there is a simpler path that skips the connectors altogether.
The simplest path: collect data with a native Softr form
All three methods below exist because Google Forms and Airtable do not talk to each other directly. You end up recreating your fields, matching them by hand, and keeping a third tool in sync. That works, but it is a lot of moving parts for a job that should be simple.
With Softr forms, the form and the data live in the same place. You build a branded form that writes submissions straight into Softr Databases, or into your existing Airtable base if that is where your data already lives. There is no field-matching step and no connection to maintain, because the form is part of the same app as the table it feeds.
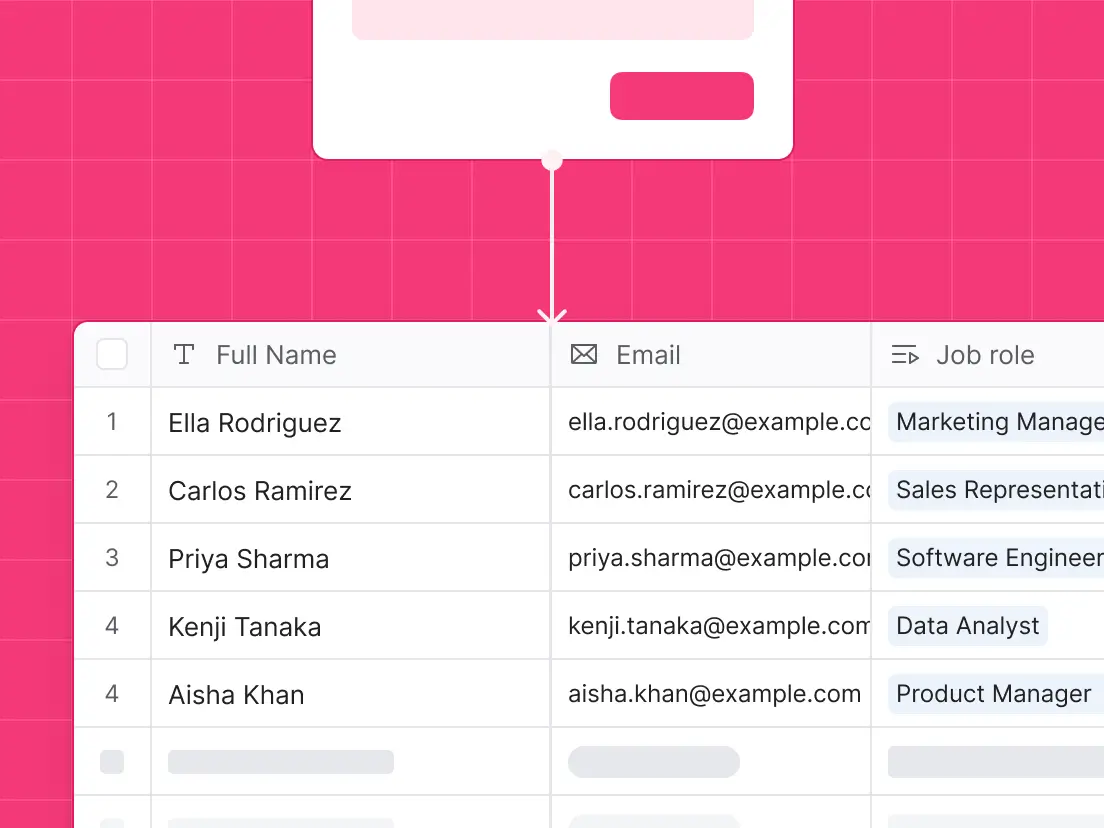
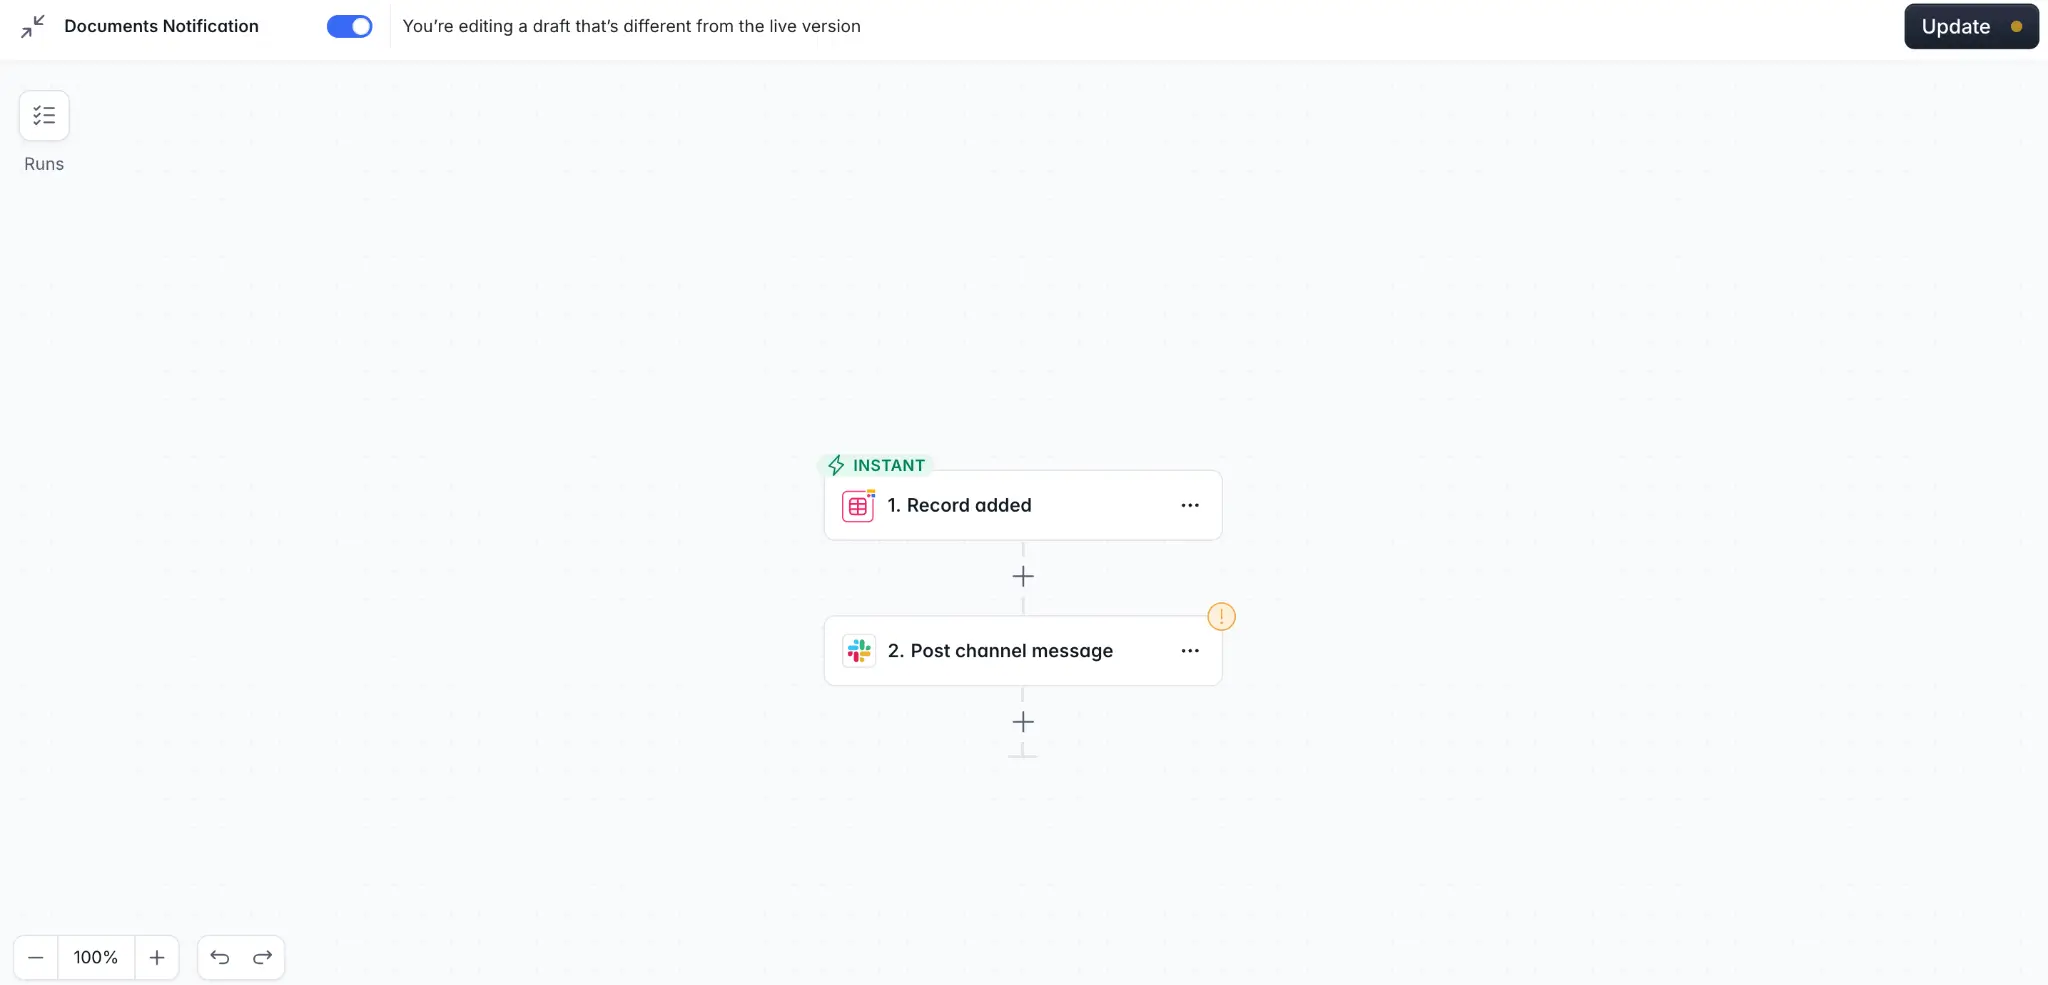
This matters because a form submission is rarely the end of the story. With Softr Workflows, each new response can trigger an action the moment it arrives, like posting to Slack, emailing an owner, or running an AI step.
"Instead of just storing the data, a form trigger launches a workflow to run downstream business logic immediately on submission." - Romain Minaud, Product Manager at Softr
Softr is a full-stack platform, not just a form tool: you get the interface builder, native databases, and workflows in one place. And if you would rather not build by hand, you can describe what you need to the AI Co-Builder and it will generate the form, the data structure, and the pages for you. Airtable is one of 17+ data sources you can connect, so the rest of this guide still applies if Airtable is your backend of choice.
If you do want to keep Google Forms as your front end and Airtable as your backend, the three methods below will get you there.
How to connect Airtable with Google Forms using Airtable automations
Unfortunately, there is no direct integration between Google Forms and Airtable. But it is possible to connect the two without third-party tools by using Airtable Automation. While not the easiest way to do it, it’ll only take 15 minutes to set it up. Follow the steps to learn how to do it.
In your Google Form, click on the “Responses” tab
Select the “Responses” tab at the top of your Google Form to have access to the responses you already received, as well as the settings.

Click on the three dots at the top
In the “Response” tab, click on the three dots to access the settings for your Google Form.

Click on “Select destination for responses”
Choose the option to select where responses to your Google Form end up, so we can easily connect it with your Airtable.

Select the destination for responses and click “Create”
You can either create a new spreadsheet or select an existing one.

In your Airtable base, create the same fields as in your Google Sheets
Back to Airtable, you need to make sure that the fields for your base are matching the fields in your Google Sheets (the questions in your form). It will be important later on for the information to be sent to the right place. Note: Make sure all Airtable fields are text fields.

Click the “Automations” tab
This is where you are able to connect various third-party tools to Airtable and create automations for your base.

Click on “Add a Trigger” button
We are now going to connect your Google Form to Airtable.

Under “Google Forms”, Select “When responses arrive”
We want every response to be automatically forwarded to your Airtable base.

Click on “Select Google Forms account”
Depending whether you have already connected your Google Account, you will either select it, or connect it now.

Select “Connect new Google account”
That way, Airtable will be able to connect with existing documents in your Google Workspace.

Select the Google account you want to connect to Airtable
With Google SSO, it only takes a few seconds.

Click on “Select from Google Drive”
Now that your Google Account is connected with Airtable, you can select files from your Google Drive.

Click on the Responses file and click “Select”
In the new tab that has just opened automatically, select the Google Sheet we previously created to receive responses from the Google Form and click on “Select.

Select the worksheet where the responses are displayed
Chances are there is only one choice, select this one.

Click on “Use suggested data”
Important: There should be at least one answer to your Google Form. If there isn’t, go ahead and submit a form yourself with answers. Otherwise, Airtable won’t be able to identify the fields.

Click on “Add advanced logic or action”
Congrats; your test is successful! (if not, go over the previous step again, making sure that there is at least one answer to your Google Form). Now, we can create the logic to make sure every response is added to your Airtable.

Select “create record”
Let’s make sure each response creates a record on Airtable.

Under “Configuration”, select your table
You can select in which table of your base the data will end up.

Matching Airtable and Google Form fields
Now, let’s make sure Airtable fields match their Google Form counterparts, so the data ends up in the right place.
Click on “Choose field”
We will now select each field and match it with Google Form responses. Let’s start with the first one.

Click on the first field in the list
Select the first field displayed in the list.

Click on “+”, select “Row Values” and choose the matching value
Because we configured our Airtable base earlier to match our Google Sheet, the values will be the same.

Click on “Choose field” and repeat
Repeat the same process of matching Airtable and Google Sheets fields until they’re all done.

Click on “Generate a preview”
Let’s make sure your automation is configured properly before we publish it!

Activate your automation by toggling it “on”
That’s it; your automation can be set live! Going forward, all responses to your Google Form will be automatically forwarded to your Airtable base.

How to connect Airtable with Google Forms using Zapier
Another way to connect Airtable and Google Forms is to use Zapier, the popular automation platform. Setting up automation between Airtable and Google Forms using Zapier takes about 10 minutes and can be done for free using Zapier’s free plan. To do so, follow these steps:
Log in or sign up to your Zapier account
Head to Zapier’s login page. If you have a Zapier account already, log in. Otherwise, create a new account using the “Sign up” button.

Click on “Create Zap”
We are going to create automation so that every new response to your Google Form gets sent to your Airtable base.

In the “Trigger” section, find Google Forms in the “Search” field
Google Forms will be the trigger for this automation.

Click on “Google Forms”
Let’s select the appropriate tool.

In the “Event” field, select “New Form Response”
Every time a response to your Google Form is registered, the automation will be triggered.

Click on the “Account” tab
Let’s connect your Google Form to Zap.

Click on “Sign in”
This will take you to the Google account sign-in page. Once it’s done, click “Continue.”

In the “Form” field, select your form
We need to select the appropriate form that will be connected with Airtable. Then, click continue.

Select “Test your trigger”
Let’s see if the trigger works properly. Once the test is complete, click on “Continue.”

In the “Action” tab, select Airtable
You can either find the Airtable icon in the list of tools available or search for it in the search bar.

In the “Event” field, select “Create a record”
Everytime a Google Form response comes in, we want a new record to be created on Airtable. After selecting “Create a record”, click on “Continue.”

Sign in your Airtable account
Let’s sign in to your Airtable account to select the destination base. Head to your Airtable account page to enter your API key. Once it’s done, click on “Continue.”

In your Airtable base, make sure to create the same fields as in your Google Sheets. The fields need to match so the information ends up in the right place later on. Also make sure all Airtable fields are text fields.

In the “Action” tab, select the Airtable base and table of your choice
The Google Form responses will be forwarded there. Once selected, press “Continue.”

Map the Airtable fields with the matching Google Form fields
Now that you’ve selected your Airtable base, you need to go ahead and match each Airtable field with the appropriate Google Form field. Once it’s all done, click “Continue.”

Click on “Test Action”
Let’s make sure the connection works.

Click on “Publish Zap”
Your Zap is ready to be published! Responses to your Google Form will automatically be forwarded to your Airtable going forward.

How to connect Airtable with Google Forms using Make
The third method you can use to connect Airtable and Google Forms is to use Make (formerly Integromat), another popular and powerful automation platform. Like with Zapier, it will take you 10 minutes and can be done entirely for free, with Make’s free subscription plan.
Log in to Make
Head to Make’s login page. If you have a Make account already, log in; otherwise, create a new account using the “Sign up” button.

Click on “Create a new scenario”
Let’s create our automation so Google Form responses get forwarded to Airtable.

Click on the “+” sign and select Google Forms in the app list
Type “Google Form” in the search bar at the bottom of the list, or scroll until you find Google Forms.

In the list of actions, select “Watch Responses”
We want the automation to be triggered every time you receive a response to your Google Form.

Under “Connection”, click “Add” and connect your Google account
Make will take you to a Google sign-in screen. Allow the connection.
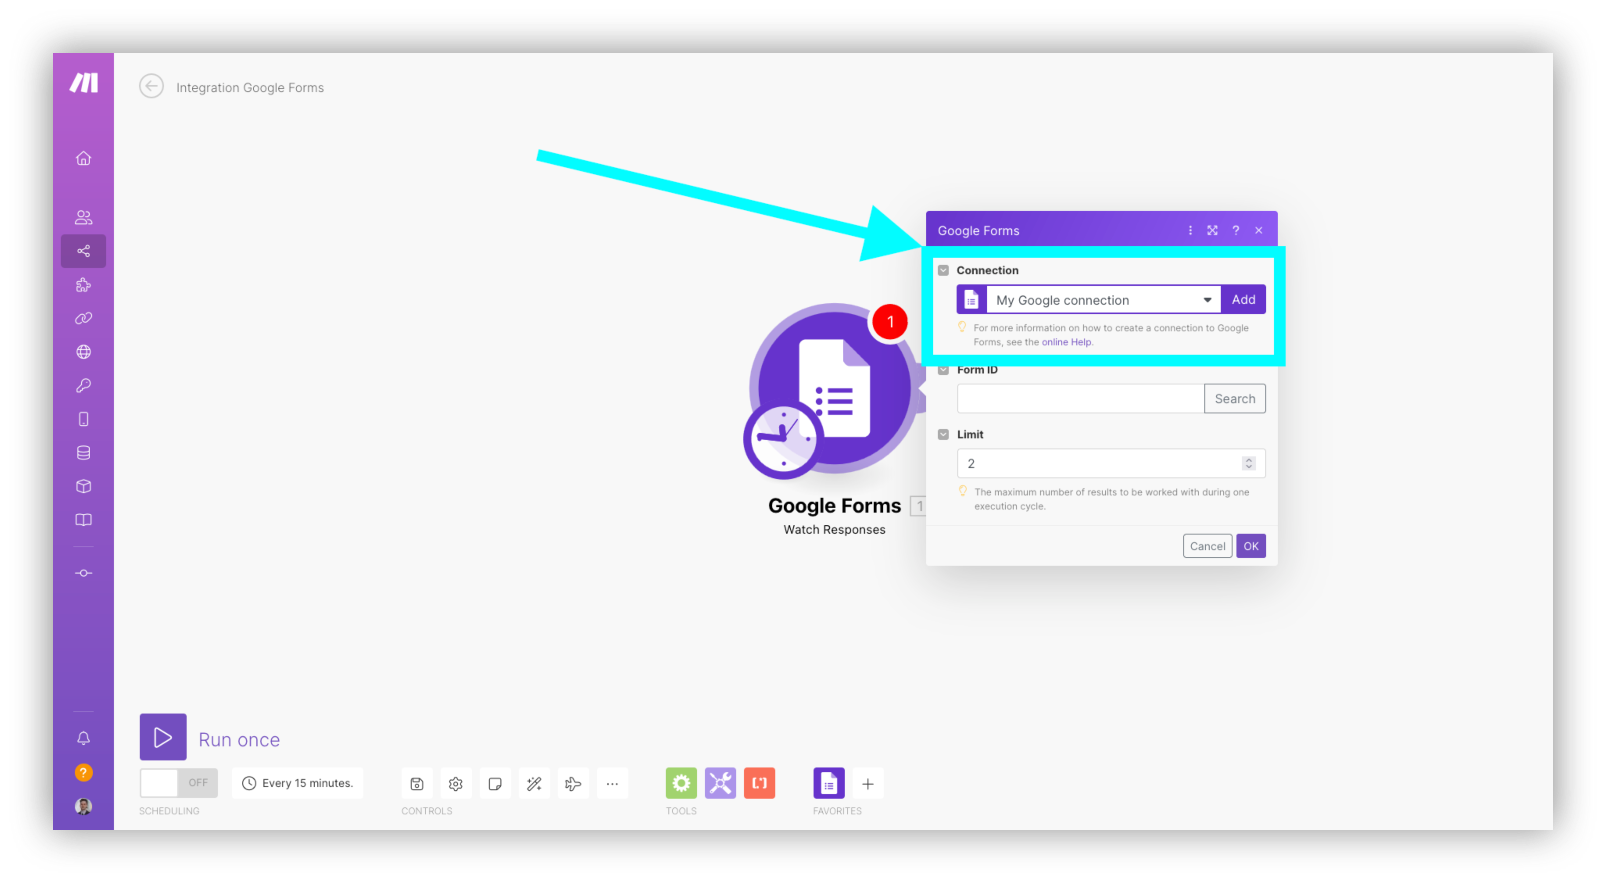
Under “Form ID”, click on “Search” and find your Google Form
Click on “Search” and enter your form name. If you have several Google Forms with similar names, Make will give you the option to select the right one. Once it’s done, click “OK.”

Select where to start and press “OK”
Your selection depends on when you want your automation to start running. We recommend choosing “From now on” unless you have specific requirements. Once you've picked your choice, press “OK.”

Back to the main editor, select “Add another module”
We will now add your Airtable base into the equation.

In the list of apps, select Airtable.
Type “Airtable” in the search bar at the bottom of the list, or scroll until you find Airtable.

Click on “Create a record”
Everytime a Google Form response gets added, we want a new record to be created.

Under “Connection” click “Add” and connect your Airtable account
Make invites you to connect your Airtable account, which you can do using various ways including the API key you can access in your Airtable Account page.

Note: In your Airtable base, make sure to create the same fields as in your Google Sheets
You need to ensure that the fields match. It will be important later on for the information to be sent to the right place. Note: make sure all Airtable fields are text fields.
Select your Airtable base and Table
Pick the Airtable base and table which the Google Form responses will be forwarded to.

Under “Record,” match the Airtable and Google Forms fields
Click on each field and select the matching record between Airtable and Google Forms. Once done, click on “OK.”
Note: in Make, make sure to match the Google Form “value.” You can see the response for each field by navigating the various answers.

Click on “Run Once”
Make sure that the automation is running smoothly. If an error pops up, look at the details Make provides you.

Click on the “Save” icon
Scenarios must be saved manually before publishing.

Toggle the scenario “ON”
Congratulations, your scenario is now live. Going forward, a record will be created on Airtable everytime someone submits a response to your Google Form (within a certain period, depending on the interval you picked in the scenario and your Make subscription plan).

Pick the path that keeps your data in one place
Airtable automations, Zapier, and Make all get the job done, and any of them is a solid choice if Google Forms is already part of your process. Just remember that each one adds a tool to maintain and a set of fields to keep in sync.
If you are setting this up from scratch, it is worth asking whether you need the middle layer at all. A native Softr form writes straight into your database, and Softr Workflows can act on every submission the moment it lands, which removes the field-matching and connection upkeep entirely. Teams often reach for this once a form is more than a place to dump responses.
"I found it useful to switch from Airtable's backend to Softr's internal database to avoid API limits. I was able to replace a WordPress site and a management system made in Excel." - Marco D., .NET Analyst Developer, G2 review
The fastest way to see the difference is to start from a ready-made client intake form template and adapt it to your data, or compare your options in our guide to the best Google Forms alternatives.

Frequently asked questions
- Is there a direct integration between Google Forms and Airtable?
- Can I collect form responses without using a separate form tool at all?
- What happens to my data after a form is submitted?
- Do I need to recreate my Airtable fields somewhere else?
- Is Airtable the only data source Softr supports?