Transcript
Softr allows you to build websites and apps without coding, making it a great tool for creators, startups, and businesses that want to launch platforms quickly using simple visual tools. On the platform's pricing page, you can view all the available plans, starting from free up to enterprise. You can sign in using your existing account or proceed with a Google login.
Once signed in, you will be brought to the onboarding process. You will need to select what you want to use Softr for and provide some details about your company size and professional role. Next, choose what you mainly want to build and indicate your experience level with app building, spreadsheets, and databases.
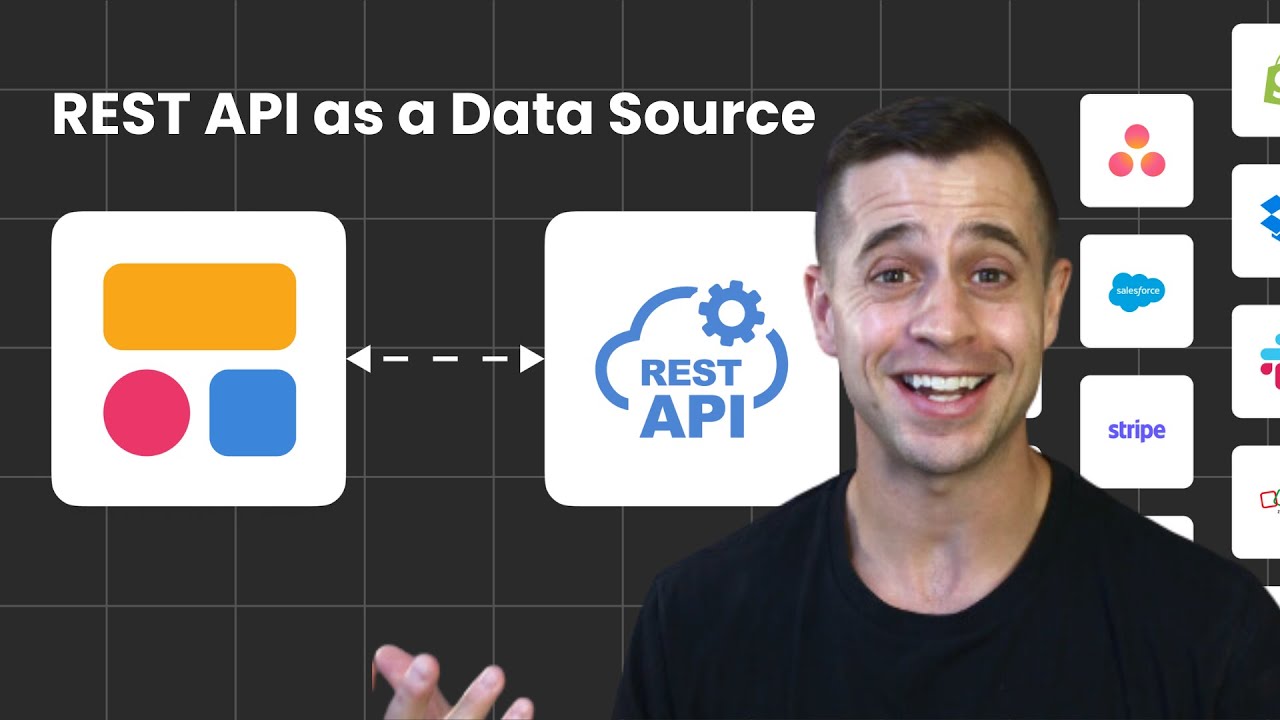
You will then be asked to choose which data sources you want to use for your application. After selecting the tools you are familiar with, you will be ready to create your first app.
[.blog-callout]
Note from Softr: When selecting external data sources, keep in mind that Softr Databases is our powerful, native way to manage data directly within Softr for maximum performance.
[.blog-callout]
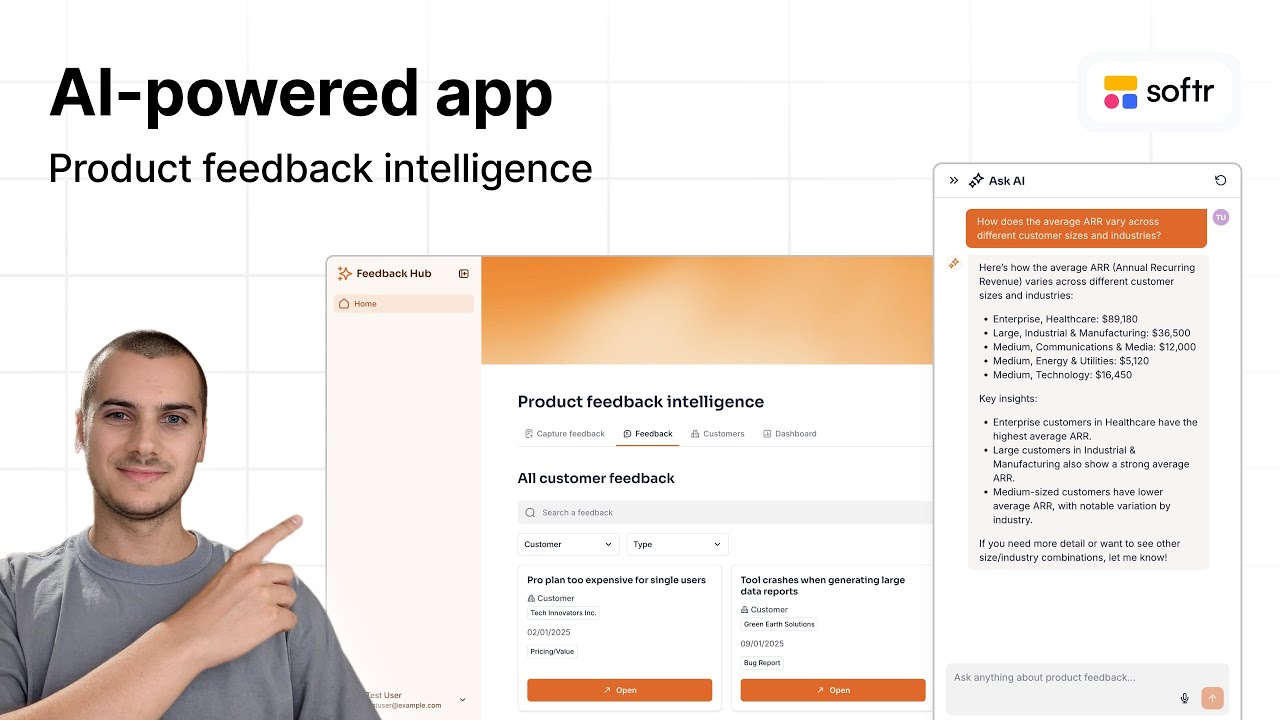
You can start your project from scratch, use an existing format, or generate the application with AI. There are numerous categories to help you easily find a starting layout, but selecting the AI option is often the quickest path.
[.blog-callout]
Note from Softr: While browsing App templates is a fantastic starting point, using the AI co-builder is another powerful option. It instantly builds complete apps, pages, or database schemas simply from your prompt, while still giving you full freedom to adjust things manually later.
[.blog-callout]
In the prompt box, put in as much detail as possible regarding what you are building and click the go button. The system will start processing your request and ask a couple of follow-up questions about user login methods. You can choose whether people can sign up on their own and select the main navigation layout for the app.
Next, select a theme for your application from the variety of available options. You can view these themes applied in real time on the right side of the screen before finalizing your choice. Click on create your app to generate the final interface.
Once the app is ready, try it live to interact with the elements and see a full preview of the platform. You can easily switch between desktop, tablet, and mobile views to inspect responsiveness. Interacting with the different sections and checking the buttons ensures everything looks properly configured.
You can test out functions like adding new records and navigating the functional search bar. This helps guarantee that all inputs update correctly and that the pages meet your structural preferences. Once you are satisfied with the initial layout, return to the editor to begin making manual adjustments.
By selecting individual elements, you will see the detailed properties on the right side of the screen where you can make specific tweaks. For example, changing the layout for a card block can be done with a single click. This provides full control to tailor the interface directly to your liking.
You also have the choice to expand your app by browsing through the available blocks and adding new sections. Any blocks you pick will be immediately added to your website layout.
[.blog-callout]
Note from Softr: If you ever find that a native block doesn't quite fit your advanced vision, remember that you can add a Vibe-Coding block. This allows you to simply prompt for the exact custom component you want, and it will generate the structure and connect to your database seamlessly.
[.blog-callout]
Adjustments can also be executed using the AI prompt window located in the bottom left corner. Whenever you type in a prompt, such as asking to alter the landing page color, the system will apply the updates directly. Once it finishes processing, the changes become permanently visible on your main screen.
After making any kind of update, use the preview option in the top right corner to verify the changes live. You can even check out the account settings and test the signup workflow. These real-time previews reflect all recent edits, allowing you to iterate fluidly until you are satisfied.
On the left side of the interface, you can navigate to the pages menu to add new application screens. The themes section provides extensive options for customizing global colors, typography, and visual styling. The settings option houses additional fundamental configurations for your entire platform.
Jumping into any specific page from the pages menu quickly redirects you to that screen's individual editor. Once you are completely satisfied with the customizations across the entire application, just click publish on the top right. Your newly designed application will then be live and accessible to the public.