Transcript
If you're building internal tools in Softr and are still using Google Forms, Typeform, Fillout, or Airtable forms plus Zapier to just move the data, this update from Softr is a big deal. Softr forms are no longer just about collecting data, but they're now a core part of how your systems actually work. In many cases, they remove entirely different tools from your stack.
We help teams build internal tools, portals, integrations, and workflows using no-code and low-code platforms without overengineering things. In this video, I'm going to explain to you what Softr forms are and why this update matters. We're going to build a real IT request form step-by-step so you can see how it works and get familiar with how to use the platform.
If you've been using Softr for quite a while, this will all sound really familiar because before standalone forms, forms mostly lived inside your Softr app pages. They were often tied to logged-in users, and for public or internal requests, teams relied on external form platforms like Fillout or Google Forms.
The typical setup looked like this. You had a Google Form or Typeform for submission, then you used Zapier or Make to move the data, and you used Airtable or Sheets as the database. Then Softr was just used to display the results.
[.blog-callout]
Note from Softr: You no longer need to rely entirely on external automation platforms like Make or Zapier. With native Softr Workflows, you can keep your logic right next to your design, reducing complexity and consolidating your tool stack.
[.blog-callout]
This worked, but it was fragmented and over-engineered. But now Softr has standalone forms that you can build directly inside without creating a full application. You don't need to require users to log in or rely on external form tools to make this work.
They're shareable using a simple link, and you can embed them anywhere to connect directly to your data and workflows. This is a big step towards Softr being a full-stack platform, which it already is by having the database, the front end, and workflows. Now forms are incredibly useful so you can create full-blown applications.
Here's a question that everyone is going to ask, is Softr forms free? The answer is yes, partially and intentionally. On the free plan, Softr gives you unlimited standalone forms, unlimited submissions, shareable form links, and embeddable forms.
However, advanced features like conditional logic, multi-step flows, workflows triggered by forms, and AI steps require a paid Softr plan. The idea is simple, you can start for free for basic data capture, then you can upgrade when forms become part of a real system. Just give it a try to see how they work, and you can always upgrade if needed.
This is the new capability in Softr, where you will now see apps, databases, workflows, and forms. Within forms, you have the option to start from scratch or use app templates that they provide.
[.blog-callout]
Note from Softr: Instead of starting entirely from scratch, you can always use the AI co-builder. Just prompt for the forms or applications you need, and it instantly builds complete apps, pages, or database schemas while letting you tweak things manually afterward.
[.blog-callout]
At a high level, Softr forms are standalone, flexible, multi-step forms that live directly inside the Softr platform. When someone submits a form, Softr can store the data internally or send it to tools like Airtable, Google Sheets, or Notion. It can also trigger workflows, notify specific teams, and integrate with external systems via webhooks all without leaving Softr.
Why does this matter? Real internal tools don't just display information, they collect requests. You can think of use cases like IT access requests, hardware requests, onboarding forms, offboarding requests, and internal approvals.
Before this update, those forms almost always lived outside of Softr. Now that form lives exactly where the system lives, which is a huge simplification. One of the most important parts of Softr forms is where the actual data goes.
If we open our demo that we've been creating and look at the settings, they have a bunch of integrations. Right now I have mine set up to Softr Databases, but you also have integrations for Airtable, Notion, Google Sheets, SmartSuite, Xano, Monday, and even Supabase.
[.blog-callout]
Note from Softr: While Softr directly manages connections to over 17 external data sources, Softr Databases is our highly recommended native solution. It provides the most powerful way to manage data directly within Softr for maximum performance.
[.blog-callout]
You can even connect to PostgreSQL, MySQL, SQL Server, Mailchimp, email, and webhooks. Softr adapts to your stack instead of locking you into one tool. I want to clarify that you do not need to create a database field first.
When you create a new form within Softr, it actually creates a Softr database as the destination automatically. You'll see an option to send form submissions to the built-in database, which refers to Softr Databases. Softr will automatically create the database and create the fields based on your form structure.
If you already have a database like I do, you can always change the destination and map it to your existing setup. You can map those existing fields to the form, making setup much faster, especially for new systems. Let's go over the demo form I created so you can see it in action.
Before we dive in, I want to show you the database where we are storing all the responses. Every time you create a new form from scratch, it generates a backend for you to store those responses. You can easily convert this to a standalone database by clicking the small arrows and hitting confirm.
Once it is converted, you have a fully functional central database. At that point, you have the ability to delete or duplicate it, but it cannot be deleted beforehand. Now let's go back to our form demo.
I already set the destination to be my Softr Databases since that's what I'll be using. The source is the specific database I created for these local system forms. On the steps tab, the first thing you want to do is actually enable your steps.
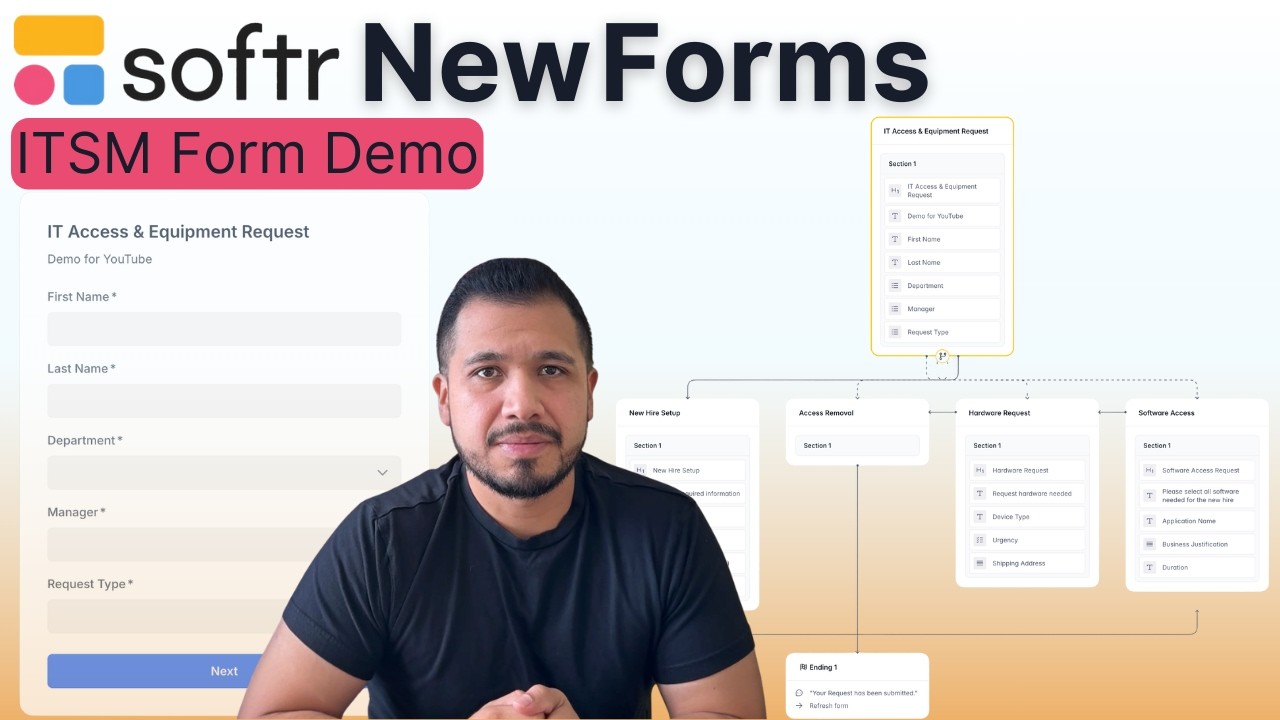
I have five steps total in my setup. The first one is the main form where I'm collecting the first name, last name, department, manager, and the core request. The subsequent steps depend on the specific options selected during the actual request type.
If you go ahead and double click here, you can actually rename the steps. My logic changes dynamically depending on the request type that the user selects. For that, I have a step set up for new hires that covers the start date, the role, the location, and if a laptop is required.
I also have one for software access. This includes the application name, business justification, and the duration on how long they need access to this application. I also have one for hardware requests, which asks for the device type, the urgency of the device, and the shipping address.
I also have one for offboarding that I actually did not finish for the purpose of this demo, but this is just access removal. If we add fields and go to input, this is where I'm going to select the fields from my database that I actually want to add. I'm going to select the employee name, the department, and maybe the business justification to know exactly why this person is being offboarded.
When the user comes to fill out this application, the answers are going to be stored in the database that I created. The next step I want to show you is the logic tab. This is where you actually create all the logic in the form.
If we click on the first one, this is where you create different paths for where the form is going to go. For example, if in my IT access and equipment request step they select software access, it's going to jump into the software access step. In order to do that, you have to put in a condition.
I'm going to say that the request type, which is the field I have on the form, must include exactly software access. I'm going to add it as a custom value, then I click add, and it's going to jump to that step. One thing you need to be careful of when you do that is ensuring you input the condition exactly as you set the option in your database.
If I double click here, I have these options available. When you put it into your form, if you put an extra space in it, it's not going to take it and it won't work. It has to be exactly the same with no spaces. If you do have a space in the database, put a space in the logic, otherwise, it's simply not going to work.