Transcript
So for the database to work, we have identified the different tables that we will have in our database. You can consider tables as objects.
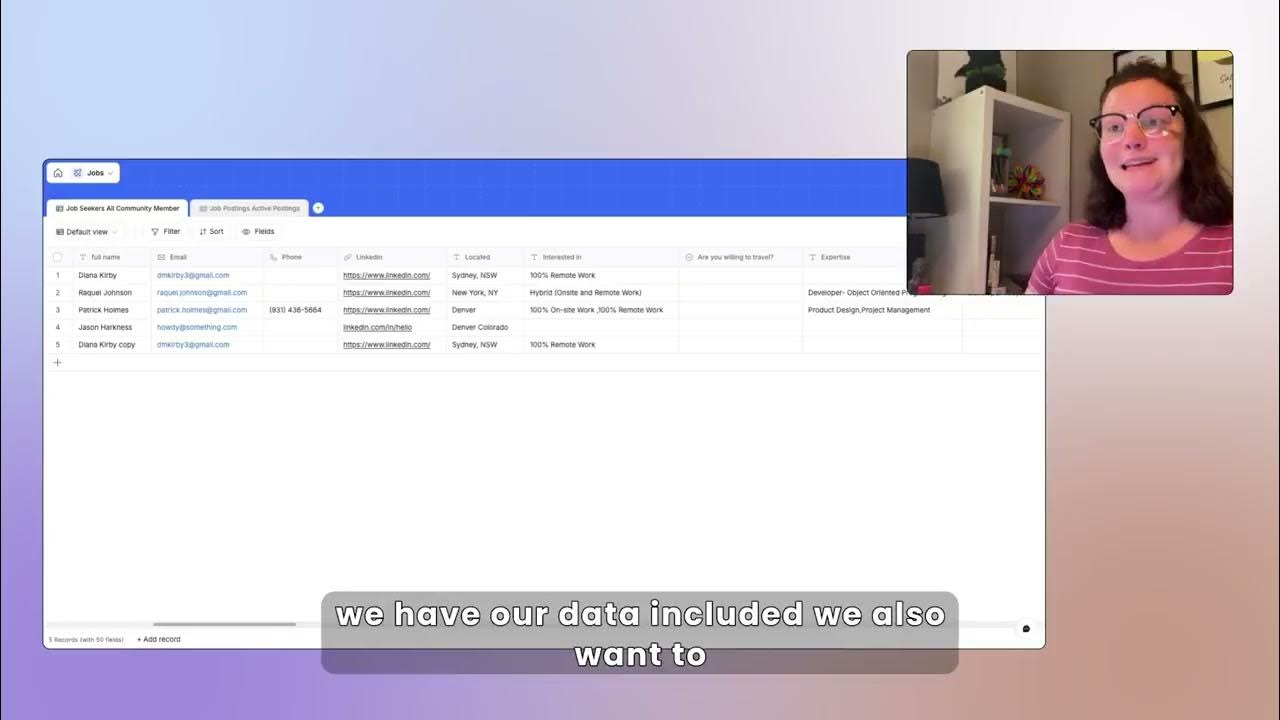
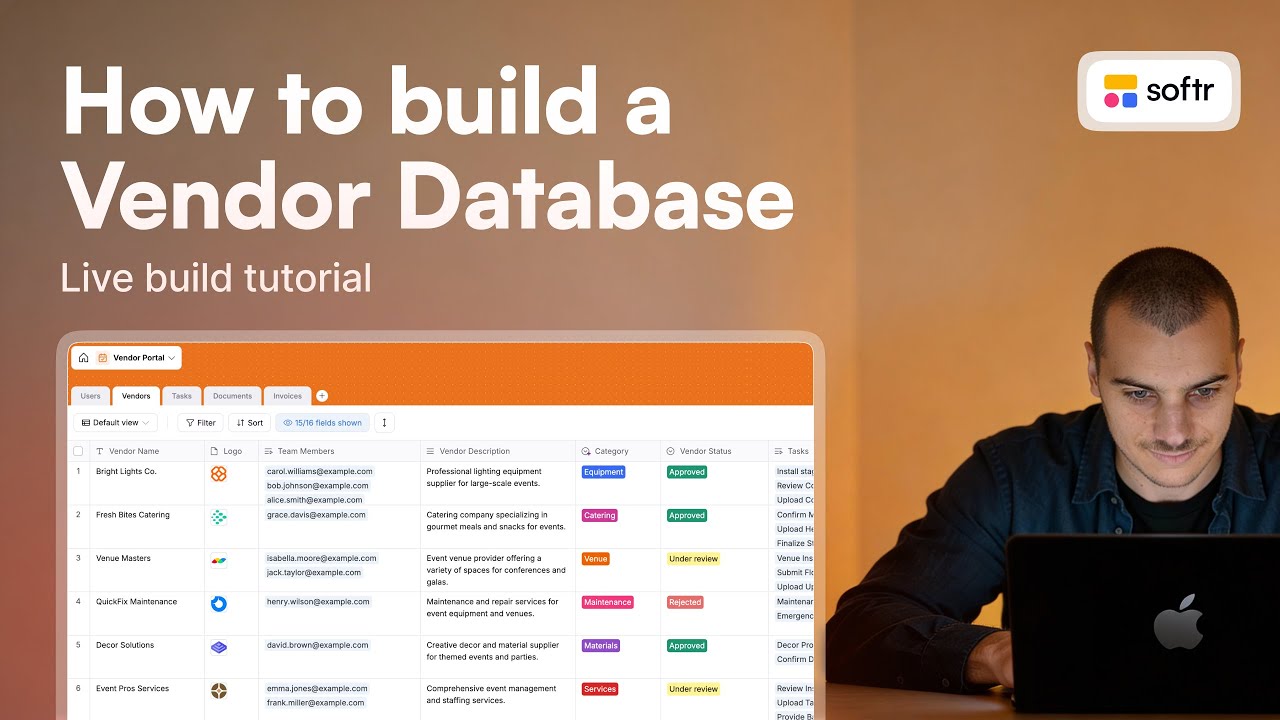
In our case, we have users, so each row of our database will be one user. Users is one of the objects of our app, but we will also have a list of vendors.
We will also be able to create connections between objects. We can define that this user is assigned to this vendor, which would be one of the companies providing services to your business.
In the same way, we will be able to link documents and vendors, or invoices and vendors, or tasks and users. This helps us know who has been assigned to each task.
If the vendors have a team of four people logging into the app, they can also assign the different tasks to their team.
I always recommend starting by mapping the tables you will need in a format like this. It gives you clarity on what you need to build and helps you think about the different properties for each table.
[.blog-callout]
Note from Softr: A great way to start is by using the AI co-builder. You can simply prompt for a vendor management system, and it will generate the necessary pages and database schemas for you automatically.
[.blog-callout]
For the users table, we will probably have a field for their email and their name. For invoices, you will have the title and a file field to attach the actual document, like a PDF.
You will also have a number field for the amount of the invoice and a status field to know whether the invoice has been paid or not.
We will be creating these objects as tables right now in Softr Databases. I am in the dashboard of my Softr account and I will create an app from scratch.
We have three components available here, and I will be deciding what data to connect to my app. I could have my data in a Google Sheet, Notion, or any REST API.
Softr would be able to connect the interface components to those sources. For example, if you have records in a Notion table, you could display them in a calendar block.
[.blog-callout]
Note from Softr: While Softr integrates with 17+ external sources, using Softr Databases is the powerful, native way to manage your data directly within the platform for maximum performance.
[.blog-callout]
In our case, we will be using Softr Databases. They are the native database that Softr provides, giving you the best performance since it is directly included within Softr.
I will continue with that, and it will create an app with some utility pages. We see two blocks being created already.
When you have a dynamic block, the first step is to connect it to a source. I will hit create new database and rename it to match our app.
You could have one database that connects to different apps if those apps need to share the same set of data.
Now I will create the different objects as tables. We will get started with the users table.
I usually start with users because all of my apps have users, and we will be able to connect them to Softr user settings later.
Each column is a field that enables us to categorize data. I am removing the default columns to focus on the primary field.
I recommend the primary field always be as unique as possible. A first name is not a great choice because you might have two people with the same name.
Email is a great unique identifier. In your vendor ecosystem, there is a high chance that no two companies have the same name, but always think about uniqueness.
I will add a short text field for the full name. We will also use a select field called role to determine if a user is an admin or a vendor.
Later, when we configure our users, we can create user groups based on this role. This avoids having to create separate tables for admins and vendors.
[.blog-callout]
Note from Softr: Once your roles are defined, you can use user groups to control exactly what each person sees when they log into your portals.
[.blog-callout]
I will now create the other tables we need: vendors, invoices, tasks, and documents. I create them all now so we can create related records.
A related record is a way to say a user is related to a vendor. I will call this field works at and relate it to the vendors table.
When I open the vendors tab, I see a mirrored field has been created automatically. This ensures the connection exists and stays robust.
Using related fields is the way to make your data structure as robust and scalable as possible. It is much better and more organized than using Excel.
I had already planned the different fields for my tables, so I will implement those now using various field types.
For example, we have a native field for phone number which can validate the format. We have the same for URLs.
I am adding an avatar field using the file type. We can map that to the Softr user settings so people see their icon in the interface.
I am also adding a status field for users. This allows an admin to approve vendors before their account becomes active, maximizing security.
When configuring a select field, we can select specific colors for values. We can reflect these color codes within the app to make it easy to understand.