Looking for a simple way to manage your customer relationships?
Customer Relationship Management (CRM) is essential for maintaining strong customer relationships, managing data, and driving business development.
As a no-code database, Airtable is a popular CRM tool that allows users to customize workflows and manage data, including tracking customer interactions, managing leads, and following up on sales opportunities.
In this guide, we'll walk you through how to use Airtable as your go-to CRM tool. Whether you're a small business owner or managing a team, it's easy to get started.
- Use an Airtable CRM template
- Build a CRM with Airtable and Softr
- Start from scratch in Airtable
Why choose Airtable for CRM?
Airtable is a dynamic platform that bridges the gap between a database and a CRM, making it ideal for managing customer relationships. Here’s why:
- Pre-built, customizable templates let you import data and get started in minutes.
- Create a relationship between contacts, deals, and tasks with linked records.
- Use Kanban boards, grids, or calendars to track your pipeline and streamline your workflow.
Whether managing a customer database or building a sales pipeline, you can customize Airtable to meet your sales and business development needs.
Get started with our free B2B SaaS CRM.
Setting up your Airtable CRM
Since every organization has unique needs and processes, there's no universal tutorial, but you can follow the steps and add any requirements and processes.
Use an Airtable CRM template
The quickest way to get started is using an Airtable CRM template.
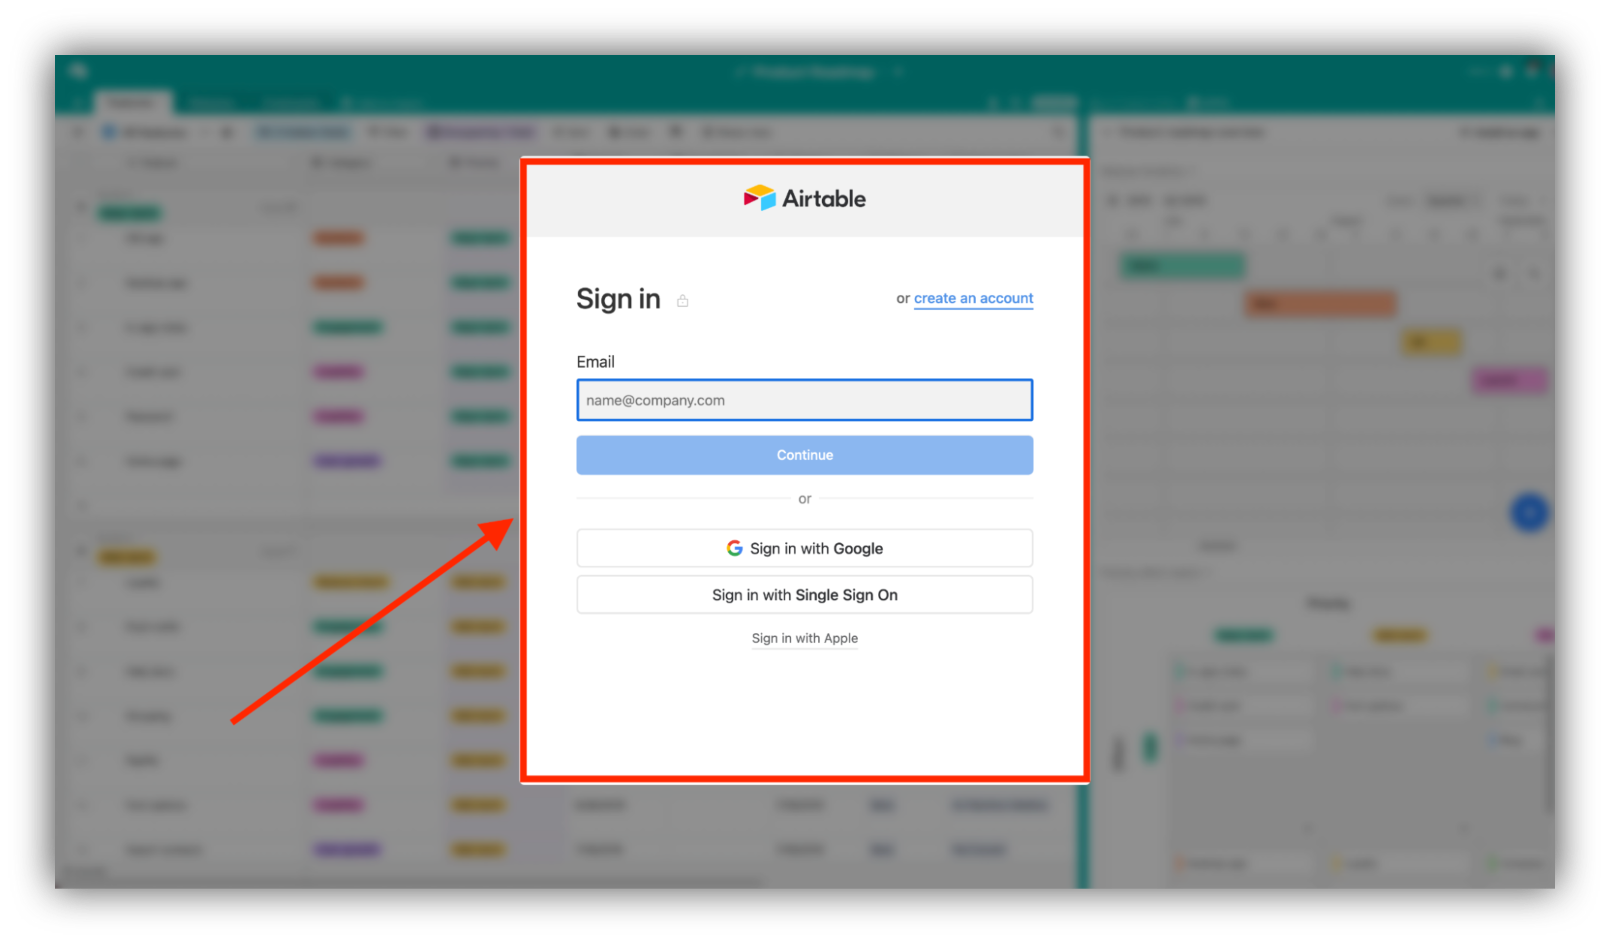
1. Sign in to Airtable
Log in to your Airtable account or create a new one.
2. Choose the Sales CRM template
Click "Start with templates" to open a list of templates.
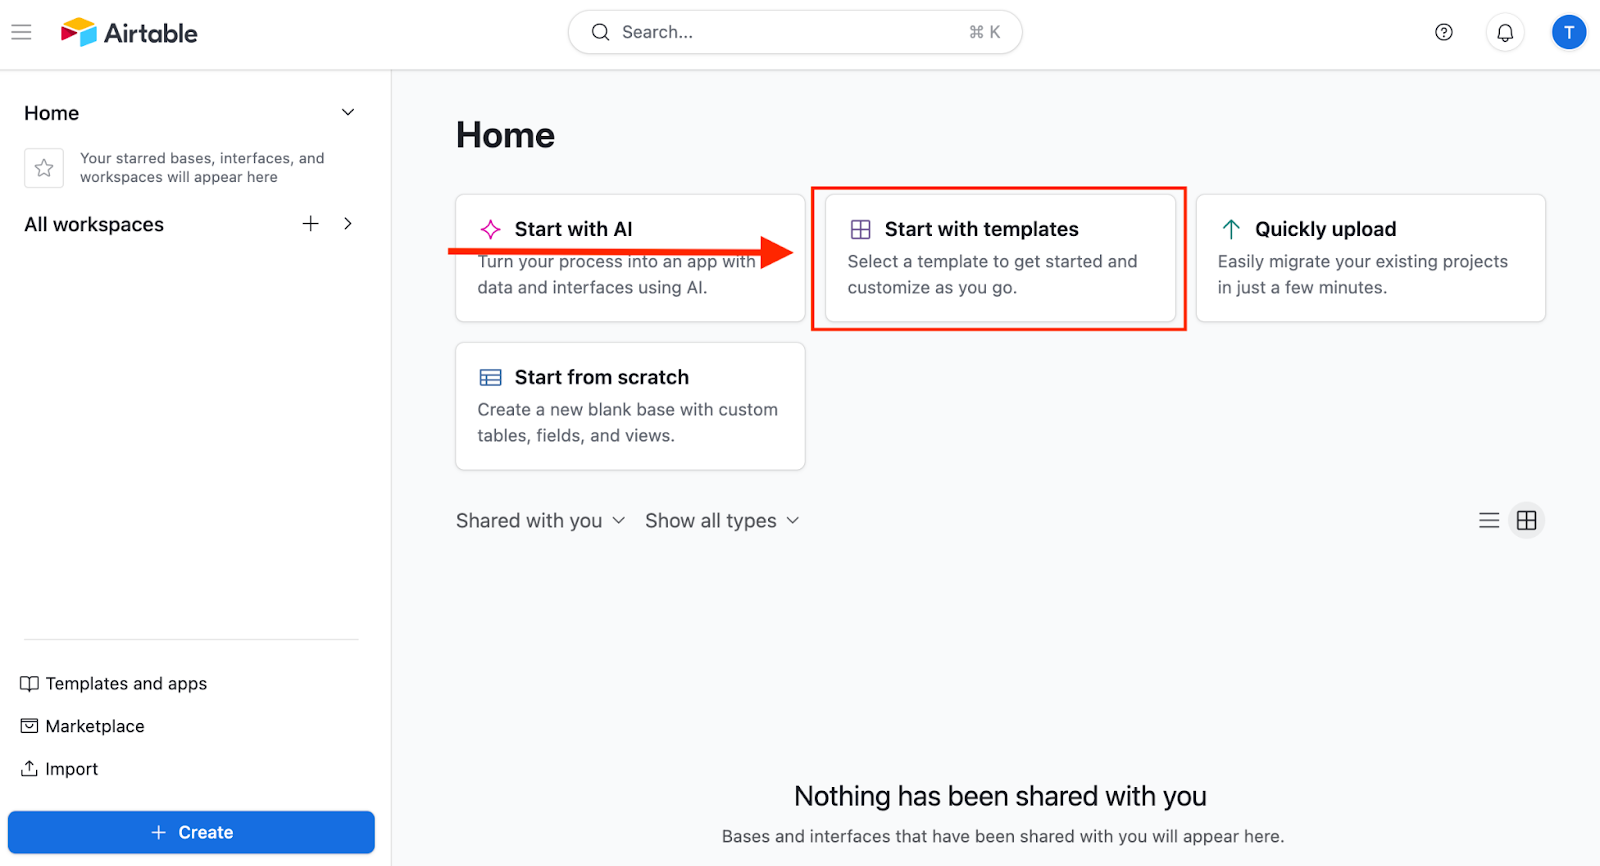
If the Sales CRM template doesn’t appear, click “Explore more templates” and search for CRM options.

Select the "Sales CRM" template, then the "Try this template" button.
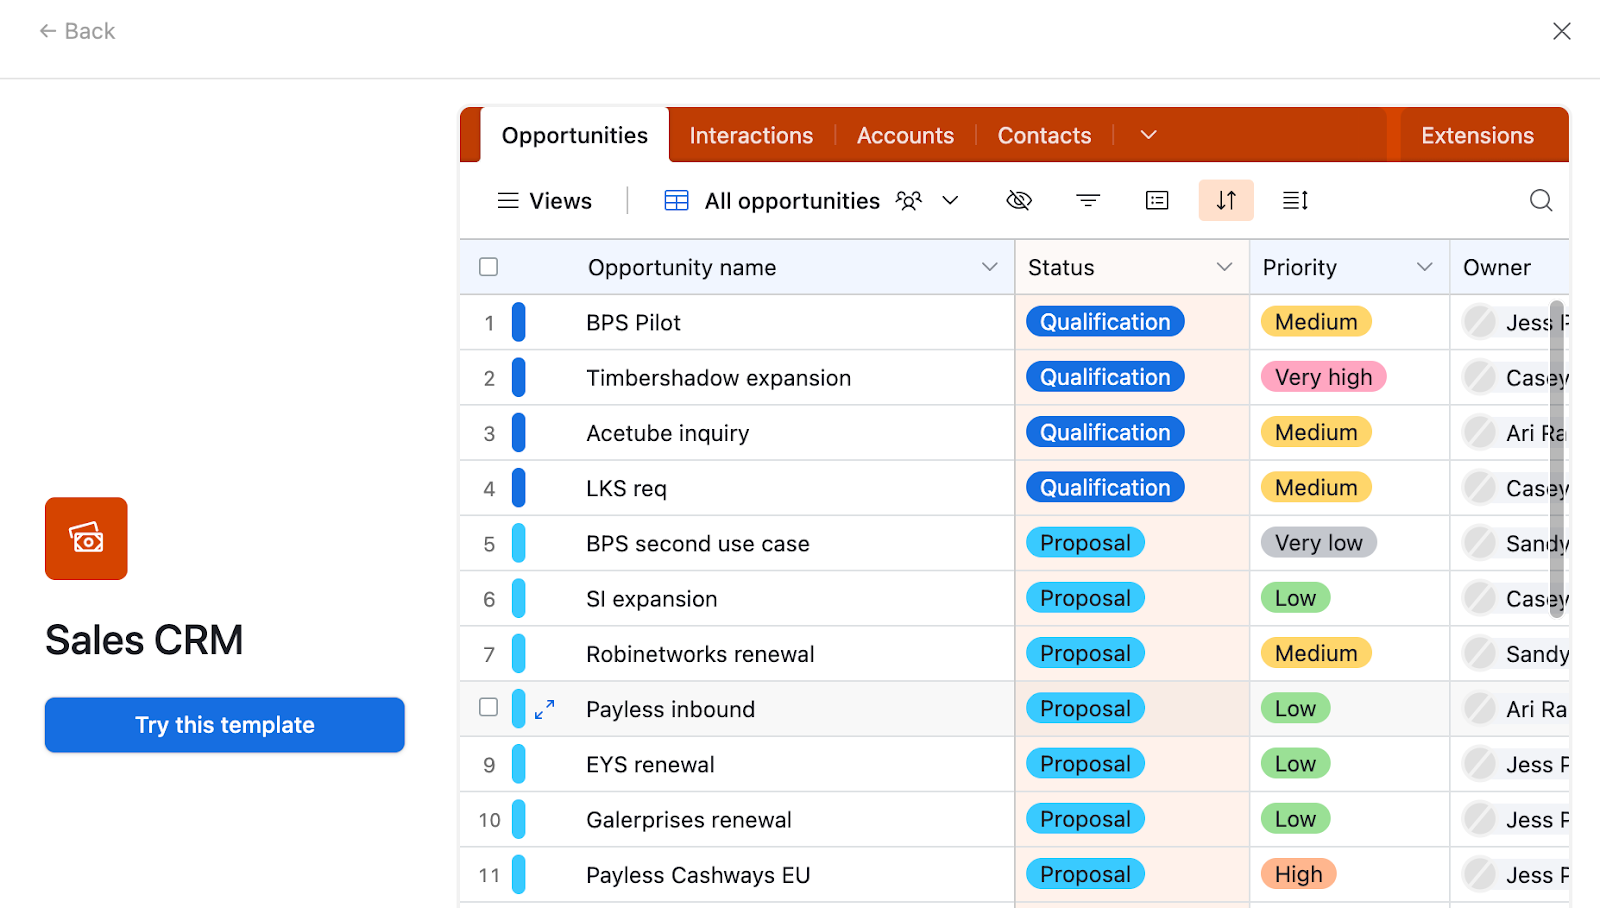
You can also start the entire process from the template page. Airtable will create your CRM using the template.
3. Import data
Click the "Add" button at the bottom and use Airtable’s import features to upload your existing contact list, pipeline details, or sales data into your new base.
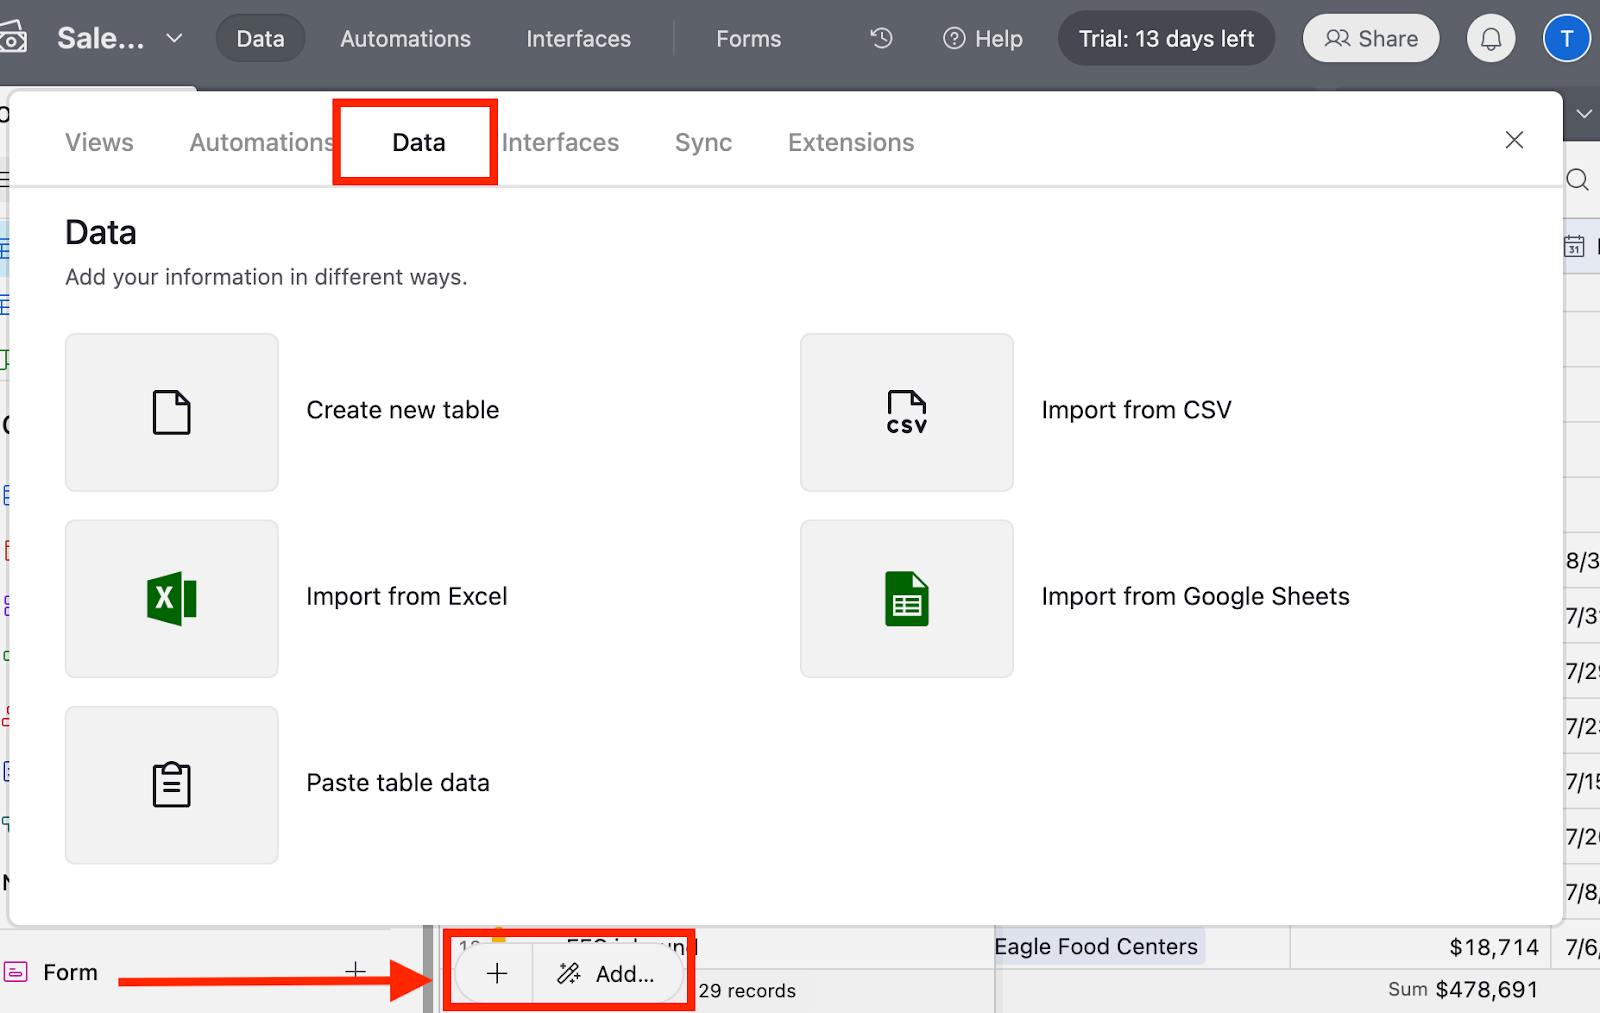
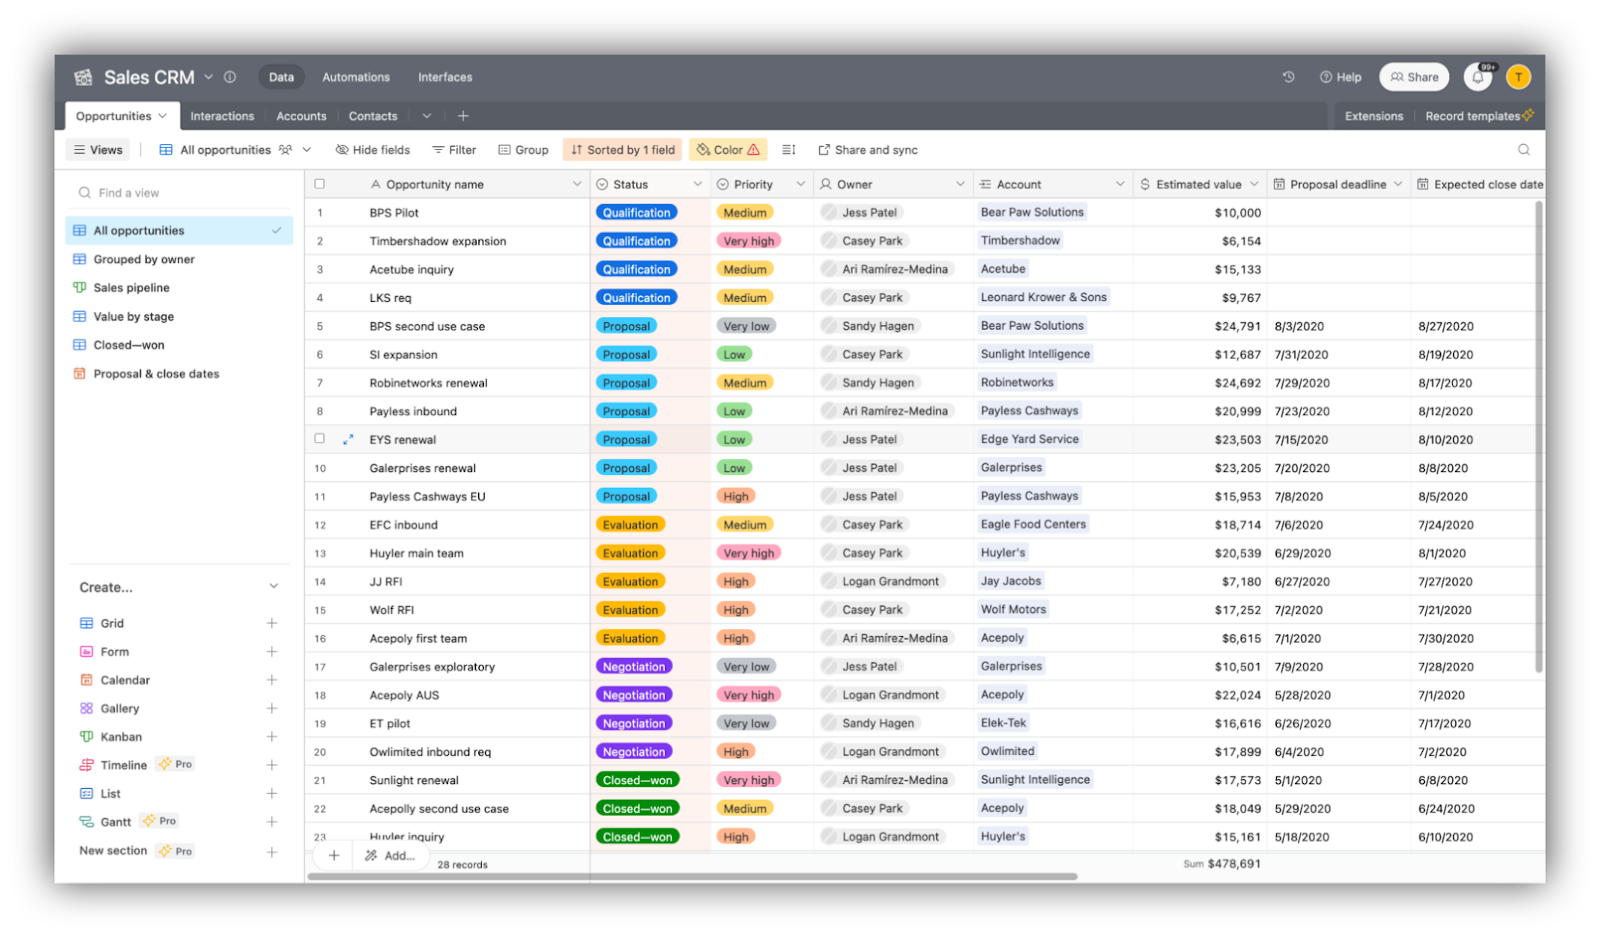
4. Start managing relationships
You now have a fully-fledged CRM to track customer interactions, manage your pipeline, and follow up on opportunities.
While this CRM is powerful and very practical, there are a few issues:
- Learning curve: Because it's out of the box, you now have to master it, which might take time.
- Custom capabilities: While Airtable’s CRM template does many things right, it is generic and may not fit your specific use case.
- Views and reports: Your CRM may be overwhelming. It’s basically a big database/spreadsheet, and you might have difficulty understanding it without easy-to-digest reports.
To tackle these issues, let’s look at a faster, simpler way to use Airtable as a CRM.
Build a CRM with Airtable and Softr
While Airtable excels at data management and offers a variety of views, Softr makes it super simple and fast to build a user-friendly, custom CRM—no code required.
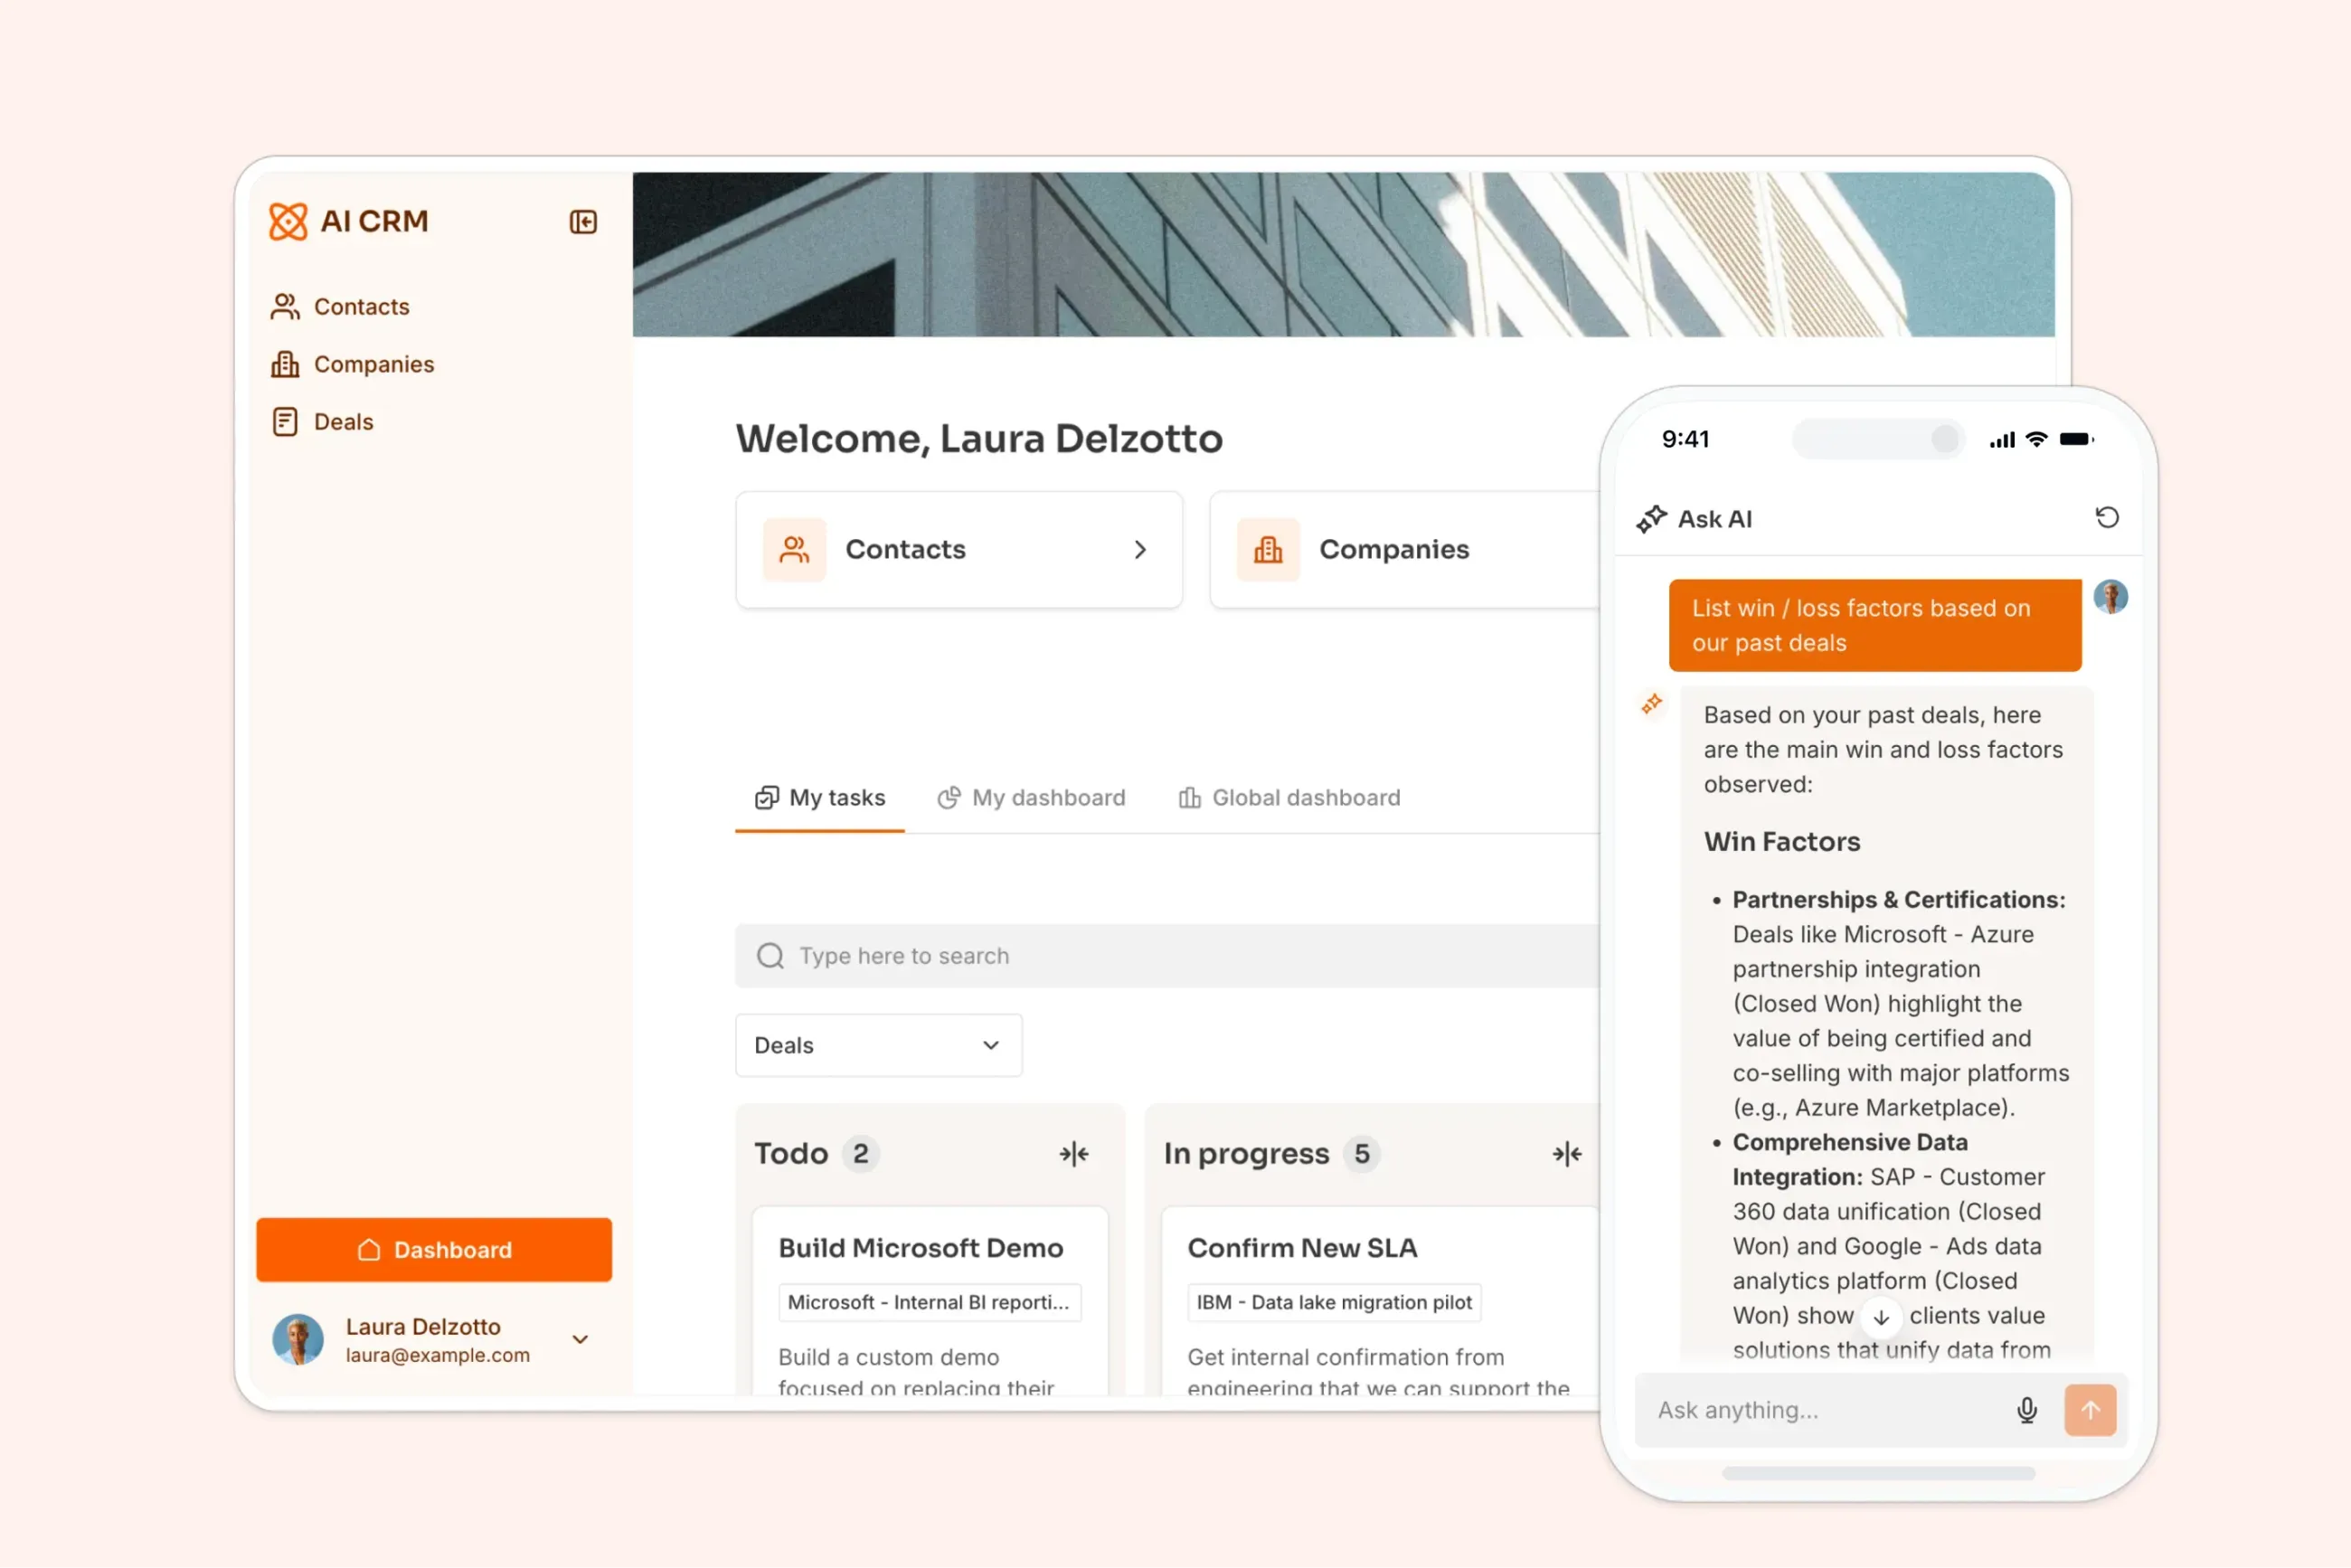
This interface can drastically improve the user experience for your team members and customers, making it easier to navigate, update, and interact with customer data.
- Monitor sales and customer development and get real-time updates with dashboards and embedded reports.
- Capture leads from forms embedded on your site.
- Customize pipeline stages, add deals, and update statuses as they progress.
- Store customer details, interactions, and transaction records in one place.
- Send and track emails from your app.
- Log, track, and manage customer support issues with ticketing and custom feedback forms.
Follow these steps to get started with Softr.
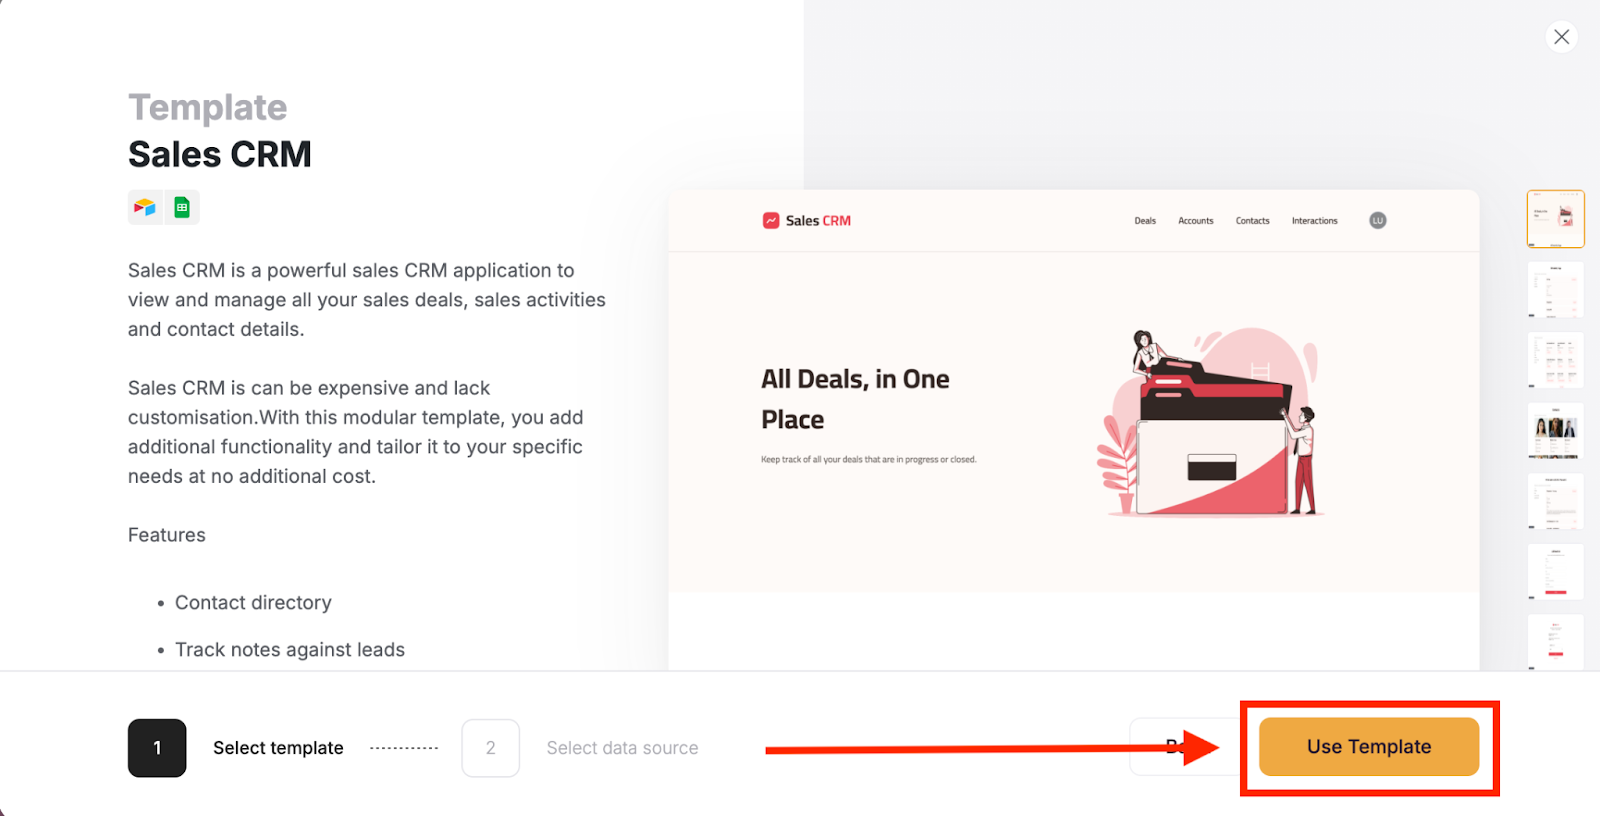
1. Sign up for Softr and choose a CRM template
Log in to Softr or create a free account.
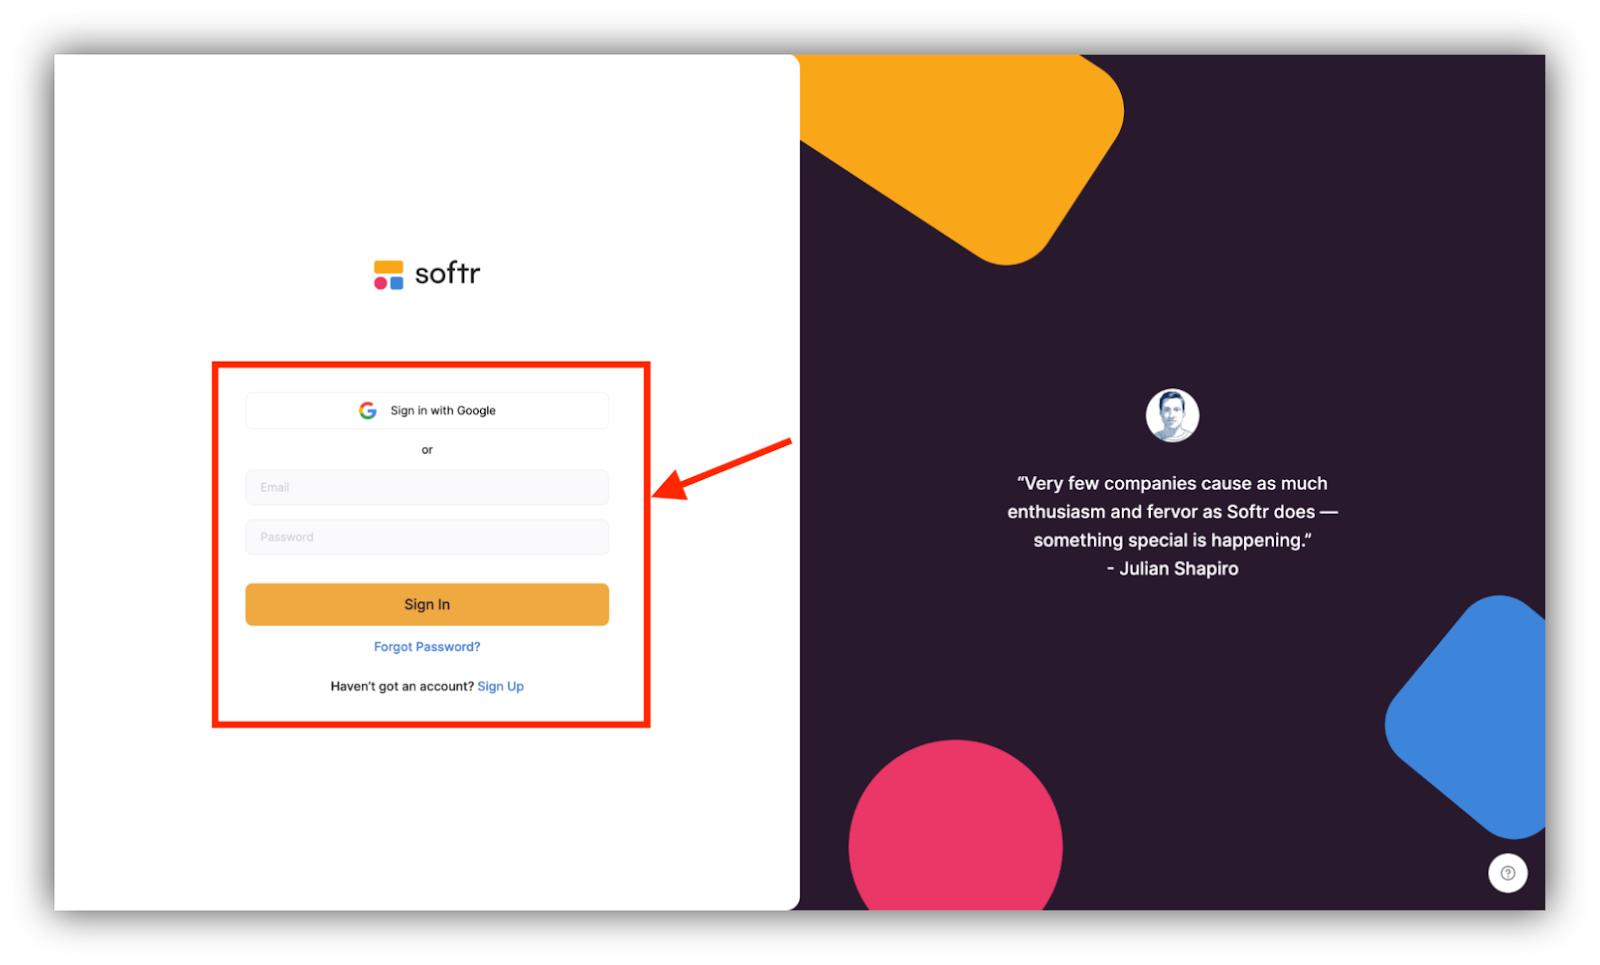
Click the free Sales CRM template or “All templates” to browse the gallery.
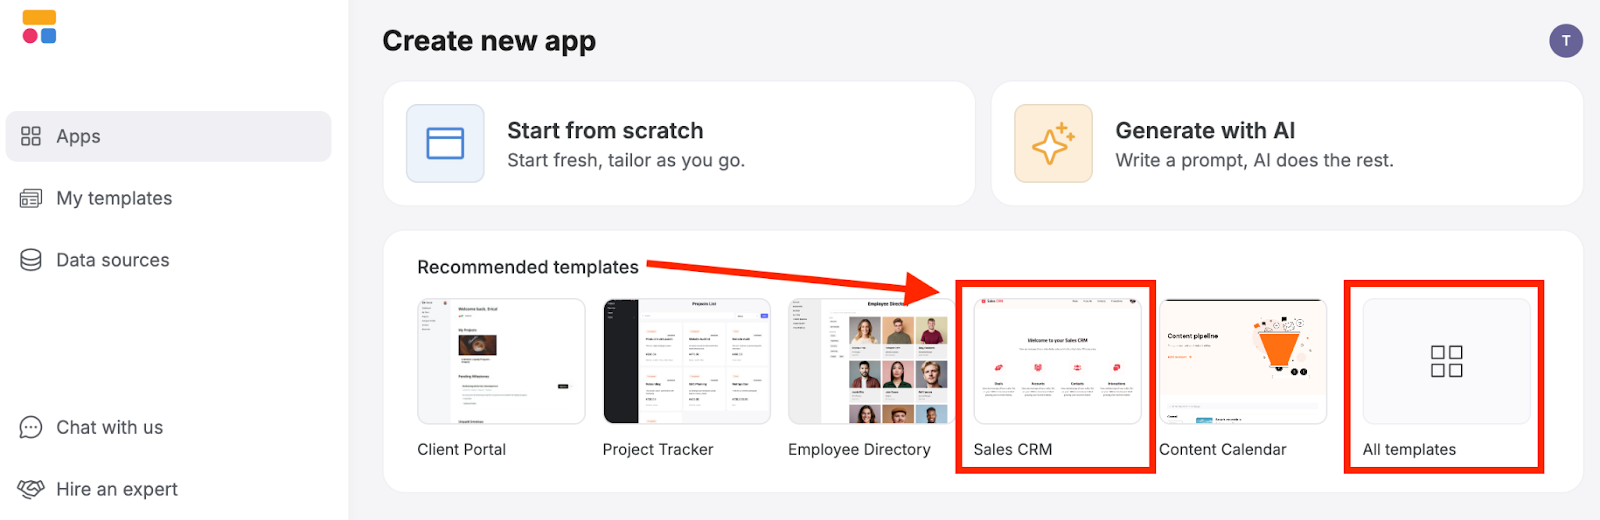
Click "Use template".
2. Connect Softr to Airtable
Click “Add a data source” to connect.
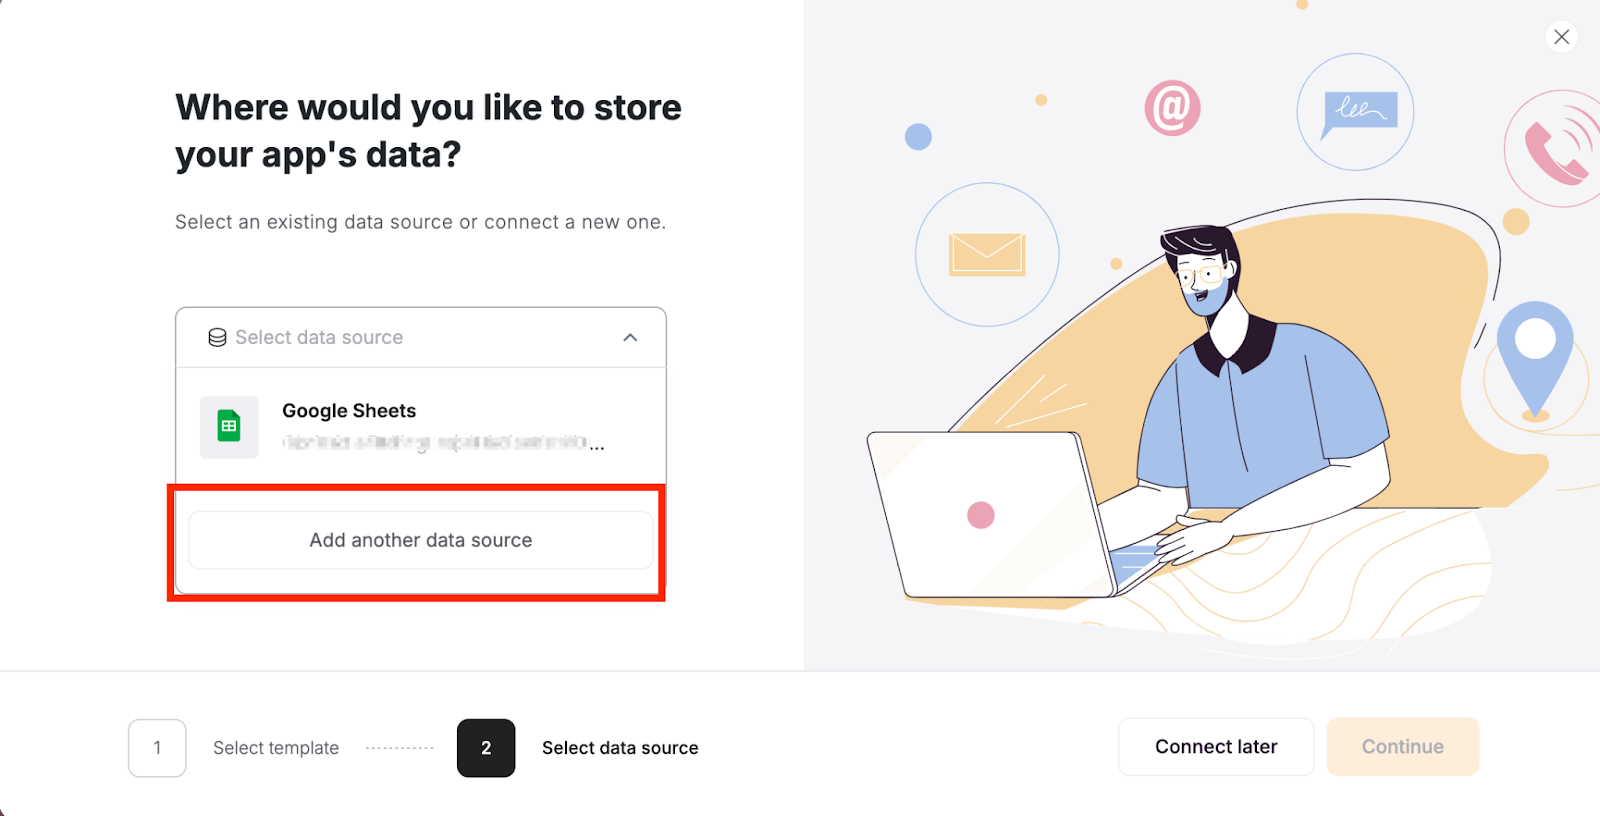
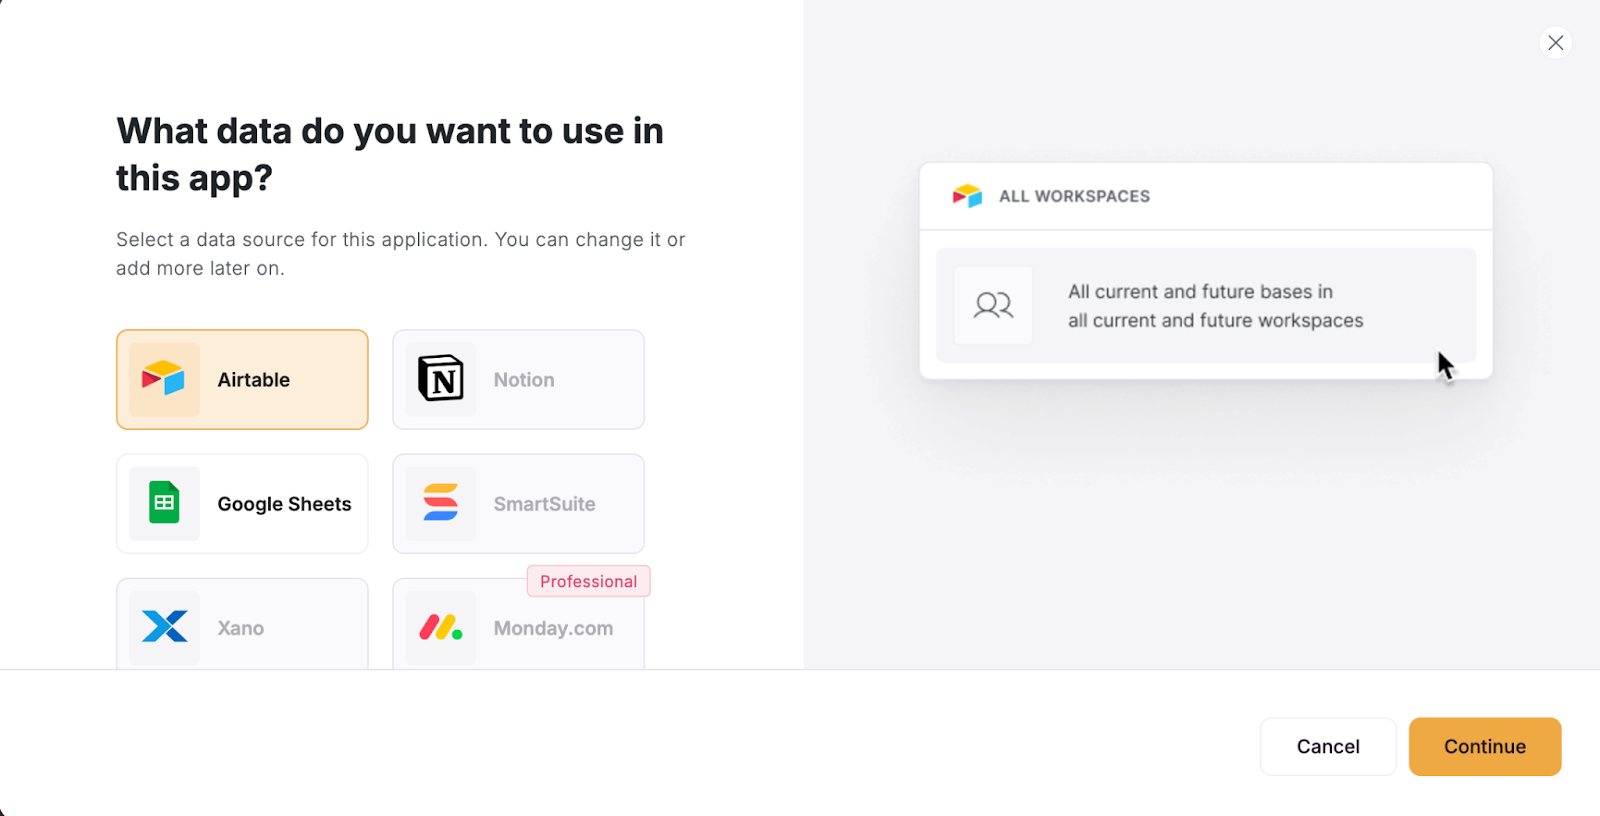
Choose Airtable then and press “Continue”.
You can now connect Softr to Airtable using your API key or personal access token. The steps are simple and explained on screen. Once you have added your authentication method, the setup will continue automatically.
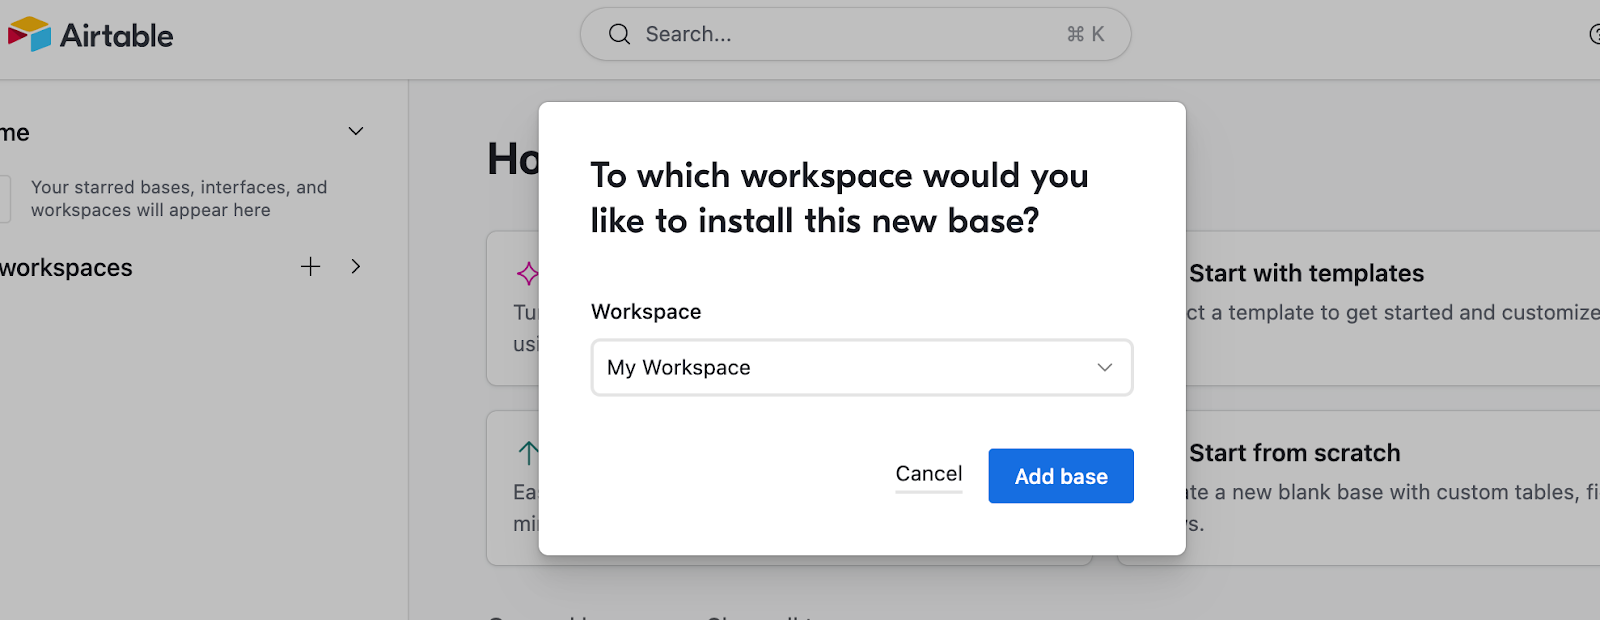
3. Copy the Softr base to Airtable
Softr provides a template Airtable base you can use as a starting point. Click “Copy base to your Airtable account” to create it.
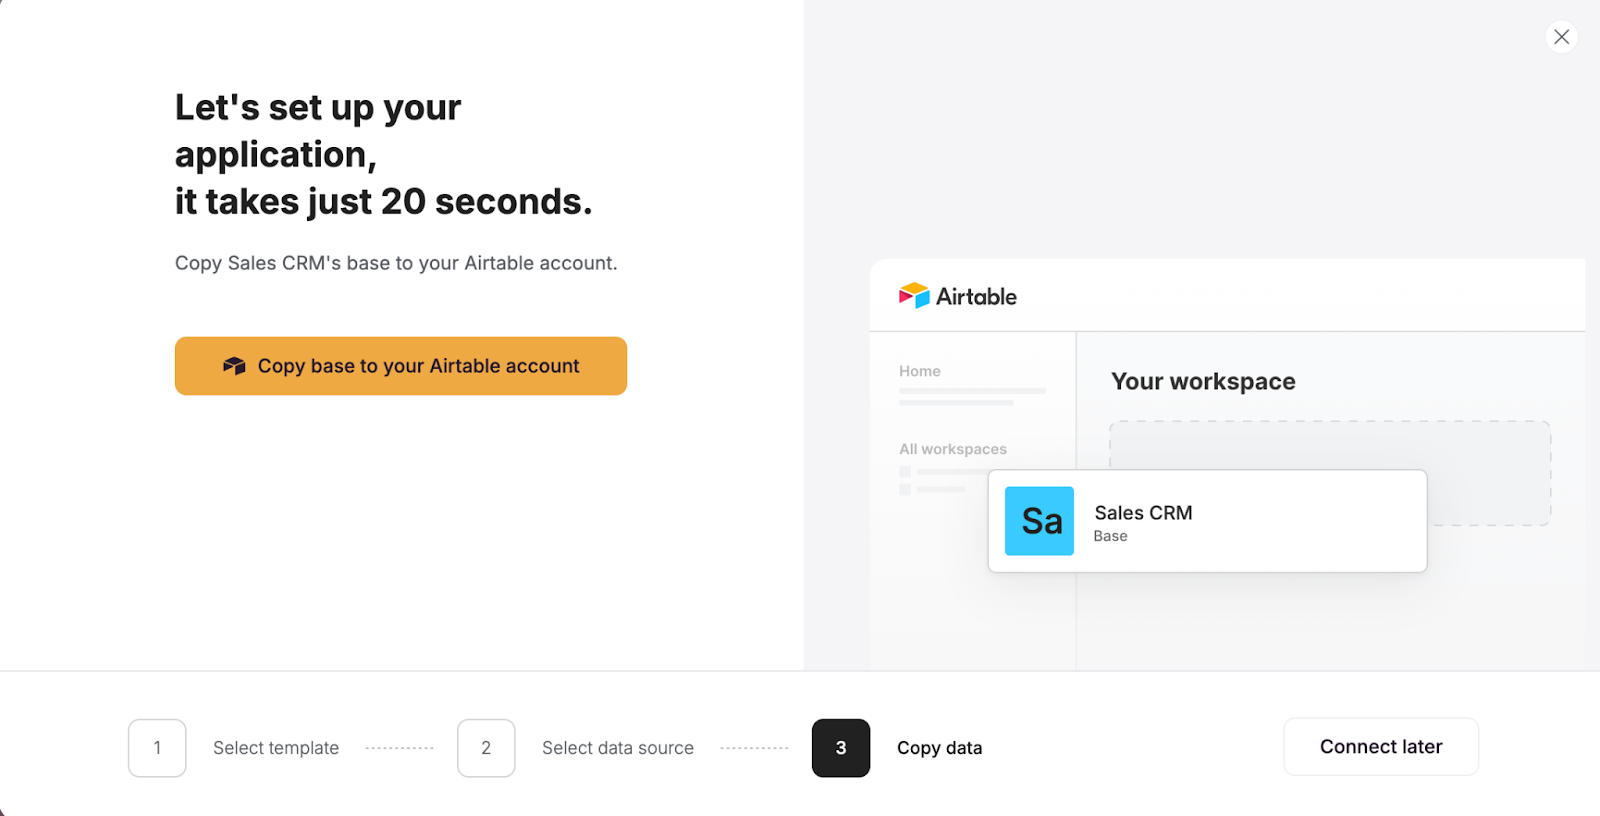
Choose the workspace where you want the base to be created and click “Add base”.
Softr creates a complete Airtable CRM for you, featuring several tables, linked records, and more. This simplifies the entire process by giving you a great place to start in minutes.
You can also create custom fields for customer data to personalize your CRM.
4. Build a frontend interface for your Airtable CRM
You're ready to build a complete frontend interface based on the Airtable CRM we created.
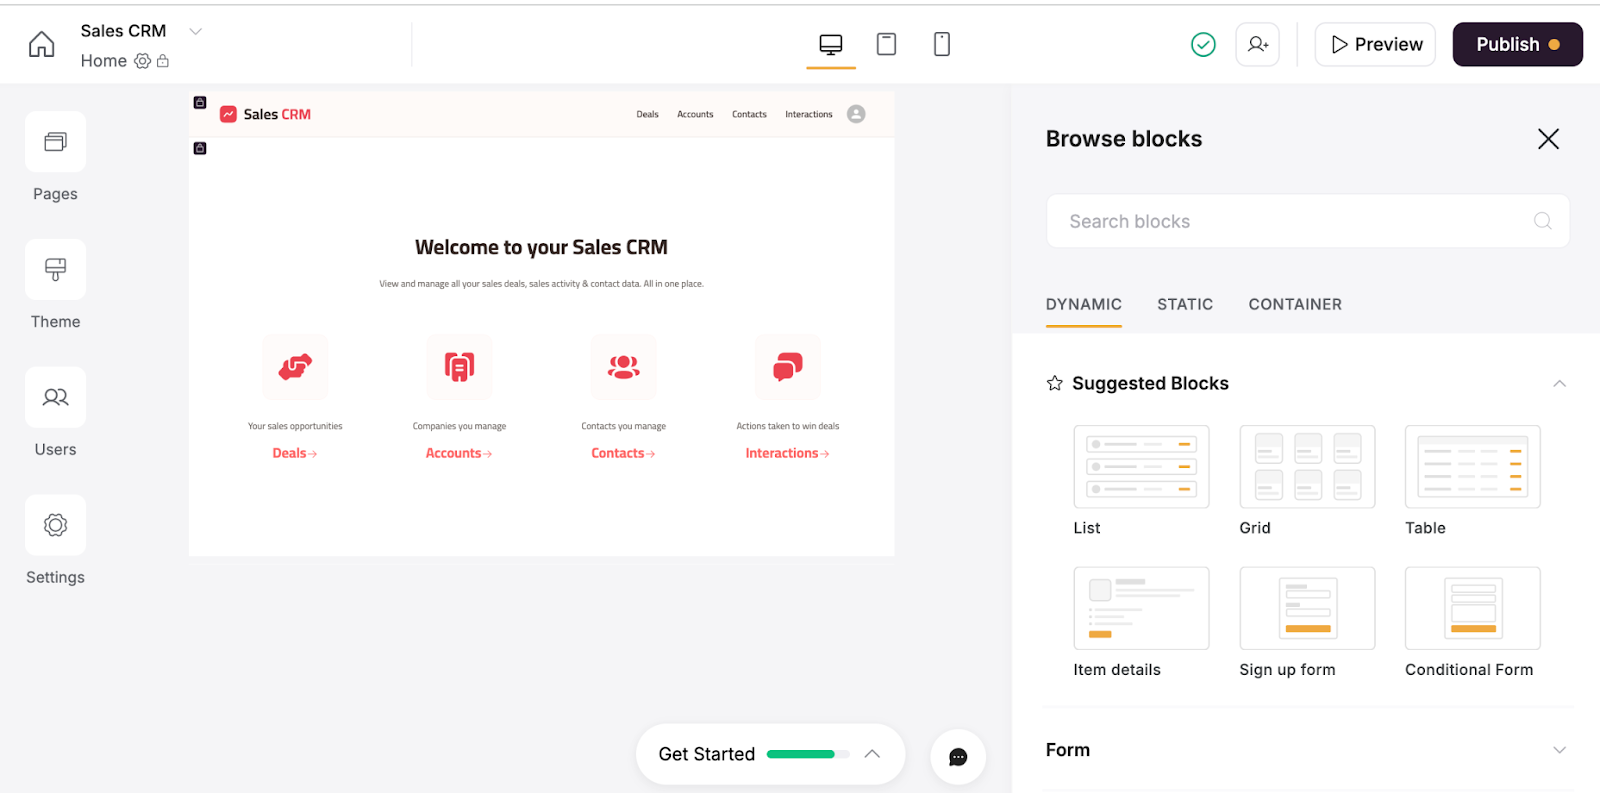
The CRM app already includes various pages and functions. You decide what to create, share, and make available to team members.
Use the drag-and-drop interface to:
- Build dashboards for your customer data and sync them with your marketing tools.
- Simplify data entry with forms and buttons.
- Implement payment management options.
- Assign user roles and manage who can access or edit specific customer data.
- Turn your CRM app into a Progressive Web App (PWA) with one click.
5. Automate tasks
Softr offers 30+ third-party integrations to help you build custom CRM automation workflows, or you can set them up in Airtable. Here are some suggestions:
- Send automated email follow-ups after a deal reaches a specific stage.
- Assign tasks to team members based on deal status.
- Receive notifications when a contract renewal date approaches.
Check out our complete guide on Airtable automation to better streamline your workflow.
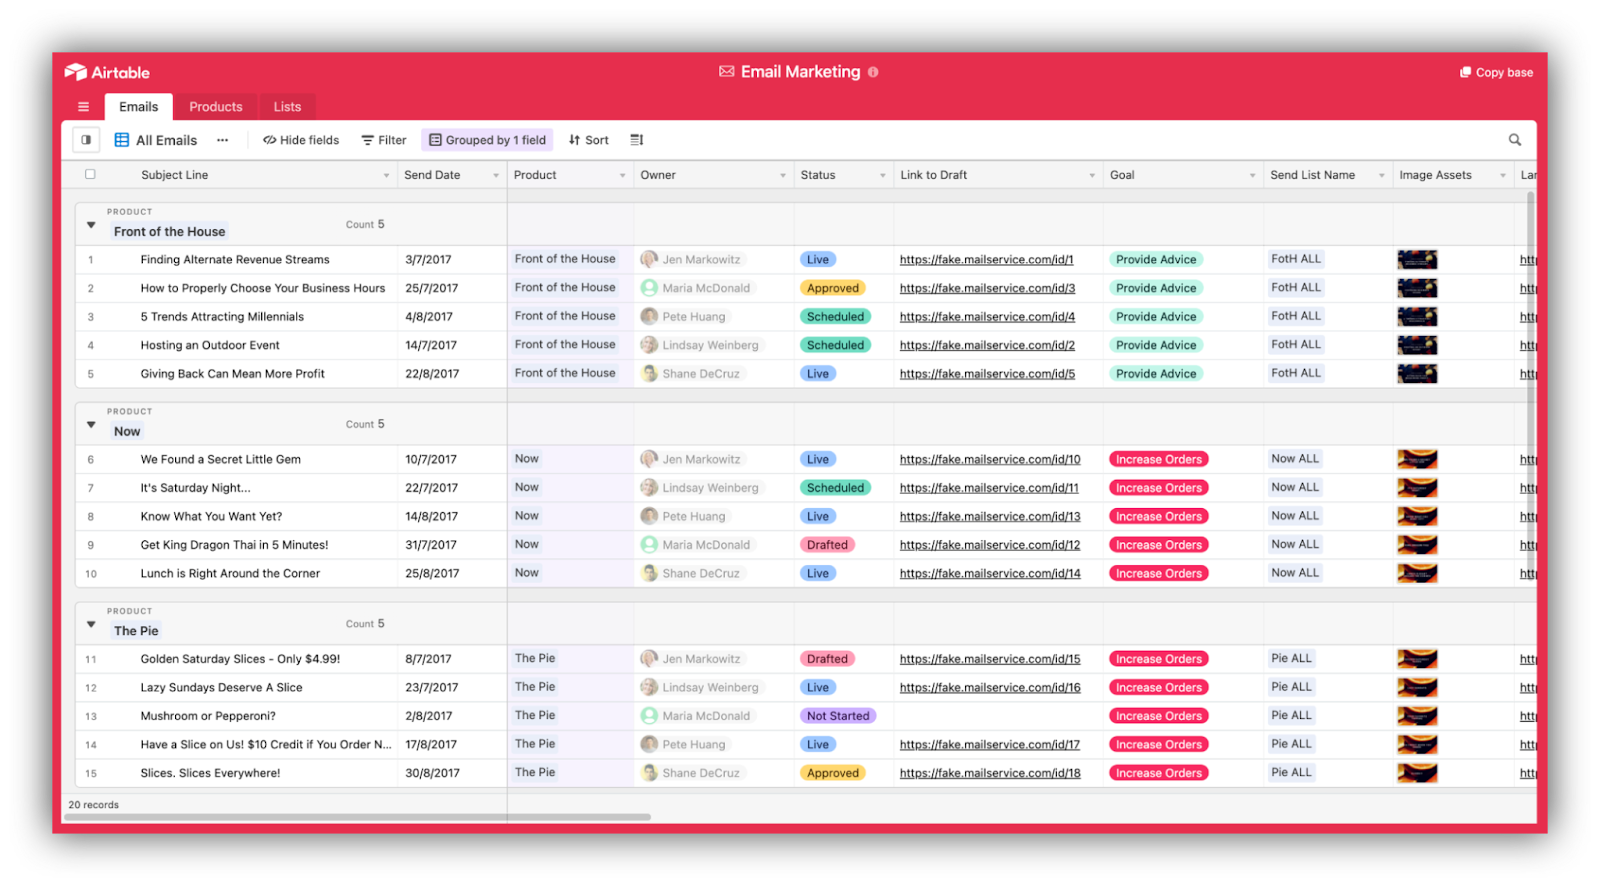
Image source: Airtable
Start from scratch in Airtable
If your business has unique needs that a pre-made template won’t meet, the "Start from scratch" option in Airtable gives you full control.
For this tutorial, we’re we’re keeping it simple. You can add any requirements and processes you might need.
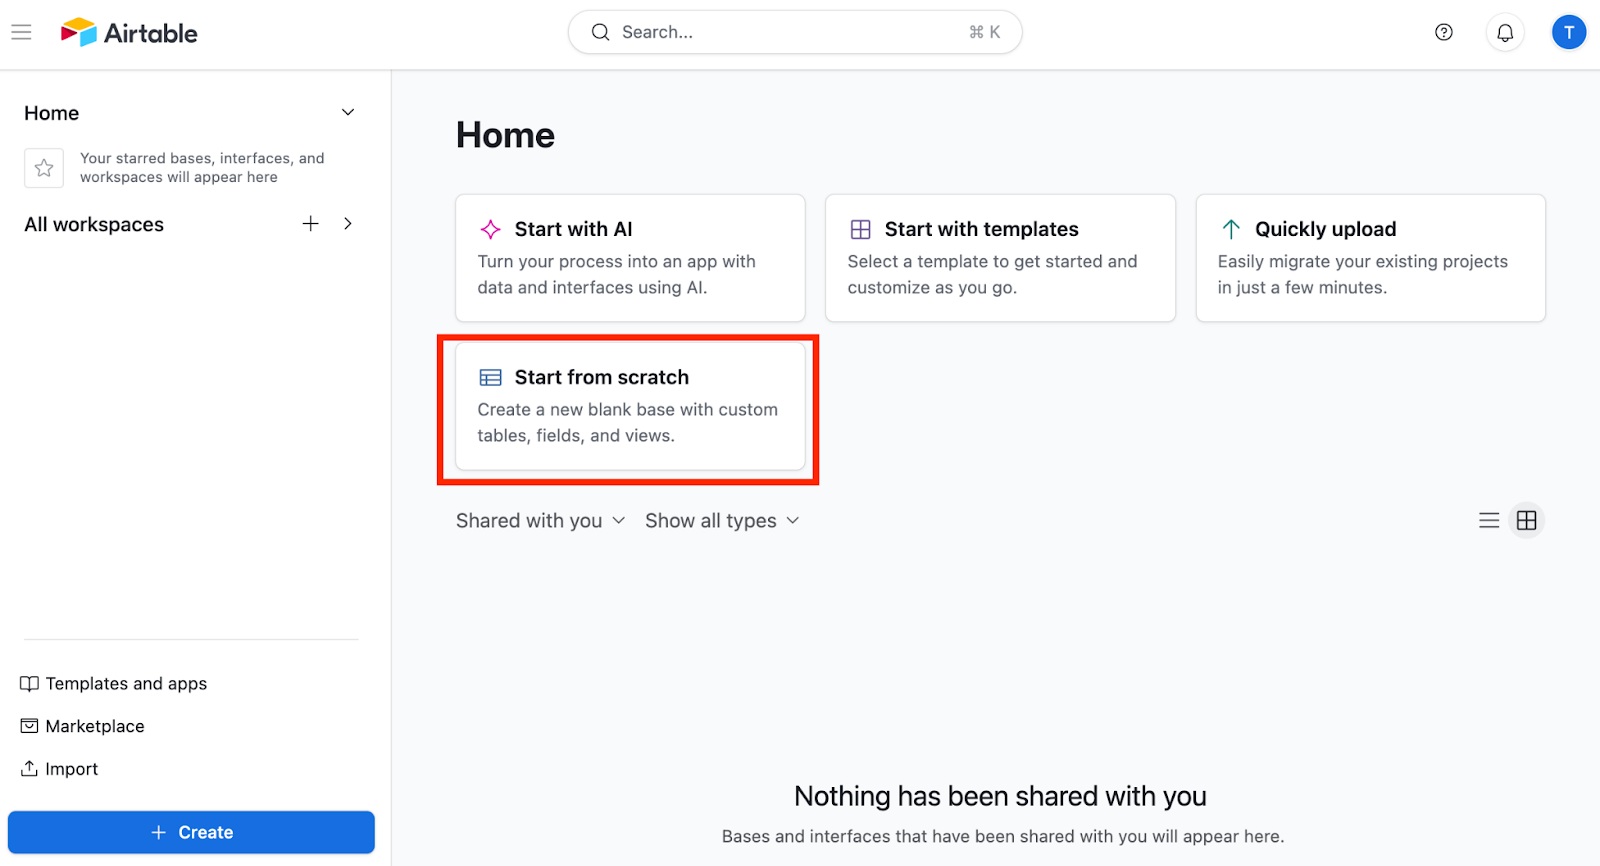
1. Create a new base
Log in to your Airtable account or create a new one.
Click "Start from scratch" to create a clean, new base.
2. Create tables for your CRM
In our example, we’ll create three tables:
- Contacts: Customers, prospects, or partners.
- Opportunities: Deals, potential revenue, and sales pipeline stages.
- Customers: Confirmed, paying customers.
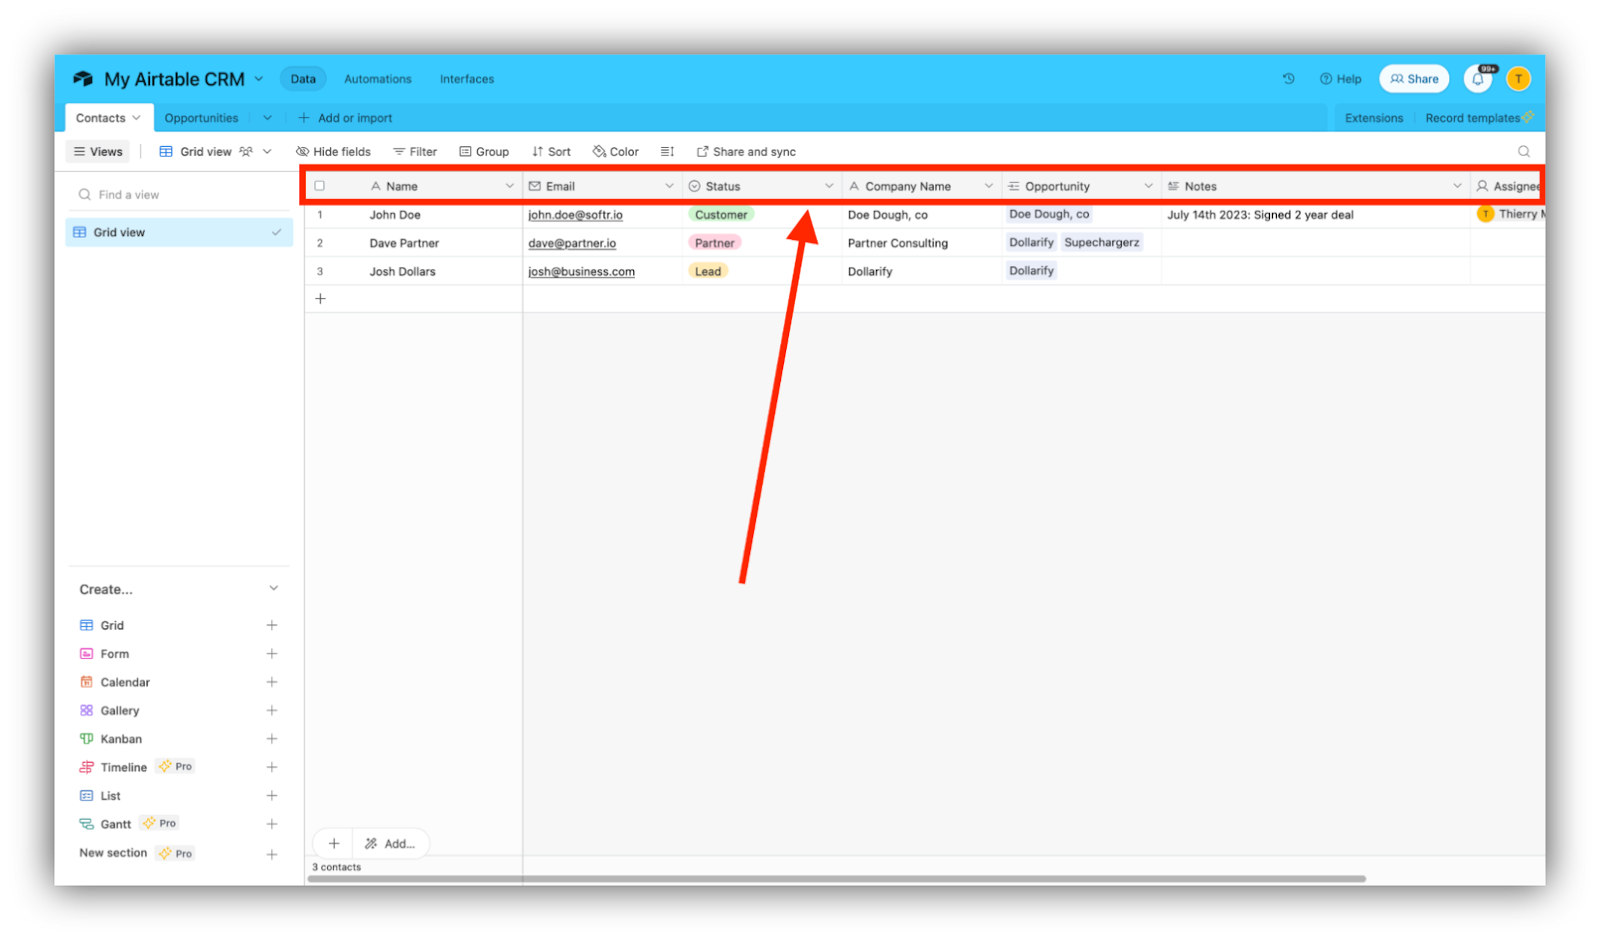
3. Build your “Contacts” table
Click on the arrow on the right of “Table 1”, select “Rename Table,” and rename it “Contacts.”

Create the fields to store the information for your contacts. In our example, we created the following fields:
- Name
- Company name
- Status (single-select dropdown: lead, customer, partner, etc.)
- Assignee (linked record to team members)
- Opportunity

You can create custom fields based on your requirements, such as the last contact date or a URL field for call recordings.
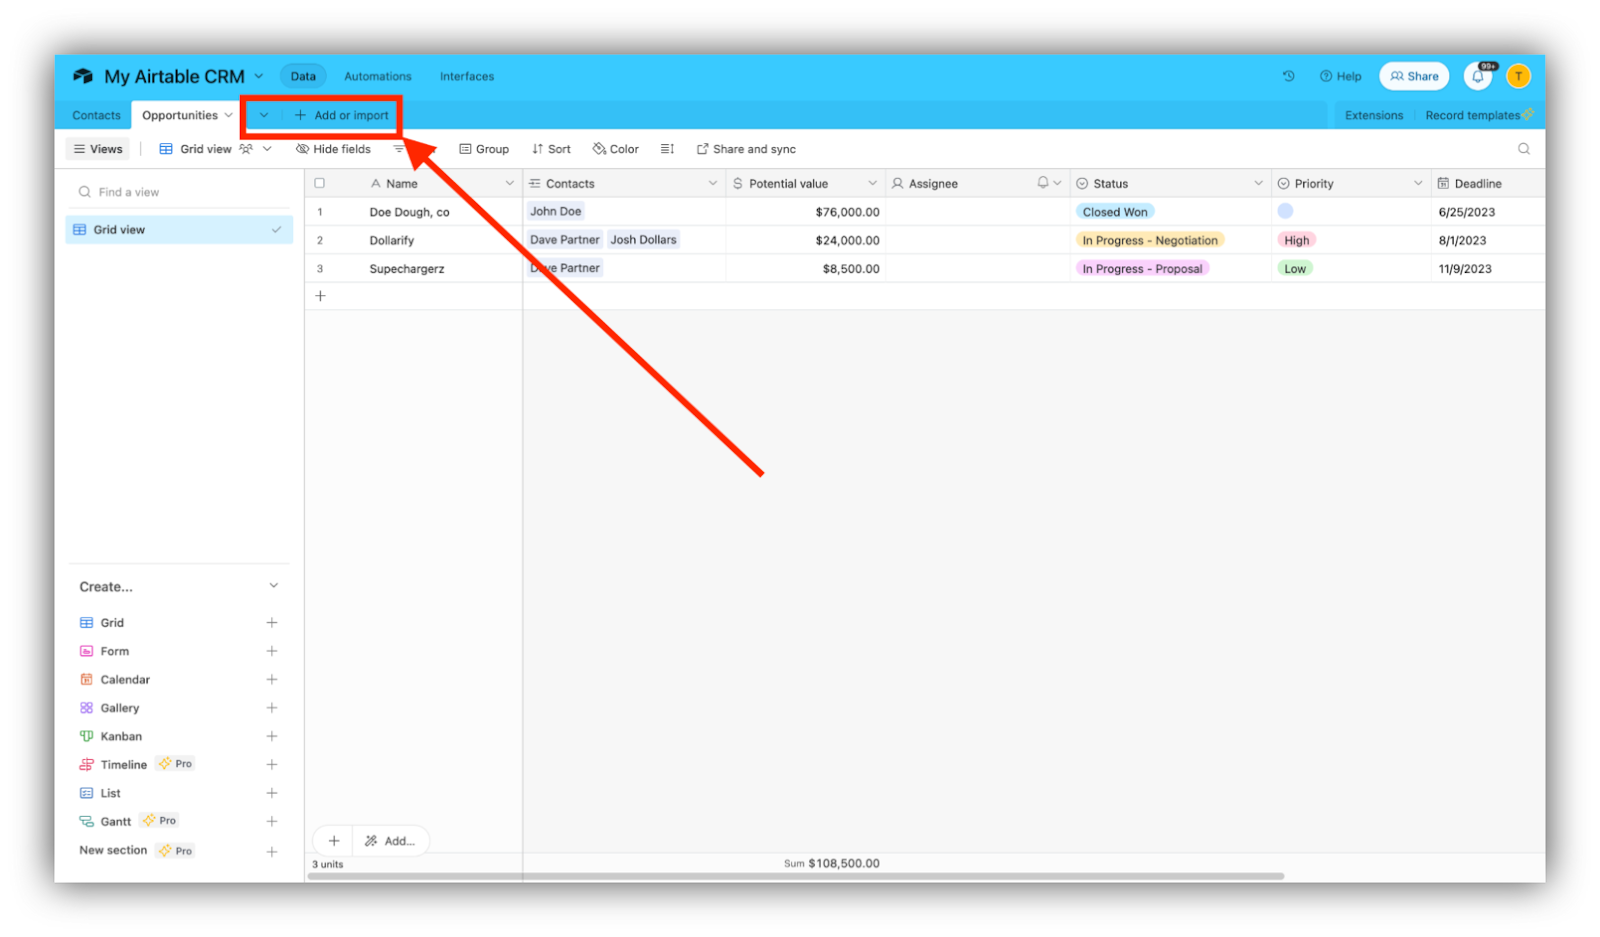
4. Build your “Opportunities” table
Click “Add Table” and “Create a new blank table”.
Name it “Opportunities” and save.

Create fields for your opportunities. For our example, we created:
- Name (single line text)
- Contact (linked record to Contacts table)
- Potential value
- Assignee
- Status (dropdown: negotiation, won, lost, etc.)
- Priority
- Deadline
- Notes/Comments
You can create custom fields, depending on how granular or general you want to get, such as:
- Next Step (A text or single select field you can pair with deadline and assignee fields).
- Win/Loss (dropdown to provide insights in case of a “lost” opportunity).
- Attachments to store documents (contract, formal offer, RFP, etc.).

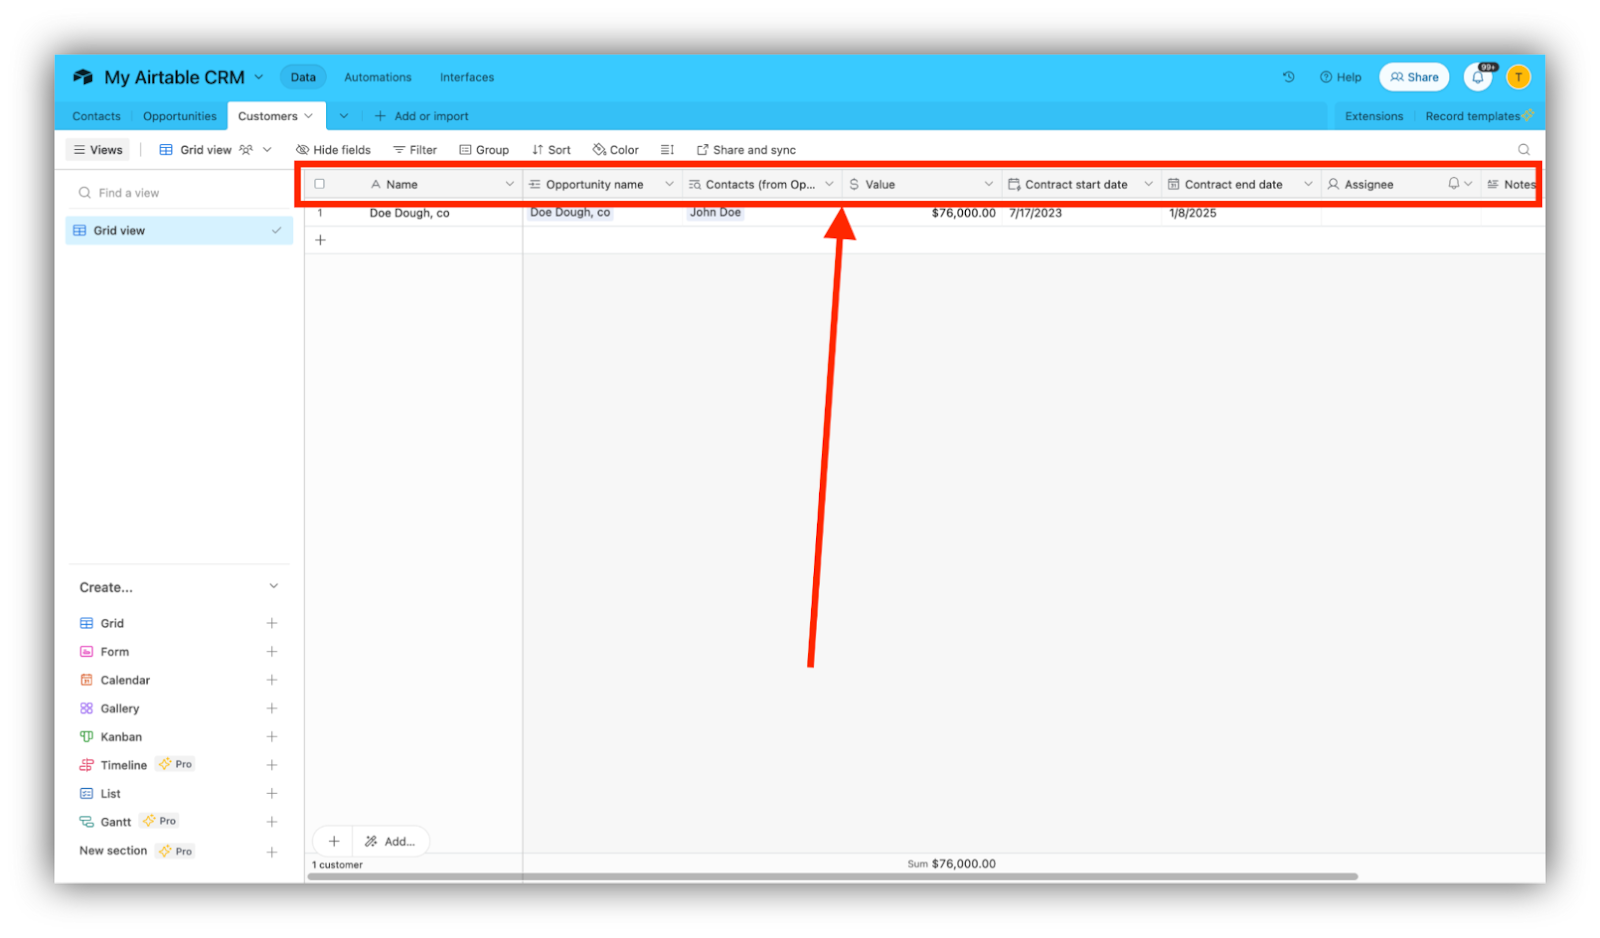
5. Build your “Customers” table
Click “Add Table” and “Create a new blank table”.
Name it “Customers” and save.
Create custom fields for customers. For our example, we created the following fields:
- Name
- Contacts (linked record)
- Opportunity name (linked record)
- Contract Start End Date
- Contract End Date
- Assignee
- Notes/Comments

You can add custom fields for additional information, such as:
- Conversation history
- Churn risk
- Time until renewal
6. Link your tables
If you still need to, link records to build relationships between tables.
Using the field type “Link to another record,” you can link this field to another field or table.

For example, link a “Contact” in the Contacts table to a “Deal” in the Opportunities table.
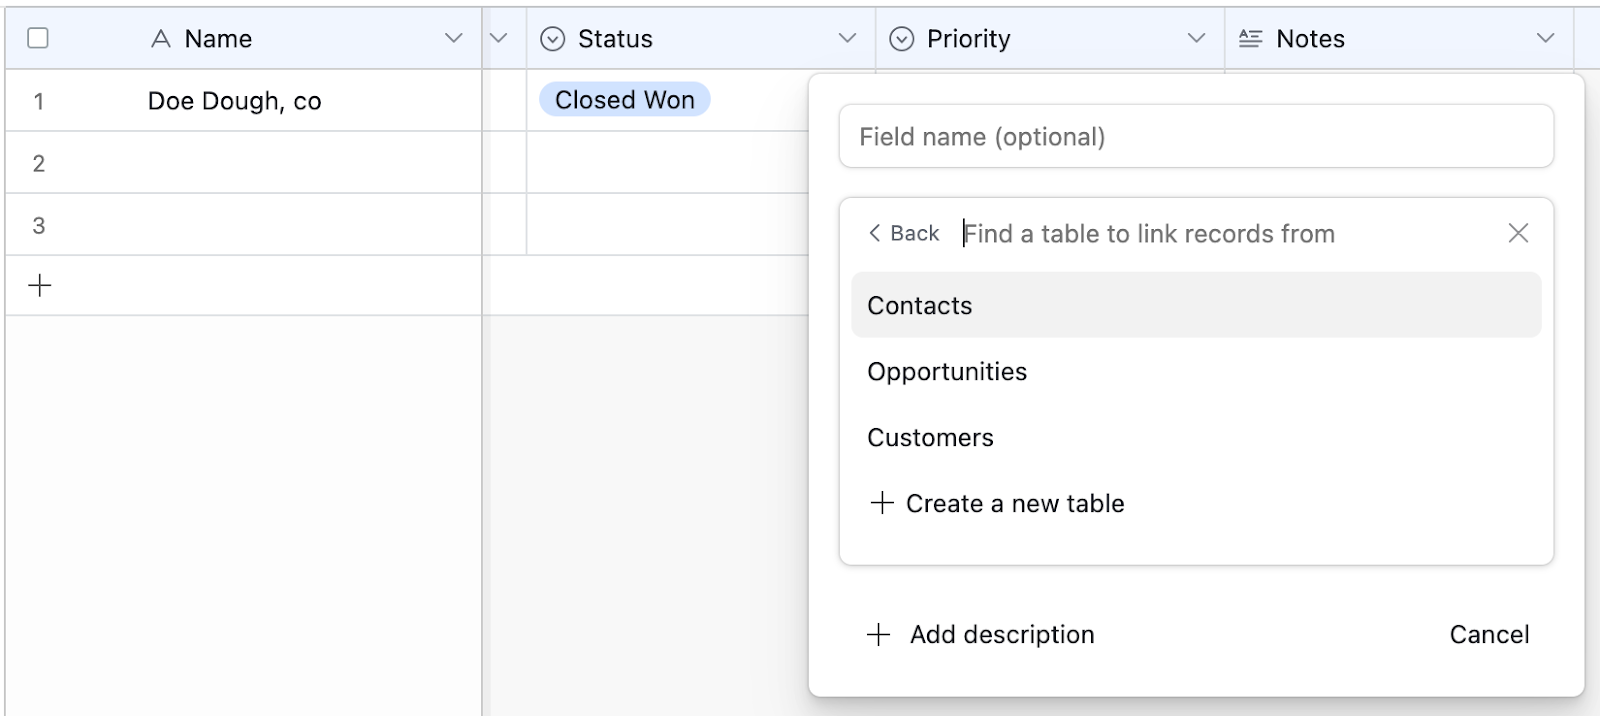
Choose your permissions and filters, then click “Create field”.

You now have a very basic but functional CRM built on Airtable. While rudimentary, it’s a perfect canvas for you to start experimenting.

Related: 5 best CRM software with client portals
Conclusion
Customer relationship management doesn’t have to be complicated. With Airtable’s flexibility and Softr’s simple drag-and-drop interface, you can build a custom CRM that perfectly fits your enterprise or small business needs.
Softr lets you streamline your workflow by creating user-friendly, real-time apps powered by your Airtable data—all without writing a single line of code.
Connect your Airtable base to Softr today and see how easy it is to create a system that works for you.