How to create a client portal in Webflow


Webflow is a website builder. It allows you to build websites without any coding knowledge.
Even though it focuses on providing a simple experience in building websites, Webflow can be used for other online endeavors. You can use it to create online stores, portfolios, membership websites, and even client portals.
A client portal is a tool that allows your customers to see their projects, tasks, and invoices, download documents, and communicate with your team. With a client portal, clients can see for themselves how things are progressing and have a central hub for everything work-related.
Webflow has many use cases, and it can be utilized as a basic client portal software. There are two main options to implement your Webflow client portals.
You can use Webflow’s memberships feature. It’s still in beta, but you can use it to create protected pages, access levels and a client portal.
Another option is to use a mix of different tools. You can use Webflow to build forms and create the front-end. Then you use a membership service, such as Memberstack, to manage content restriction.
The upside of a Webflow-only setup is that it is simpler and cheaper. On the other hand, with Memberstack you get more detailed control over the memberships, access levels, and other features such as Single Sign-On (SSO). This allows users to log in using credentials from Google, Facebook, Github, and other platforms.
Using Webflow only, you can deploy a client portal for free, but you are limited to 2 pages and 50 form entries for life. If you want to use one of their paid plans, you can pay between $18 and $49 per month, depending on the plan you pick and the billing cycle.
If you want to use Webflow and Memberstack, you will need a paid plan right off the bat. That’s because you need the embeds feature to connect Webflow and Memberstack. In this case, you are going to pay at least $18-$49 for Webflow and $25-$49 for Memberstack per month. So the total cost is going to be from $43 to $98 per month, depending on the plans and billing cycles you pick.
Let’s see how you can implement each of these options for Webflow client portals.
How to create a client portal in Webflow using the Membership feature
Cost: 0 to $49/month
Time: 30m
To create a Webflow client portal using the Membership feature, you will need at least a login page and pages to store the project details. You can create a sign-up page as well if you want to.
Step 1 — Enable the Users feature
Using the Webflow Designer, go to the Users section and enable the users feature.

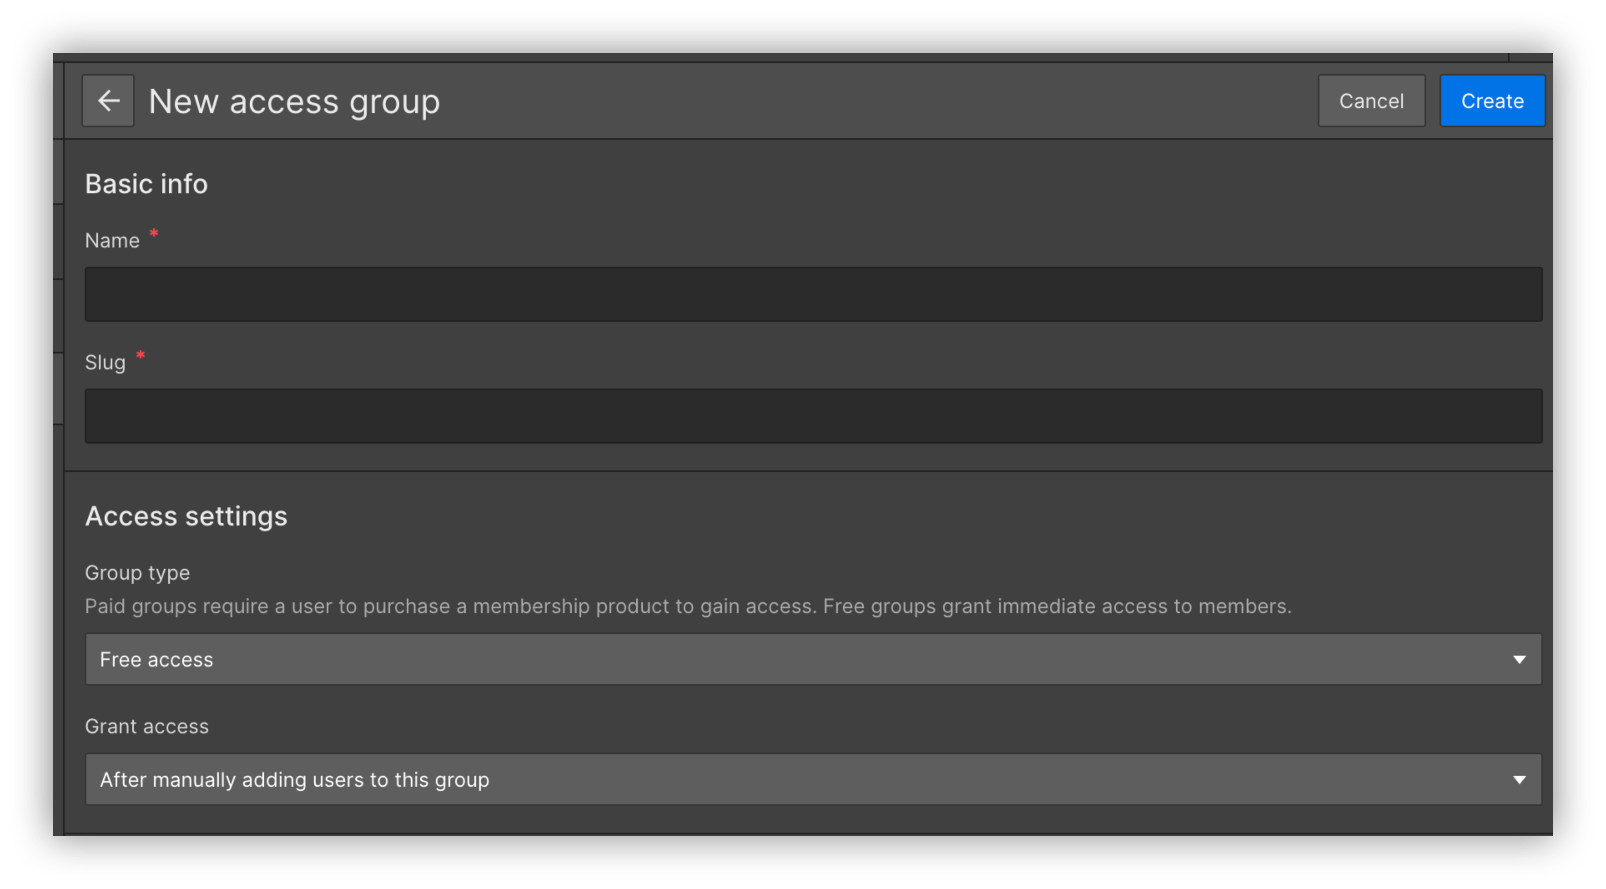
Step 2 — Create a new access group
Create an access group under Users > Access Groups > Add new access group. You can create one access group for each of your clients.
Step 3 — Create the utility pages
Go to Users > Setup Guide and click on each of the links to create the utility pages. This will automatically create the utility pages for sign up, login, user account, and access denied.
You can customize the page designs if you want to.

Step 4 — Create a folder for each of your clients
Create a folder and pages to store the projects and tasks for each of your clients. Make sure to change the folder settings so that it is only visible to that client’s membership level.
Step 5 — Create the client pages
Create pages to store content for your Webflow client portal. You can create pages for projects, tasks, invoices, and anything else you want.

Step 6 — Send instructions to your clients
Send an email with instructions to your clients, including links to the sign-up page, login page, project pages and so on.
Step 7 — Authorize users
After users sign up, you will need to manually assign them to the right membership plan. Go to Users > User accounts > Access Settings and pick the right membership level for them:

How to create a client portal in Webflow using Memberstack
Cost: $43 to $98/month
Time: 30m
If you want, you can use Memberstack to create your Webflow client portal. Memberstack replaces the Webflow membership management. Therefore, you use Webflow to create the pages, and then you use Memberstack to manage the sign up flow, logins, membership plans and user accounts.
This method requires a bit of back and forth between Webflow and Memberstack during the setup process. But after that, you can use Memberstack for user management and Webflow for content management.
Let’s see how it works in detail.
Create Webflow Pages
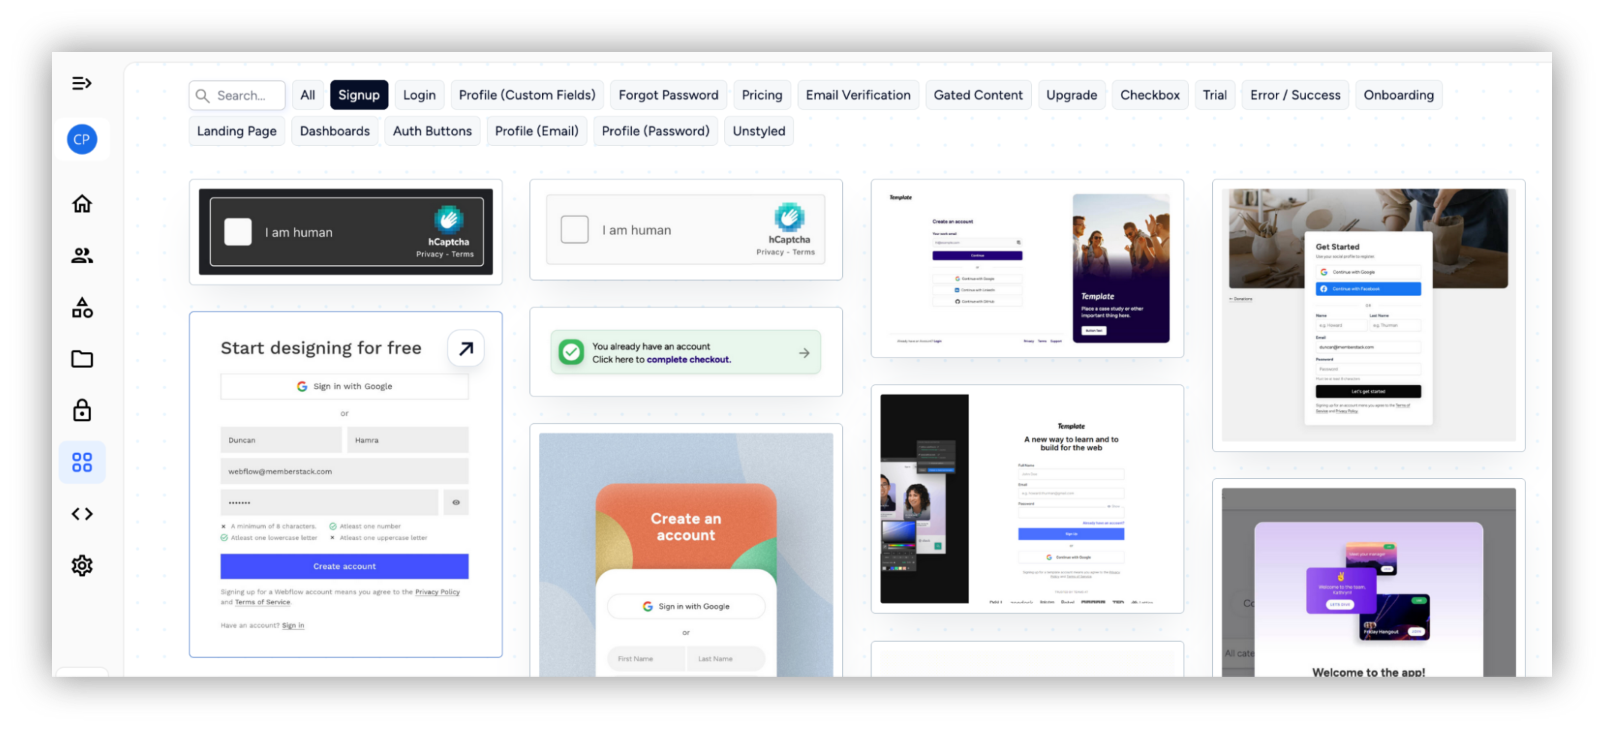
Step 1 — Create the Sign Up page
Create a new page in your Webflow Client Portal, so users can sign up.
You can add a custom form or copy the contents from a template from the Memberstack website. Go to Components > click on the “Sign Up” filter > click on a template you like > Copy. Then paste it on your Webflow page.
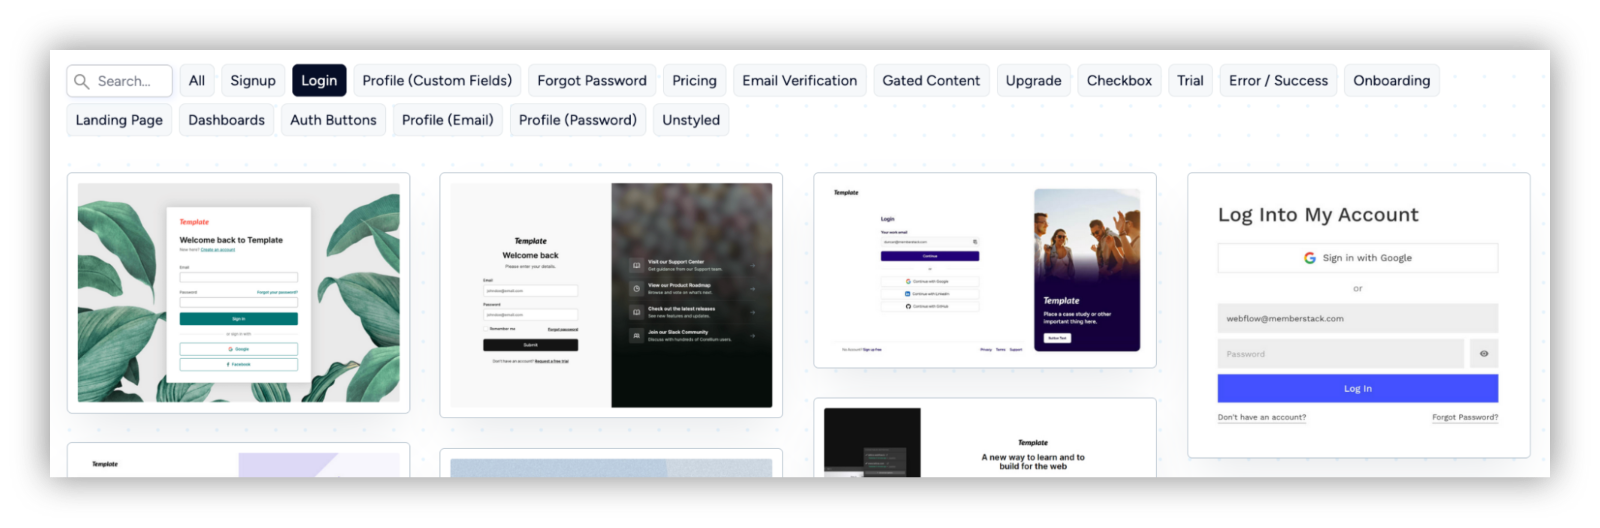
Step 2 — Create the login page
Create a login page on Webflow. Just like you did with the sign-up page, you can create a page from scratch in Webflow or copy the contents from a Memberstack component. You can copy a component under the Memberstack site > Components > click on the “Login” filter > click on a template you like > Copy. Then paste it on your Webflow page.
Step 3 — Create the instructions page
Add a page on Webflow with instructions for your clients on how to use the client portal. You can include general instructions, such as how they can sign up, log in and reset passwords.
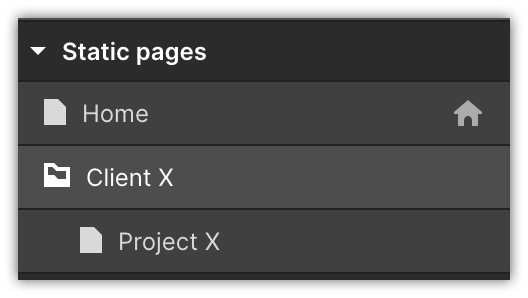
Step 4 — Create the client folders and pages
Create a new folder for each of your clients using the “create new folder” icon and create pages, so that your clients can see their contents.
You can create pages for projects, tasks, downloads, and invoices for each of your clients.
Set Up Memberstack Memberships and User management
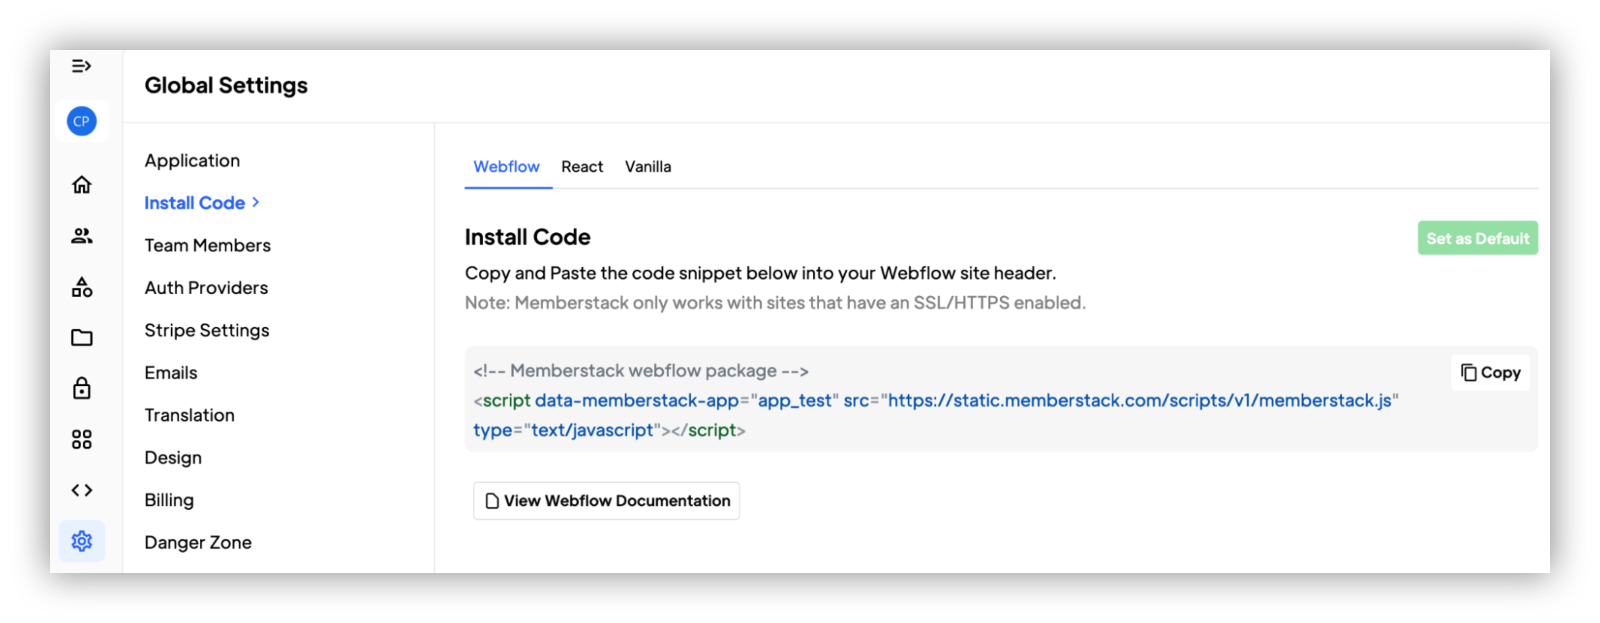
Step 1 — Install the Memberstack script
Copy the code from your Memberstack website under Memberstack > Settings > Install code and paste it to Webflow > Project settings > Custom Code.
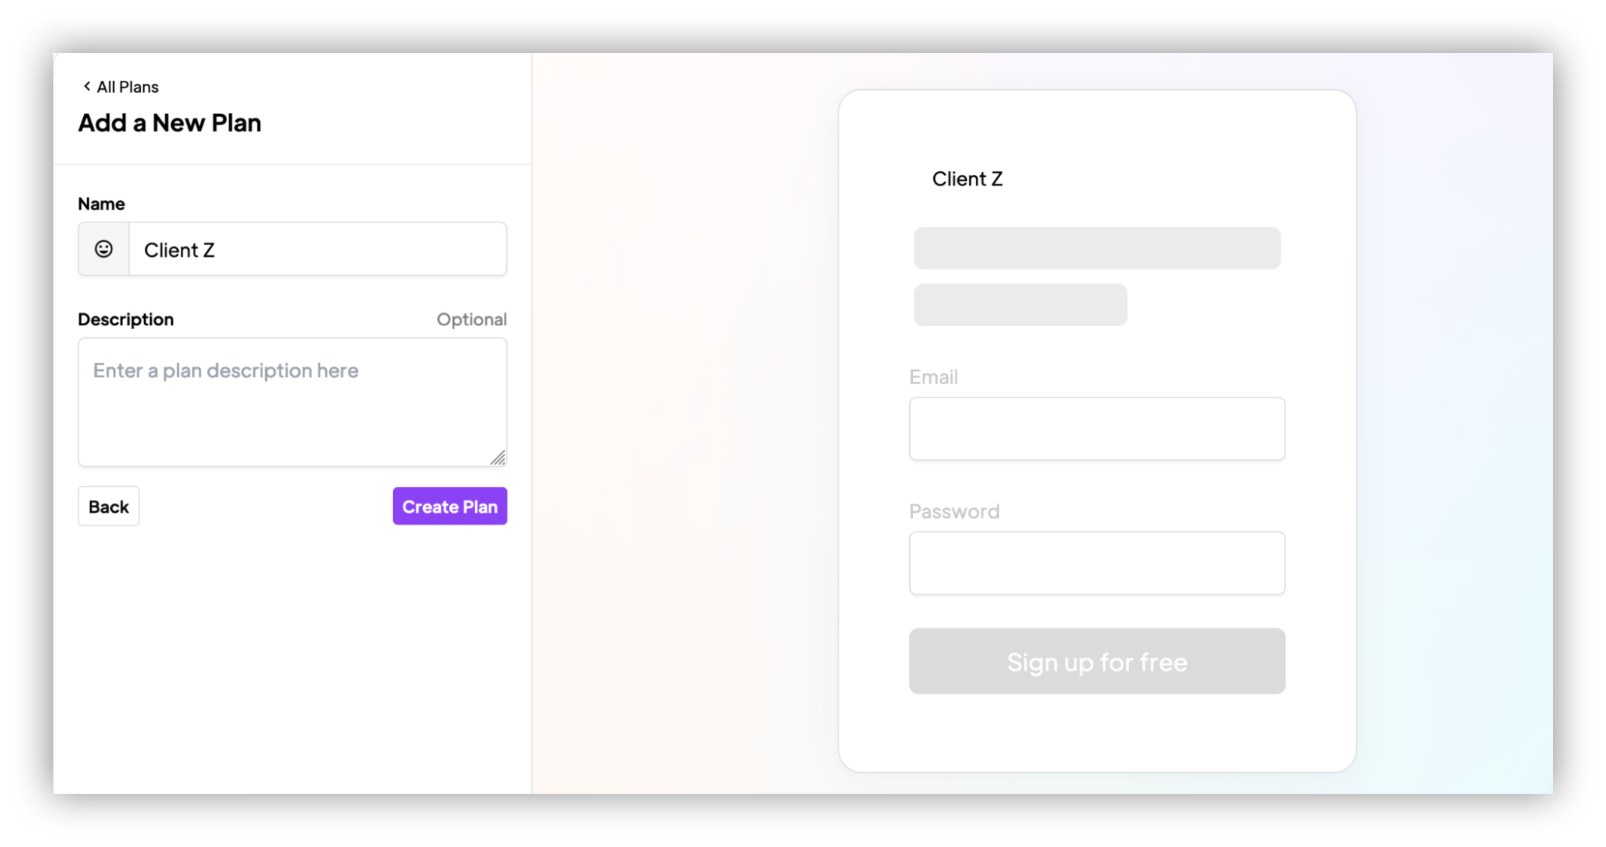
Step 2 — Create membership plans
Go to the Memberstack website, and create a membership plan for each of your clients under Memberstack > Plans > Add Plan.
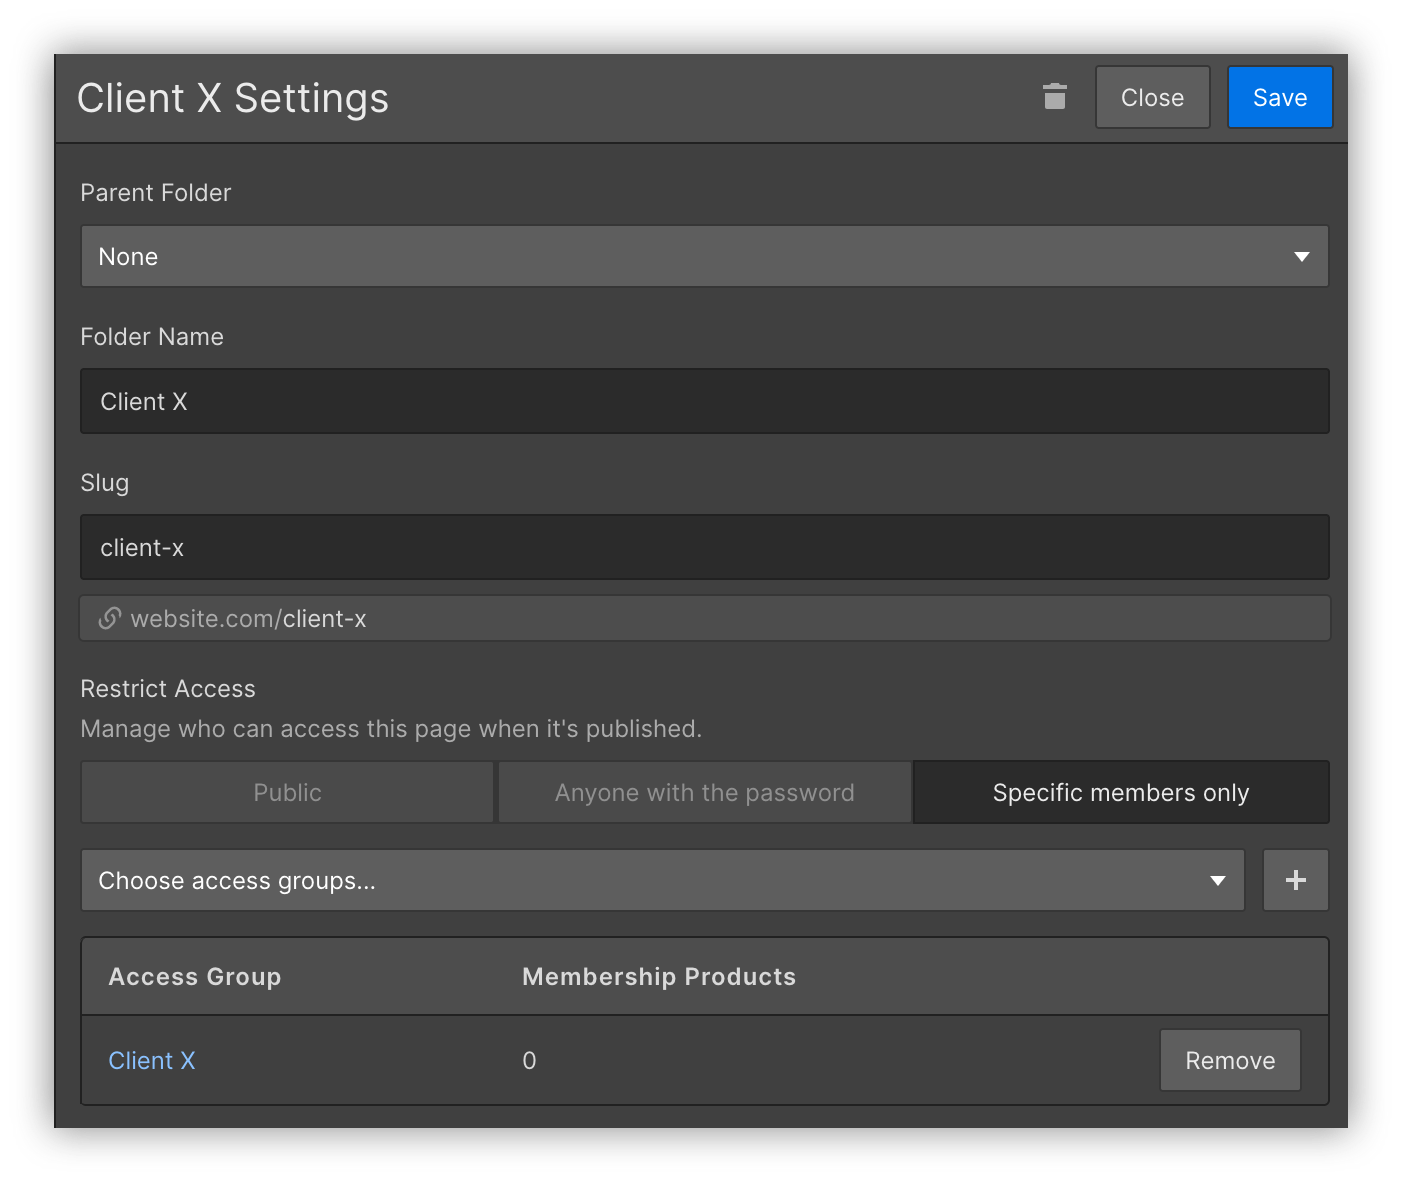
Step 3 — Set up content restriction rules
Still on the Plans page, add new content restriction rules using the “gated content” section:
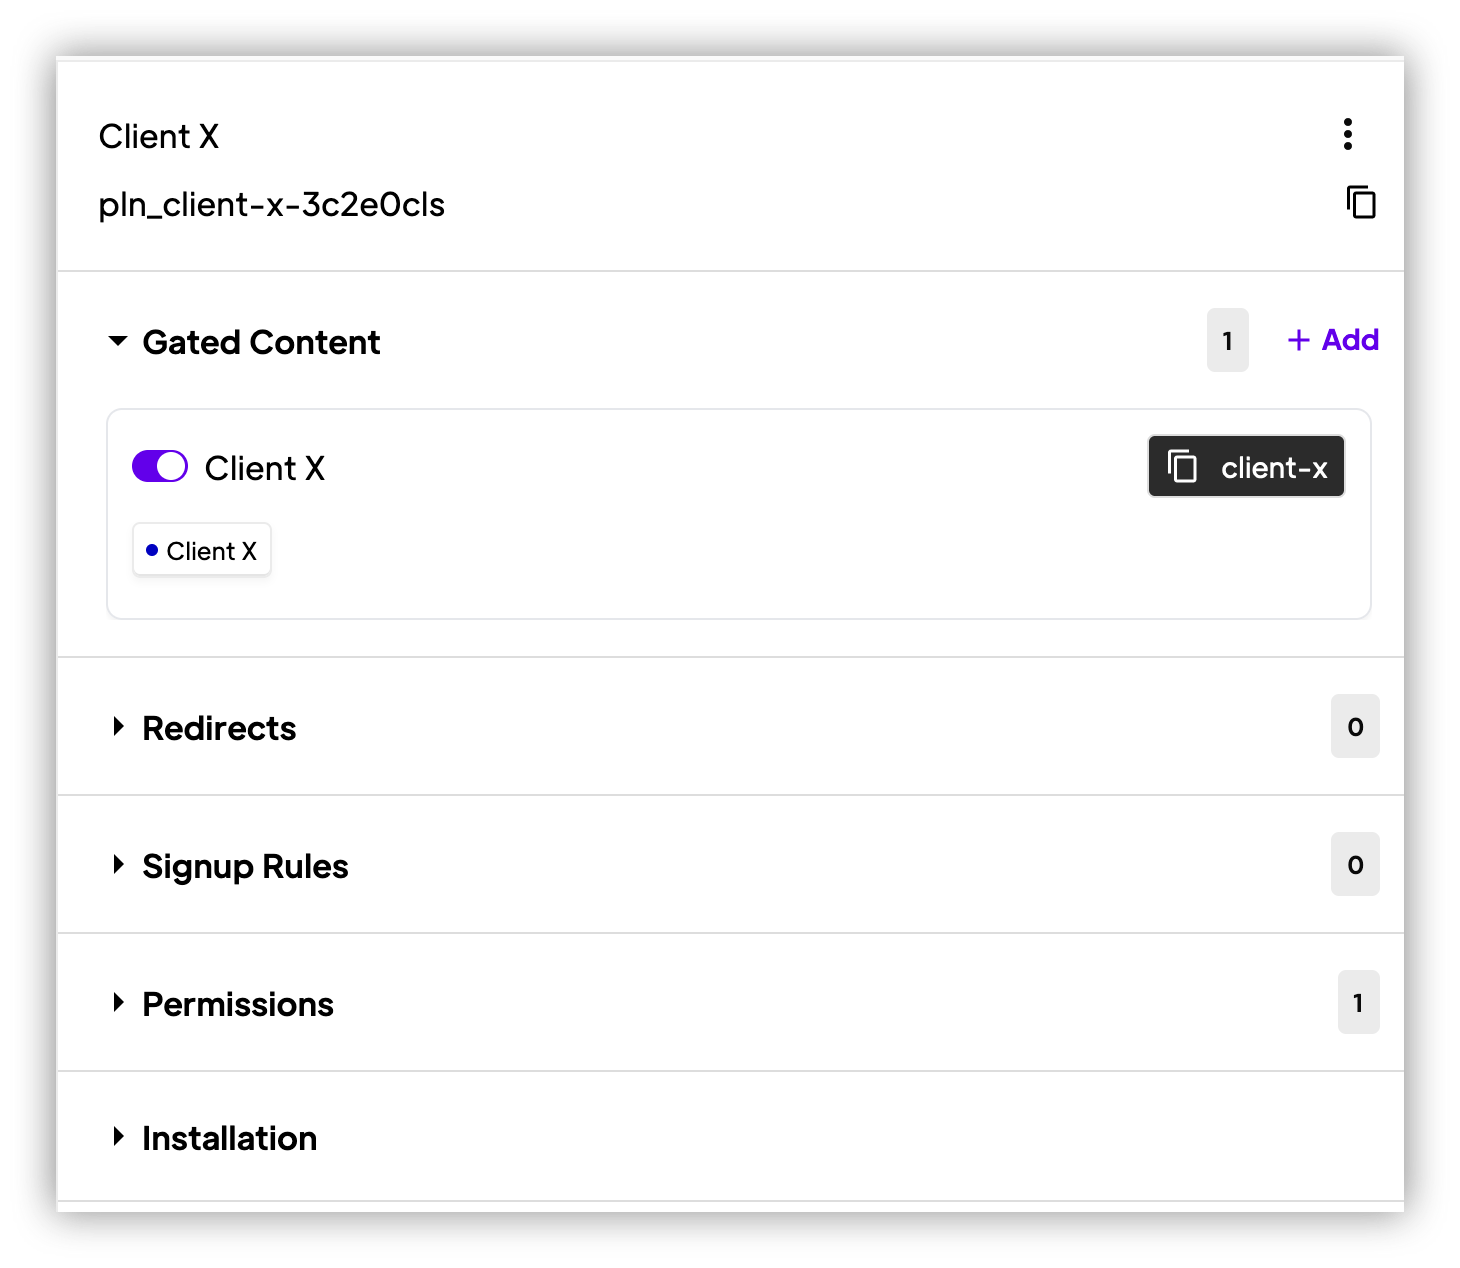
In it, you can allow each client membership plan to access their own folder, such as Client X is allowed to see the “client-x” folder:

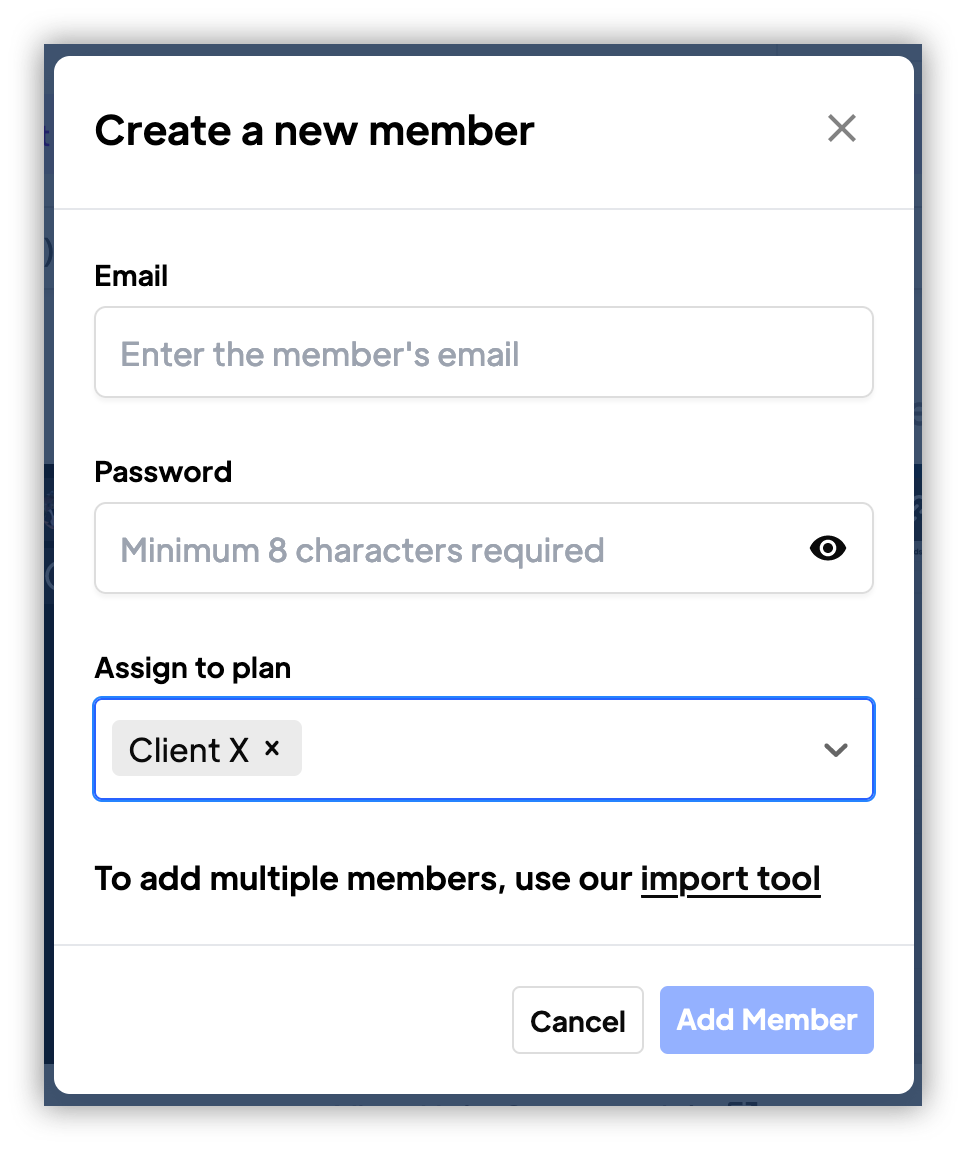
Step 5 — Create a test user
To make sure that everything is working as it should, create a new member under Memberstack > Members and see if the content restriction rules are working as expected.
Step 6 — Send instructions to your clients
Send an email with instructions to your clients, including links to the sign-up page, login page, project pages and so on.
Step 7 — After clients sign up, assign the correct membership plans
After clients sign up to your Webflow client portal, go to Memberstack and assign the correct membership to them.
Optional: Step 8 — Create customer accounts
If you don’t want to manually assign plans to your clients, create accounts for them.
You can set any password you want, and they’ll be able to reset it later using the login page.
Optional: Step 9 — Create custom sign up forms for each client
Another option is to create custom sign up forms for each client, which would automatically add them to a specific plan.
Use the plan attributes under Memberstack > Plans > Installation and paste this data in your Webflow sign up forms:

Can you create a client portal site on Webflow?
You can use Webflow to create a client portal. But you need to take into account how much it costs and its limitations.
It might work well for you if you are already invested in the Webflow ecosystem. If you aren’t a Webflow user yet, it’s worth checking other options to make sure it fits your needs.
Positive points of using Webflow to create a client portal
Webflow’s design options are truly remarkable. They allow you to build good-looking pages for your client portals, with no design experience.
In addition, the general Webflow setup process is quite easy, and they have step-by-step instructions that get you quite close to building a Webflow client portal just by completing it.
Negative points of using Webflow to create a client portal
If you want to build a client portal, or any sort of membership with Webflow, you need a paid plan. And if you want to use external tools like Memberstack, you need to pay for both Webflow and the external tool.
That’s another negative point, you can either rely on the memberships feature (which is in beta) or use an external tool to do it. There is no guaranteed way to do it using Webflow alone, and since this is a beta feature, they can remove it, or add it to higher tier plans only when it’s ready.
And even though the setup is simple, it still takes quite some time to get all your content ready. If you use Softr, for example, you can get up and running using a template in no time.
In general, a Webflow client portal might feel lacking if you experience with Webflow alternatives. You won’t be able to control users, the workflow, and what you can create in your client portal, missing out on native tasks lists and projects lists.
Overview
Webflow might be a good option to build your client portal if you already have an account, and you don’t want to learn another tool.
But it comes with a price tag, and when comparing Softr with Webflow you can see that Webflow lacks many features that other tools have (even for free).
If you want to build a client portal in no time, for free, and with all features you want, you can build a client portal with Softr.
Frequently asked questions about client portals
How do I use Memberstack with Webflow?
You can use Memberstack to manage your users and collect payments, and use Webflow to create your members-only pages as well as the public pages.
Then you set up rules in Memberstack to block access to content based on the user’s memberships.
You can block access to specific pages, or to all pages under a path. For example, you can block all pages under the /restricted/ folder, so only members can see them.
Is Memberstack free?
No, Memberstack isn’t free. Although you can log in and see how the backend works, you can only take clients with a paid plan.
Memberstack costs between $25 and $49 per month.
Does Webflow support SSO?
No, it doesn’t. If you need SSO in your Webflow app or client portal, you can use other tools in combination with Webflow, such as Memberstack.


.webp)