Airtable is a powerful spreadsheet/database hybrid that enables business operators and domain experts to build and customize databases without prior experience and to run advanced calculations without coding. For beginners, though, knowing where to start can prove difficult.
This article looks at three ways to build a database in Airtable:
- How to build a database in Airtable from scratch;
- How to build a database in Airtable using Softr;
- How to build a database in Airtable from a template.
How to build a database in Airtable from scratch
The basic way to build a database in Airtable is to do so from scratch, directly on the platform. While this method offers the most customization to start with (it’s pretty much a blank page), it can be pretty challenging to approach for beginners and take a lot of time.
Building a comprehensive database on Airtable from scratch will take you at least a few hours, but it won’t require any cost to start with, thanks to the Airtable free plan. To learn how to do so, follow the steps below.
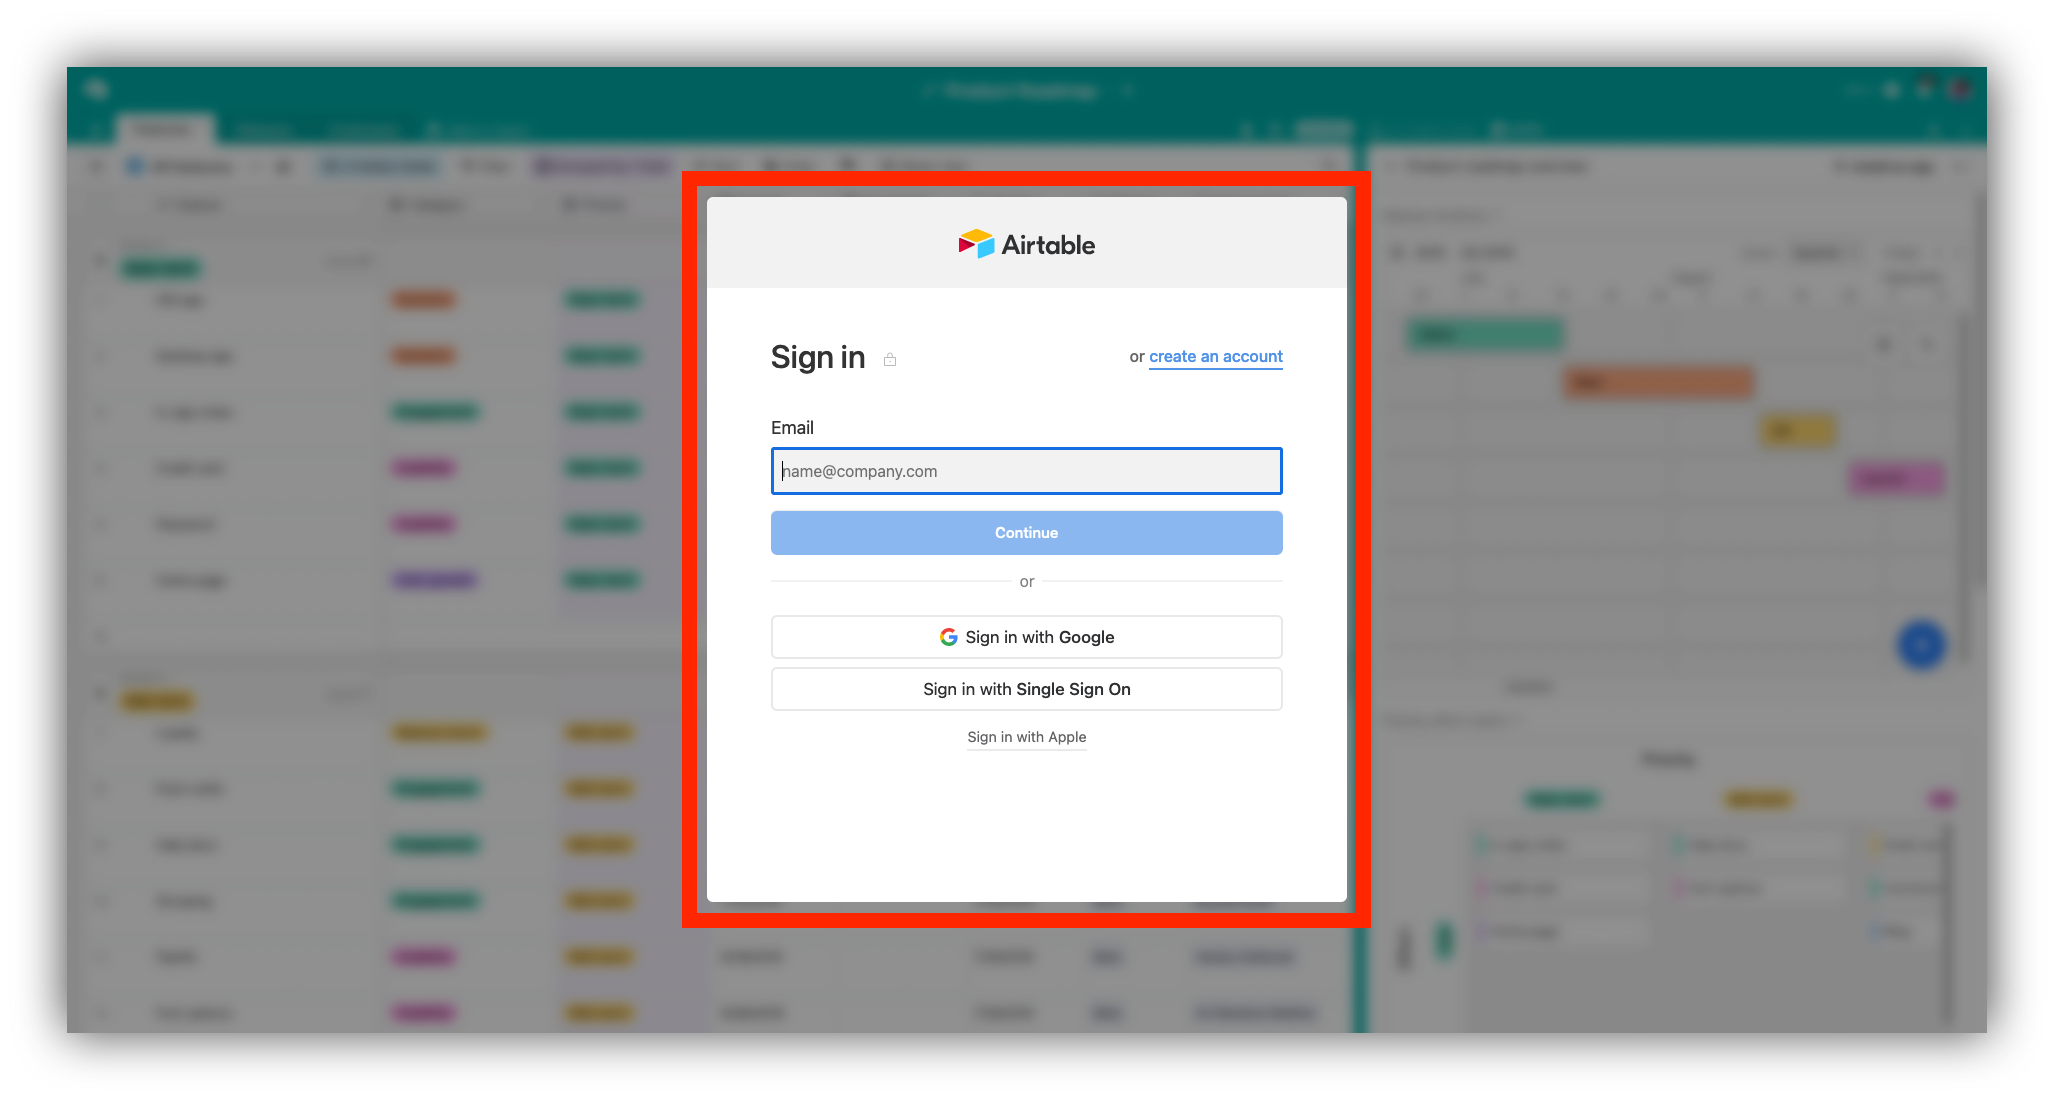
Step 1: Log in or sign up to Airtable
Log in to Airtable using your existing credentials, or create a new Airtable account.
Step 2: Create a new database
The first time you create a base, Airtable provides you with an onboarding process to help you get set up with your base. Here, we will show you how to get started without it from the ground up.
Click on “Start from scratch” to create your new database in Airtable.

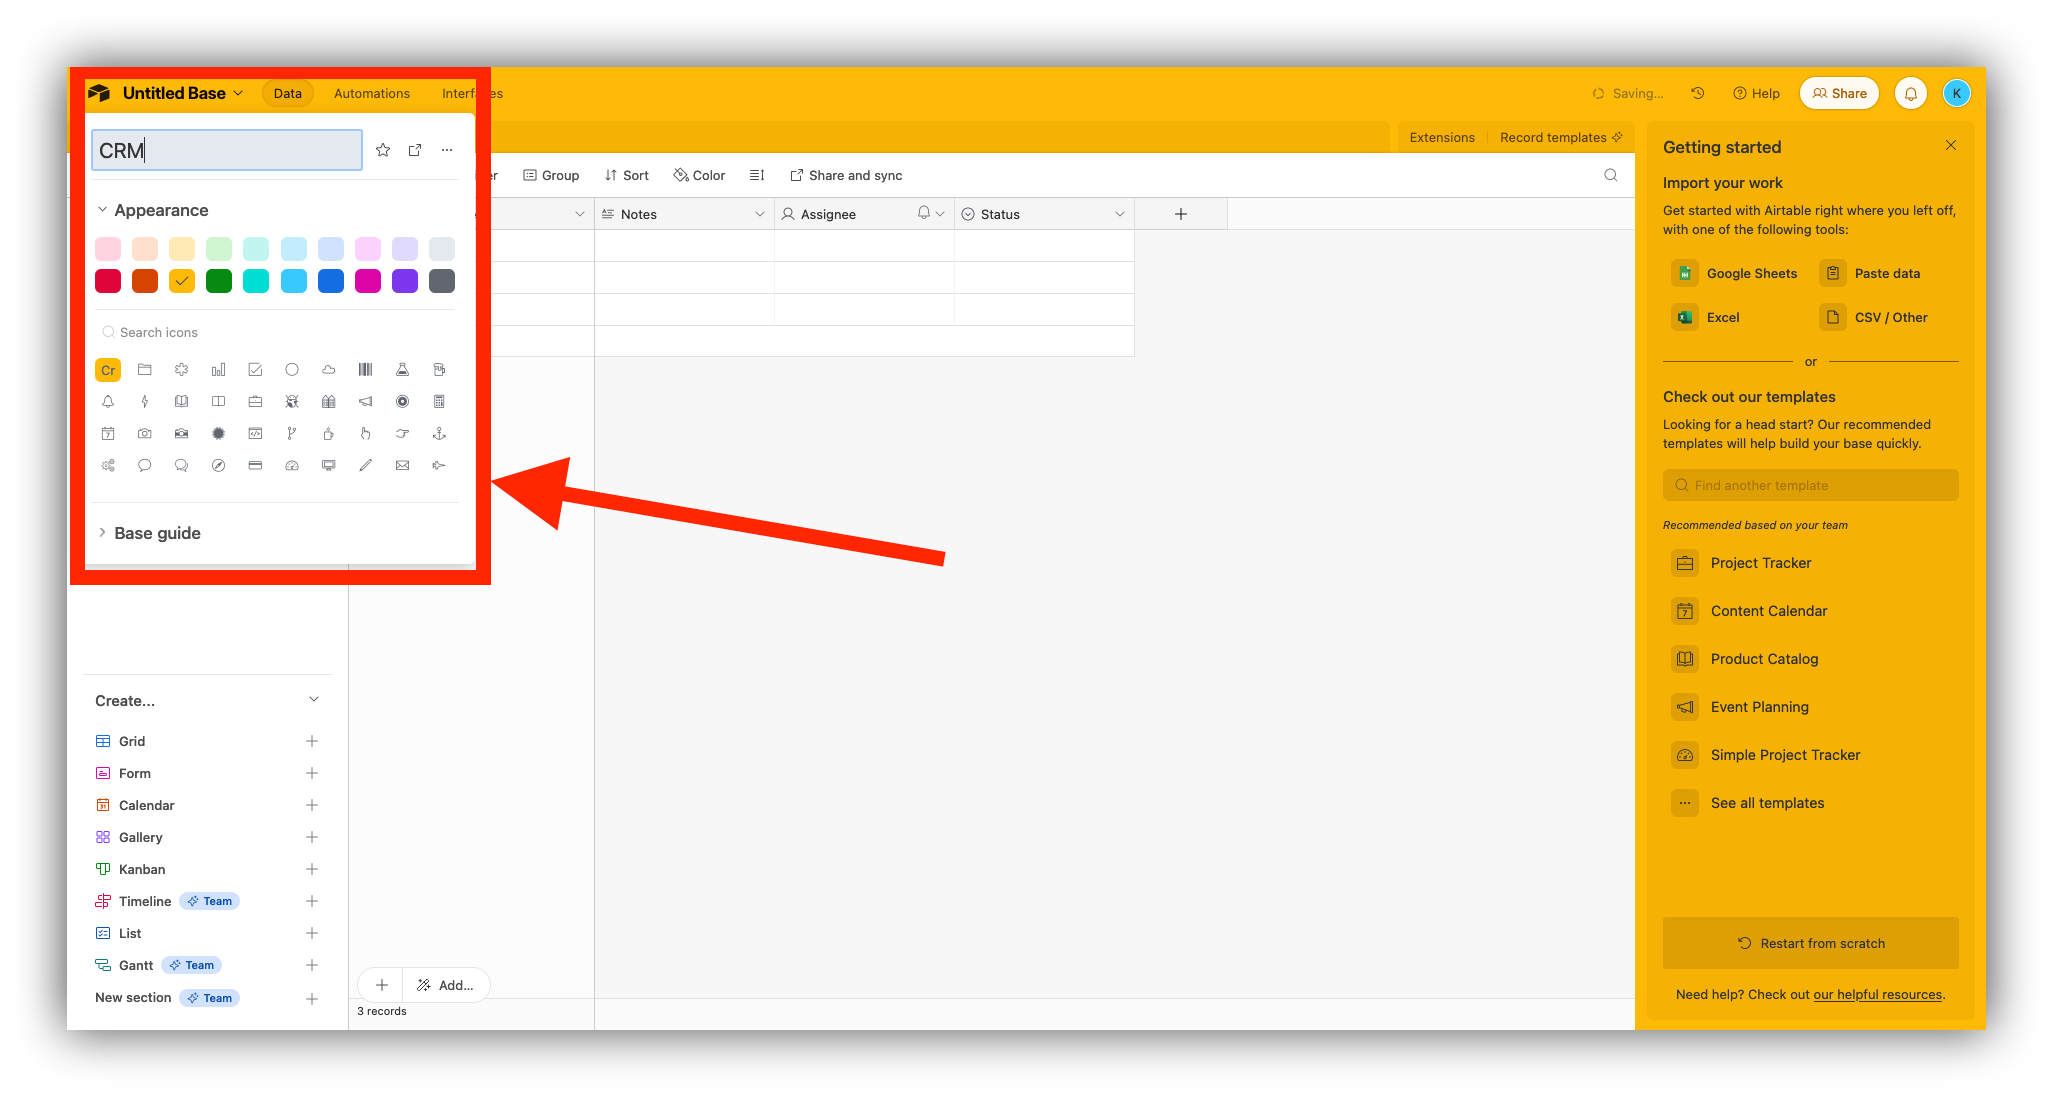
Step 3: Rename your Airtable base
Give your Airtable base an appropriate name so you can immediately identify it from your workspace. In our example, we will call it “CRM.”
In order to change the name of your Airtable base, click on the name in the top right corner and write the new name.
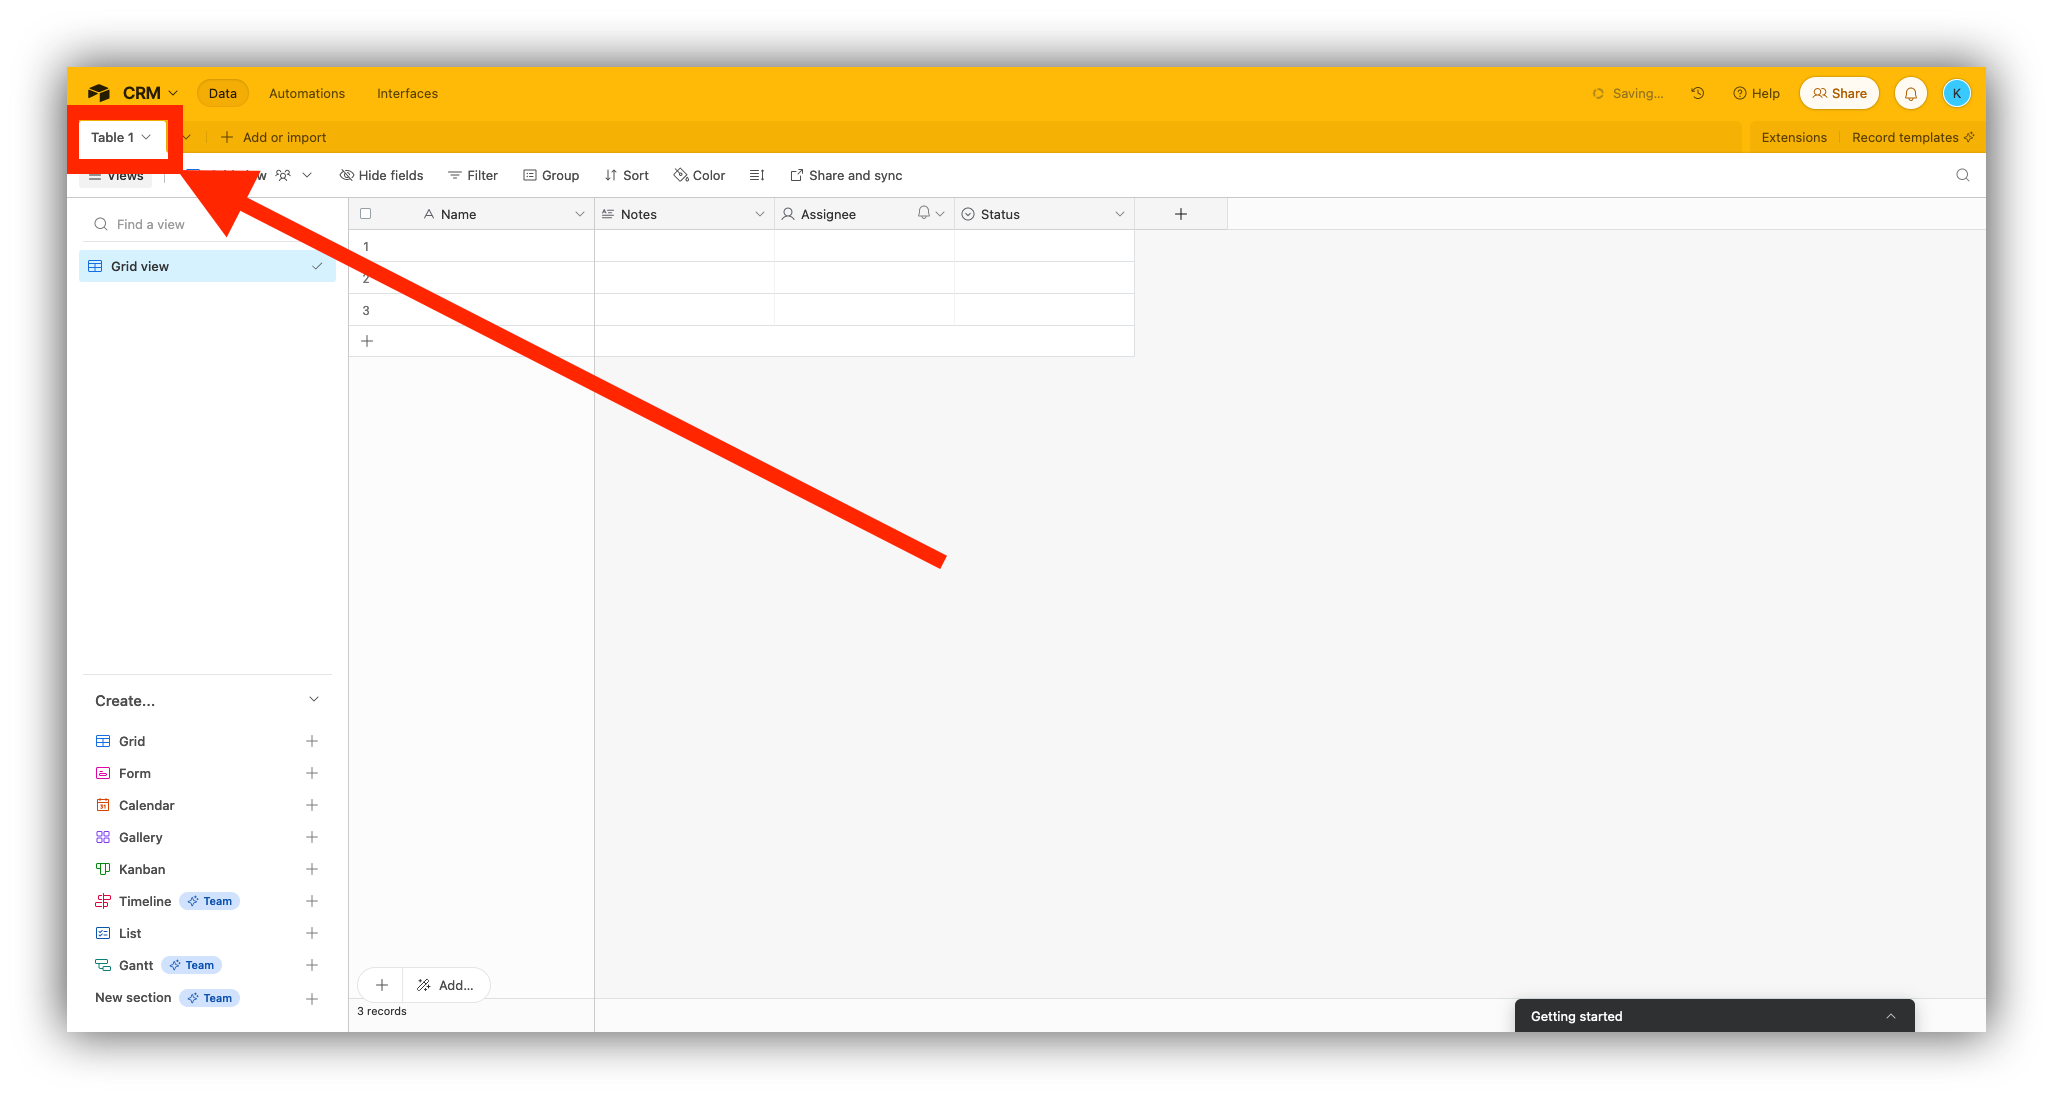
Step 4: Rename your first table
Each Airtable base is made of tables, which you can use to organize records. Click on the table name and click on “Rename table,” write the new name, and then click on “Save” when you’re done.
In our example, since we’re building a database in Airtable to use as a CRM, we will call our first table “Prospects.”
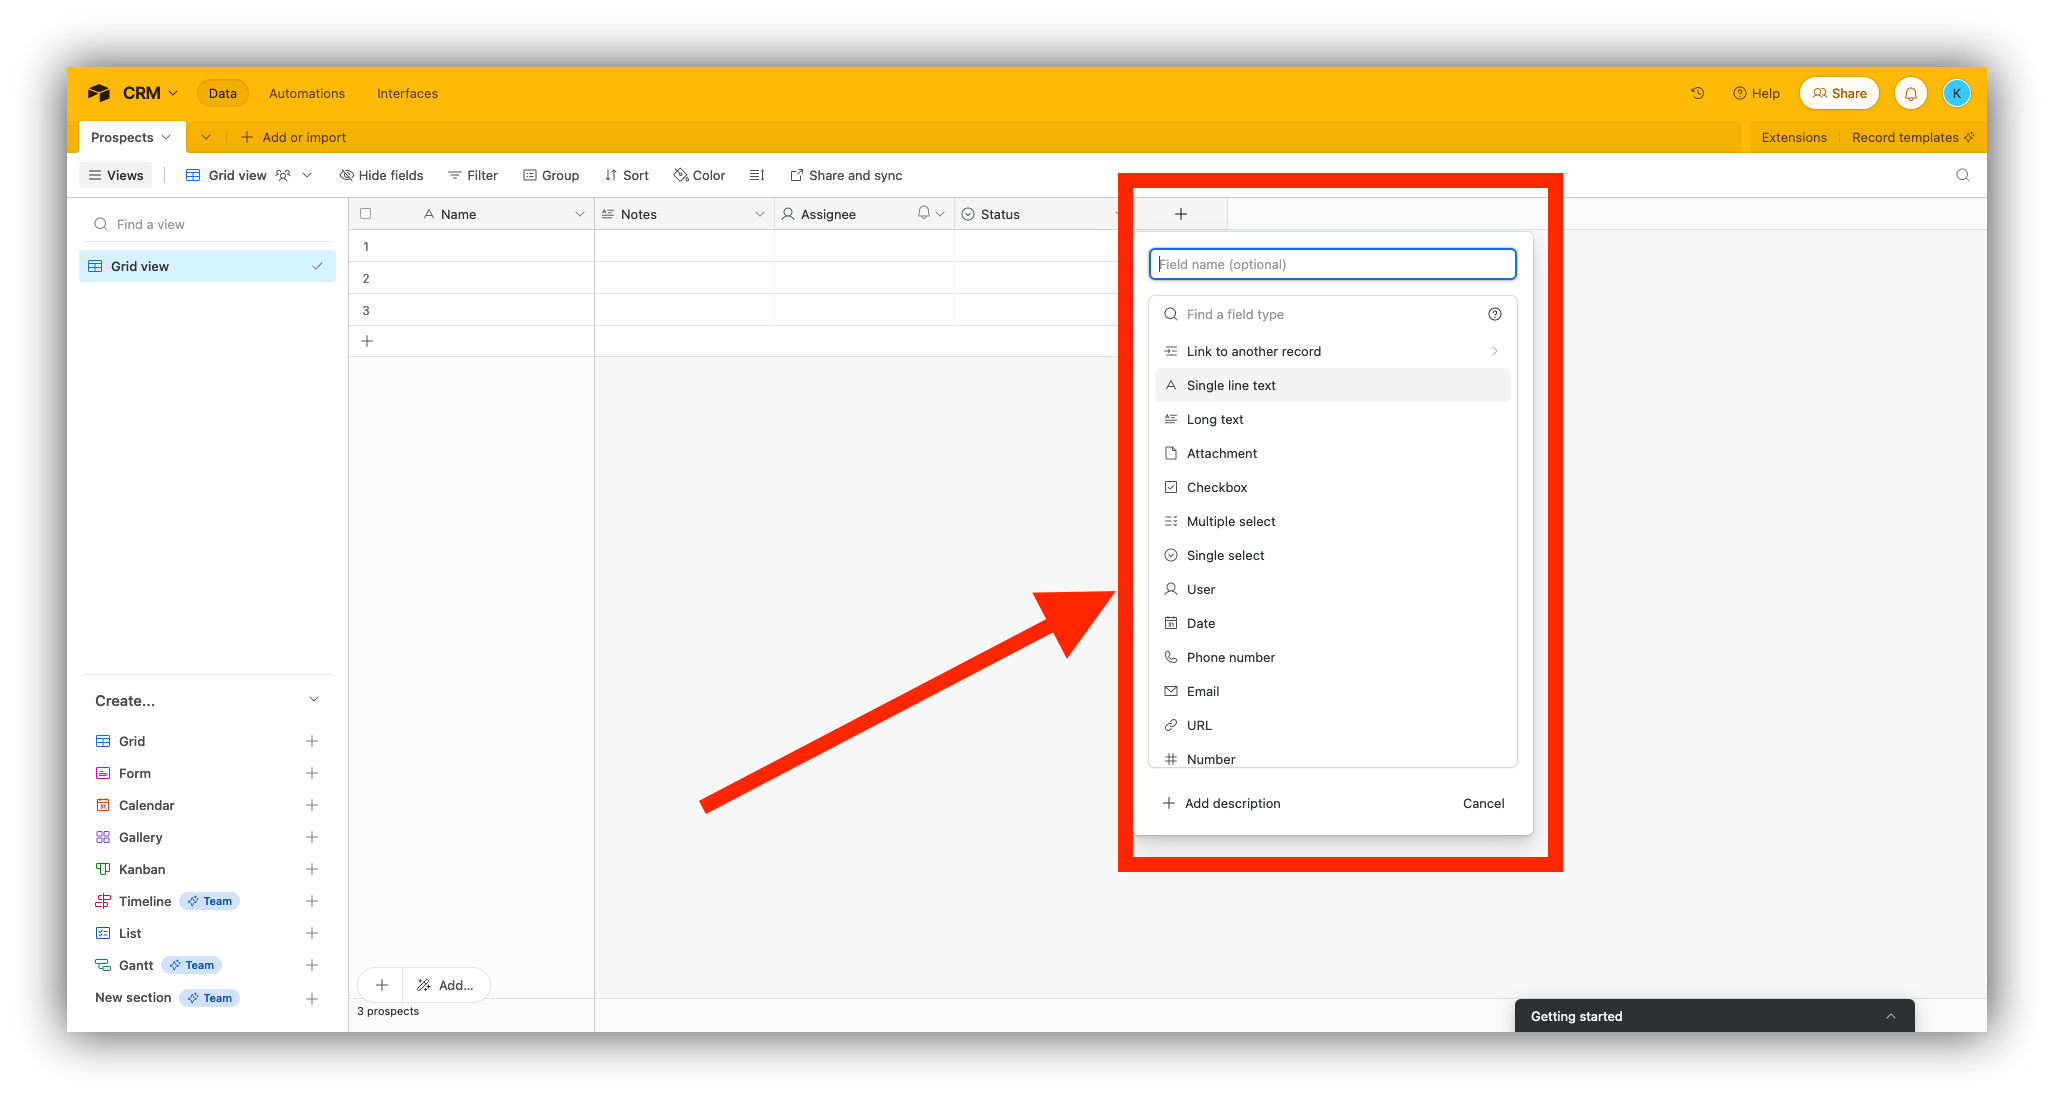
Step 5: Add fields to your table
Each table consists of records (items) organized in rows. These records are enriched with fields, which are columns that give additional details about each record.
In our example, our records are a list of people. Therefore, the first column in the table, which is called a primary field, will be called “Name.” The remaining fields will be added by default by Airtable: “Notes,” Assignee,” and “Status.”
To create a new field, click on plus sign (+), write down the name of the new field and select from one of the available field types, which can be text, attachments, checkboxes, emails, URLs, numbers, time, ratings, among others. For our example, we chose the name “Email” and the field type “Email.”
Once you’ve defined your new field, click on “Create field.”
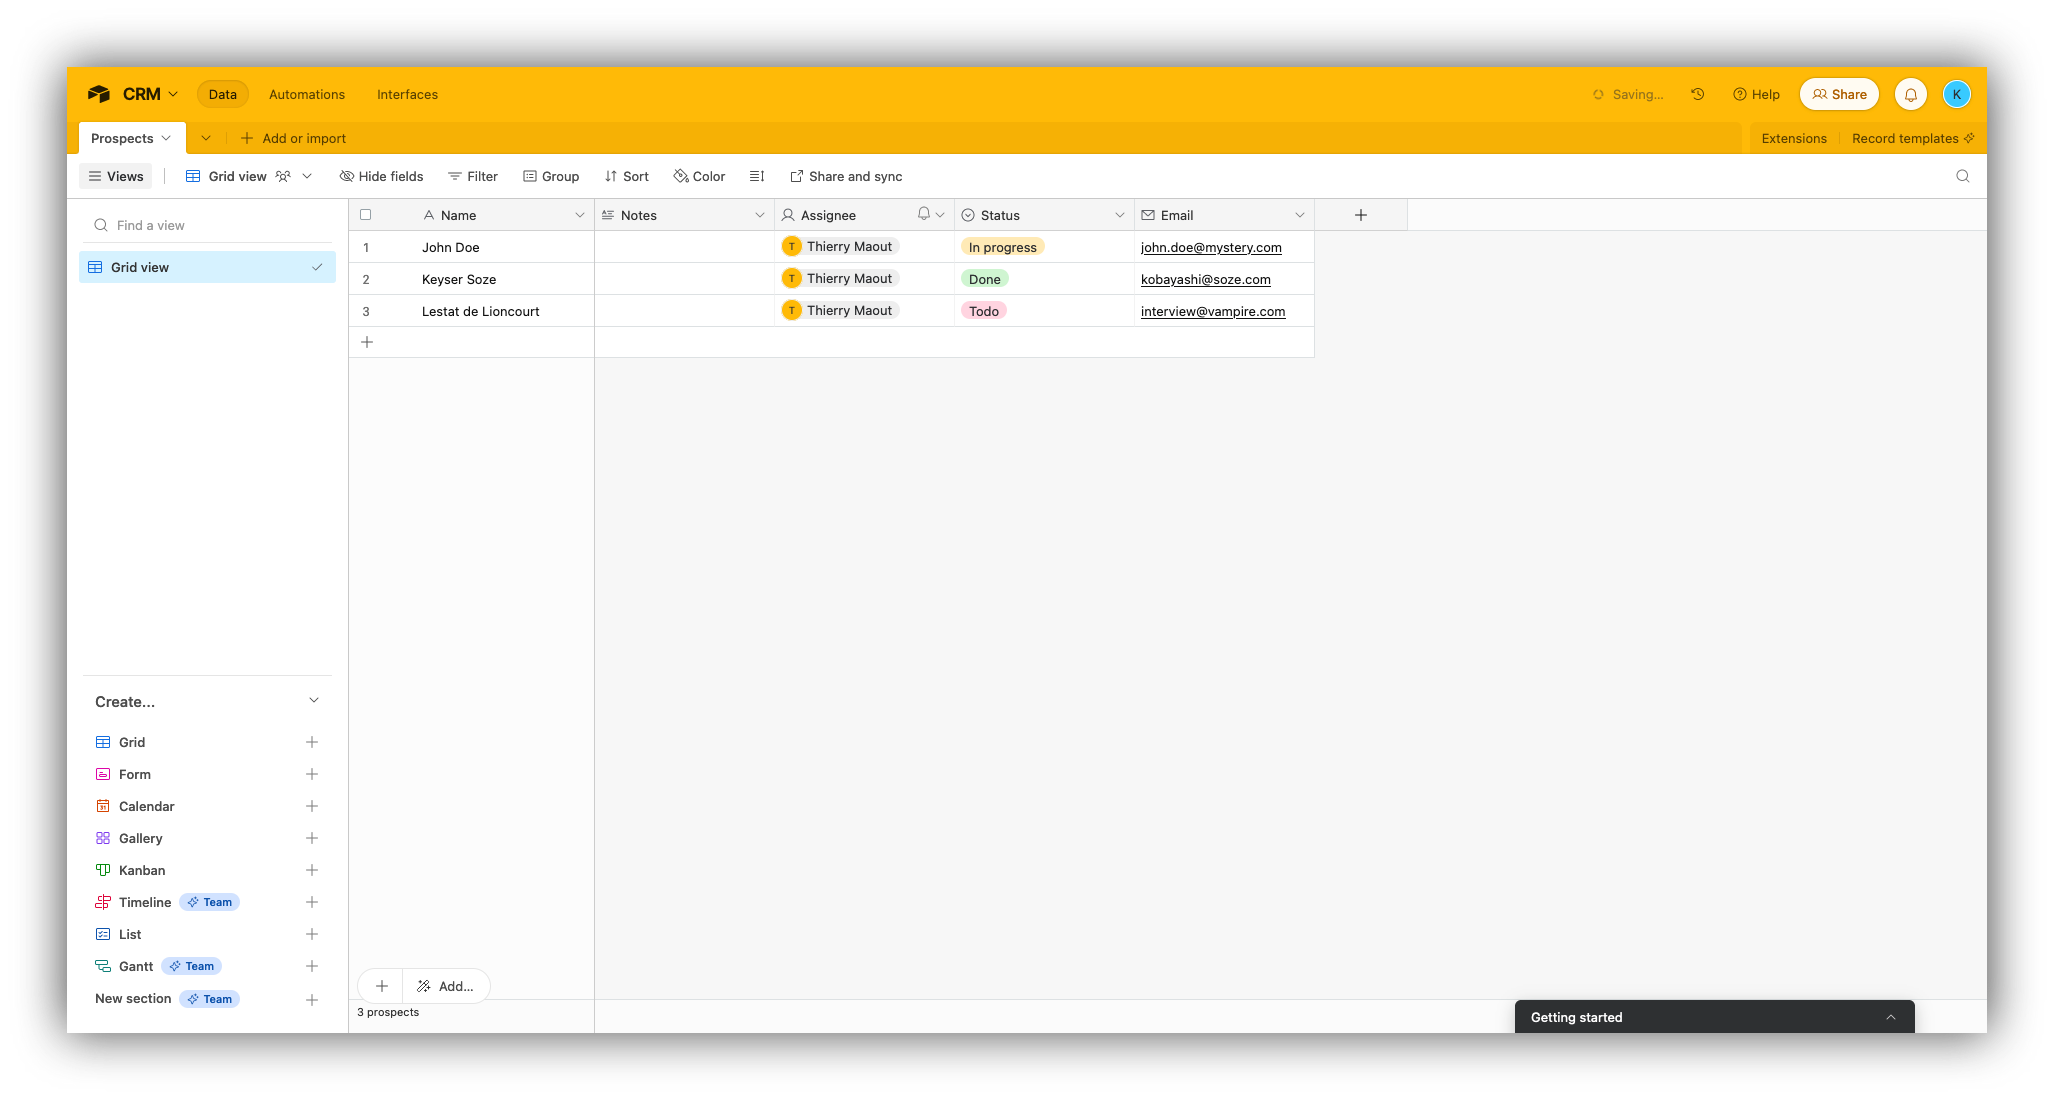
Step 6: Add data to your table
Now, it’s time to fill up your table with data. Various options are available: manually, by uploading a CSV, an Excel file, or another source of data.
Here, we will add the data manually. To do so, click on each field and write down the data.
Step 7: Pick a view for your table
Each table in your database can have its own view, which means you can showcase the data in various ways:
- Grid view, the default view in Airtable, similar to a spreadsheet;
- Form view, perfect to log information or to create polls and quizzes;
- Calendar view, to display your records in a calendar form;
- Gallery view, a way to visualize records as large cards, especially good for documents and images;
- Kanban view, the favored view for project managers to track project progress and tasks statuses;
- Timeline view, which offers a linear way to look at records in time, ideal for time-based projections;
- List view, generally favored to manage hierarchical tasks or deliverables;
- Gantt view, perfect to visualize projects or tasks that are related to one another.
You can find a view that fits your table by exploring the views on the bottom left corner of your table. In our example, we chose the Kanban view to showcase the prospects' progress as salespeople sign them into the CRM.
Once you’re happy with your choice, click on “Create new view,” answer the prompt on the screen, and click on “Done.”
Step 8: Add a filter to your database
As an alternative to using the pre-made views, you can configure your own filters for your Airtable database. Follow the steps below to learn how to do so.
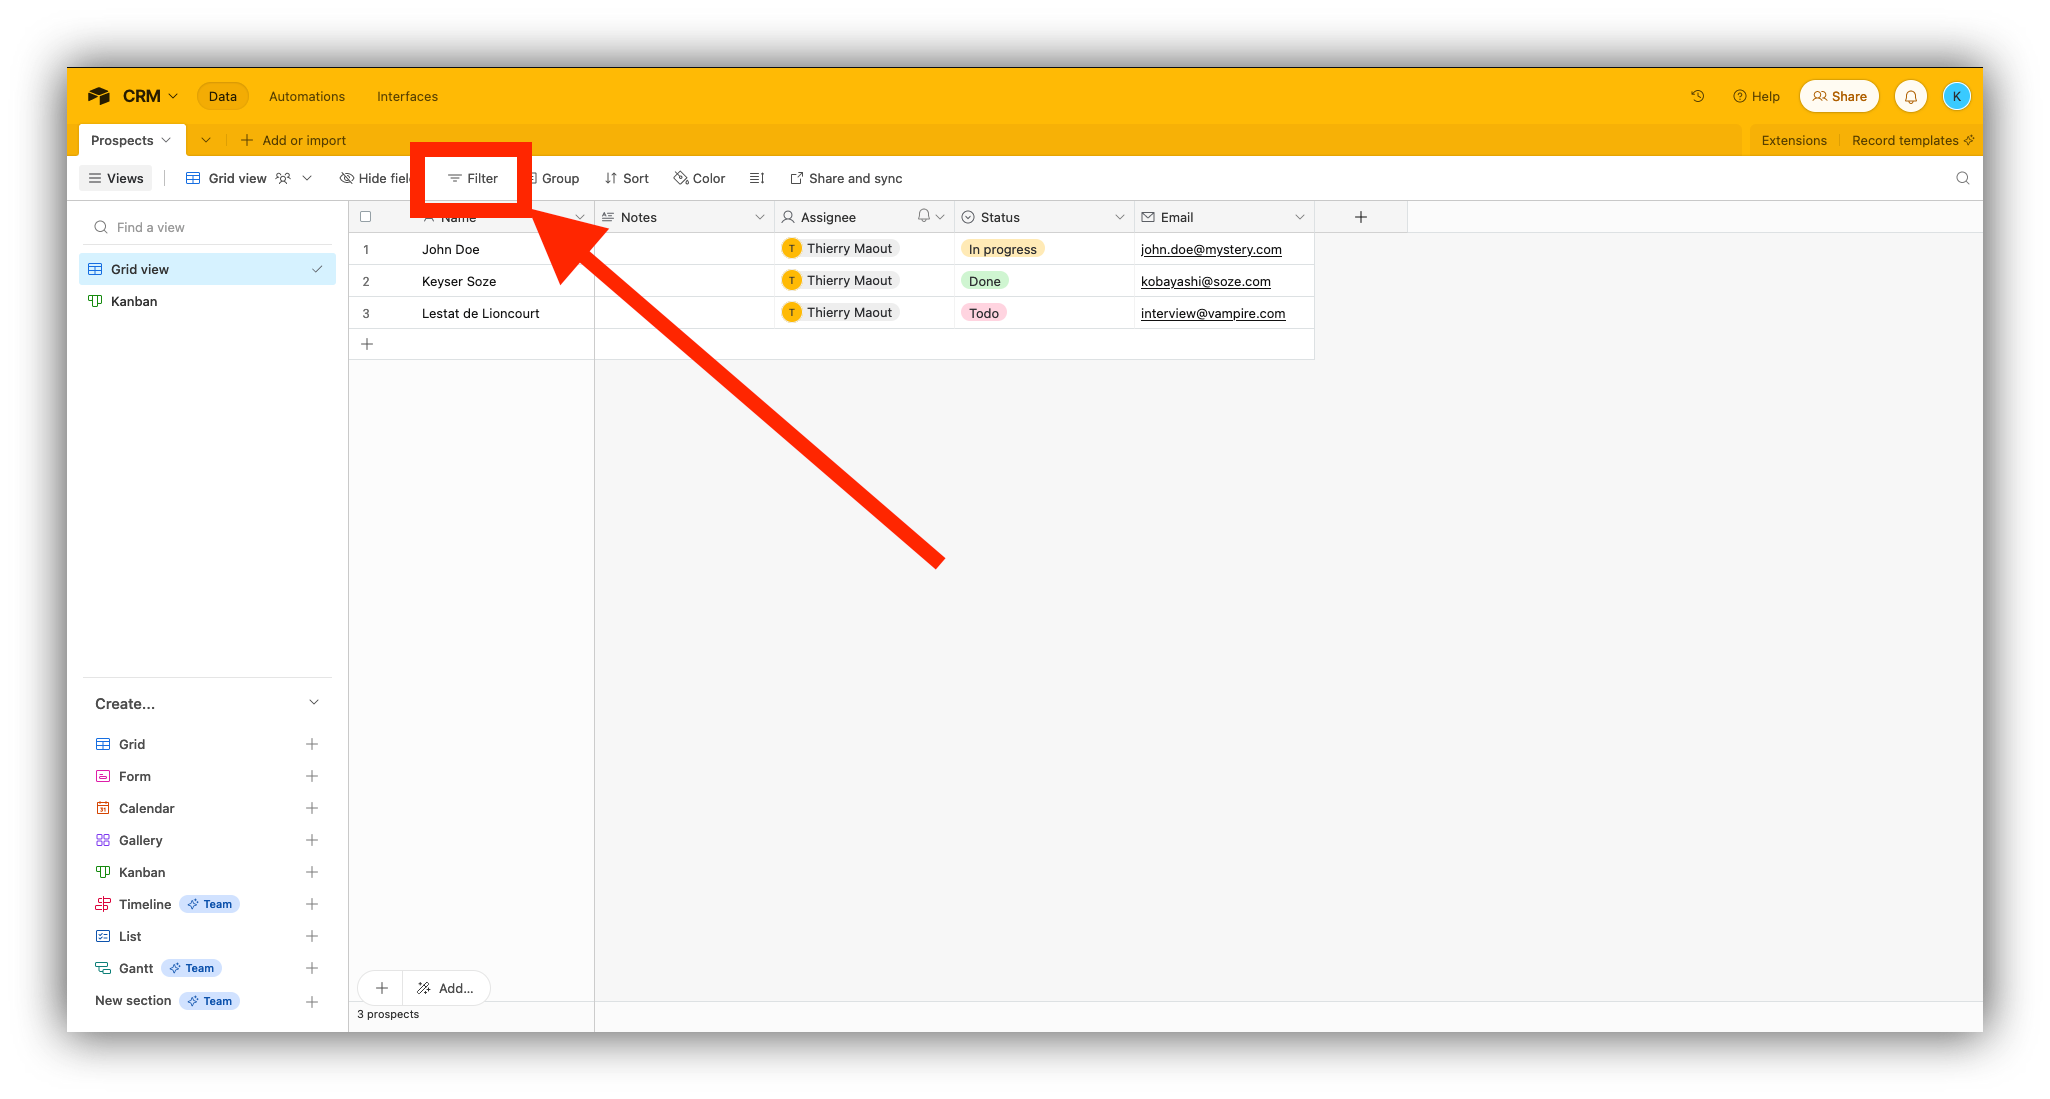
Step 8.1: Click on “Filter”
Click on the “Filter” button to display some options.
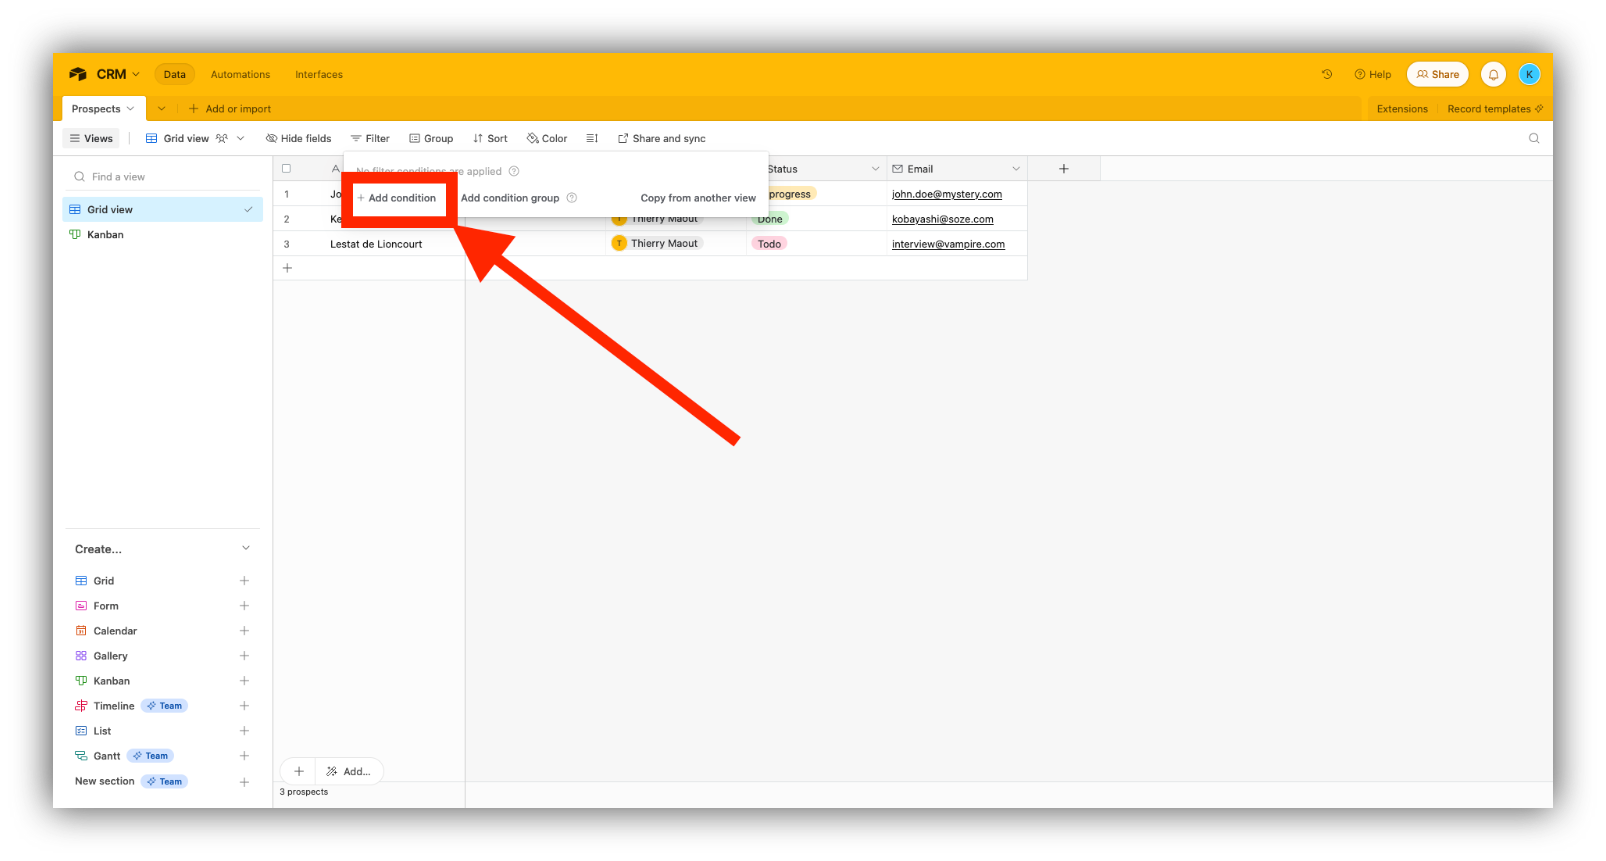
Step 8.2: Click on “Add Condition”
Let’s select a condition for this new filter.
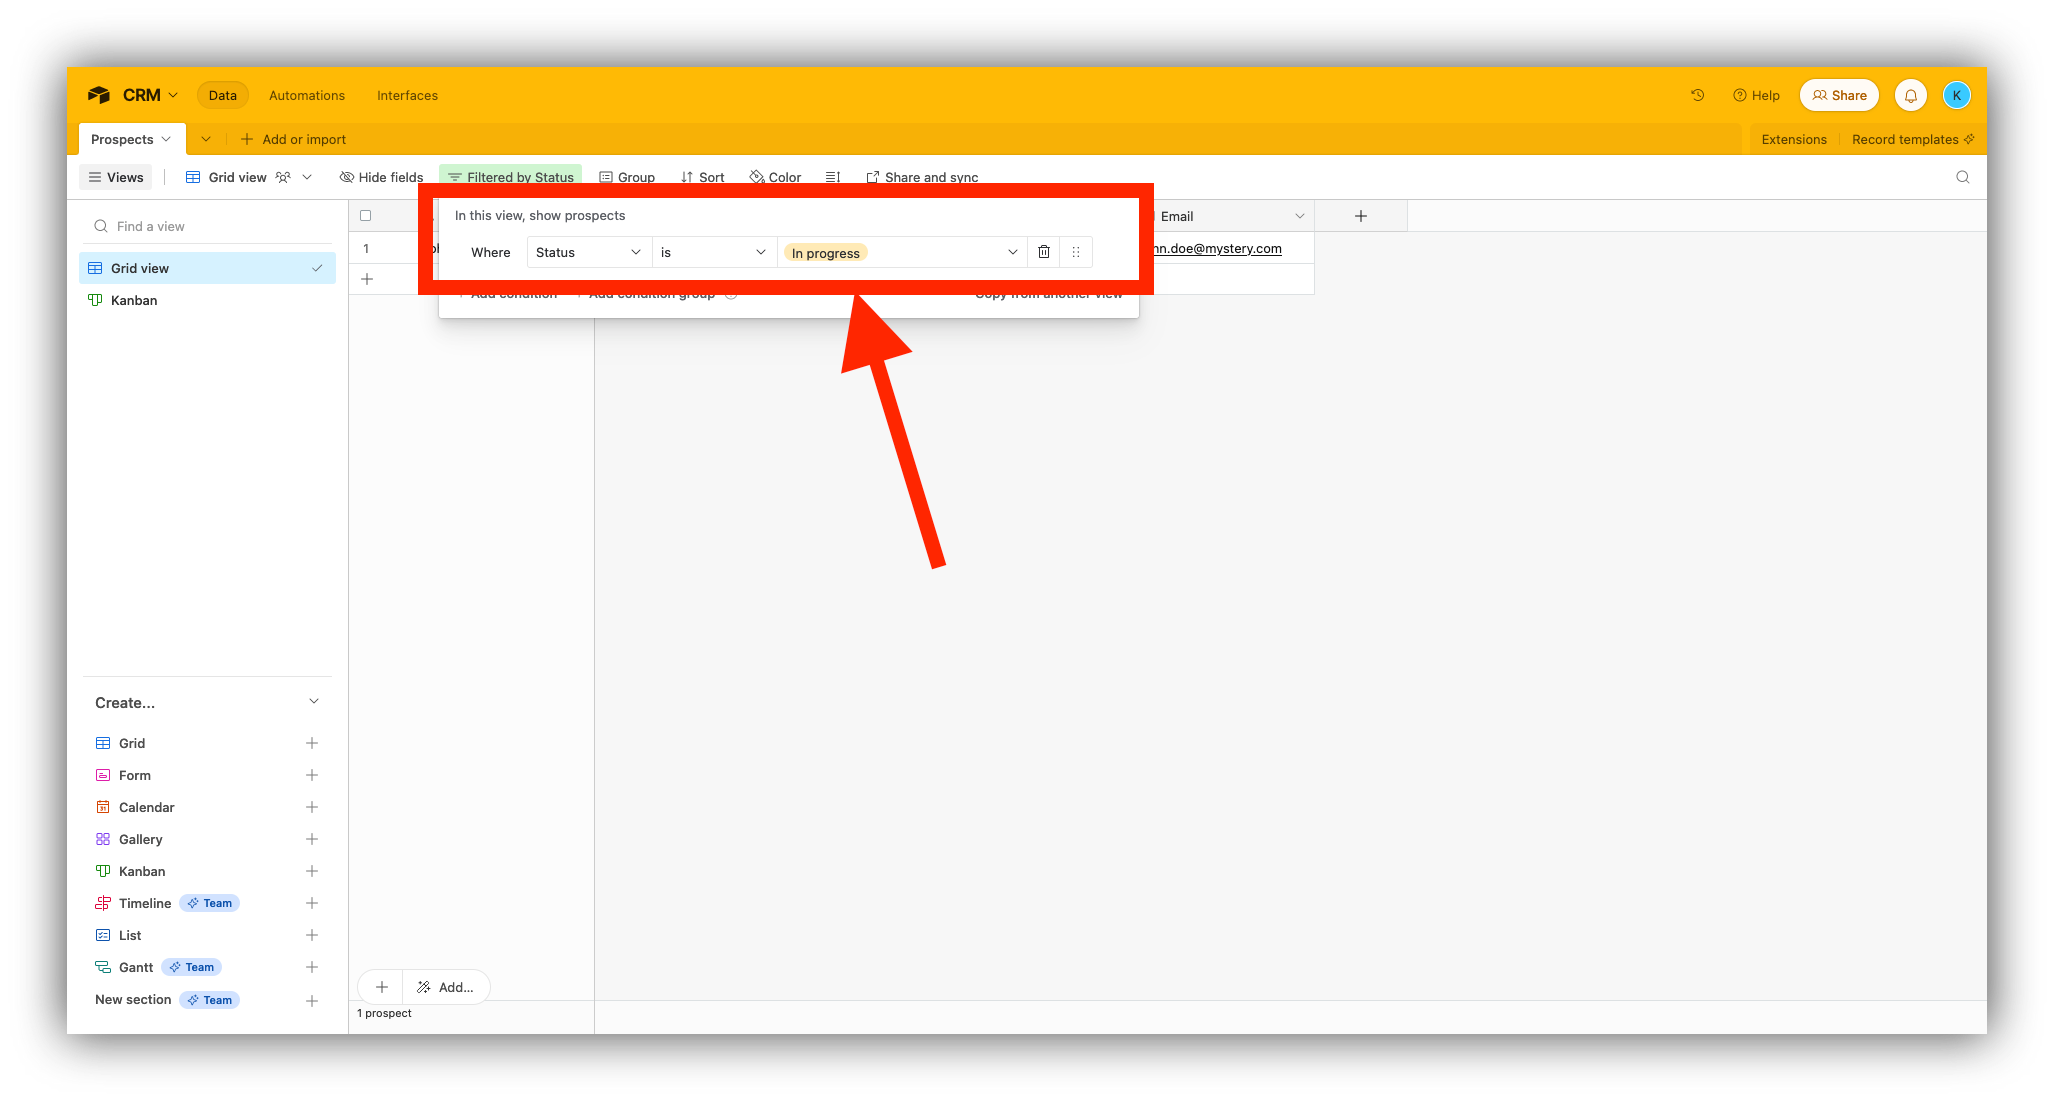
Step 8.3: Set your condition
Select the conditions you want your filter to be about. Here, for example, we want to filter every record where the status is set to “In progress,” in order to see at a glance which prospect in our CRM is currently being worked on. If you wish to, you can add other conditions on top of it to further filter your data, by following the same steps.
Step 9: Add a group
Now let’s take a look at the “Group” feature, which will help you organize your records in a grid based on certain fields, for a clearer view.
Step 9.1: Click on “Group”
Let’s create a new group.
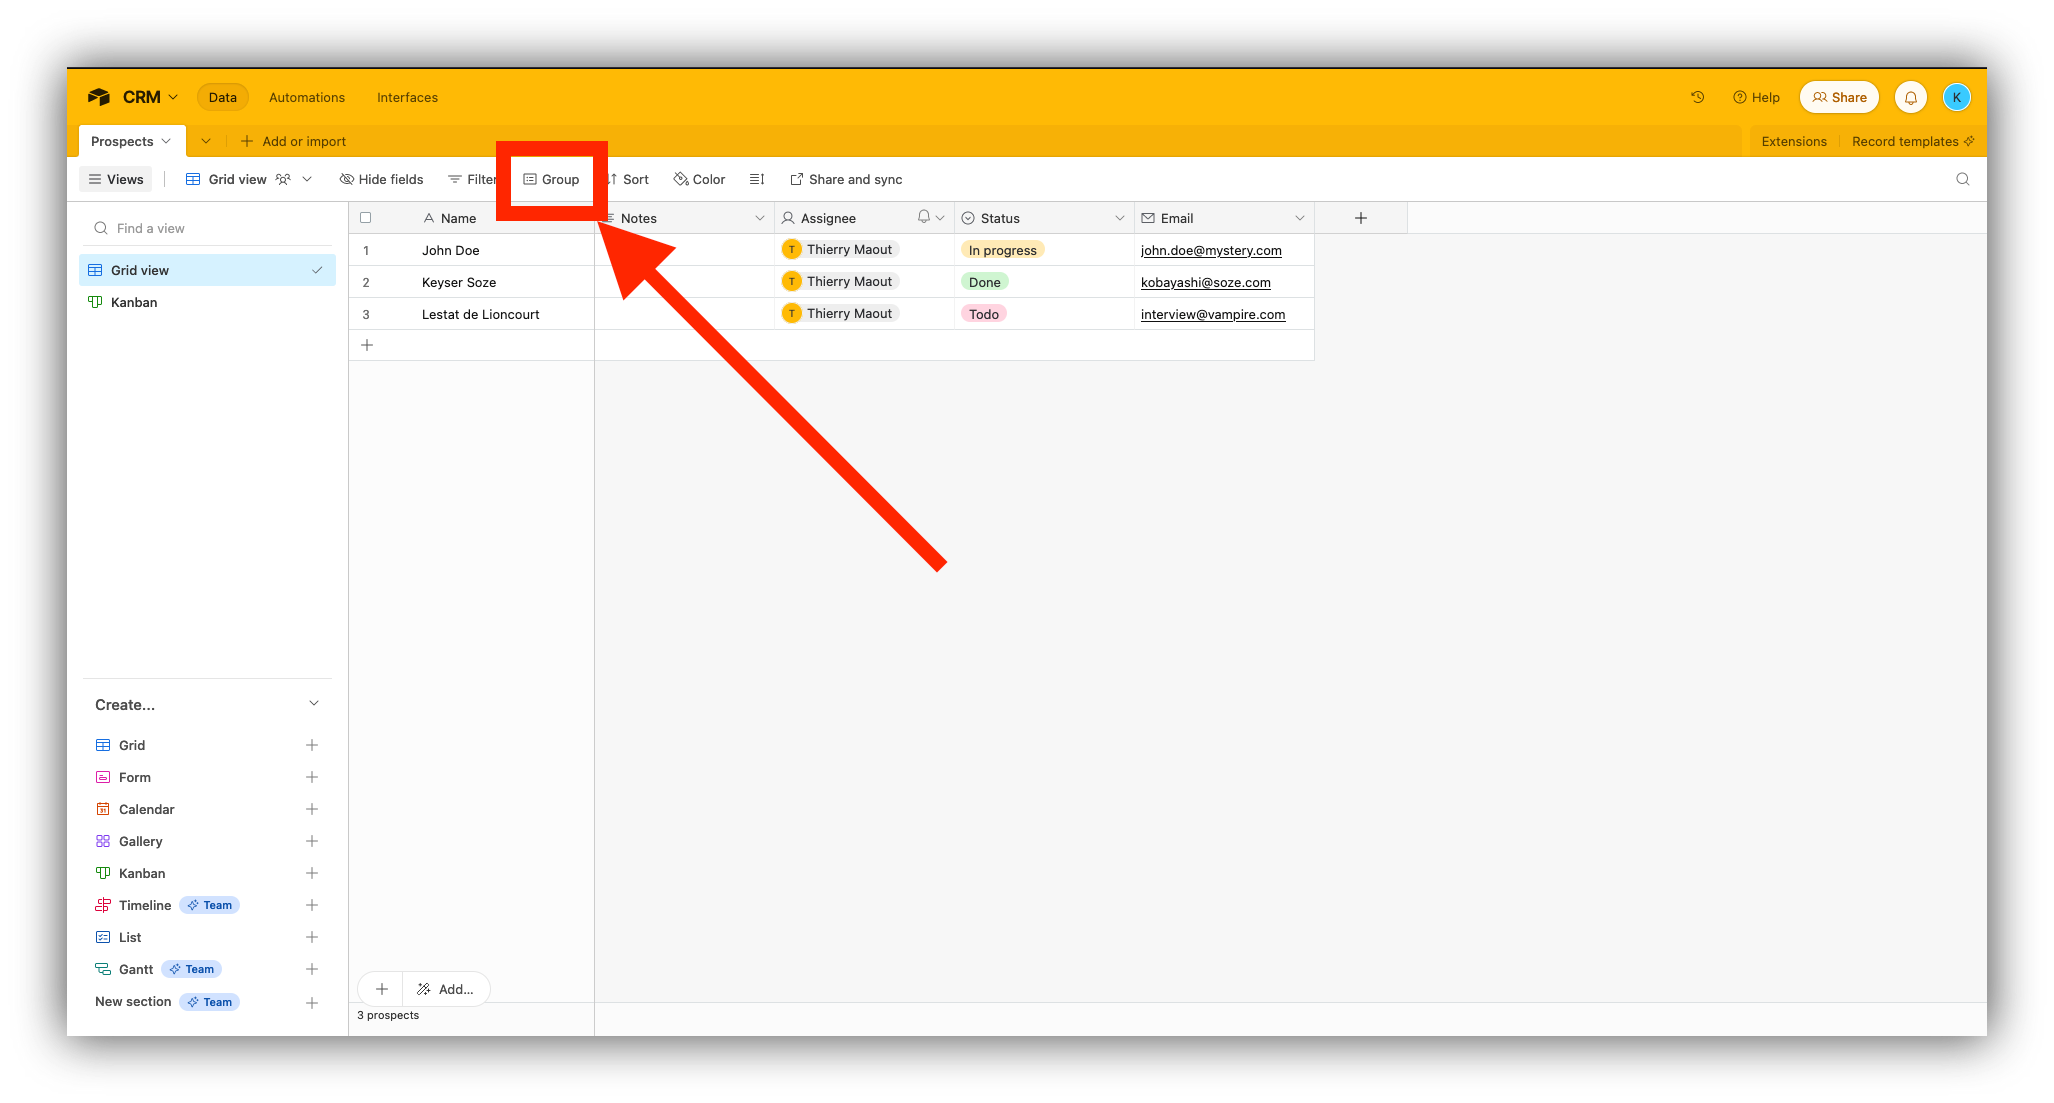
Step 9.2: Pick a field to group your records by
Your records will be organized based on this field. In this example, let’s select “Status”.

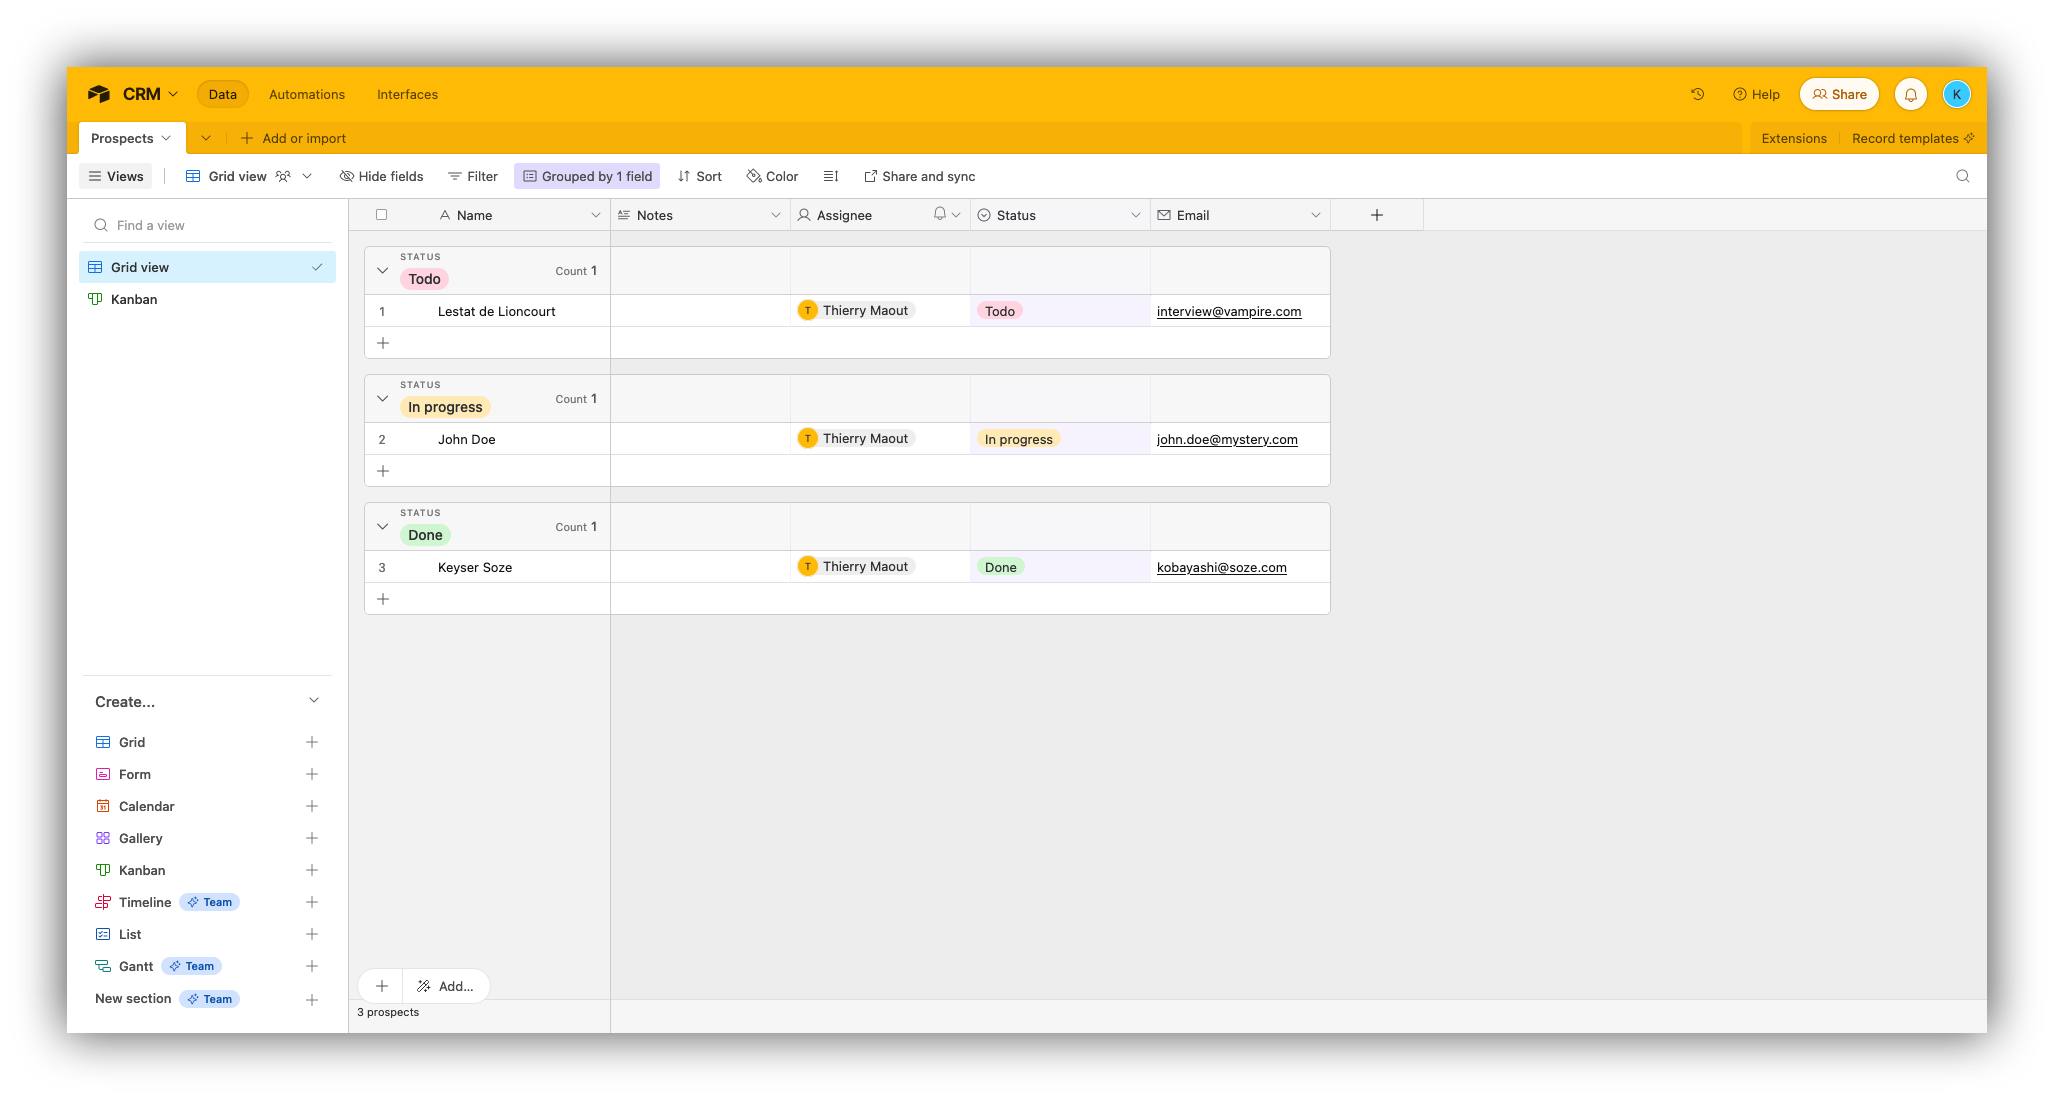
Step 9.3: Your records are now grouped in a grid
We now have an easy-to-digest view of records, grouped by their status. This is particularly useful when you start having a significant amount of data and want to be able to group records at a glance.
Step 10: You’ve built your database in Airtable
You’ve completed the first steps of building your database in Airtable. You have a very basic structure and all the keys to build a complete database using several tables, field types, and views. As we mentioned, building something complete by starting from scratch will take a while.
How to build a database in Airtable using Softr
Building a database using Softr is the fastest method and comes with the benefit of incorporating a front-end interface out of the box. Softr is a full-stack business app creation platform—providing native Databases, an Interface Builder, and Workflows—so you're not just getting a data layer, but a complete operational tool from day one. While Softr's native databases are the recommended starting point for new projects, Softr also connects seamlessly to Airtable, making it easy to build a front-end portal or internal tool on top of your existing Airtable data.
In 5 minutes, Softr allows you to get started with a template of your choice, which will generate a complete database and a front-end interface you can customize to your liking. This is entirely free using Softr's free plan, although some advanced features will require you to upgrade to a higher subscription tier, starting at $49/month.
Follow the steps below to build a database in Airtable using Softr.
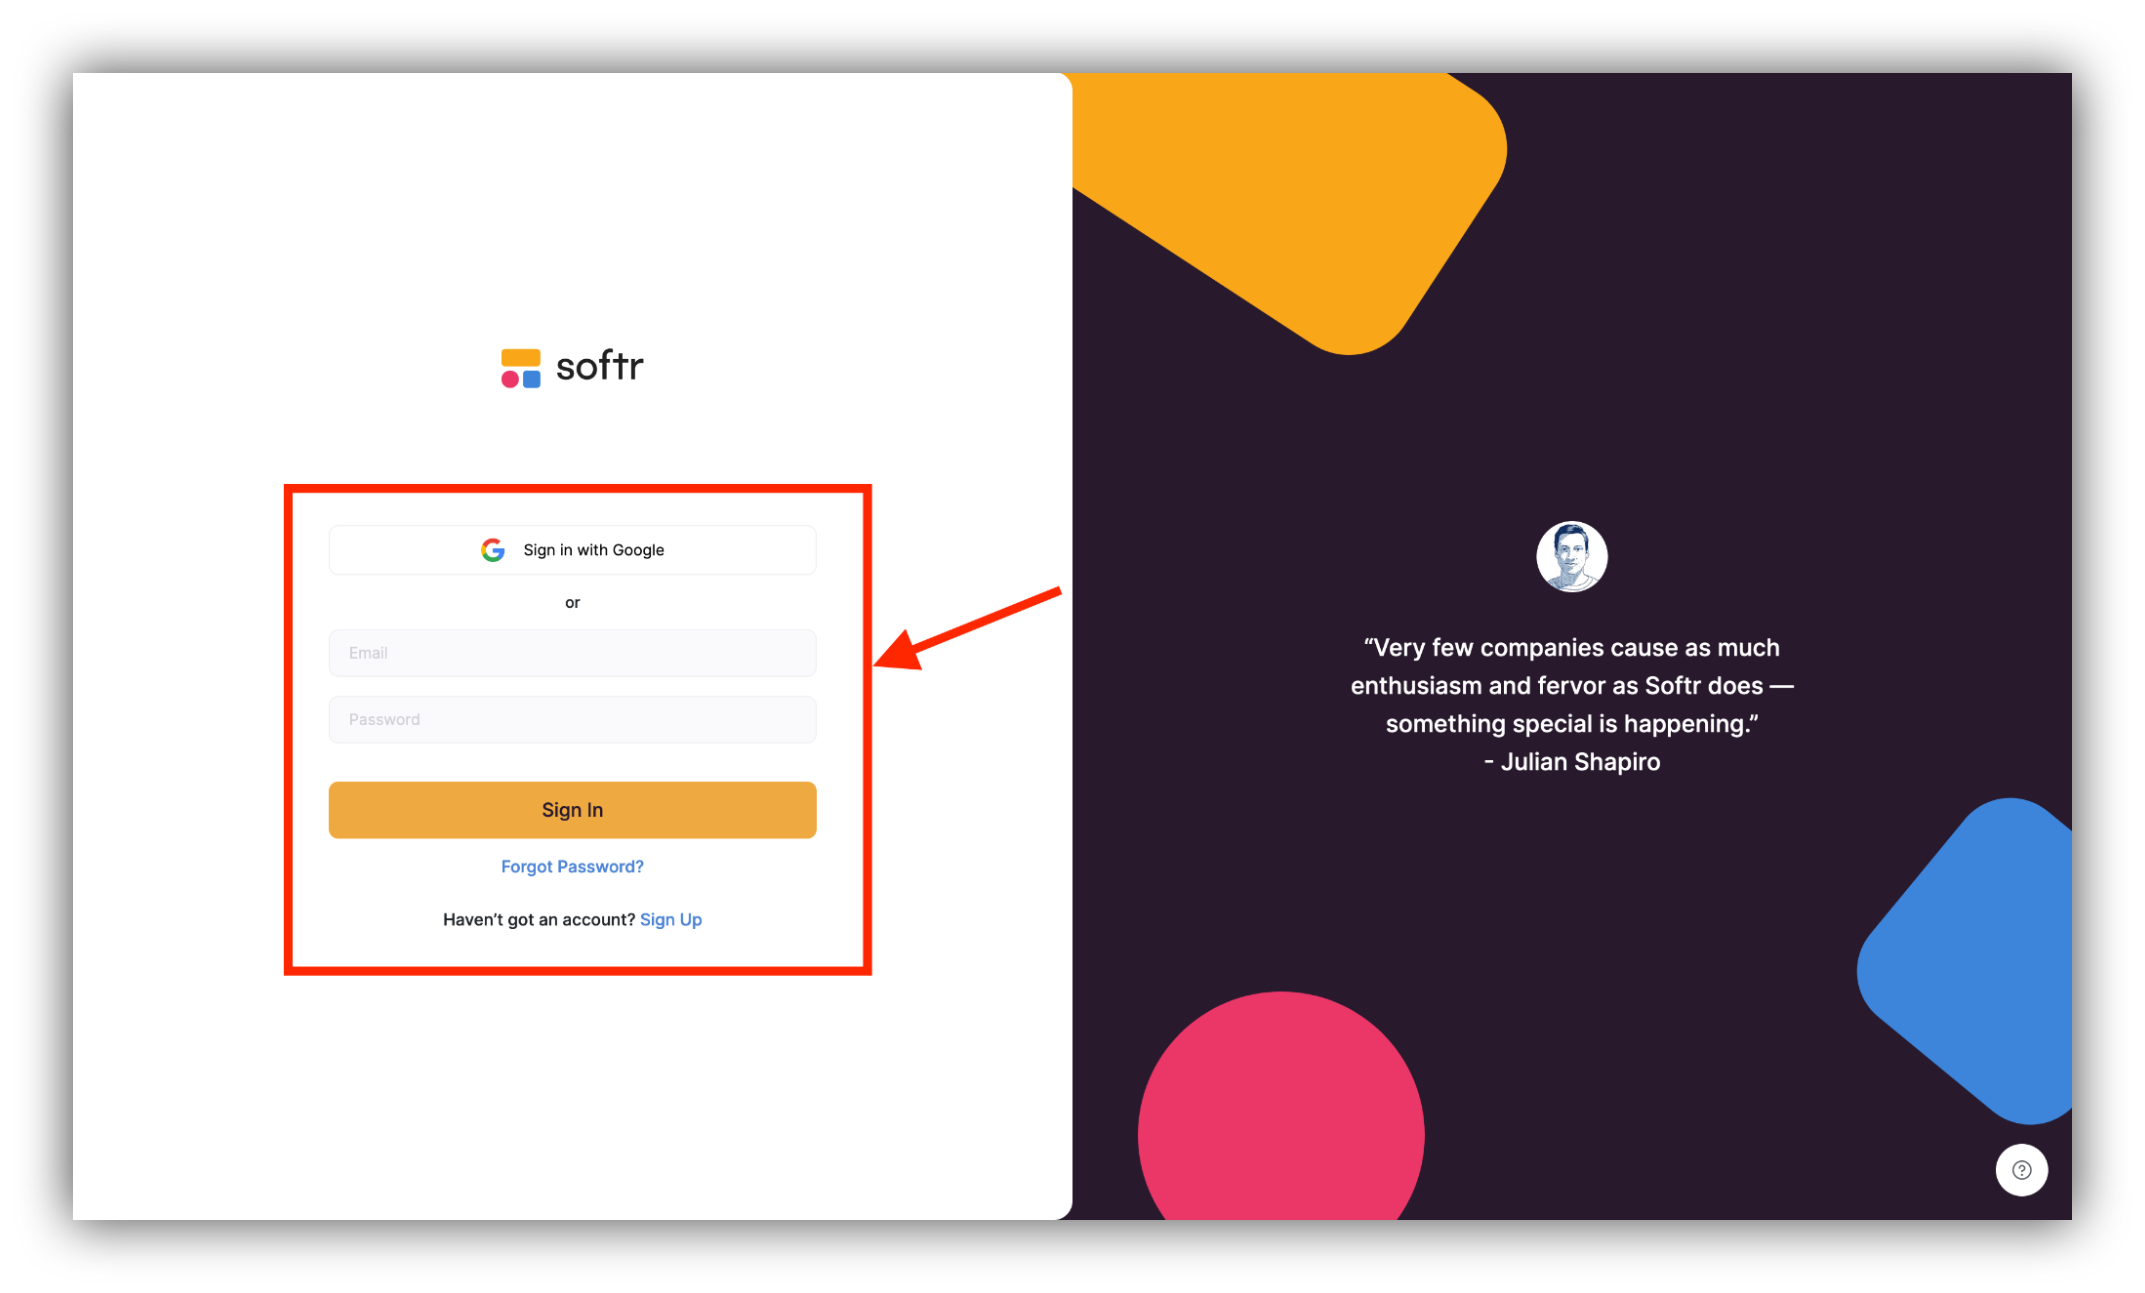
Step 1: Login to Softr
Log in to your Softr account or, if you don’t have it, create a free Softr account.
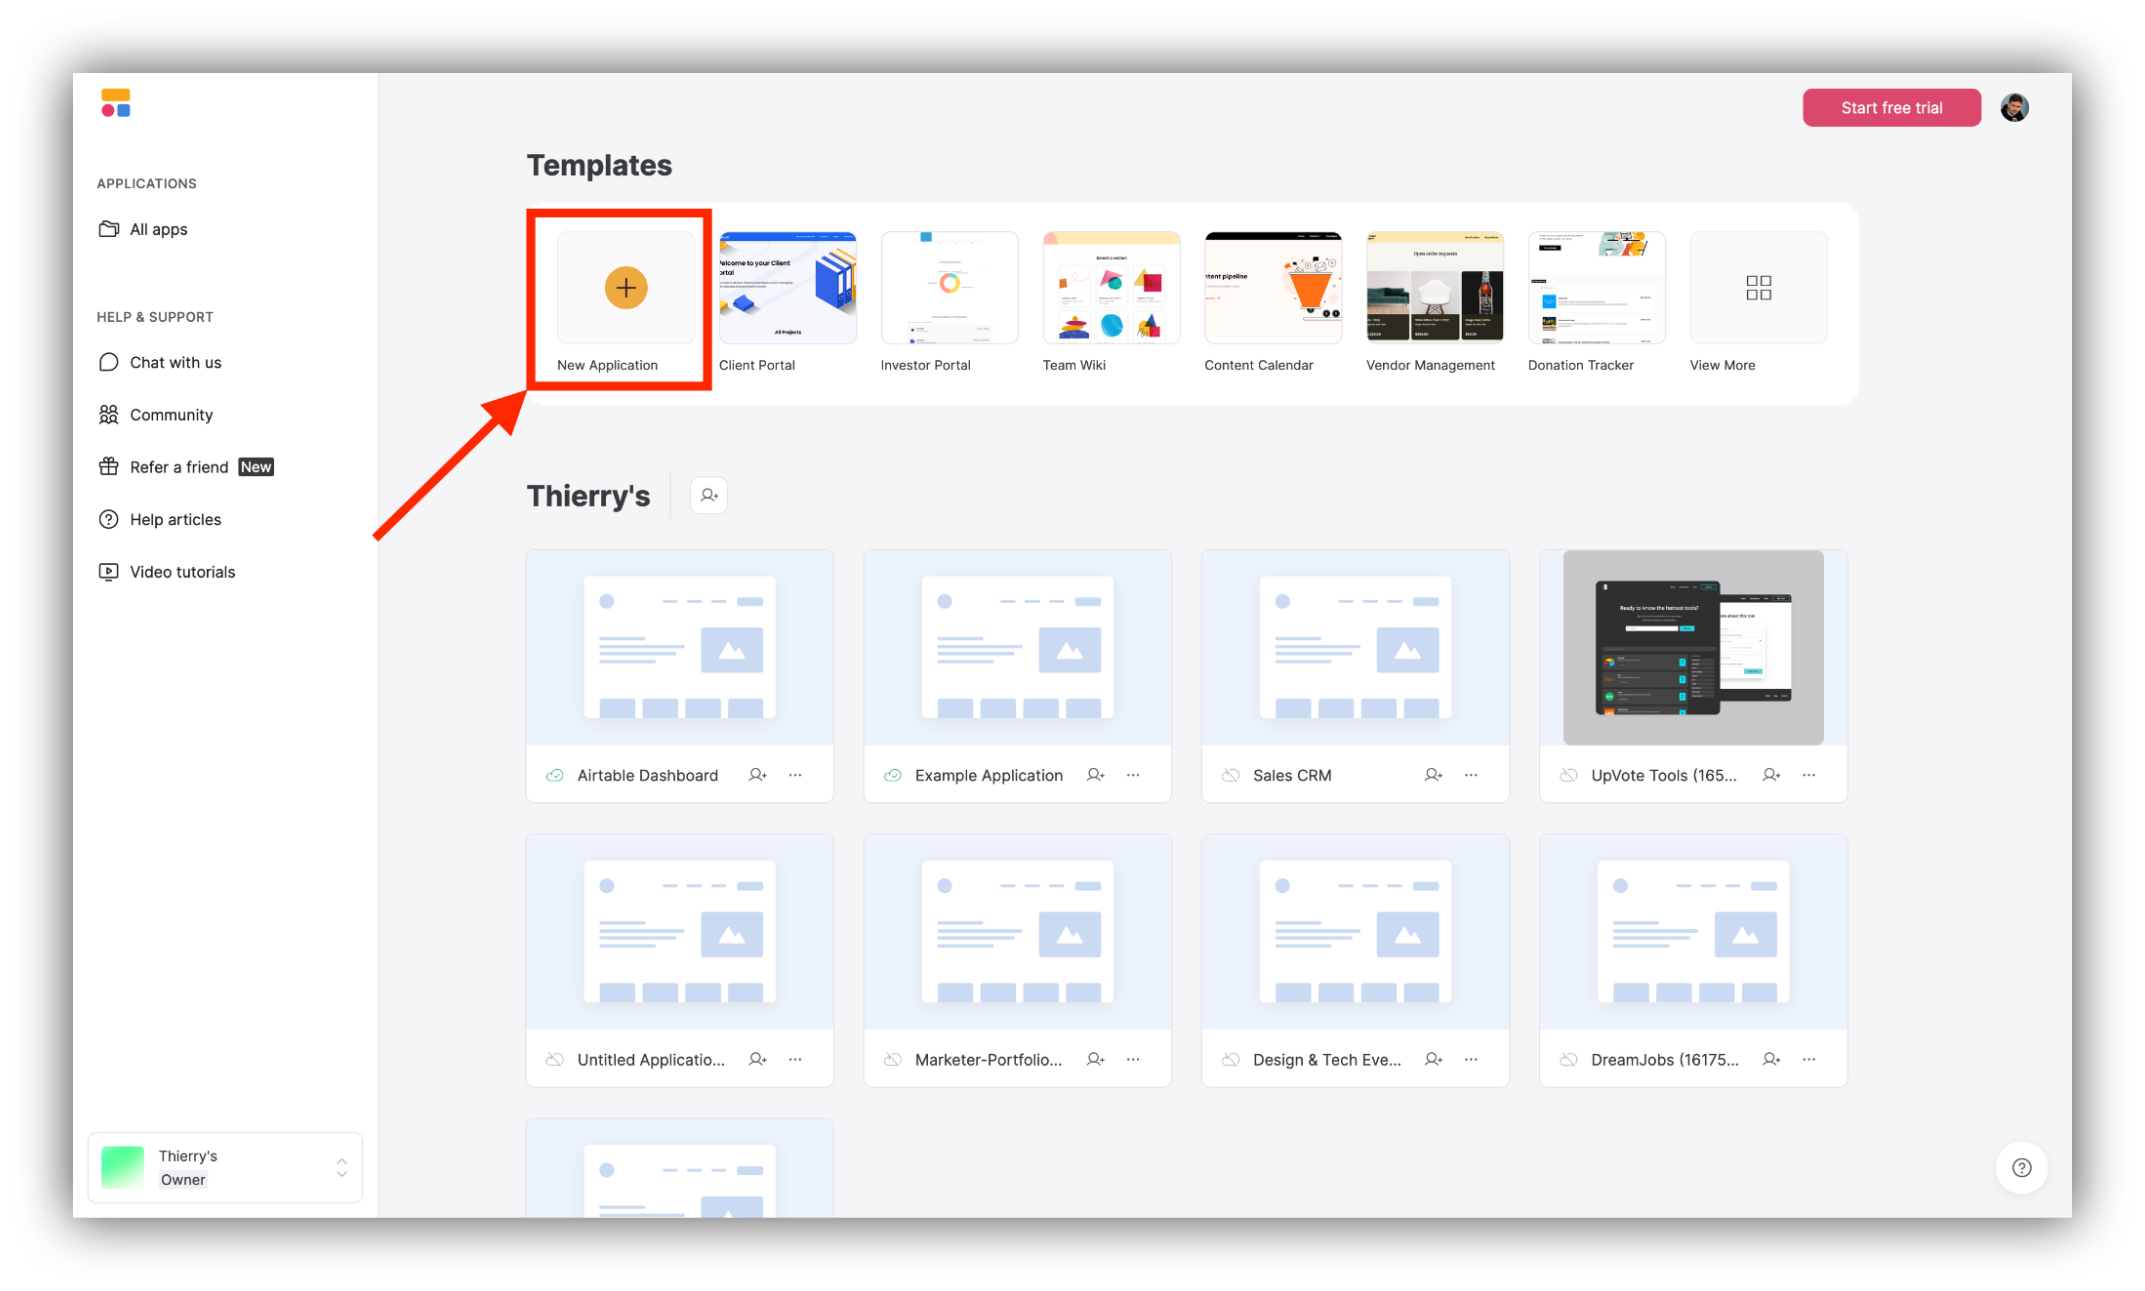
Step 2: Click on “New application”
Softr helps you create fully-fledged applications built upon Airtable data. By clicking “New application,” you will be given the option to use an Airtable database template, accompanied and its Softr-generated front-end interface.
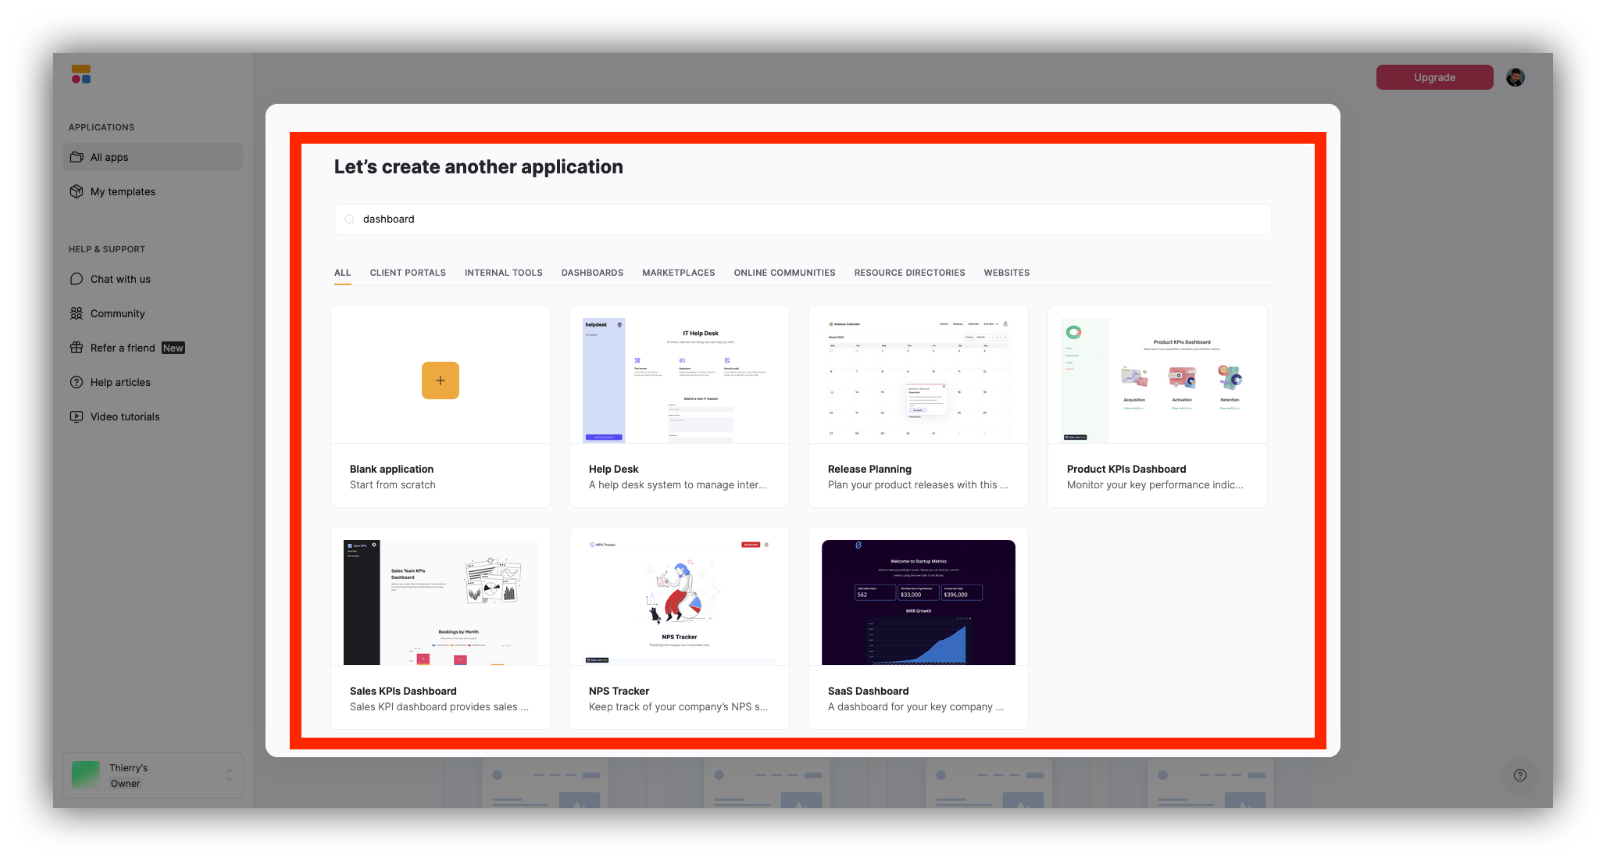
Step 3: Select a template
Softr provides a wide array of templates for you to choose from. Each comes with an Airtable database ready for use, which will be synced into your Airtable account. To find the best template for your needs, use the search bar or browse the available templates.
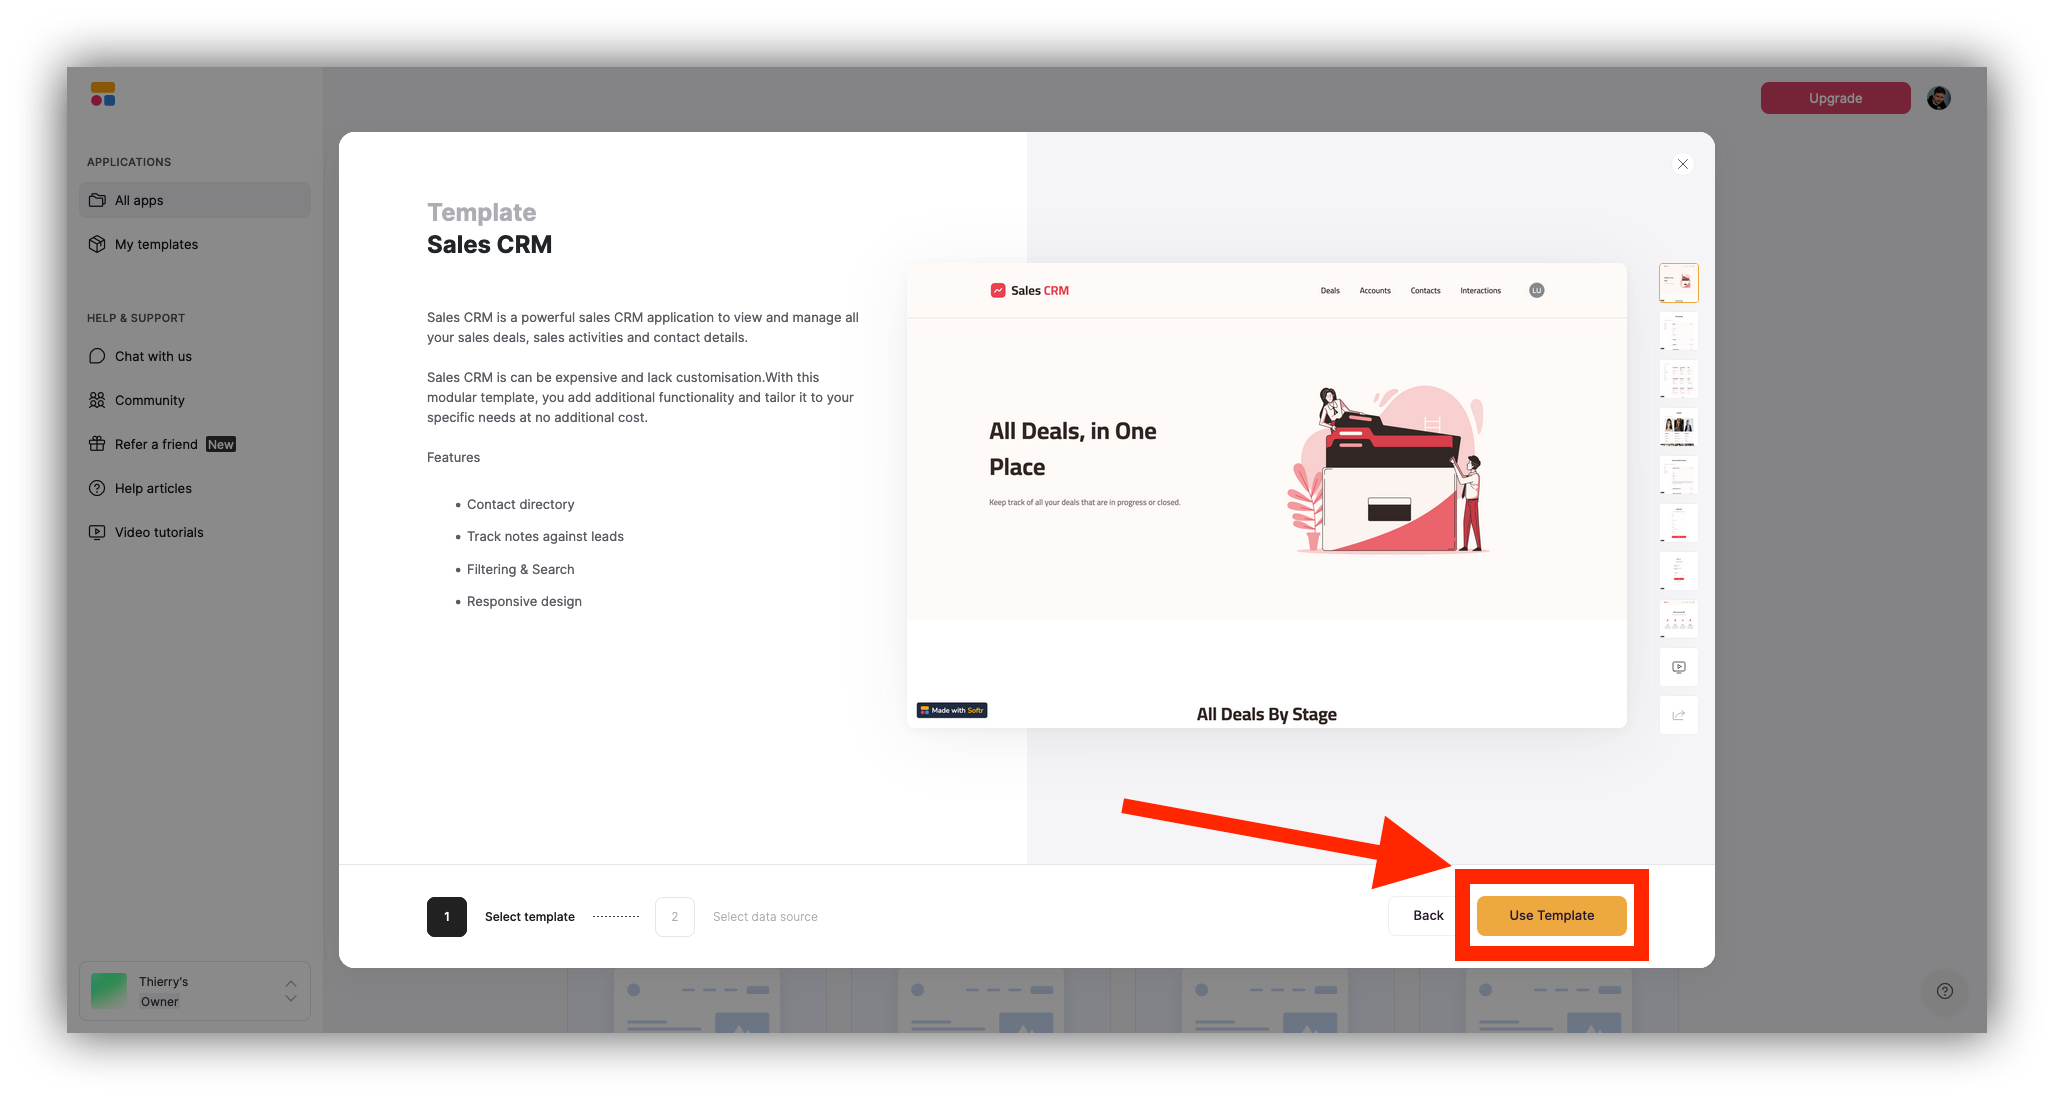
Here, we chose to go for a Sales CRM template to continue with the general theme of this tutorial.
Step 4: Click on “Use Template”
When you’ve selected a template, you’ll be invited to read more information about it and to get a preview of what it’ll look like. When you’re ready to start, click on “Use Template.”
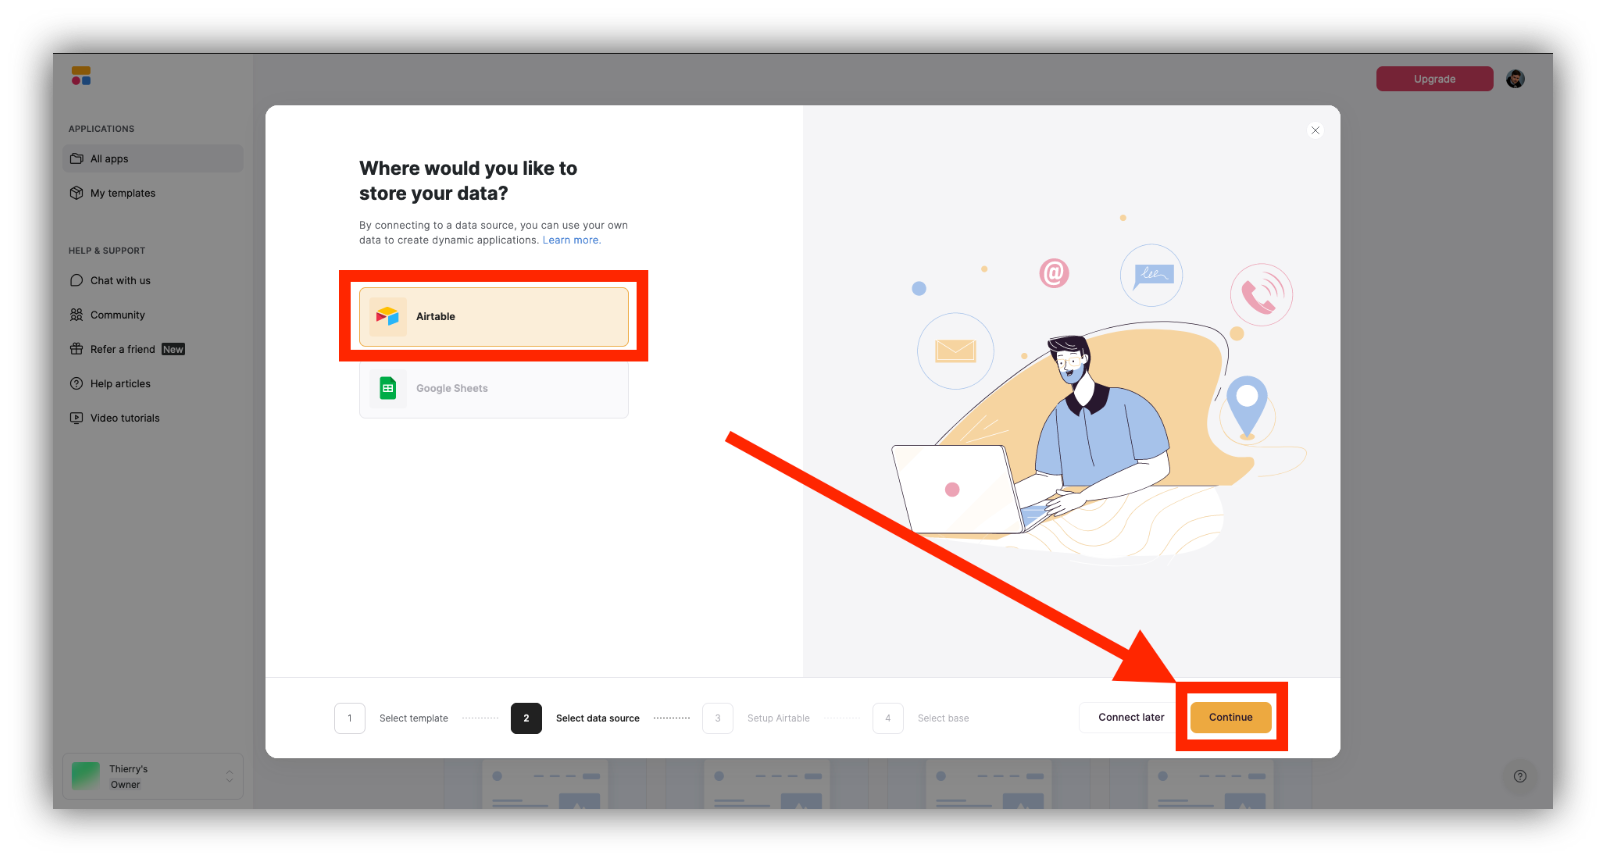
Step 5: Select Airtable as a data source
You are given the option to select a data source. While Softr Databases are the recommended native option for new projects, for this tutorial you can pick Airtable (or Google Sheets) to connect your existing data. Select Airtable and click on "Continue."
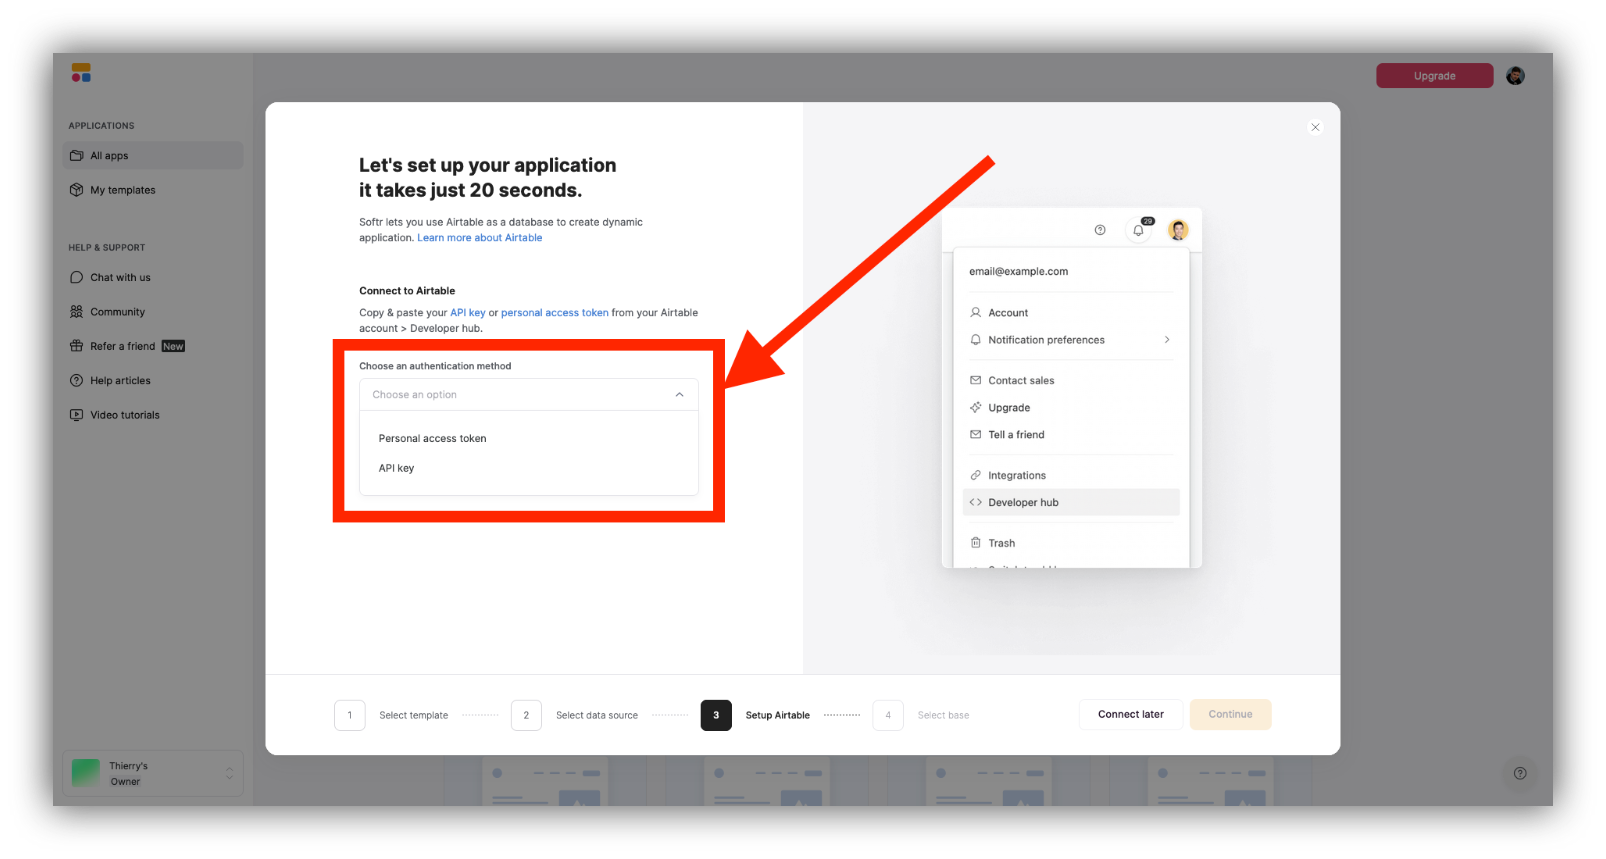
Step 6: Connect to Airtable
You have the choice between using a personal access token or your API key. Follow the steps on the screen or the next few sub-steps below to get your Airtable API key.
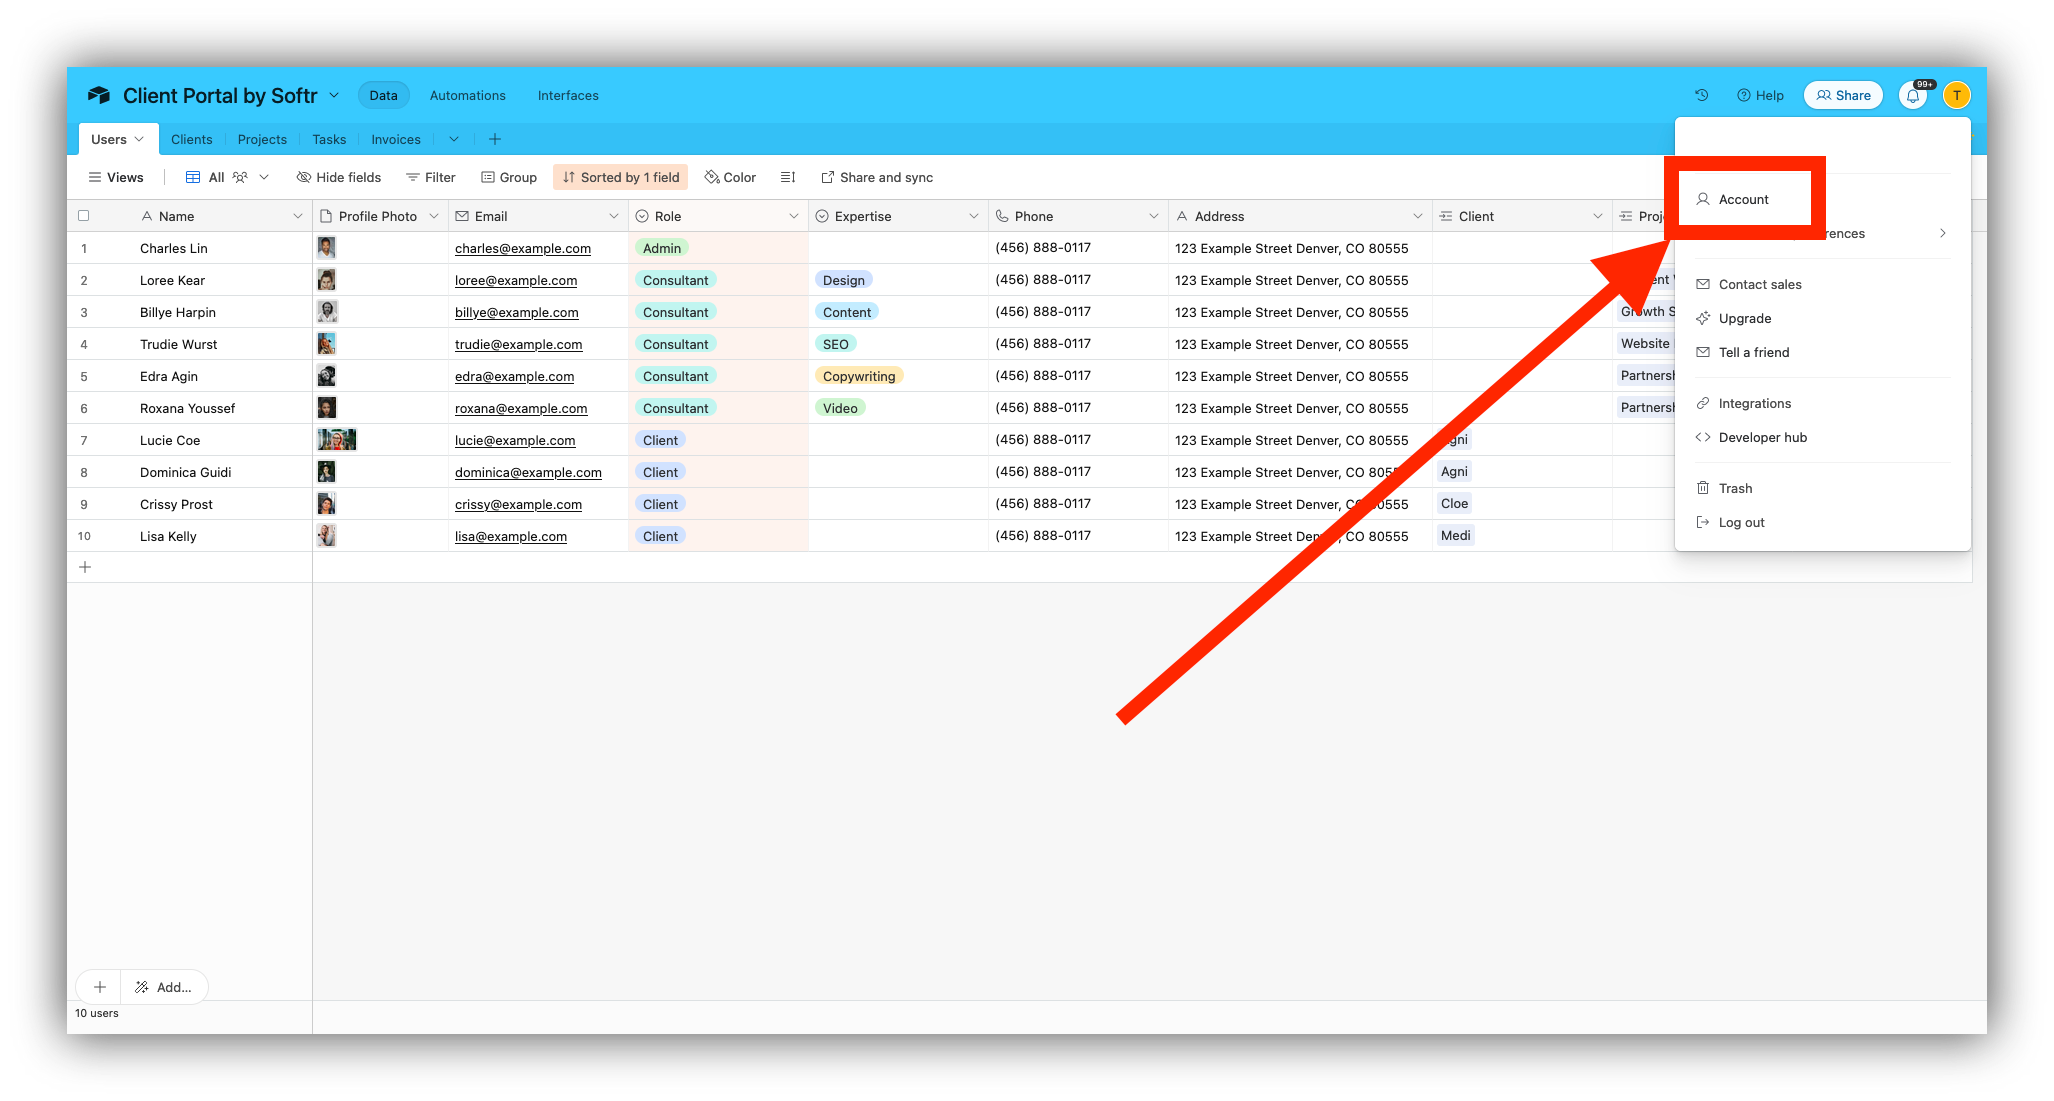
Step 6.1: Go to your Airtable Account
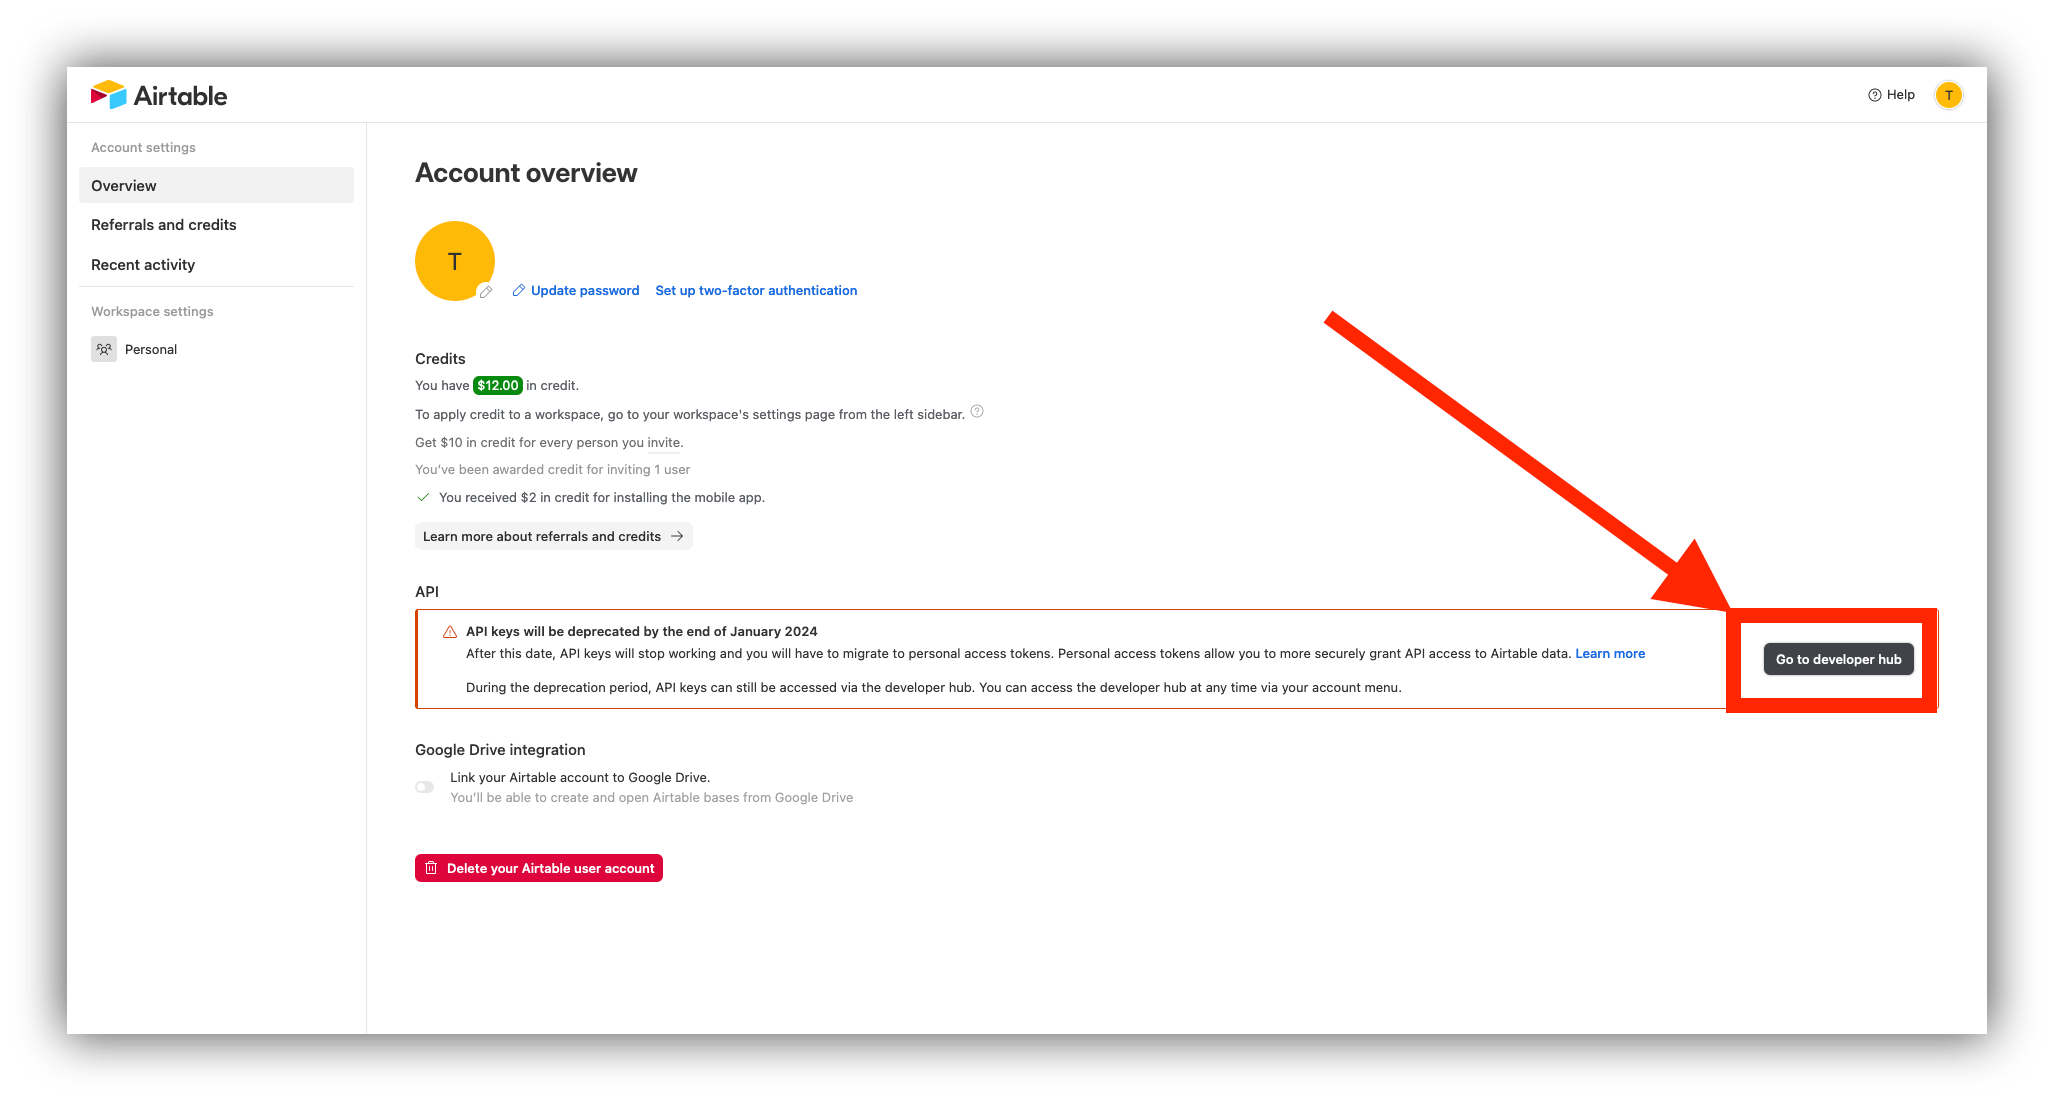
In Airtable, click on your icon in the top-right corner and then click on “Account.”
Step 6.2: Go to the Airtable developer hub
From your account page in the “Overview” tab, click on the “Go to developer hub” button.
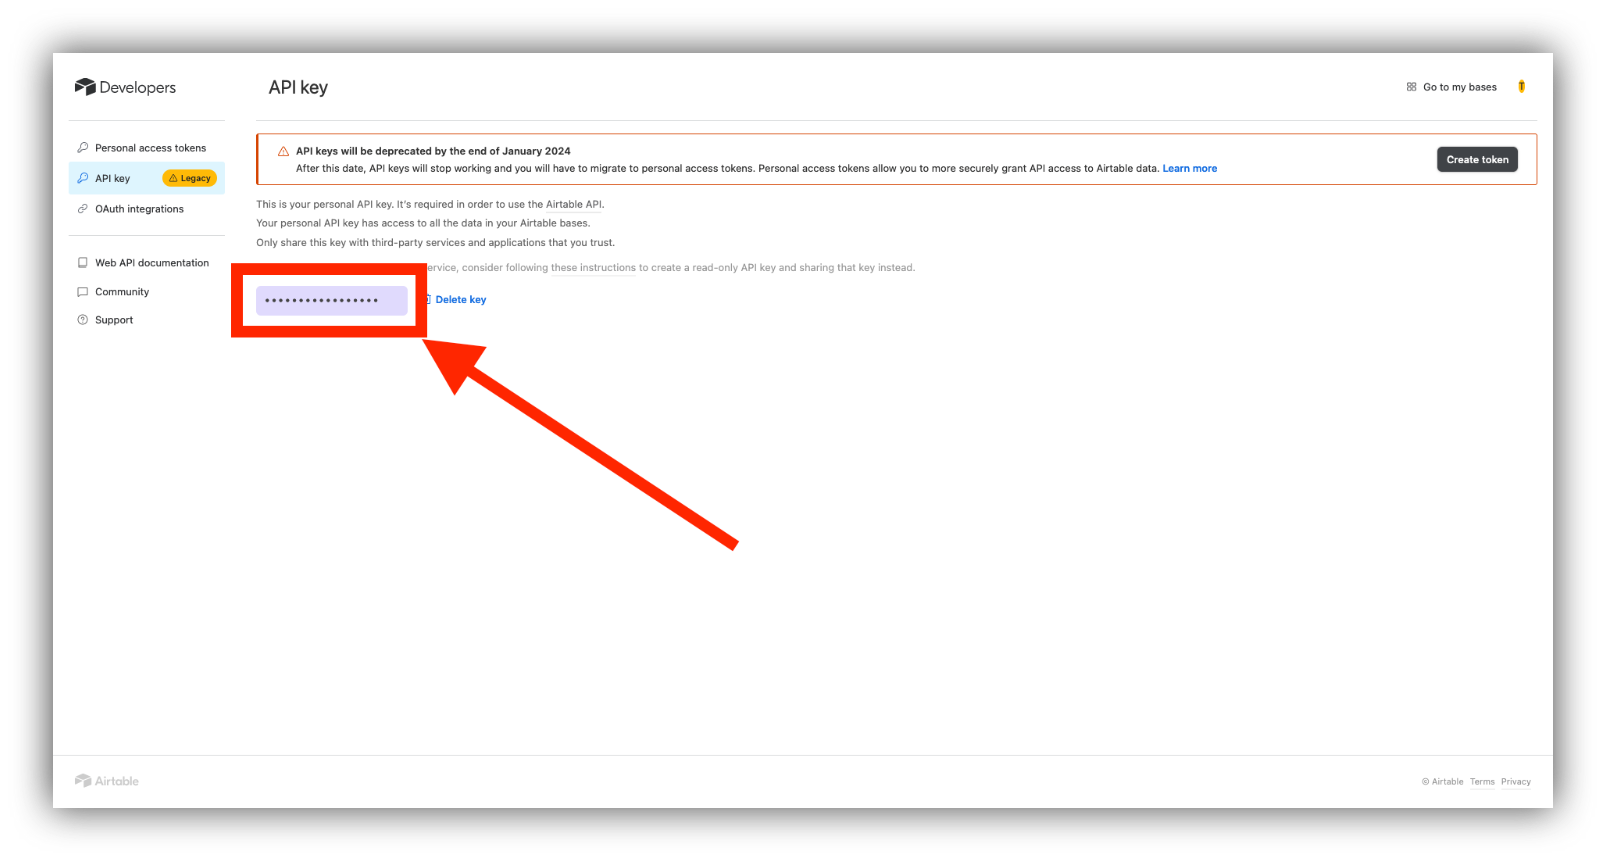
Step 6.3: Copy your API key
Select and copy your API key, a string of letters that will allow you to connect your Softr and Airtable data.
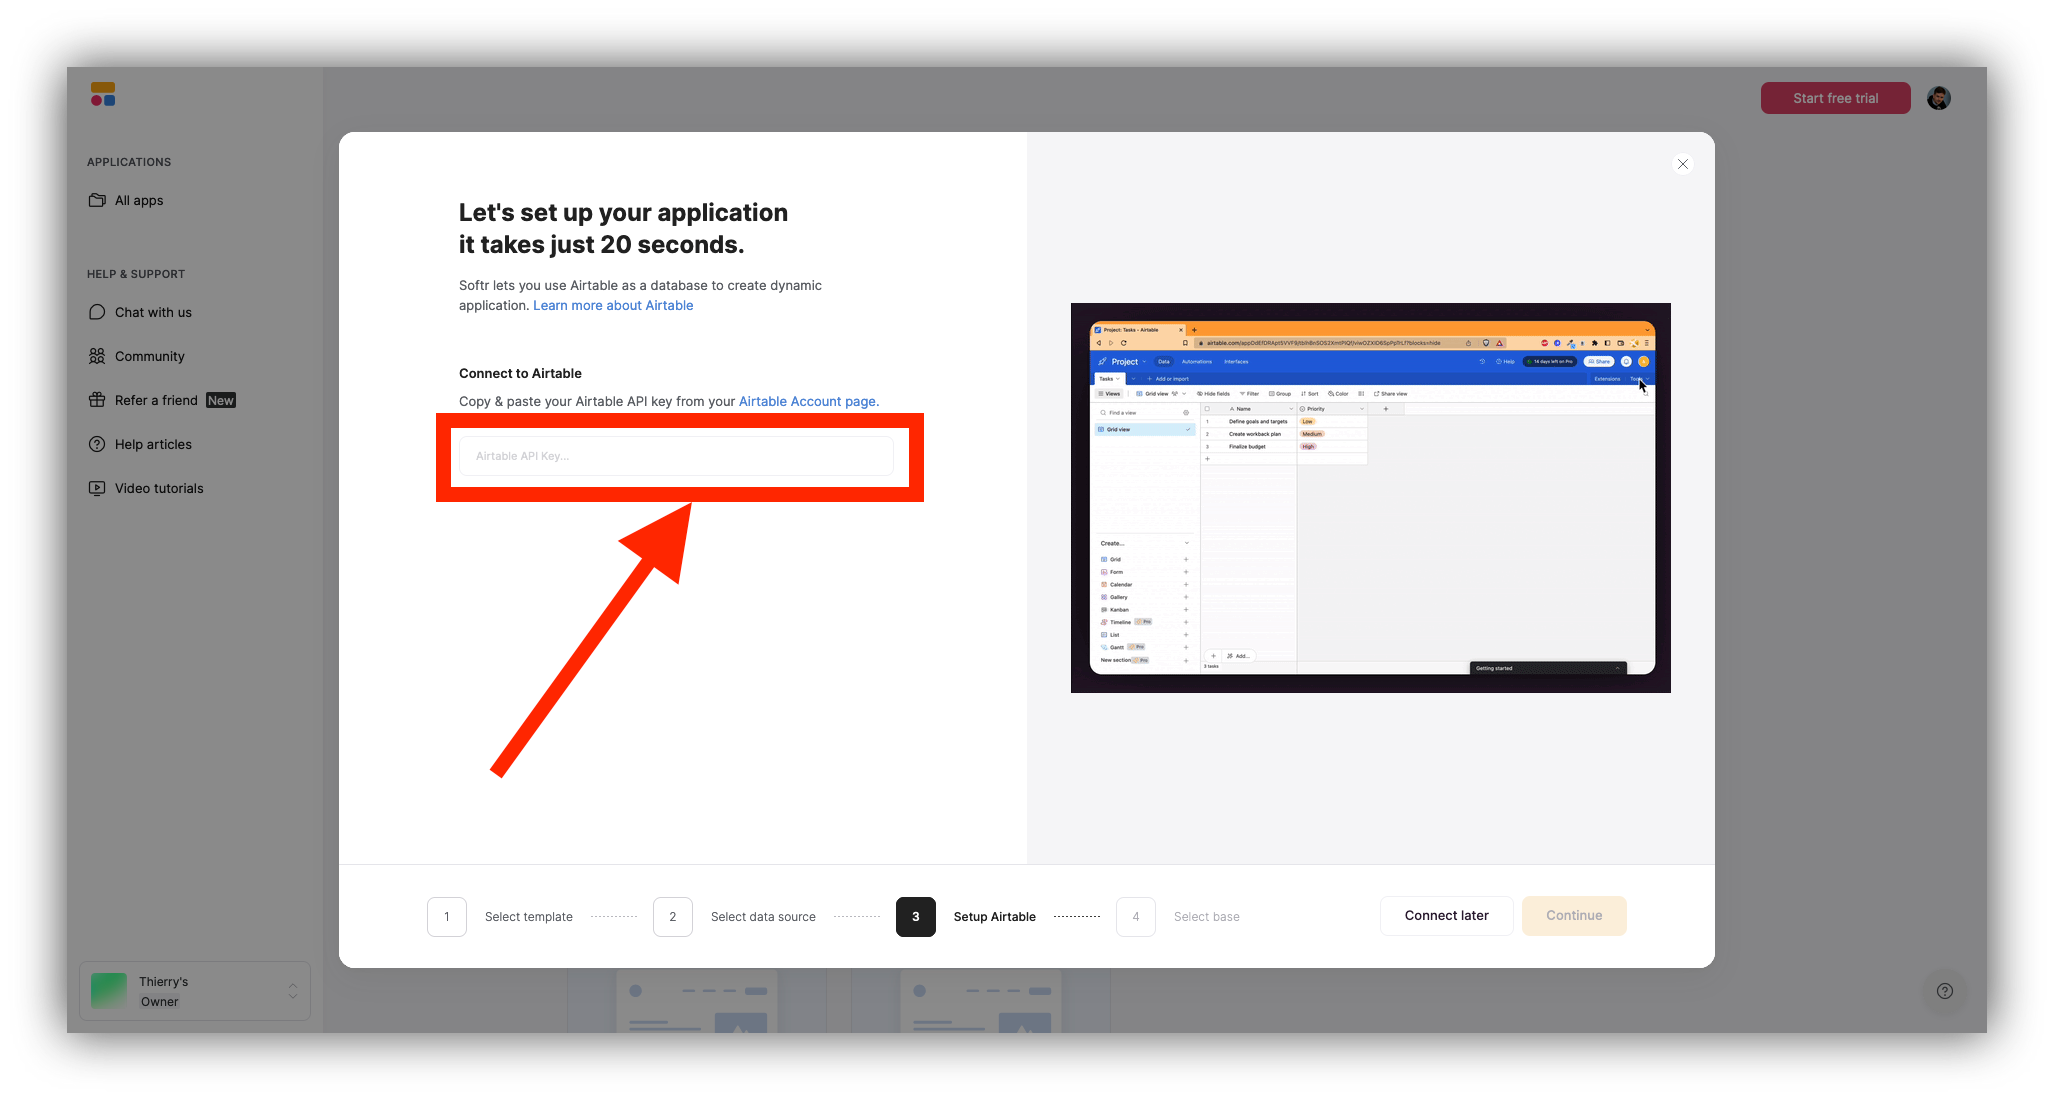
Step 6.4: Paste your API key on Softr
Head back to Softr, paste the API key to the relevant field, and click on “Continue.”
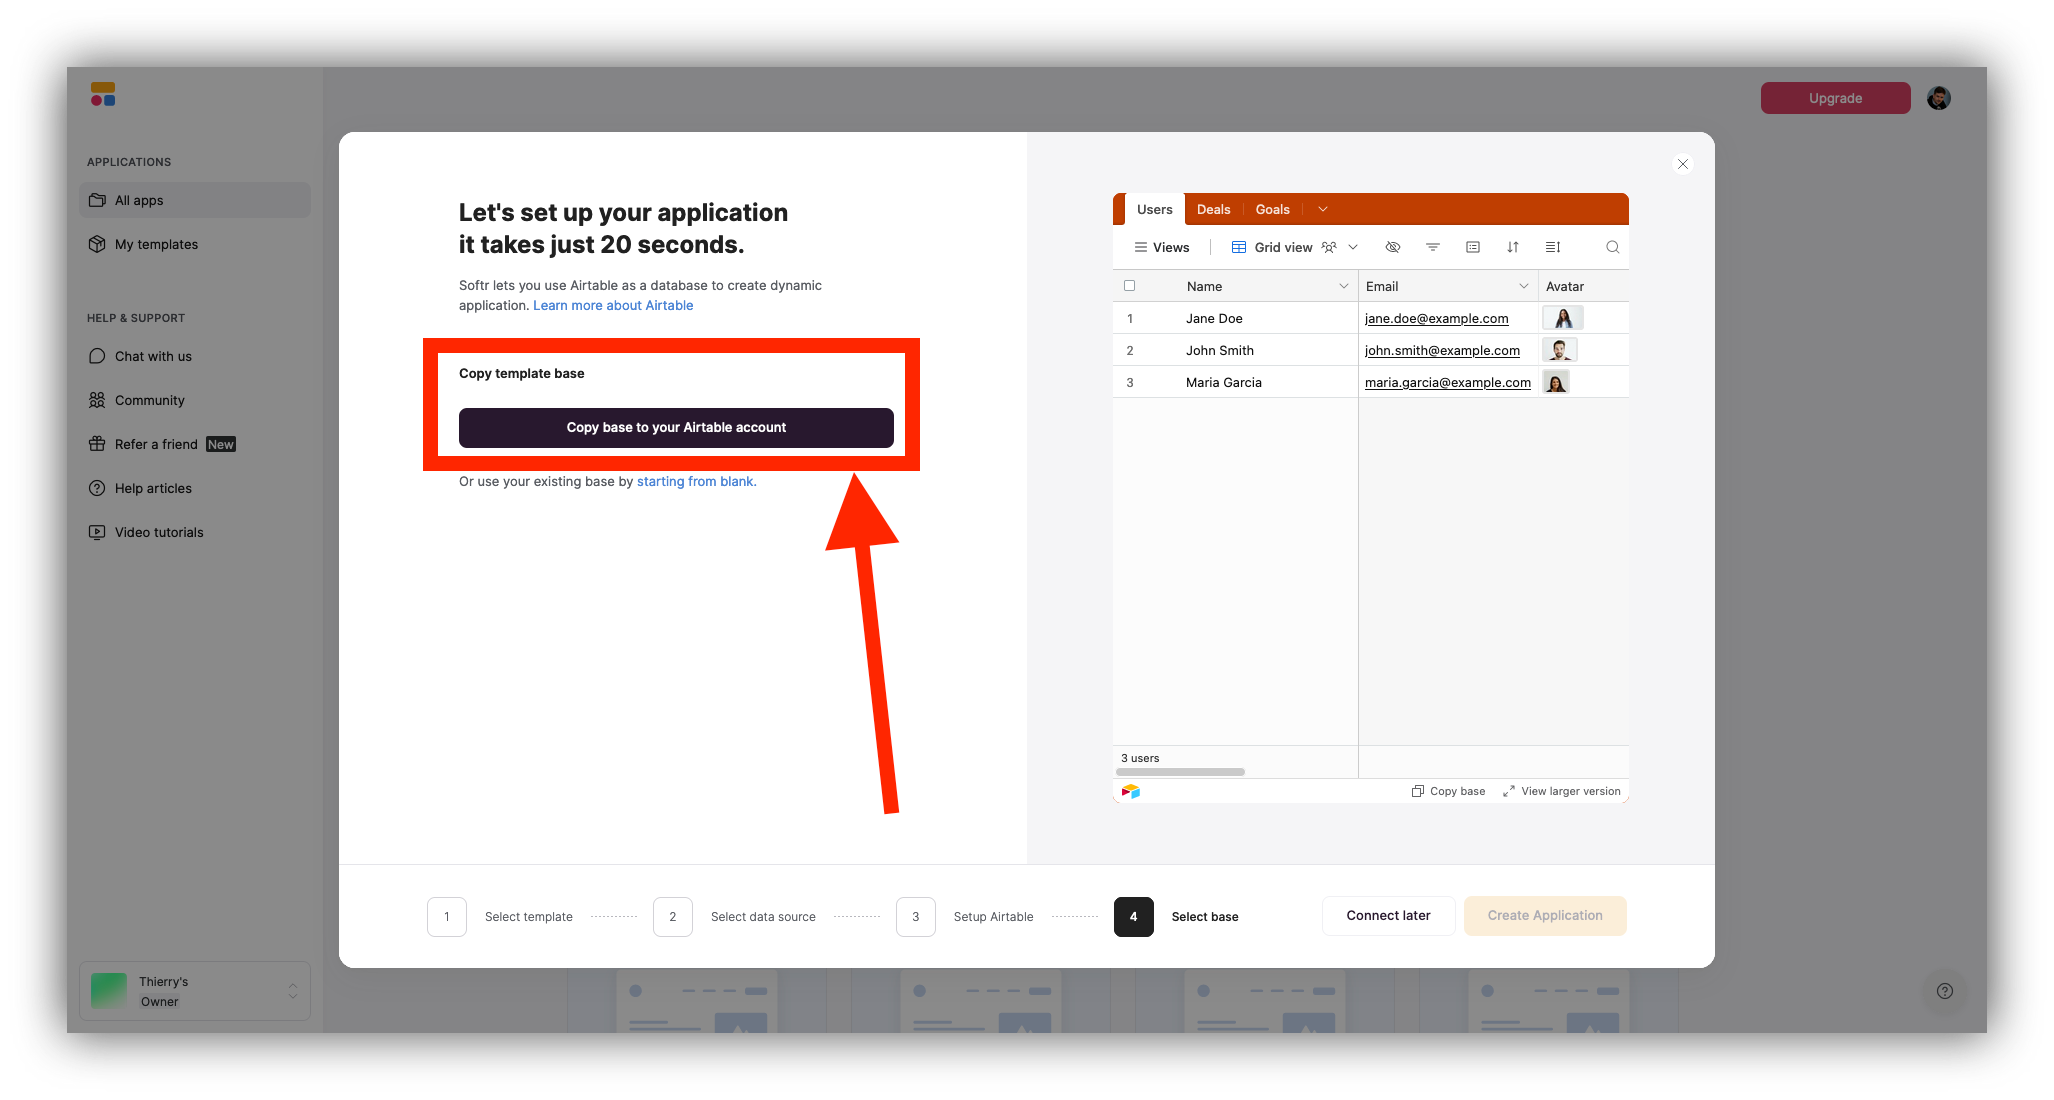
Step 7: Click on “Copy base to your Airtable account”
Now that you’ve connected Airtable and Softr to one another, you can add the database created by Softr to your Airtable workspace. To do so, click on “Copy base to your Airtable account.”
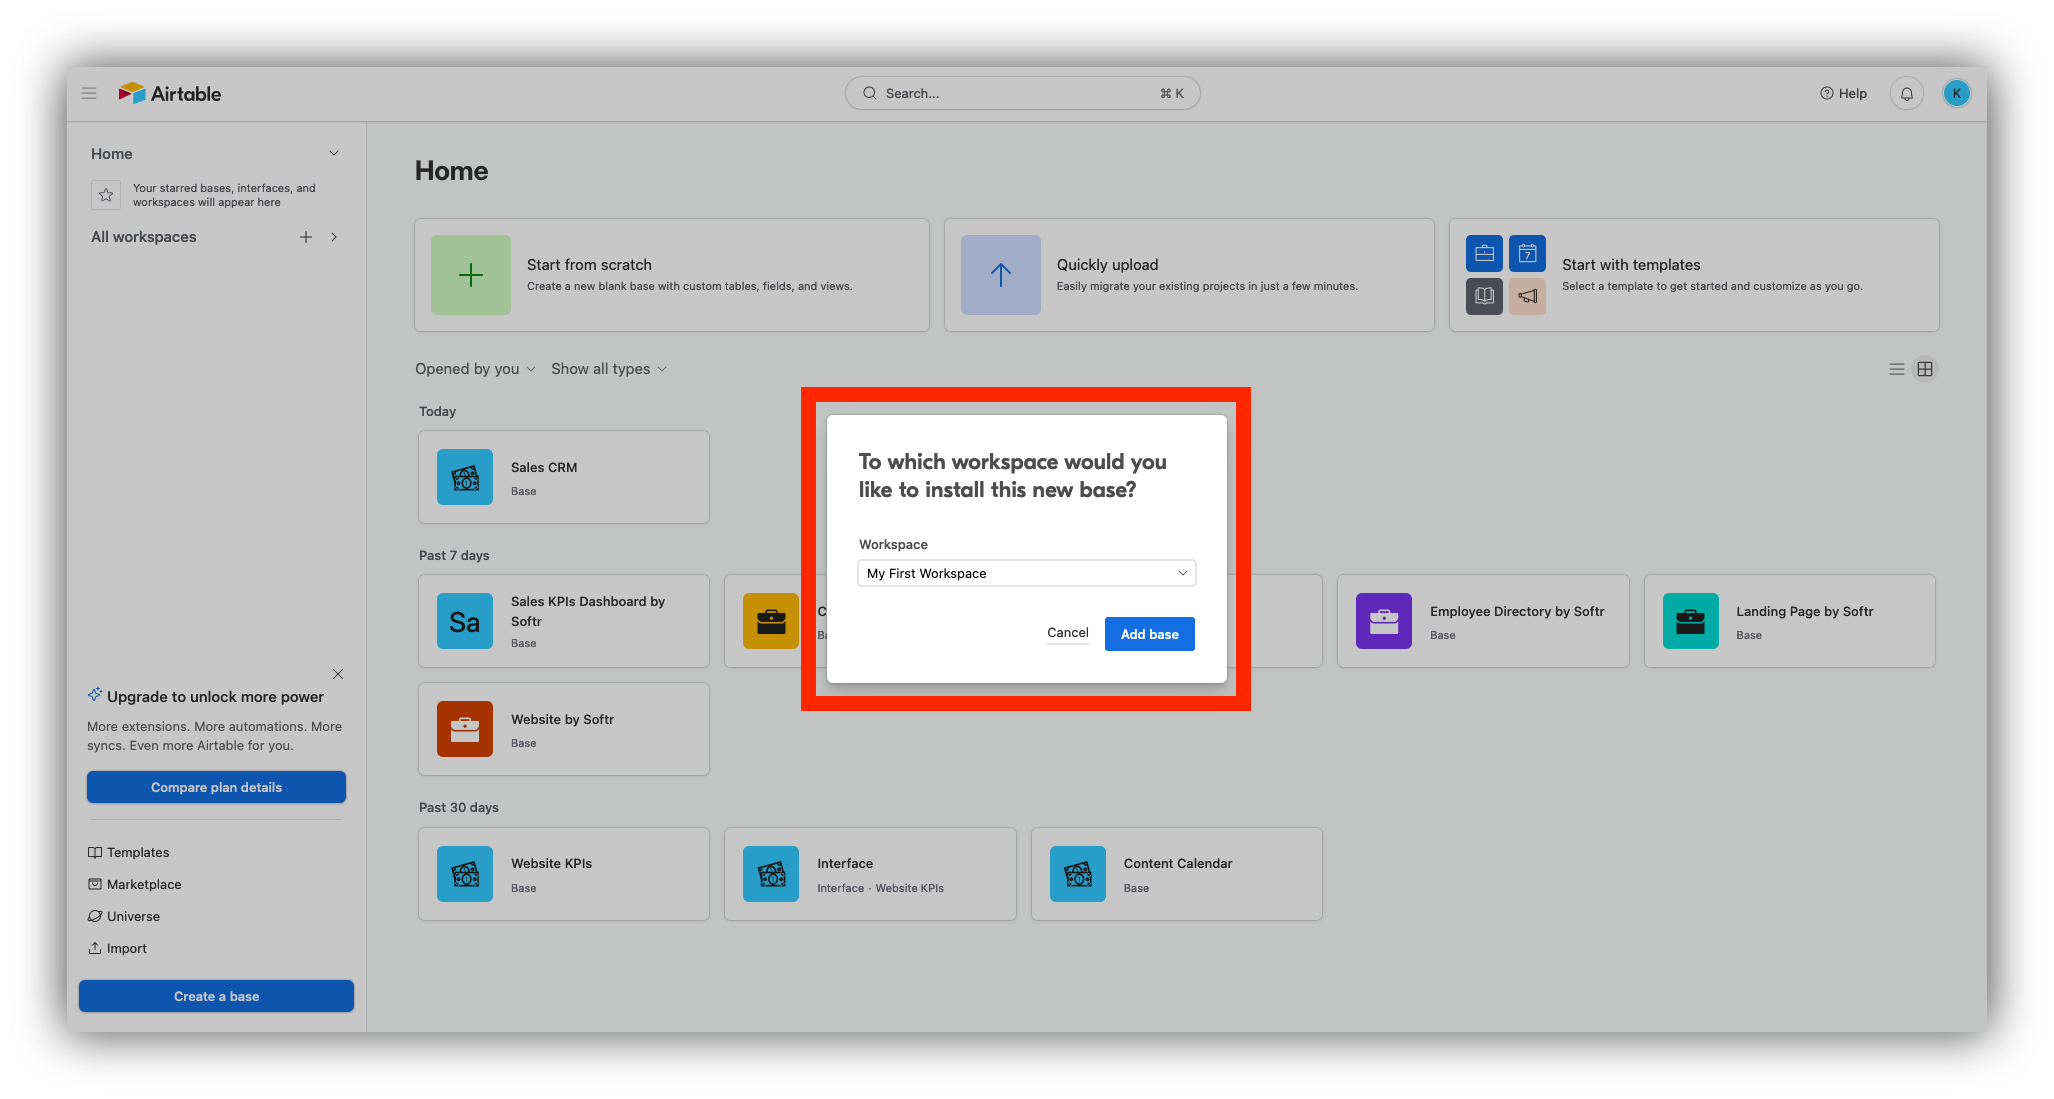
Step 8: Choose the workspace on which to add the Airtable database
Use the drop-down list menu to choose on which workspace you’d like to add the Airtable base that is part of the Softr temple. Then click on “Add base.”
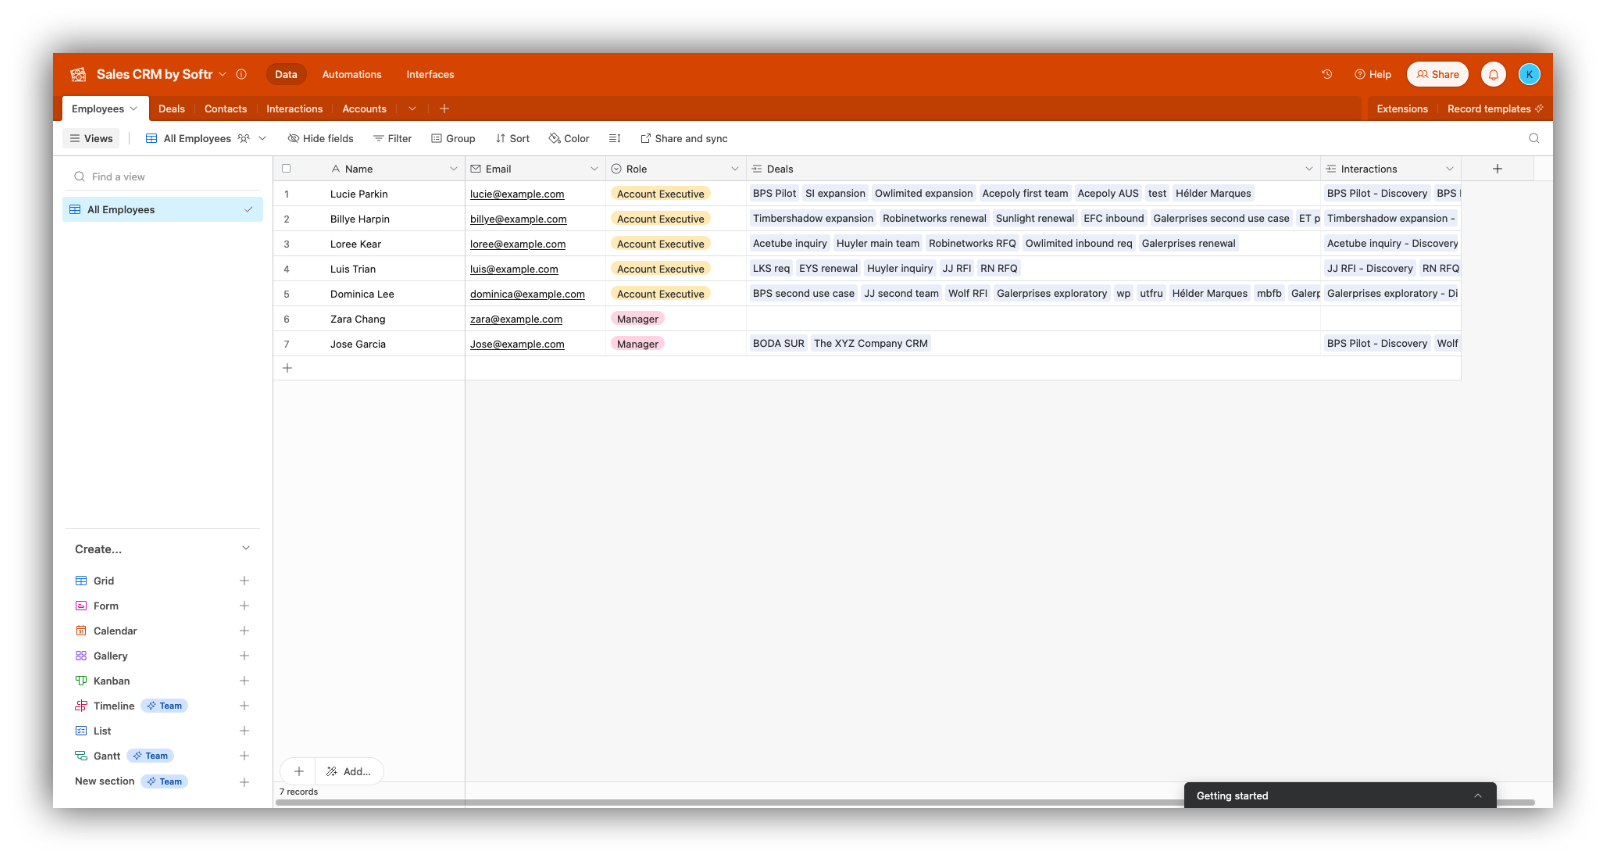
Step 9: Your Airtable database is ready!
Softr has created a database for you, complete with various tables, a wide variety of field types, and everything you know to get started. But that’s not all. Let’s go back to our Softr tab.
How to build a database in Airtable from a template by Airtable
To help users who find it challenging to start from scratch, Airtable provides a set of templates created both by the team at Airtable and the community of users at large. This is a much more user-friendly way to get started than starting from scratch, and it’s free. Going from zero to a functional database will take around 10 minutes.
Follow the below steps to learn how.
Step 1: Head to your Airtable Workspace
Log in to Airtable, using your credentials. You can also create an Airtable account, if you don’t have one.
Step 2: Click on “Start with templates”
After you’ve logged in or created an Airtable account, click on “Start with templates” to find a preliminary list of templates.

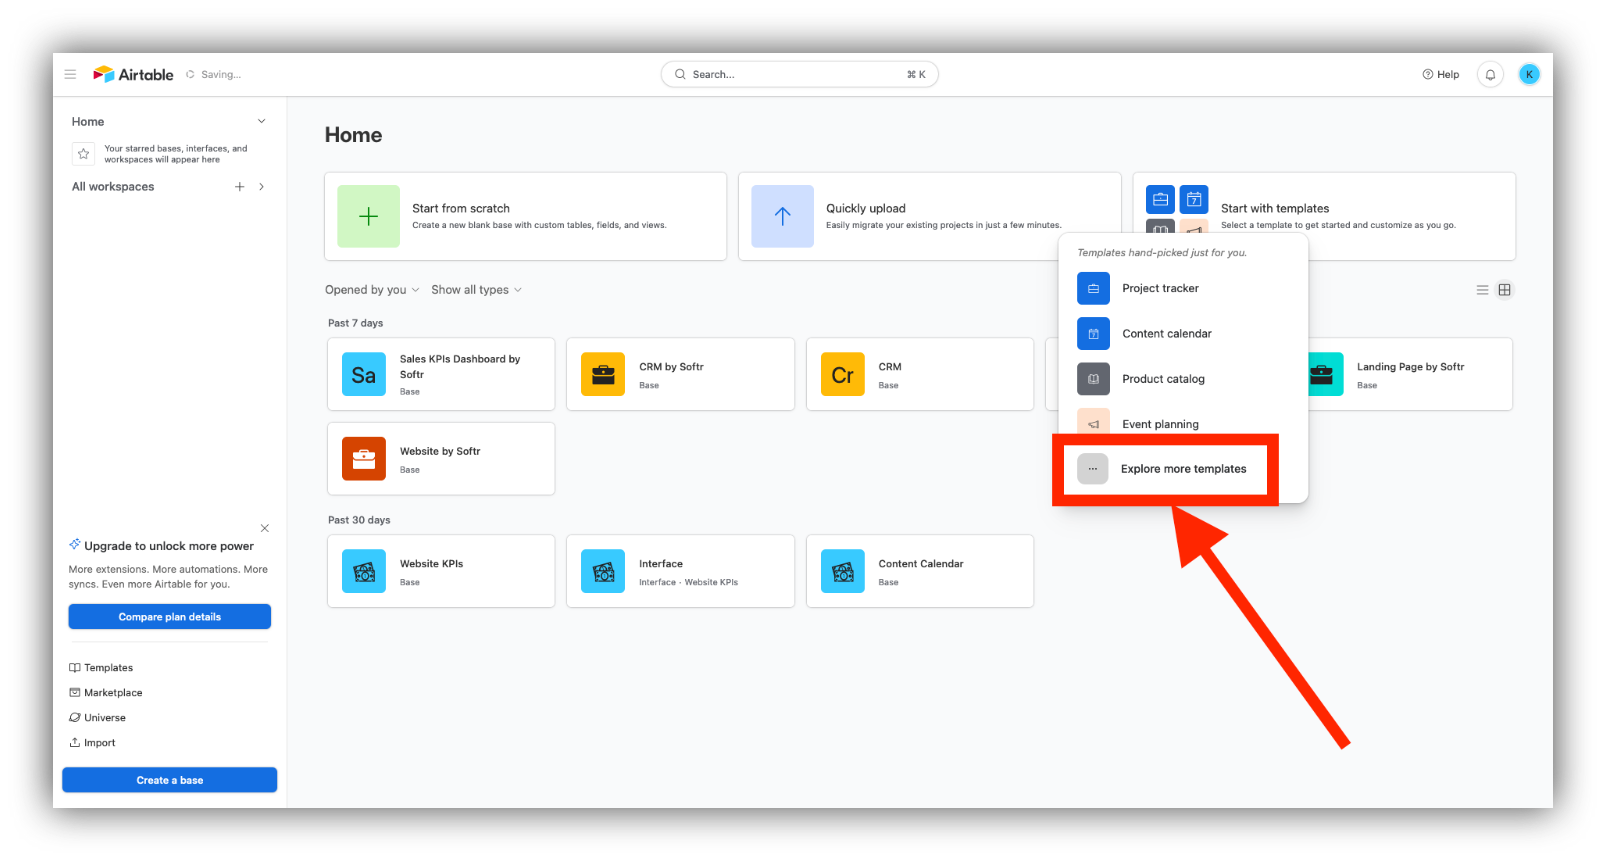
Step 3: Access the complete list of Airtable database templates
In order to find the full list of Airtable database templates available, click on “Explore more templates.”
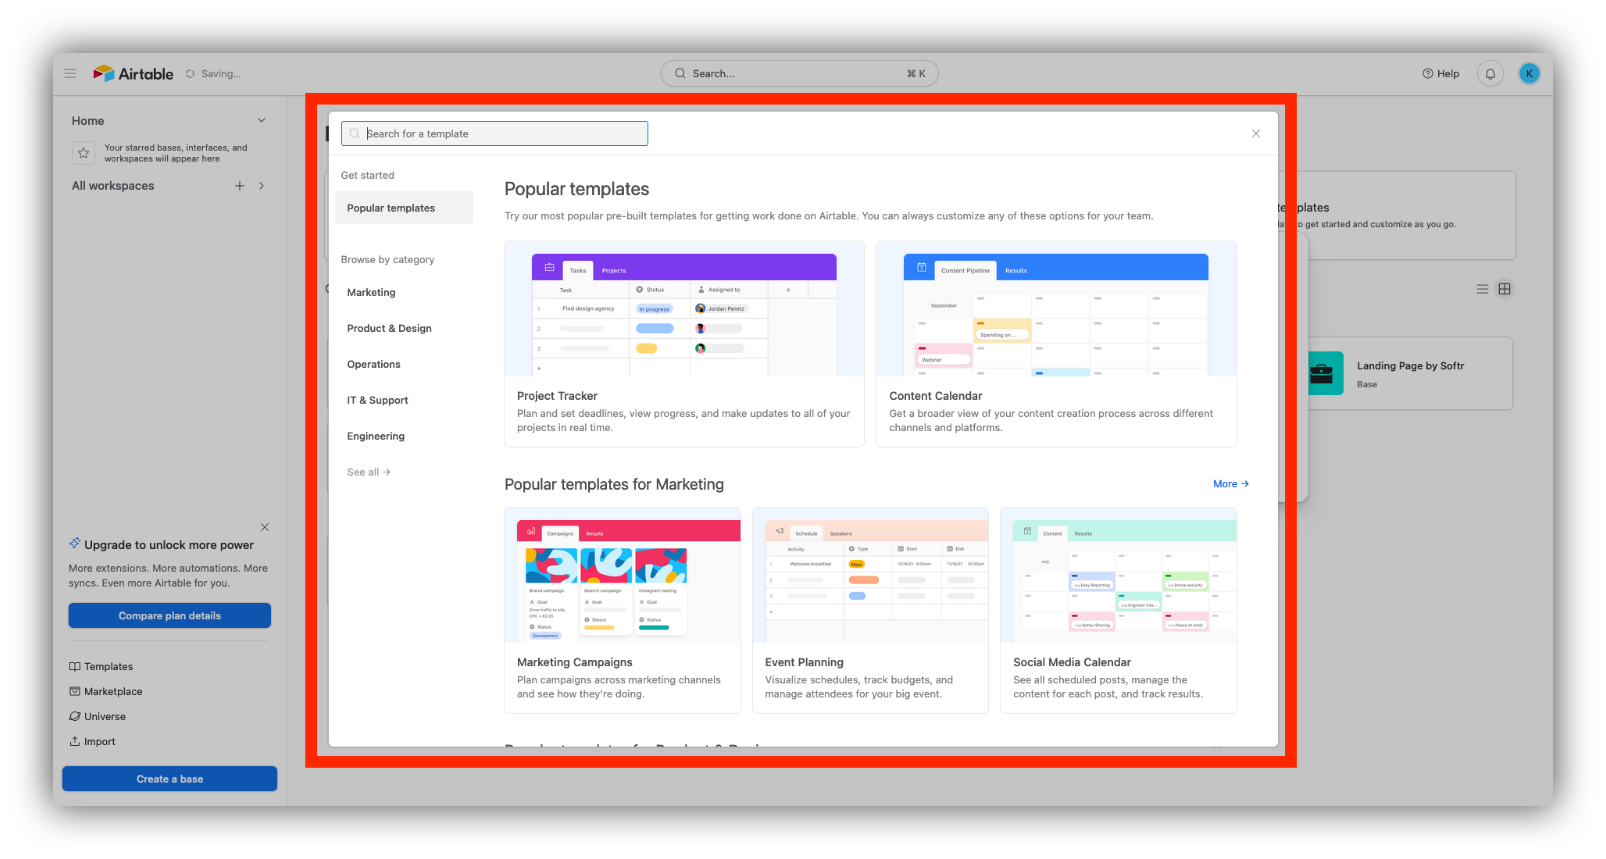
Step 4: Select a template from the library
Browse the categories of templates displayed, or use the search bar to find a template specific to your needs. For this tutorial, we went with the Sales CRM template.
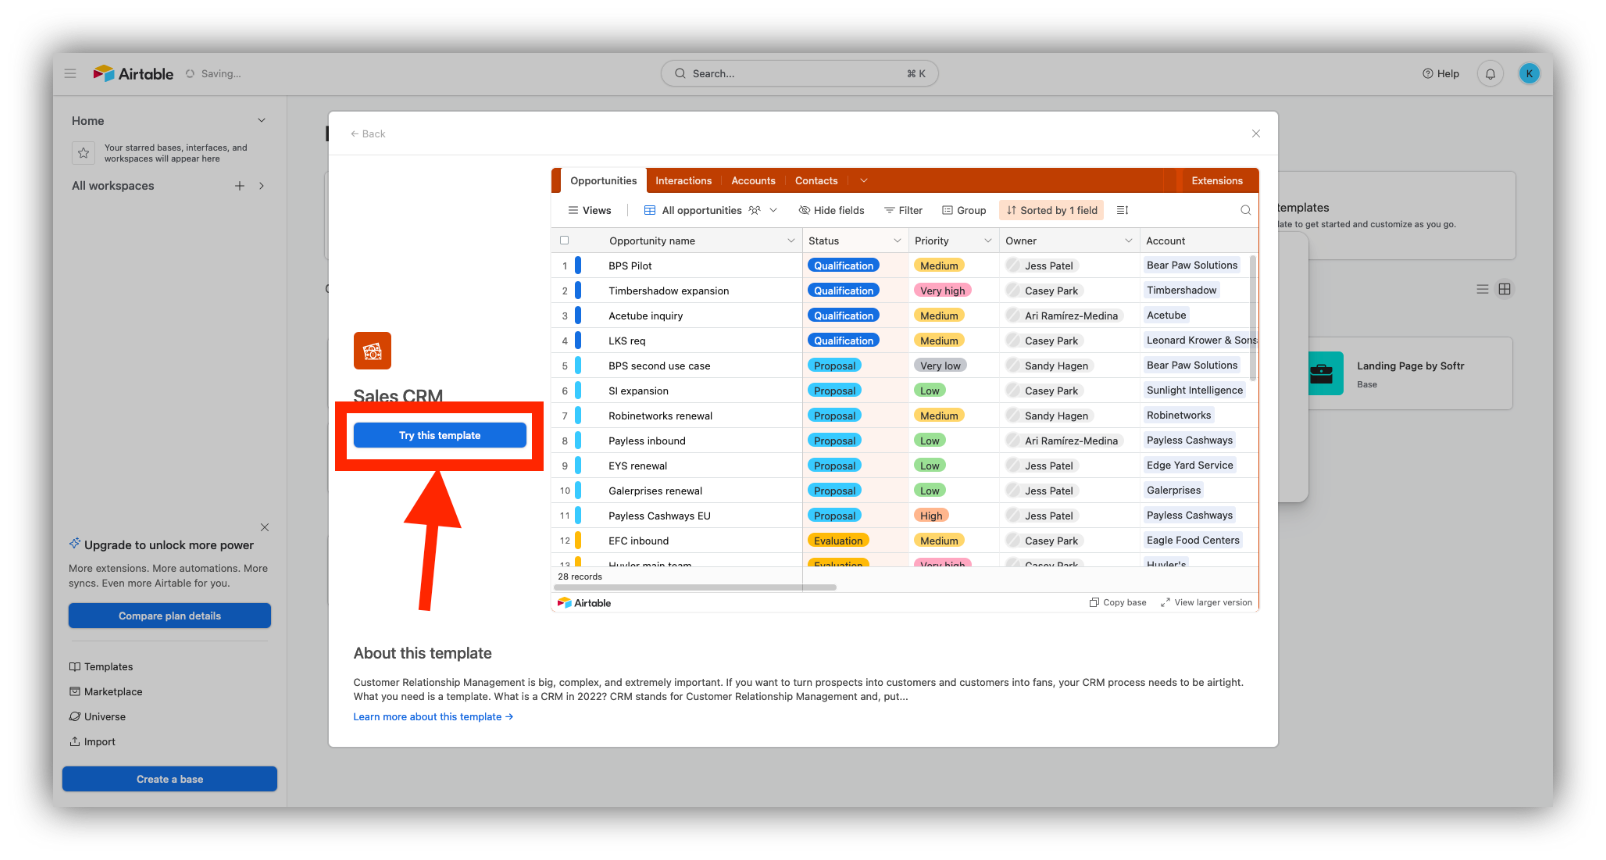
Step 5: Activate the Airtable database template
After you select a template for your Airtable database, you’ll get a preview of it, as well as a description and an invitation to learn more on a separate page. When you’re ready to try it out, click on the “Try this template” button.
Step 6: Your Airtable database is ready!
That’s it! You now have a full-on Airtable database ready to be customized and used. If you've tried to build a database from scratch before, you’ll appreciate how easy using a template is. Granted, you still have to add your own data to the base, but all the structure and functionalities are already built.
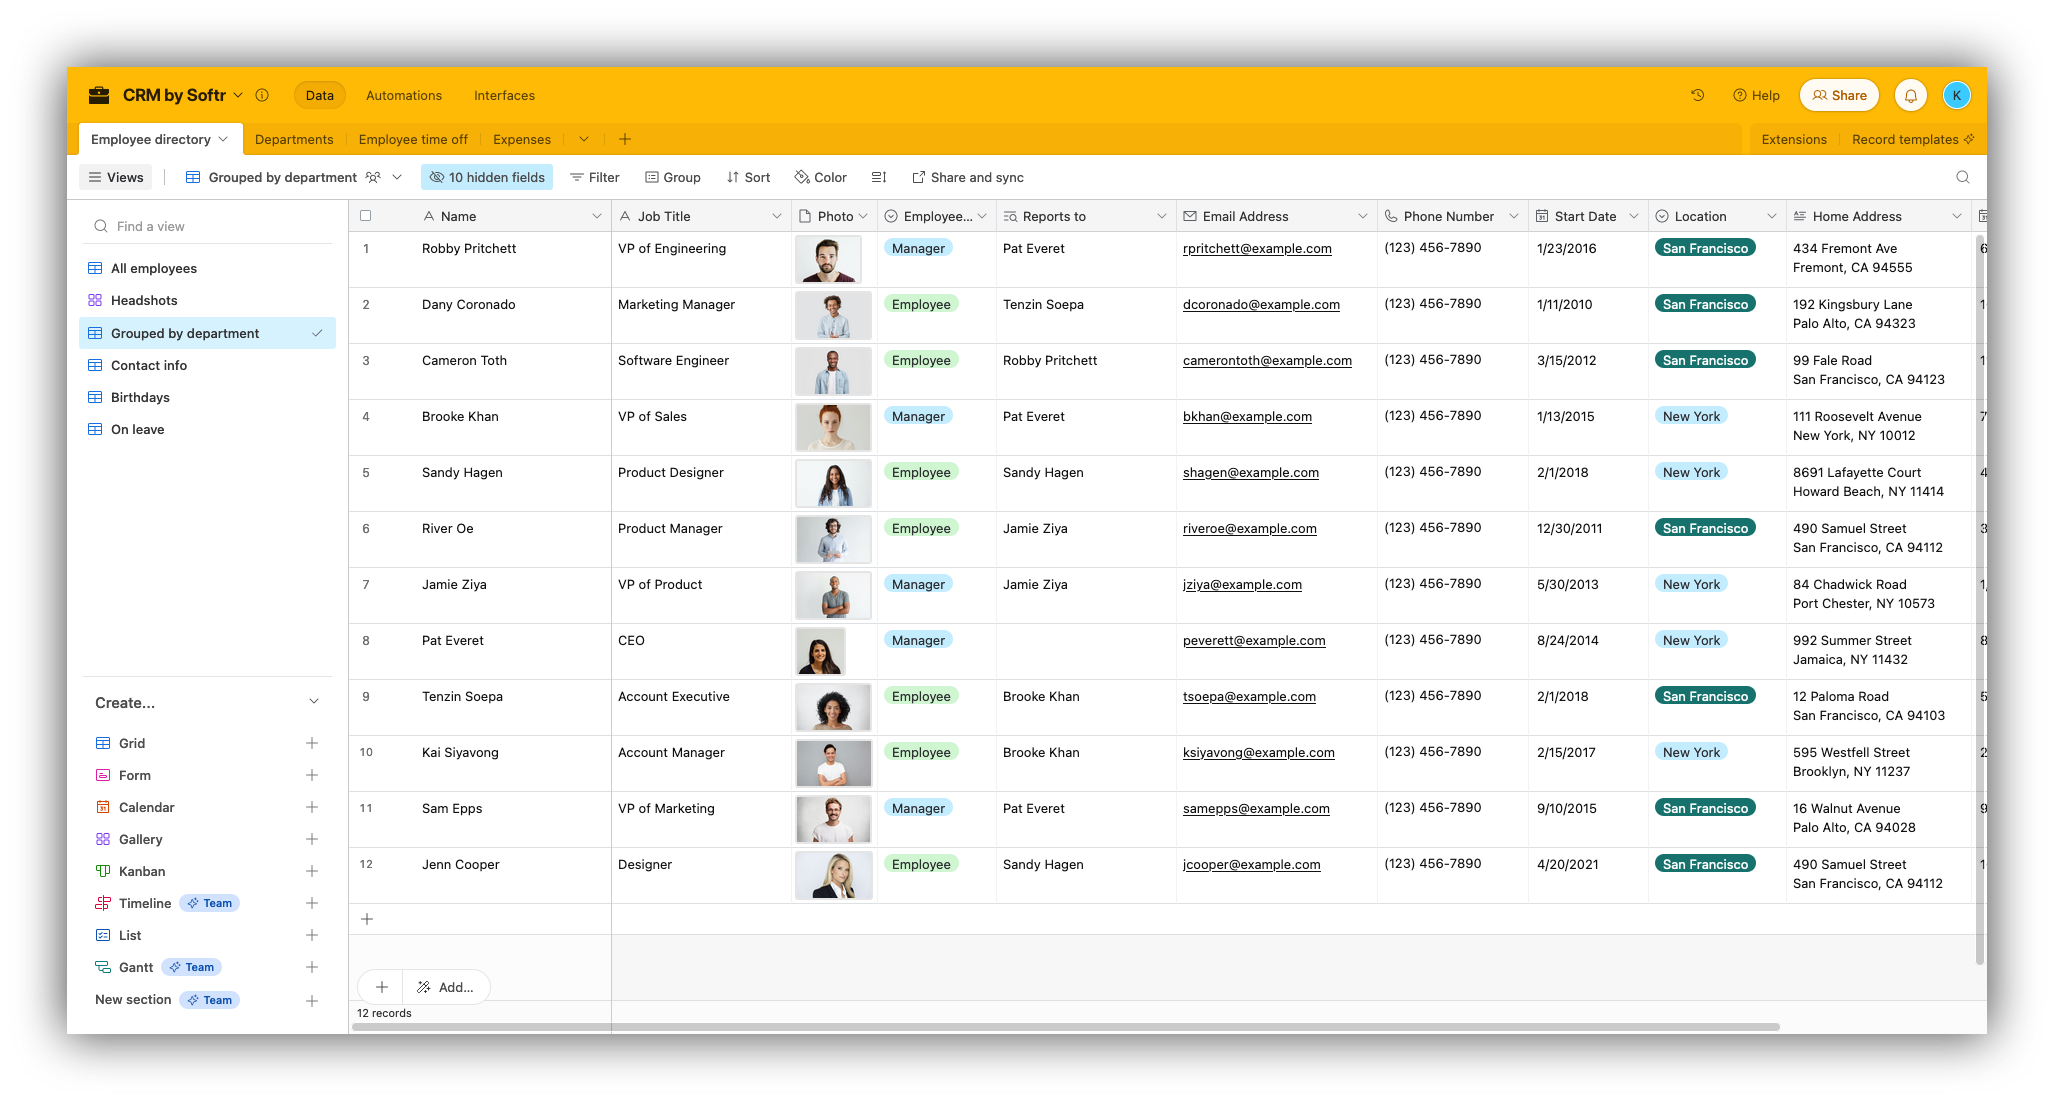
Let’s look more closely at our Sales CRM examples and some of the bells and whistles included in most Airtable templates.
Step 6.1: Learn about tables
Most Airtable database templates are already filled to the brim with fictional data separated into various tables, which is very useful for anyone looking to get started fast.
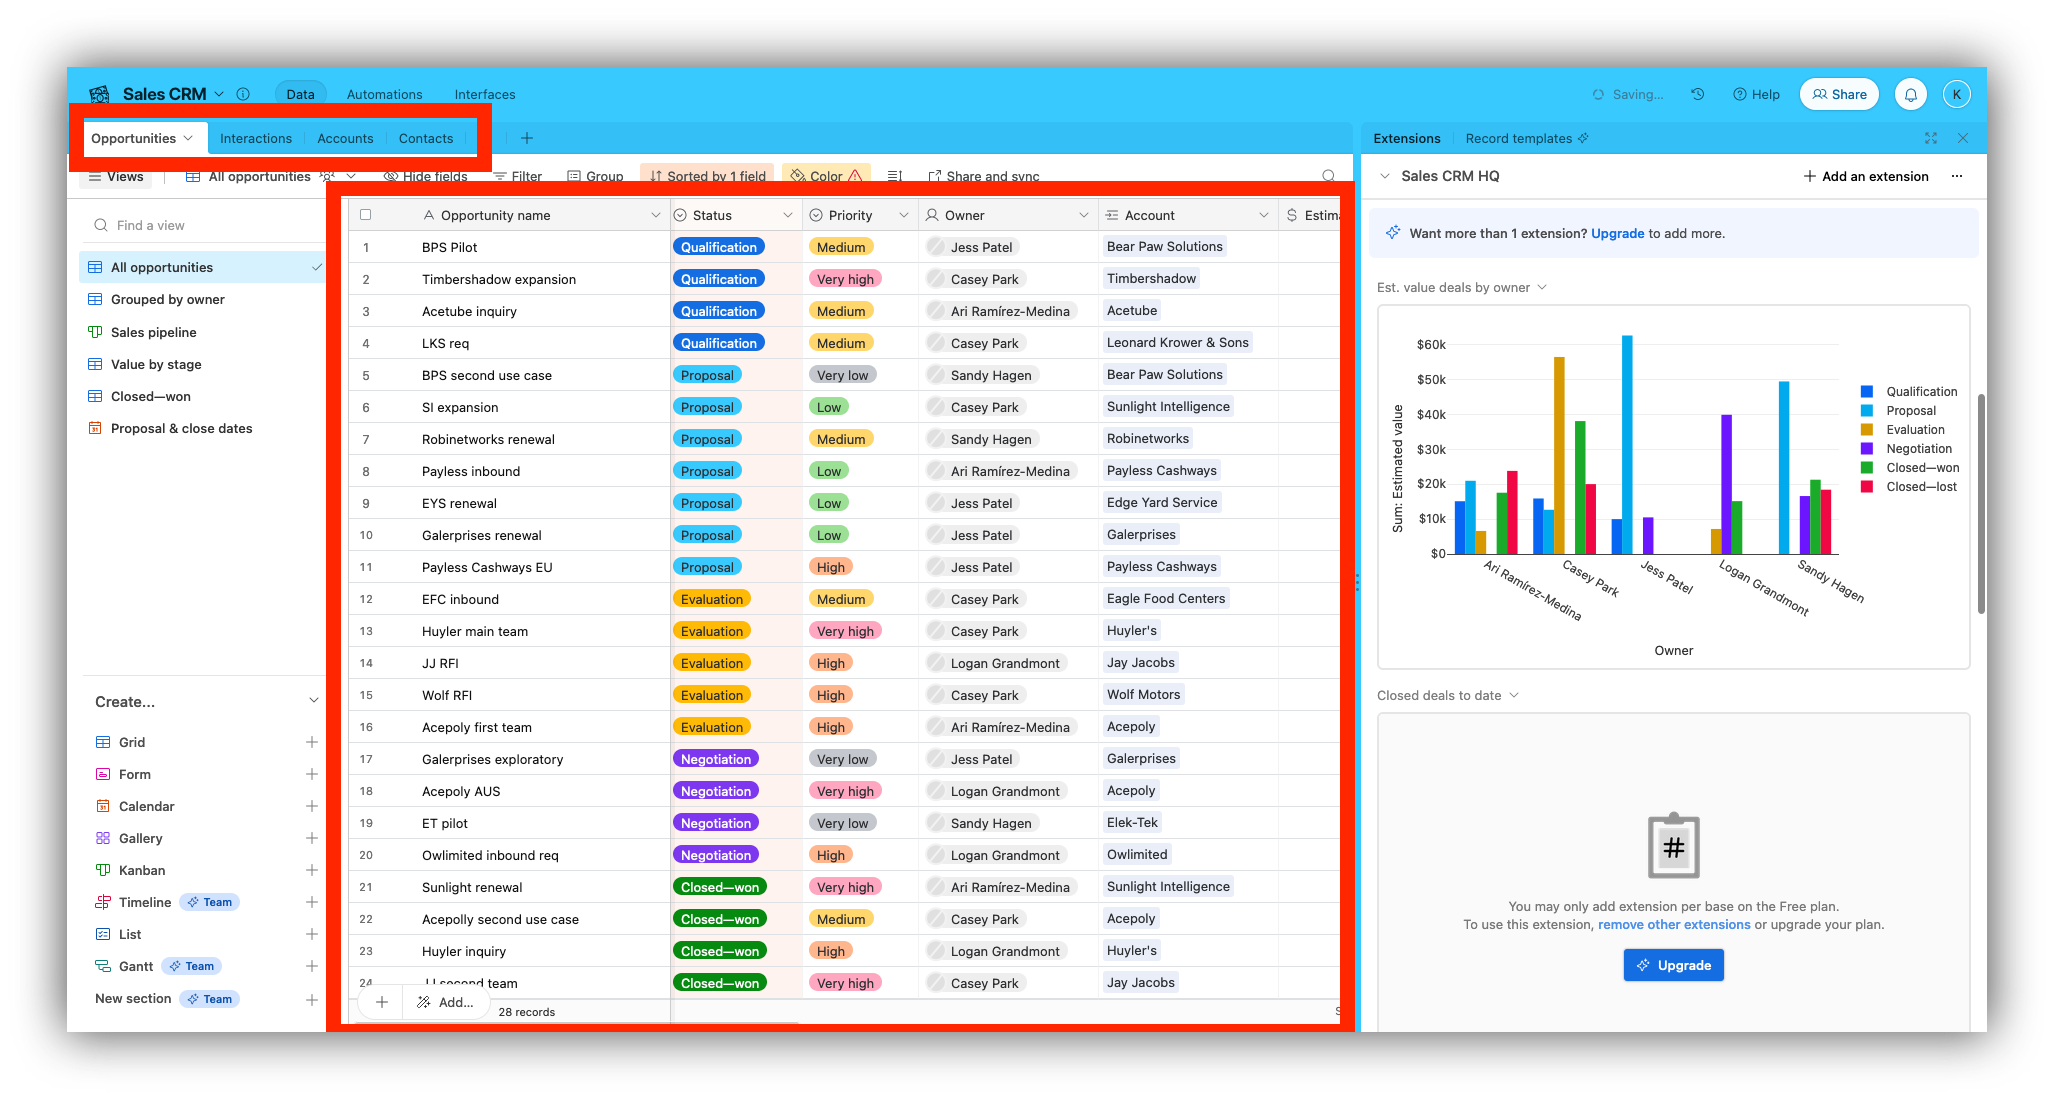
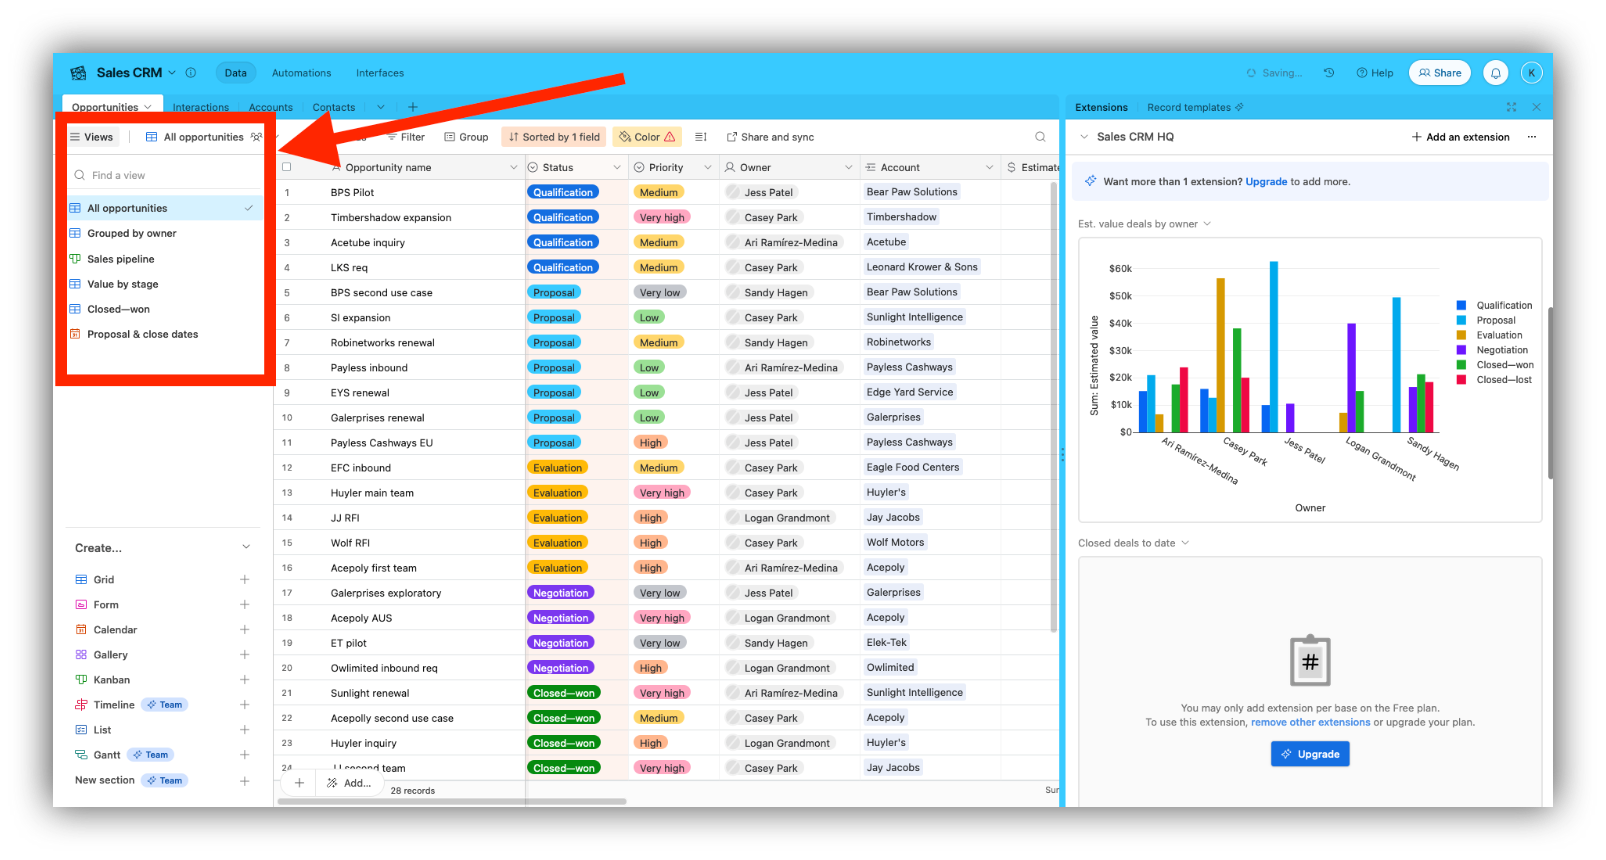
Step 6.2: Learn about views
On each table of your Airtable database, you have access to a variety of views that are adapted to the specific template. In our CRM example, views are already created to help visualize pipeline, group opportunities by owner, categorize accounts by size, among others, the kind of views a sales professional would be interested in.
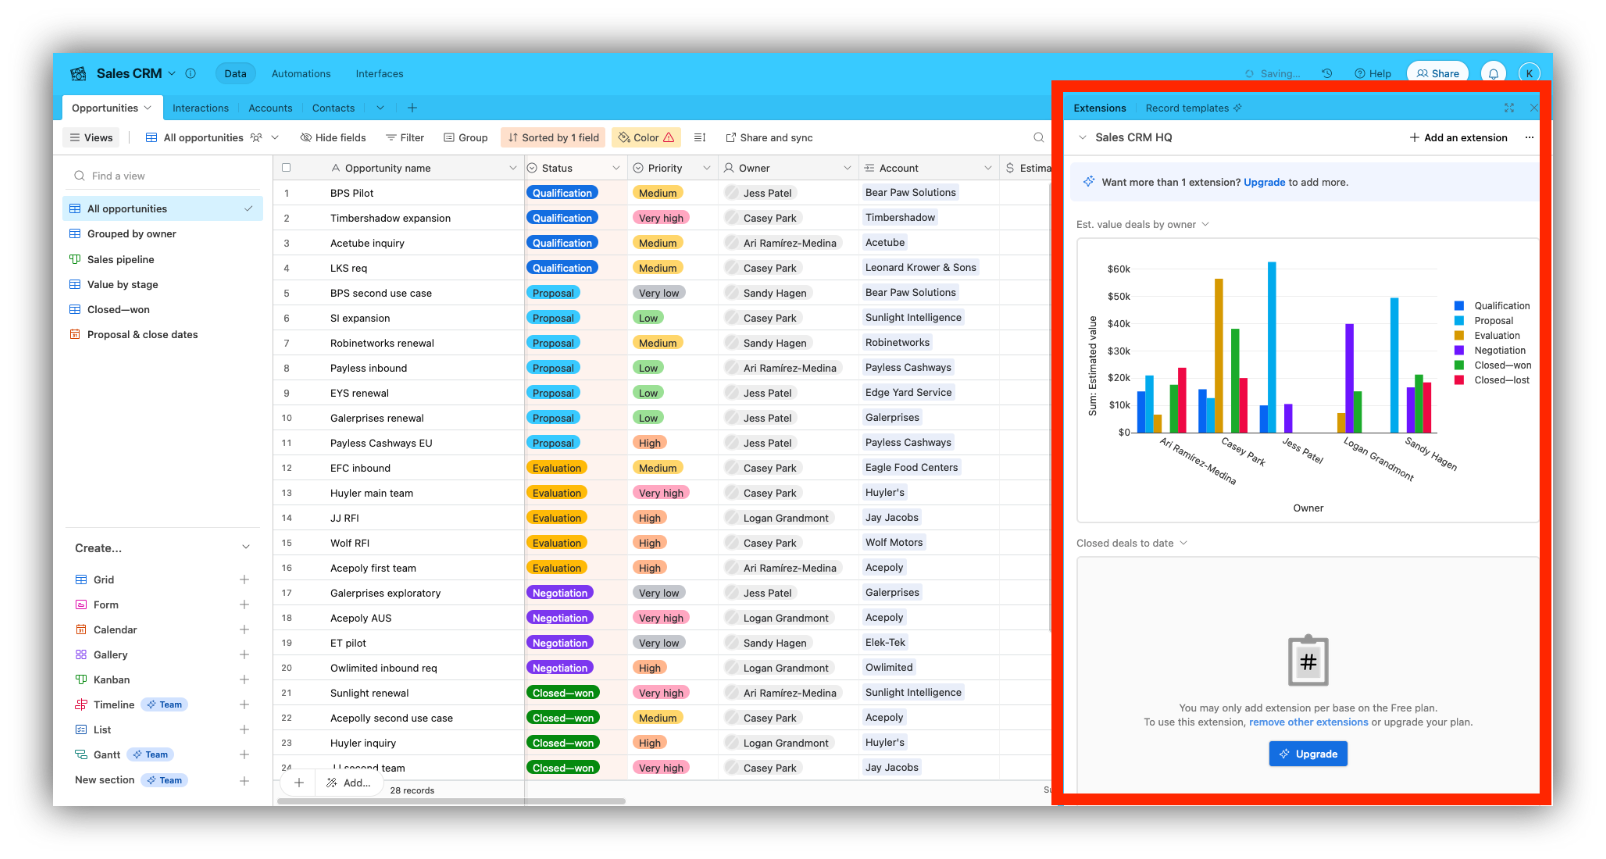
Step 6.3: Learn about extensions
Airtable database templates also often feature extensions such as visualizations. Free users can use this feature only with certain limitations, however.
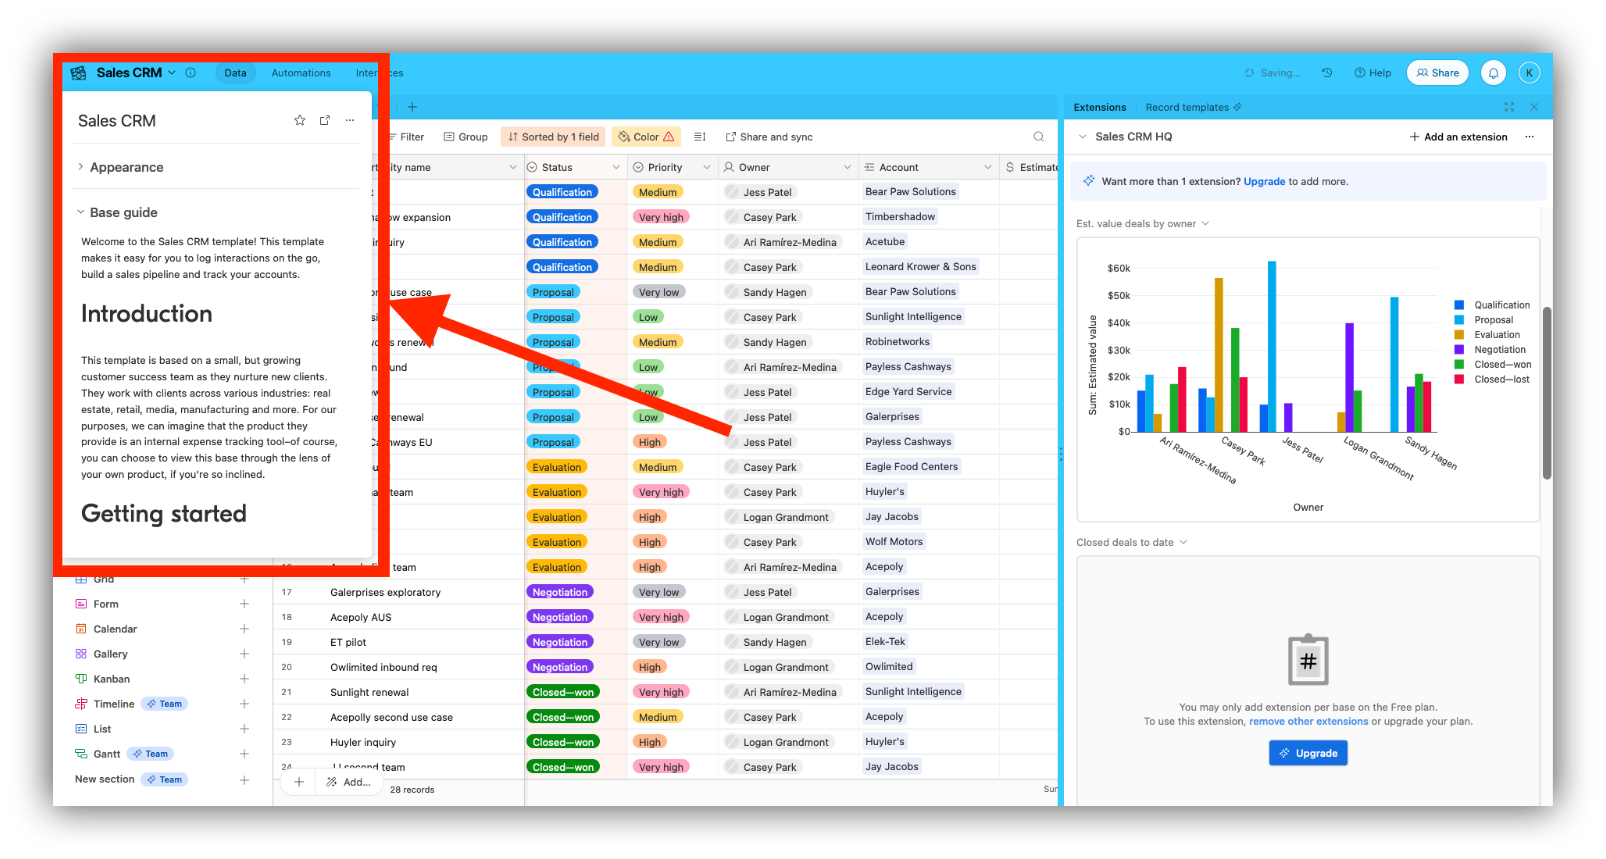
Step 6.4: Learn about the instructions
Finally, most Airtable templates feature instructions on how to maximize their use, which is very useful for understanding some of the intricacies of the various bases, especially when complicated dynamics such as linked records or advanced formulas are included.